What Paint Do You Use on Walls? Complete Guide
You’ll usually pick water‑based latex for most interior walls because it dries fast, cleans up with soap, and has lower VOCs, while reserving oil or specialty primers for trim, high‑wear areas, or stubborn stains that need extra adhesion. Match sheen to use—flat hides flaws, satin or semi‑gloss handles cleaning—and always prime new drywall or stained surfaces. Test colors in different light and sizes. Keep going and you’ll find detailed tips on finishes, tools, and troubleshooting.
Quick Decision Guide: Which Paint for Which Room?
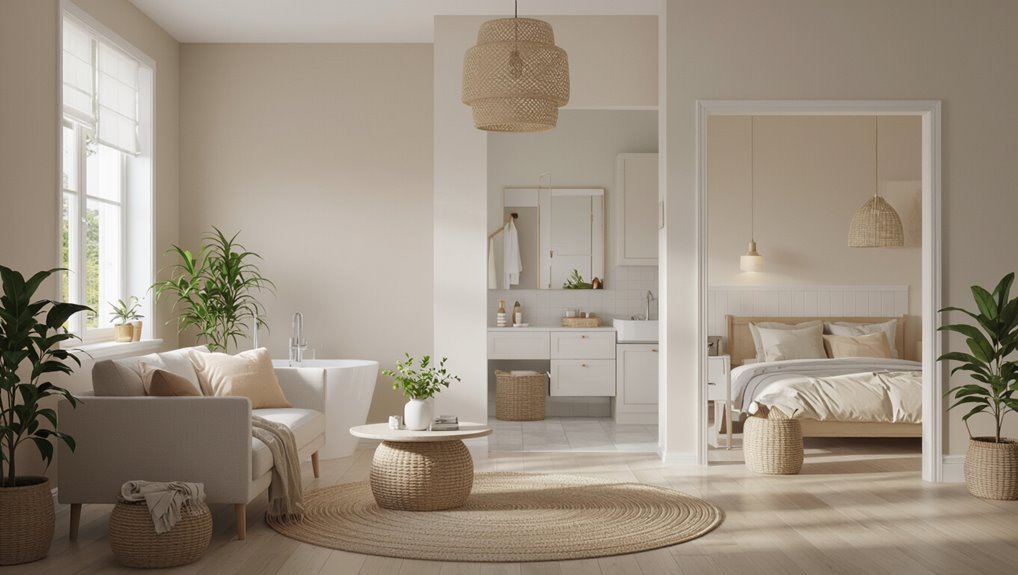
When you’re choosing paint for each room, focus on function first: pick durable, easy-to-clean finishes for high-traffic areas like kitchens and hallways, moisture-resistant options for bathrooms and basements, and softer, low-sheen paints for bedrooms and living rooms where you want a cozy feel.
You’ll match finish and sheen to use, then consider color psychology to influence mood: calming blues for bedrooms, energizing yellows for kitchens, neutral grays for versatile living areas.
Test samples on walls to see light’s effect on room ambiance. Choose practical sheens, then refine with color to balance utility and atmosphere.
Latex vs. Oil Paint: Which for Interior Walls?
Because you’ll be balancing durability, cleanup, and finish, choosing between latex and oil paints comes down to the room’s needs and your tolerance for prep and fumes. You’ll prefer latex for quick drying, easy cleanup, and lower VOCs — those latex benefits suit living spaces and bedrooms. Oil works for tough surfaces and smooth leveling, but oil drawbacks include strong fumes and longer cure times. Use oil selectively for trim or high-wear spots if you can ventilate.
| Consideration | Which to pick |
|---|---|
| Cleanup | Latex |
| Dry time | Latex |
| Smooth finish | Oil |
| VOCs/fumes | Latex |
When to Choose Water‑Based vs. Oil‑Based Paint?
You’ve weighed latex against oil for rooms and trim; now decide between water‑based (latex) and oil‑based formulations by matching paint properties to the job.
If you need quick drying, easy cleanup, low odor, and less yellowing over time, choose water based benefits—it’s forgiving for DIY, suitable for most walls, and handles humidity better.
Pick oil when you need superior adhesion on trim, metal, or previously oil‑finished surfaces, or when a harder film matters; just remember oil based drawbacks like longer cure, stronger fumes, and tougher cleanup.
Match substrate, timeline, and ventilation to the paint type.
Paint Finishes and Sheens: Appearance, Durability, Where to Use
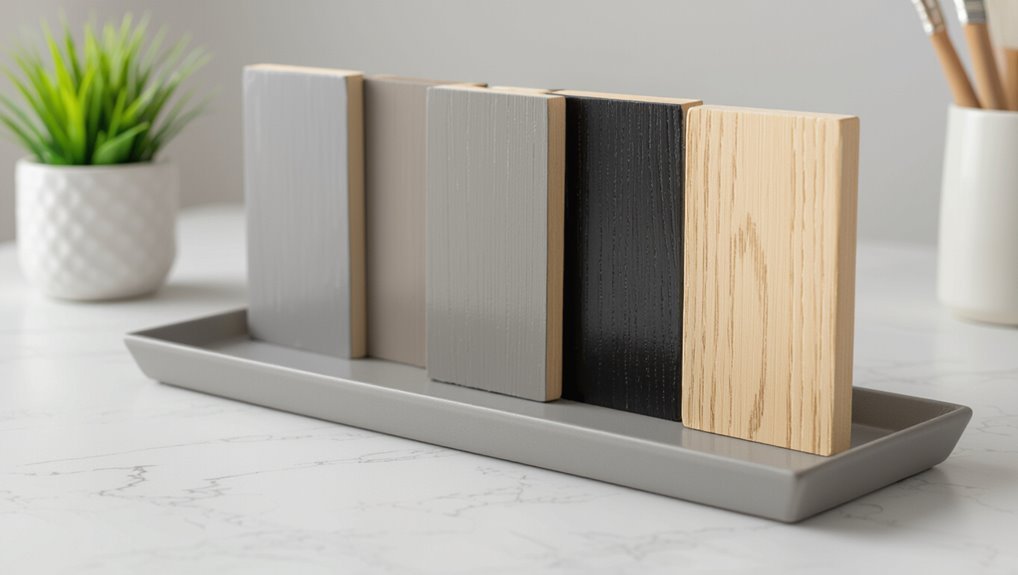
Although finish choice might seem like a cosmetic detail, it directly affects appearance, durability, and where you should use each paint. So, pick sheens based on traffic, cleaning needs, and desired look.
You’ll weigh finish types: flat, eggshell, satin, semi-gloss, gloss. Understand sheen differences for light reflection and hiding flaws.
Durability factors include pigment load and binder quality; higher sheen usually resists scuffs and cleans easier. Match appearance options to room style and lighting.
Consider application areas and surface compatibility—trim tolerates glossier finishes; textured walls suit flatter ones. Plan for maintenance needs when selecting finish.
Best Paint for High‑Moisture Walls (Bathrooms, Kitchens)
When walls face constant steam, splashes, and frequent cleaning, pick paints formulated to resist moisture and mildew so they last and keep surfaces looking clean.
You’ll want a moisture resistant paint with durable binders and mildew inhibitors; acrylic latex semi-gloss or satin is common because it wipes easily and holds up to humidity.
For showers or very wet zones, consider specialized bathroom paint choices labeled for high humidity or kitchen use.
Prep and ventilation matter: prime if needed, fix leaks, and run exhaust fans.
That combo—right product, proper prep, and ventilation—prevents peeling, staining, and mildew growth.
Are Low‑VOC or No‑VOC Paints Better for Kids and Pets?
Wondering whether low‑VOC or no‑VOC paint is the smarter choice for homes with kids and pets? You’ll usually prefer no‑VOC for reduced fumes, but low‑VOC formulas can balance performance and odor. For child safety and pet health, choose reputable brands, check labels, and allow thorough ventilation during and after painting.
- Pick certified no‑VOC when newborns or chemically sensitive people live with you.
- Use low‑VOC if you need better durability and finish, then air out rooms longer.
- Always store cans sealed and keep painted areas off‑limits until fully cured for child safety and pet health.
Choosing Paint for High‑Traffic Rooms: Durability Tips
If you want walls that stand up to constant contact, pick a paint with proven scrub resistance and a durable finish—satin or semi‑gloss typically holds up best in hallways, kitchens, and kids’ rooms.
For high traffic areas, choose a quality acrylic or latex formula labeled for washability; these resist scuffs and allow repeated cleaning without breakdown.
Lighter sheens hide imperfections less but clean more easily than flat paints. Use darker, forgiving colors or washable additives where stains are frequent.
Test a sample patch, clean it aggressively, and evaluate paint durability before committing to cover the whole room.
Do You Need a Primer, and Which Type Should You Use?
You’ll want to prime when you’re covering stains, switching from dark to light colors, painting raw drywall, or dealing with glossy surfaces.
Primer types—latex for general use, oil-based for stains and tannin bleed, and high‑adhesion or bonding primers for slick substrates—serve different jobs.
Choose based on the surface, the problem you’re solving, and the paint you’ll topcoat.
When To Prime
Because primer creates a uniform, bond-ready surface, you’ll want to use it whenever the existing wall is stained, repaired, porous, or when you’re switching between very different paint types or colors.
Priming benefits include better adhesion, even color, and reduced coats, and knowing primer types helps you pick the right product for the job.
Prime when:
- New drywall or bare plaster — surface is porous and soaks up paint.
- After repairs or stains — patching compound and stains need sealing.
- Changing sheen or drastic color shifts — prevents bleed-through and guarantees coverage.
If in doubt, prime; it saves time and improves finish.
Primer Types Explained
When deciding whether to prime and which primer to use, consider the surface material, existing finish, and the problem you’re trying to solve—sealing stains, hiding color, or guaranteeing adhesion.
You’ll pick oil-based for raw wood or heavy stains, latex for general walls and easy cleanup, and shellac when blocking severe odors or water marks.
Specialty primers handle masonry, metal, or glossy surfaces.
Primer benefits include improved topcoat coverage, uniform sheen, and stronger adhesion, reducing coats needed.
For primer application, follow manufacturer timings, apply thin even coats, and sand between layers when recommended to guarantee a smooth, durable finish.
How To Choose
Wondering if you really need a primer? Decide by surface, stain level, and finish goals.
Primer seals pores, improves adhesion, and evens color so your topcoat shows true color psychology and sheen.
- Fresh drywall or drastic color change: use a high-hide latex primer to block stains and guarantee even coverage.
- Glossy or previously painted surfaces: choose a bonding primer so new paint sticks—this saves sanding.
- Stained, water-damaged, or raw wood: opt for an oil-based or shellac primer for stain blocking and moisture control.
Consider texture options and the final look when picking primer type.
How Much Paint Do You Need? Calculating Coverage and Coats
Start by measuring your walls so you can calculate square footage, then use the paint’s stated coverage per gallon to determine how much you’ll need — remembering to account for doors, windows, and the number of coats. You’ll make accurate paint quantity choices by combining coverage estimates with surface types and application techniques. Rough or textured walls need more paint and sometimes a primer. Two coats are typical; heavy colors or porous surfaces may need three. Use the table below to visualize:
| Item | Effect |
|---|---|
| Smooth wall | Lower usage |
| Textured wall | Higher usage |
| Primer | Reduces topcoat need |
| Multiple coats | Increases gallons needed |
Color Selection: Undertones, Lighting, and Sampling Tips
How will the room feel once the paint’s dry? You’ll shape room ambiance through color psychology and deliberate choices.
Consider undertone harmony so blues don’t read gray, and test lighting effects at different times. Use color sampling: paint large swatches on multiple walls and observe mood influence across daylight and artificial light.
- Test three large samples on each wall to evaluate undertone harmony.
- Observe color sampling in morning, noon, and evening for lighting effects.
- Note how color psychology alters perceived size, warmth, and room ambiance before committing.
Tools and Techniques for Smooth, Professional Walls
Before you pick up a brush, you’ll want to prep the surface by repairing cracks, sanding rough spots, and cleaning away dust and grease.
Choose the right tools—quality rollers, angled brushes, and a good extension pole—and learn techniques like cutting in, back-rolling, and maintaining a wet edge.
With proper prep and the right methods, you’ll get smooth, professional-looking walls every time.
Proper Surface Preparation
A clean, well-prepared surface makes the difference between a pro-looking paint job and one that peels or shows every imperfection, so you’ll want to invest time and the right tools up front.
Start with surface cleaning—remove dust, grease, and old flaking paint. Do a moisture assessment to avoid trapping dampness. Match treatments to surface types: plaster, drywall, or masonry.
Prioritize wall repair and texture application—fill cracks, feather joints, and recreate or smooth texture. Use proper sanding techniques for feathered seams.
Check paint compatibility and promote paint adhesion with primer suited to the substrate.
- Clean and assess
- Repair and texture
- Sand and prime
Painting Tools & Techniques
Gather the right tools and master a few key techniques, and you’ll get smooth, professional-looking walls without guesswork. You’ll need quality brushes, a smooth-rolling roller, extension pole, tray, painter’s tape, drop cloths, and a sanding block.
Use brush techniques like cutting in with angled brushes for crisp edges, feathering to blend, and light wrist strokes to avoid marks.
For roller efficiency, choose nap length for your surface, load evenly, and work in W patterns to prevent lap lines.
Maintain a wet edge, inspect for drips, sand minor flaws, and apply consistent pressure for an even finish.
Common Paint Problems and Quick Fixes (Peel, Streaks, Lap Marks)
Paint jobs can go wrong in a few predictable ways—peeling, streaking, and lap marks—but you can fix or prevent each with the right cause-focused approach.
Identify causes: poor paint adhesion from bad surface preparation, moisture issues, or incorrect paint application. Use proper repair techniques: remove loose paint, dry and prime, and match paint type.
Fix paint problems by addressing root causes: remove loose paint, dry and prime, and match the paint type.
- Peel: scrape, sand, prime with adhesion-promoting primer, then repaint.
- Streaks: thin coats, maintain wet edge, use quality roller and consistent pressure.
- Lap marks: work in manageable sections, keep edges wet, blend overlaps immediately.
Address root causes for lasting results.
Frequently Asked Questions
What Paint Is Best for Exterior Brick and Masonry Surfaces?
You should use high-quality exterior paint formulated for masonry, paired with a breathable masonry primer to guarantee adhesion and moisture control. You’ll pick acrylic latex masonry paint for durability, weather resistance, and long-lasting protection on brick.
How Long Does Painted Drywall Need to Cure Before Hanging Wallpaper?
You should wait 2–4 weeks for painted drywall to fully cure before hanging wallpaper. During drywall preparation, make certain the surface is clean, smooth, and primed so wallpaper adhesion is ideal; avoid rushing to prevent bubbles or peeling later.
Can You Paint Over Wallpaper Without Removing It Entirely?
You can, but it’s a compromise: you’ll mask flaws rather than fix them. Check wallpaper types, prep seams and primer, then use proper painting techniques so paint adheres and patterns don’t telegraph through, minimizing future surprises.
What’s the Best Paint for Heat-Exposed Surfaces Like Radiators?
Use heat-resistant options like high-temperature radiator paint formulated for 200–600°F; you’ll prep, degrease, sand, and apply thin coats for durability and smooth finish, and you’ll avoid regular wall paint that can blister or yellow.
Are There Paints Formulated to Resist Mold in Basements?
Yes — you can choose mold resistant options specifically labeled as basement paint; they contain mildewcides and moisture-blocking binders so you’ll prevent mold growth, improve durability, and keep damp basements fresher with proper prep and ventilation.
Conclusion
You’ve got the tools to pick paint that fits each room, finish, and moisture level—so choose latex for most interiors, oil for trim or high-wear spots, and semi‑gloss in bathrooms and kitchens. Test colors on your wall and calculate coverage before you buy. For example, imagine repainting a damp bathroom: you pick a mold‑resistant semi‑gloss latex, prime repaired drywall, apply two coats, and your bathroom looks brighter and resists moisture for years.