Will Spray Paint Dry in the Cold? Cold Weather Tips
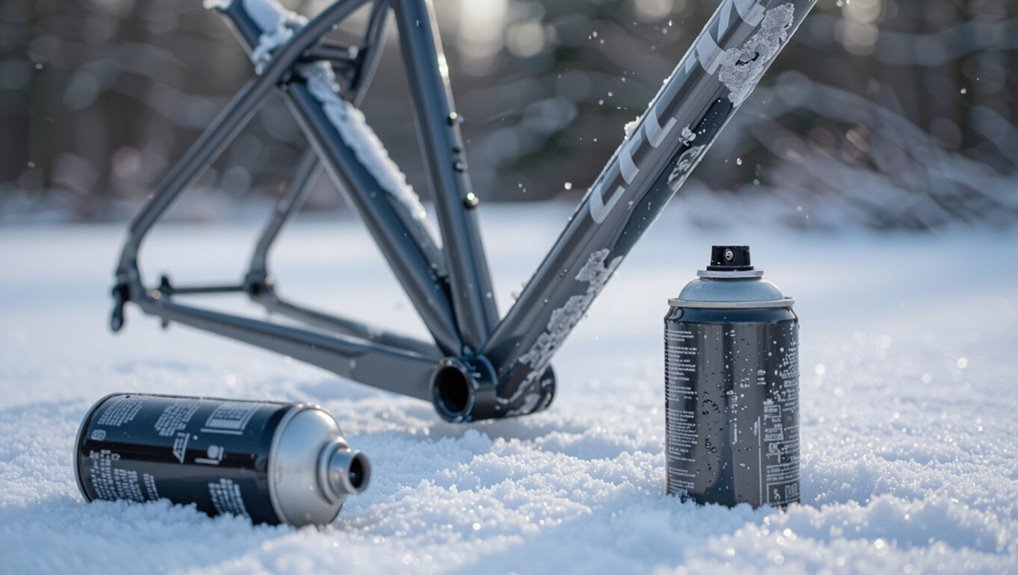
You can spray paint in cold weather, but you’ll need to adjust prep and technique to get a durable finish. Cold slows evaporation and atomization, so thin, multiple coats, slightly higher pressure, and warmer substrate temps help. Clean and warm surfaces, use fast‑evaporation primers, and shelter work from wind and humidity to avoid runs and tackiness. Protect fresh pieces with breathable insulation and let them cure in a warmer spot; keep going for tips on timing, tools, and troubleshooting.
Cold‑Weather Spray Painting: Quick Action Plan
If you’ve got to spray paint in cold weather, move fast but stay deliberate: you’ll prep surfaces indoors when possible, warm cans gently, and use thin, multiple coats to prevent runs.
Your cold weather preparation includes choosing fast-evaporating primers and keeping work sheltered from wind.
Use proven spray paint techniques—short bursts, consistent distance, and quick overlaps—to maintain finish quality despite low temperatures.
Why Cold Changes Spray Paint Drying
Because temperature directly affects solvent evaporation and polymer flow, cold weather slows spray paint drying and changes how the coating levels out and bonds to the surface.
You’ll notice cold paint chemistry shifts: solvents evaporate slower, viscosity stays higher, and flow is reduced.
The temperature impact alters tack time and adhesion, so you’ll need longer drying windows and careful handling to avoid runs and poor film formation.
How Temperature Slows Atomization and Cure
When temperatures drop, your spray gun struggles to break paint into fine droplets and the coating’s chemical reactions slow, so atomization and cure both take longer. You’ll notice atomization effects like larger droplets and uneven mist, plus curing challenges that extend tack time and raise run risk.
| Issue | Result |
|---|---|
| Atomization effects | Coarser spray |
| Curing challenges | Slow hardening |
What Temperatures Cause Drying or Adhesion Problems
When temperatures drop, you’ll notice slower drying, poor film formation, and higher risk of solvent entrapment that harms finish quality.
If you approach freezing, water-based paints can freeze and solvent-based systems can gel, both causing adhesion failures and surface defects.
Aim for the manufacturer’s recommended ideal adhesion range—typically above 50°F (10°C) for most sprays—to avoid these issues.
Low-Temperature Effects
If temperatures drop below about 50°F (10°C), you’ll start seeing slower solvent evaporation, tacky finishes, and weaker adhesion; most auto and industrial spray paints recommend a minimum of 50–60°F (10–15°C) for reliable drying.
You’ll notice cold paint behavior: longer tack times, increased recoat intervals, and higher dust pickup.
These low temperature challenges can cause runs, poor film formation, and reduced durability unless you heat or delay application.
Freezing Point Risks
Because solvents and water in many spray paints freeze or become so sluggish below about 32°F (0°C) that they can’t evaporate or form a proper film, you’ll see catastrophic drying and adhesion failures at or near freezing. You must avoid freezing conditions to preserve paint integrity. Check temps, use heated shelters, and don’t apply if surface or air approach 32°F.
| Risk | Effect |
|---|---|
| 32°F | Solvent stalls |
| <32°F | Film fails |
Optimal Adhesion Range
Although paint formulations vary, you’ll usually get reliable drying and adhesion between about 50°F and 85°F (10°C–29°C); outside that window either slowed solvent evaporation or overly rapid skinning can cause poor film formation, sagging, or loss of bond.
Aim for that ideal temperature range, since colder conditions create adhesion challenges from trapped moisture and slow cure, while heat can cause blistering.
How Humidity and Dew Point Affect Curing
You’ll notice that high humidity slows solvent evaporation and can lengthen or prevent proper curing.
If the air temperature nears the dew point, moisture can condense on the paint and cause blushing, poor adhesion, or a tacky finish.
Monitor both relative humidity and dew point to decide whether conditions are safe for spraying or if you need to warm and dry the workspace first.
Humidity’s Role In Curing
When humidity climbs and the dew point nears the surface temperature, your spray paint takes longer to cure because moisture interferes with solvent evaporation and chemical crosslinking; low humidity speeds evaporation but can cause brittle films, while high humidity can trap solvents and promote blushing or poor adhesion. You’ll manage humidity effects and curing challenges by controlling ventilation and timing.
| Condition | Risk | Fix |
|---|---|---|
| Low RH | Brittle film | Slow coats |
| Moderate RH | Ideal cure | Normal practice |
| High RH | Blushing/adhesion | Dehumidify |
| Variable RH | Uneven cure | Stabilize environment |
Dew Point And Moisture
Humidity affects curing, but the dew point is the real gatekeeper for moisture on the surface: if the air temperature drops to the dew point before solvents have evaporated, water will condense onto the paint and interrupt film formation and crosslinking.
You need dew point effects and moisture control to avoid blushing or soft spots.
- Check dew point before spraying.
- Heat or ventilate to stay above it.
- Use low-temp, fast-evap solvents.
Best Spray Paints for Low Temperatures
Picking the right spray paint for cold weather makes the difference between a smooth finish and a tacky, uneven mess.
You’ll want cold resistant formulas labeled for low temperatures and winter friendly brands that guarantee adhesion and faster cure times.
Look for paints with anti-freeze additives, higher solids, and clear manufacturer temperature ranges.
Choose sprays with anti-freeze additives, higher solids, and explicit manufacturer cold‑temperature ratings for reliable winter performance.
Test a small patch before full application to confirm performance.
Solvent vs. Water‑Based Sprays in Cold Weather
The type of carrier in your spray paint—solvent (oil/alkyd) or water‑based (acrylic/latex)—makes a big difference in cold conditions.
So after choosing a winter‑rated product, you’ll want to compare how each chemistry behaves.
Solvent performance often resists freezing and cures at lower temps; water based challenges include slow drying and film defects.
- Flash-off time
- Film formation
- Recoat window
Can Spray Paint Adhere in Freezing Temps?
Even when temperatures dip below freezing, spray paint can stick — but adhesion depends heavily on paint chemistry, surface temperature, and prep.
You’ll get the best bond if you warm the object, remove frost, and use formulations rated for cold.
Expect slower curing and weaker initial tack in freezing temperatures, so handle parts minimally until full adhesion develops.
Three Quick Tests for Paint Compatibility in Cold
When you’re dealing with cold-weather spray painting, run three quick, targeted tests to verify compatibility:
- Spray a small panel to check paint consistency and atomization at low temps.
- Apply a thin stripe, let it sit in cold conditions, inspect for cold effects like wrinkling or slow tack.
- Do an adhesion tape test after full cure to confirm bonding and finish integrity.
Prepping Surfaces Before Cold‑Weather Spraying
Before you spray, clean and dry every surface so paint can bond properly; remove grease, wax, loose rust, and old flaking coatings with appropriate cleaners, degreasers, and mechanical abrasion.
Then sand glossy areas, mask adjacent parts, and guarantee temperatures meet product specs.
Prioritize surface cleaning and precise paint preparation so coatings adhere and cure reliably in cold conditions; work efficiently to limit exposure.
Cleaning and Degreasing When It’s Cold
When it’s cold, warm your solvent slightly so it stays fluid and works faster on oily residues.
Make sure you remove all grease—any leftover film will ruin adhesion in low temperatures.
Keep quick‑drying wipes handy to speed drying and prevent recontamination before you paint.
Warm Solvent Use
Although cold weather slows solvent action, you can speed cleaning by warming solvents slightly so they cut grease and lift contaminants faster without freezing on surfaces.
Choose appropriate solvent types and use a controlled warm application—never boil. Follow safety: ventilation, gloves, and ignition control.
- Mild citrus or alcohol-based cleaner
- Low-flash-point solvent warmed cautiously
- Water-based cleaner with gentle heat
Remove Grease Thoroughly
Because cold traps oils and slows solvent action, you’ll need to strip grease thoroughly before spraying to guarantee proper adhesion and even drying. You should use solvent-based degreasers, scrub with warm water if possible, and inspect for residues. Focus on grease removal as critical surface preparation to prevent fish-eyes and peeling.
| Step | Agent | Tip |
|---|---|---|
| 1 | Solvent degreaser | Ventilate |
| 2 | Detergent scrub | Warm water |
| 3 | Rinse | Dry fully |
| 4 | Isopropyl wipe | Test spot |
| 5 | Inspect | No residue |
Quick Drying Wipes
If temperatures dip below about 50°F, quick-drying wipes become your best tool for cleaning and degreasing before painting; they evaporate faster than cloth and leave less residue so paint can stick and dry evenly.
You’ll use quick drying techniques and follow ideal storage to keep wipes effective.
- Wipe in one direction.
- Use fresh sheets.
- Seal pack after use.
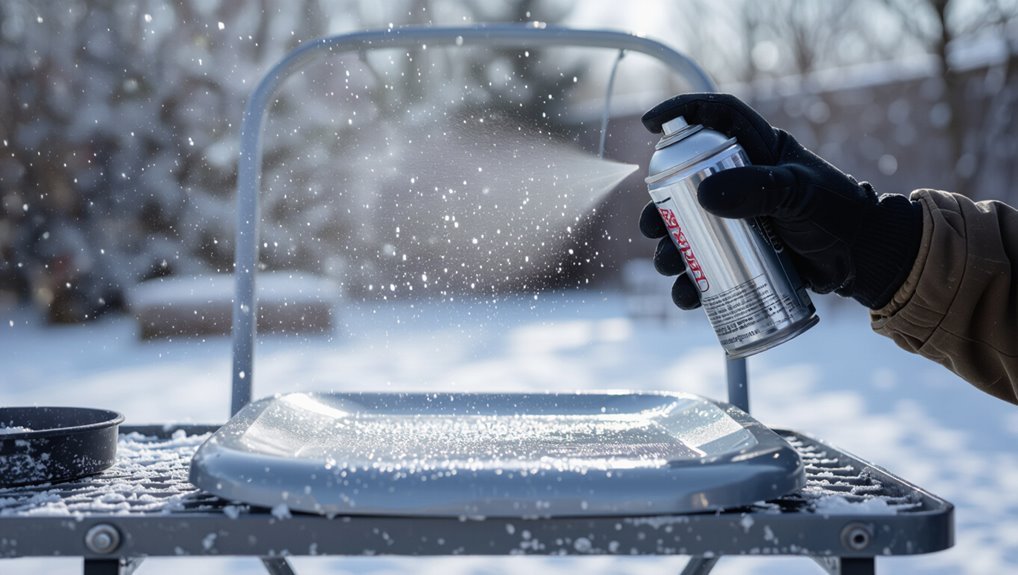
Warm Cans Safely
When temps drop, don’t try to heat spray cans directly with open flames or ovens — you can safely raise a can’s temperature by letting it sit in warm water (around 90–100°F / 32–38°C) for 5–10 minutes or by keeping cans in a heated room or insulated bag before use.
Use warm water, insulated containers, and avoid shaking frozen cans; test spray on scrap.
Why Surface Temperature Matters More Than Air Temp
Paint dries where it touches, so the temperature of the surface you’re spraying matters more than the ambient air; a cold substrate steals heat from the paint, slowing solvent evaporation and causing poor adhesion, runs, or bloom.
Paint dries where it touches—cold surfaces rob heat, slow solvent evaporation, and invite adhesion problems, runs, or bloom.
You’ll focus on surface prep and understand temperature effects to get consistent results.
- Check substrate temperature.
- Remove moisture/oil.
- Test adhesion with a small patch.
Warm Metal, Wood, and Plastic Before Spraying
Cold substrates will sap heat from fresh spray, so warm the metal, wood, or plastic before you start to keep solvent evaporation steady and adhesion reliable. You’ll improve surface preparation and control temperature impact, so coats level and bond. Check parts are dry and eliminate condensation before spraying.
| Material | Benefit |
|---|---|
| Metal | Better adhesion |
| Wood | Reduced blotchiness |
| Plastic | Even cure |
Safe Heating Methods to Avoid Damage
When you need to add heat, pick safe sources like space heaters or heat guns with adjustable settings to avoid open flames.
Keep the heater or gun at the recommended distance to prevent scorching or melting the surface.
Watch the temperature continuously with a thermometer or infrared gun so you can adjust heat before damage occurs.
Safe Heat Sources
Because you want the paint to cure without harm, choose heat sources that provide gentle, even warmth and avoid anything that can blister, crack, or discolor the finish.
Use portable heaters for controlled, indirect surface warming and monitor temps. Keep flames, heat guns, and direct coils away.
- Infrared panels
- Ceramic space heaters
- Heated enclosures
Maintain Proper Distance
Think of distance as your primary control knob: keep heaters far enough to warm the air and substrate without blasting the paint surface.
You should maintain a proper distance that prevents softening or runs while still aiding drying. Adjust your spray technique to apply even, light coats and position heat sources so they gently raise temperature without creating hotspots or blowing paint around.
Monitor Temperature Continuously
If you’re using heaters to speed drying, monitor temperature continuously so you don’t overheat the paint or substrate.
You’ll protect finish and guarantee consistent paint performance by keeping readings stable with proper temperature monitoring.
- Use a reliable probe or IR gun.
- Set safe upper/lower limits.
- Log changes and pause heating if thresholds hit.
Build a Temporary Heated Spray Booth
When temperatures drop, you can still get smooth, even paint by building a temporary heated spray booth that controls airflow, particle containment, and temperature around your workpiece.
Use clear plastic sheeting, a sturdy frame, and sealed seams as spray booth essentials.
Position filtered intake and exhaust vents, add thermostat-regulated temporary heating solutions, and guarantee proper ventilation and fire-safe materials for efficient, clean curing.
Use Portable Heaters Without Blowing Dust
While you’re warming your workspace, position portable heaters so they gently raise ambient temperature without creating strong drafts that stir dust onto wet paint.
You’ll pick portable heater types for even heat, set distance to avoid airflow across surfaces, and use dust control techniques like tack cloths and temporary barriers to keep finish clean.
- Radiant vs convection
- Directional shields
- Surface protection
Ventilation Basics for Indoor Cold Spraying
Because indoor spraying concentrates solvent fumes and overspray, you need a clear ventilation plan before you start: set up make-up air, exhaust, and airflow patterns that remove contaminants without chilling the job or blowing dust onto wet paint.
Use ventilation techniques like directional exhaust, filtered intake, and adjustable fans. You’ll keep indoor safety high, limit fume buildup, and prevent overspray recirculation.
How to Reduce Condensation on Your Workpiece
To cut condensation, keep the workpiece slightly warmer than the surrounding air so moisture won’t form on the surface.
You can use space heaters, heat lamps, or pre-warmed staging areas to control surface temperature.
Also improve airflow around the piece with fans or by repositioning it to prevent humid pockets from settling.
Control Surface Temperature
If you’re working in cold conditions, keep the workpiece warmer than the surrounding air so moisture won’t condense on the surface as you spray.
Use surface insulation and thermal blankets to retain heat, and pre-warm parts safely.
Follow these quick steps:
- Wrap with thermal blankets before spraying.
- Use surface insulation pads or wraps.
- Preheat in a controlled, ventilated space.
Improve Airflow Around Workpiece
1 way to cut condensation on your workpiece is to keep air moving steadily around it; moving air replaces cold, moisture-laden boundary layers at the surface and speeds evaporation so spray paint can tack and dry properly.
Use targeted airflow techniques—oscillating fans, directional vents, or gentle heat-assisted circulation—to lower local surface temperature, prevent dew, and guarantee even drying without disturbing the fresh finish.
When to Start Spraying After Warming or Defogging
How long should you wait after warming or defogging before you start spraying?
You’ll want surfaces fully dry and cooled to ambient temperature after using warmed surfaces or defogging techniques. Start spraying once no visible condensation remains and touch feels dry.
- Check for moisture with a clean cloth.
- Wait 10–20 minutes after warming ends.
- Reinspect before each coat.
Gun Settings and Nozzle Choices for Cold Weather
Choose a slightly higher fluid flow and open the air cap a touch to maintain atomization in cold, dense air—you’ll need more paint and slightly higher air pressure than in warm conditions to get the same spray pattern. Check nozzle selection for proper size, purge moisture, and perform gun maintenance frequently to prevent clogs and inconsistent spray.
| Tip | Action | Benefit |
|---|---|---|
| Nozzle | Match size | Consistent droplet |
| Pressure | Raise slightly | Better atomization |
| Maintenance | Clean often | Fewer clogs |
Adjust Atomization and Fan Pattern in Low Temps
When temperatures drop, you’ll need to increase atomization to help the paint break into finer droplets that dry more evenly.
You should also widen the fan pattern to reduce buildup and promote thinner, quicker-drying coats.
Make small, incremental adjustments and test on a scrap panel before tackling the whole job.
Adjust Spray Atomization
Lower your air pressure and open the fan slightly to compensate for slower solvent evaporation in cold weather; this produces larger droplets that stick better and reduces orange peel.
You’ll use atomization techniques to improve spray consistency and avoid runs. Adjust nozzle distance, test spray pattern, and refine trigger control.
- Slow, overlapping passes
- Shorter bursts
- Incremental pressure changes
Widen Fan Pattern
Since cold air slows solvent evaporation and increases build in any one spot, widen your spray fan slightly so each pass lays down thinner, more even coats.
You’ll perform a careful fan adjustment to reduce overlap and avoid runs. Change your spray technique by keeping the gun moving faster, holding it consistent distance, and testing patterns on scrap to guarantee uniform coverage in low temps.
Why Thin Coats Beat Heavy Coats in Cold Weather
Even in cold weather, you’ll get better results by applying several thin coats rather than one heavy one.
Even in cold weather, apply several thin coats—controlled bursts that dry evenly and avoid runs or tackiness.
You’ll avoid runs, reduced adhesion, and trapping solvent. Thin coats cure more evenly and resist dripping; heavy coats stay tacky and tack on debris.
Apply controlled bursts and let each layer set enough to firm before adding the next.
- Prevent runs
- Improve adhesion
- Reduce tackiness
Recommended Dry Time Between Coats in Cold Temps
Now that you’re using thin, controlled coats, give each layer time to set before spraying the next one—especially in cold temps where solvents evaporate slowly. Wait 10–20 minutes between coats at 40–50°F, 20–40 minutes below 40°F. Use drying techniques like gentle warming and check paint compatibility first.
| Temp Range | Wait Time |
|---|---|
| 40–50°F | 10–20 min |
| <40°F | 20–40 min |
Prevent Sagging, Orange Peel, and Fisheyes
When temperatures are low, you’ll need to adjust technique to prevent sagging, orange peel, and fisheyes—three common defects that become more likely as paint flows and dries unevenly in cold air.
When temperatures drop, adjust technique to prevent sagging, orange peel, and fisheyes from cold-air drying.
Use these tips for sagging prevention and smoother finishes:
- Apply thin, even coats; wait longer between passes.
- Keep can warm and shake thoroughly.
- Use a slow-drying enamel or add compatible retarder.
Troubleshoot Tacky or Non‑Drying Spray Paint
If your spray paint stays tacky, first check the surface prep—oil, dust, or old finish can block proper adhesion and curing.
Also remember that cold temperatures slow or stop the chemical curing process, so you’ll need to warm the part or move the work to a warmer, dry area.
Troubleshooting those two issues usually gets paint drying again.
Surface Prep Issues
Because surface contamination and improper prep keep solvents from evaporating properly, tacky or non‑drying spray paint usually points to the substrate rather than the paint itself.
You should confirm surface cleaning and paint compatibility before blaming temperature.
Check these steps:
- Degrease and scuff for adhesion.
- Remove rust, old coatings, and debris.
- Use primers matched to substrate and paint.
Cold Curing Problems
Even with clean, compatible surfaces, cold temperatures can stop paint from curing properly and leave a tacky finish.
So you’ll need to check how low temps affect solvent evaporation and chemical crosslinking. In cold weather, warm the can, raise substrate temperature, improve airflow, or use fast‑curing primers/paints formulated for lower temps.
Understand paint chemistry to choose compatible products and avoid recoat failures.
Fixing Adhesion Failures and Peeling After Cold Spray
When paint peels or flakes after a cold-weather application, you can usually trace the problem to surface contamination, inadequate drying time, or spraying at too-low substrate temperatures.
Addressing these root causes quickly prevents further damage and makes repairs easier. You’ll restore adhesion and paint durability by cleaning, feathering edges, and recoating under proper temperatures.
- Clean and degrease
- Sand to solid edges
- Recoat when warmer
When to Use Primer or Adhesion Promoter in Cold
You’ll always start with proper surface prep—cleaning, de-greasing, and scuffing—to give coatings any chance to bond in cold conditions.
Use an adhesion promoter when the substrate is smooth, chemically inert, or you need a fast bond at low temps; it’s thin and designed to lock paint to difficult surfaces.
Choose a primer when you need filling, corrosion protection, or a thicker build that evens out absorption before topcoating.
Surface Prep Necessity
Cold, damp air cuts paint’s grip, so know when to add a primer or adhesion promoter before you spray.
You’ll improve bonding by focusing on surface preparation and proven cleaning techniques: remove grease, rust, and loose particles; sand glossy finishes; and wipe with solvent.
Follow these steps:
- Degrease and dry thoroughly
- Sand or scuff for tooth
- Remove dust, then apply primer as needed
Adhesion Promoter Benefits
Good surface prep sets the stage, but primers and adhesion promoters can make the difference between a coating that sticks and one that flakes off in low temperatures. You should use promoter application on slick or cold substrates and follow tested adhesion techniques to guarantee bond strength.
| Use case | Benefit |
|---|---|
| Cold metal | Better bond |
| Plastics | Reduced peeling |
Primer Vs. Promoter
Deciding between a primer and an adhesion promoter comes down to the surface you’re coating and how low the temperature is.
You’ll choose primer application for bare metal, rust, or big imperfections; use an adhesion promoter when coatings struggle to stick in cold.
- Primer for fill and corrosion resistance.
- Promoter for bonding on plastics.
- Test small areas for promoter effectiveness.
Speed Up Spray‑Paint Curing Safely (Heat Lamps, Infrared)
If you need paint to cure faster in cold weather, using controlled heat—like heat lamps or infrared—can be effective and safe when done right.
You should keep lamps at a moderate distance, move them evenly, and avoid focused hotspots. Follow manufacturer guidelines, monitor surface temperature, and allow gradual cooling.
Proper heat lamp techniques and infrared benefits speed solvent evaporation without rushing the bond.
When Heat Acceleration Can Damage the Finish
You can overdo heat acceleration and wreck the finish by forcing solvents to evaporate too fast, which leaves a weak, brittle film.
Rapid surface heating also creates stress and cracking as the top skin contracts before the lower layers cure.
If solvent gets trapped under a sealed surface, you’ll see blushing and adhesion problems down the line.
Too-Fast Solvent Evaporation
When temperatures rise enough to dry spray paint almost instantly, you risk the solvent evaporating too quickly and leaving a brittle, uneven film that can crack, blush, or trap solvent pockets.
You should slow drying to avoid surface defects and lost adhesion; understand solvent evaporation and temperature effects.
- Reduce heat or add retarder.
- Apply thinner coats.
- Allow flash time between passes.
Surface Temperature Stress
Although speeding up drying with heat might seem helpful, raising the surface temperature too quickly can stress the paint film and cause cracking, orange peel, or poor adhesion.
You should heat gradually, monitor substrate temperature, and follow recommended cure ranges. Proper surface preparation and controlled warming preserve paint performance; otherwise you risk finish failure, rework, and wasted materials despite faster drying.
Trapped Solvent Blushing
A rapid burst of heat can trap solvents beneath the paint surface and cause blushing, a cloudy, whitish film that ruins gloss and clarity.
You’ll see reduced paint adhesion if solvent evaporation is too fast at the surface, leaving solvent pockets.
Prevent it by controlling heat and drying.
- Slow dry
- Moderate heat
- Proper ventilation
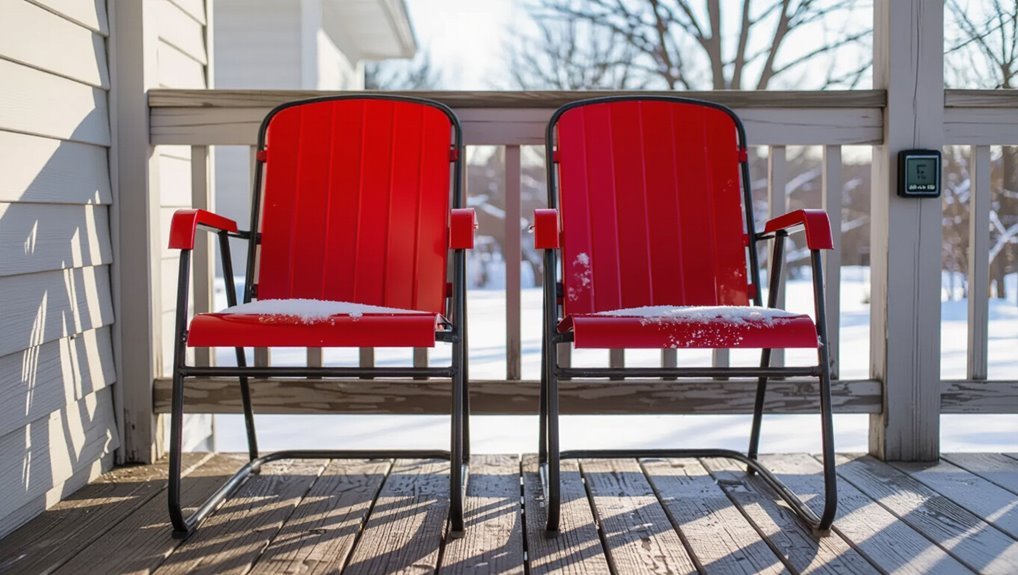
Protect Freshly Sprayed Pieces From Frost
If temperatures drop near or below freezing overnight, cover your freshly sprayed pieces immediately with a breathable, insulating barrier like a frost cloth or moving blanket to prevent frost crystals from forming on the wet paint.
For frost protection, position covers without touching wet surfaces, secure edges against drafts, and avoid plastic.
Prepare a dedicated spray paint storage spot for covered items until surface tack passes.
Store Painted Items to Finish Curing in Cold Climates
When temperatures stay low, move freshly painted items into a stable, cool-but-above-freezing space so the paint can finish curing without frost or extreme cold slowing chemical drying.
Keep humidity moderate, limit drafts, and arrange pieces so air circulates around them without surfaces touching.
Use proper curing environment and storage solutions to protect finish.
- Sheltered garage with heater
- Dry storage cabinet
- Insulated tent or box
Winter Maintenance for Spray Guns and Nozzles
Proper winter maintenance keeps your spray gun and nozzles functioning reliably and prevents freeze damage, clogged passages, and corrosion that can ruin finishes.
You should follow spray gun maintenance routines: flush with appropriate solvent, disassemble as recommended, lubricate seals, and store dry.
Prioritize nozzle cleaning after each use to remove buildup, inspect tips for wear, and replace damaged parts before cold weather compromises spray patterns.
Cost vs. Benefit: Delay the Job or Alter Conditions?
Cleaning and storing your spray gun for winter helps prevent damage, but you still need to decide whether to postpone a job or change conditions to finish it safely.
Do a quick cost analysis and weigh job timing against risks:
Run a brief cost check — weigh timing versus risks before deciding to delay, alter, or hybridize the job
- Delay: reduced rework risk, potential schedule penalties.
- Alter: heaters, tents, faster dry agents—higher expense.
- Hybrid: partial delay plus controlled environment.
Frequently Asked Questions
Can Cold-Altered Paint Colors or Gloss Levels Permanently Change?
Yes — cold can permanently alter paint: you’ll see color consistency problems and gloss variation if paint cures unevenly or crystallizes; you’ll need repainting or stripping to fully restore original hue and sheen.
Will Spray-Can Propellants Freeze and Render Cans Unusable?
Rarely — propellant behavior usually prevents freezing, so cans keep spraying; however, extremely low temperatures can reduce pressure and performance. Store cans at moderate temps for reliable use, and avoid prolonged cold can storage to preserve function.
Can Cold Curing Increase Long-Term Brittleness or Cracking?
A homeowner who cured epoxy in freezing garage noticed hairline cracks later, so yes, cold curing can increase long-term brittleness or cracking. You’ll face cold temperature effects and paint adhesion issues that weaken coatings over time.
Are Environmental Regulations Different for Indoor Winter Spray Painting?
Yes — regulations can differ; you’ll need to follow stricter ventilation requirements and monitor indoor humidity to meet VOC limits, worker safety, and local codes, and you’ll often require permits, PPE, and air extraction controls.
How Long After Cold Exposure Is Paint Fully Chemically Cured?
Think of curing like slow sunrise: you’ll often reach full chemical cure in 7–30 days depending on paint adhesion and temperature impact; colder conditions push curing toward the longer end, so test adhesion before heavy use.
Conclusion
You can paint in cold weather, but don’t expect normal results: paint will atomize worse, solvents will evaporate slower, and curing will stall. Protect fresh coats from frost, pause jobs below manufacturer temps, and store pieces indoors or use heaters or blankets to finish cure. Weigh the cost: rush now and risk runs, tackiness, and poor adhesion; delay and control conditions to get smooth finishes, stronger bonds, and lasting protection.