How to Remove Mold From Painted Ceiling: Safe Cleaning Steps
You can remove mold from a painted ceiling safely by wearing gloves, goggles and an N95, testing a small area first, and using a mild cleaner like diluted bleach (1:10), white vinegar, or hydrogen peroxide. Gently scrub with a soft brush, rinse, and dry thoroughly with fans or a dehumidifier to prevent regrowth. Document any leaks and monitor humidity; if mold keeps returning or the paint’s damaged, consider a pro. Keep going for steps on prevention and repairs.
Why Mold on Painted Ceilings Matters (Health & Paint Damage)
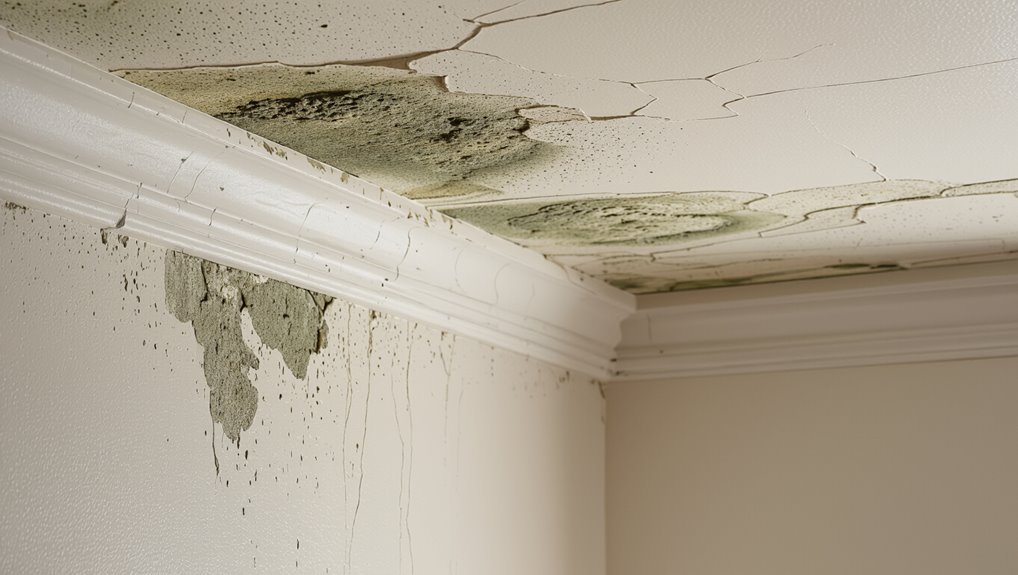
Because mold feeds on organic matter and releases spores and microbial fragments into the air, it matters for more than just how your ceiling looks.
You’ll face health risks like allergies and respiratory irritation, and paint deterioration from staining and blistering.
Use mold prevention strategies and routine ceiling maintenance tips to control moisture, inspect for growth, and fix leaks promptly to protect health and finish.
How to Tell Mold vs. Simple Ceiling Discoloration
How can you tell whether that dark patch on your ceiling is mold or just old stains? You’ll inspect color, texture, and smell: mold often appears fuzzy or spotty, grows outward, and smells musty.
Ceiling discoloration from age or water stains stays flat and follows gravity lines. For reliable mold identification, consider moisture sources and document changes over time.
Quick Checklist: Can You Tackle This as a DIY?
Ready to tackle that ceiling mold yourself? Check hazards, surface size, and paint type — small, non-porous spots are DIY-friendly if you follow mold prevention tips and safe DIY cleaning techniques.
- Wear gloves, goggles, and a mask
- Test a small area and use mild cleaner
- Confirm ventilation and dry thoroughly
When to Call a Professional for Ceiling Mold
If you see visible structural damage to the ceiling, call a professional right away to prevent collapse or hidden rot.
If mold keeps coming back despite your cleanup, a pro can find and fix the underlying moisture source.
And if anyone in your home has severe allergy-like symptoms or respiratory issues, don’t wait—get expert help for safe assessment and remediation.
Visible Structural Damage
Spotting sagging, cracks, or soft spots in your ceiling means you shouldn’t delay—these signs suggest the mold has damaged the structure and you need a professional assessment.
During a thorough ceiling inspection, a pro will evaluate mold growth extent, structural safety, and repair needs.
Consider consulting an expert if you notice:
- visible rot or large discolored areas
- active water leaks
- ceiling movement or bulging
Persistent Or Recurring Mold
When mold keeps coming back despite your cleaning efforts, it’s a sign you’re dealing with a deeper problem that likely needs a pro’s investigation.
Call a professional if mold returns repeatedly, covers large areas, or links to hidden leaks.
Experts identify underlying causes, assess structural risk, and recommend mold prevention strategies while evaluating environmental factors like humidity, ventilation, and insulation to stop recurrence.
Health Risks Or Severe Symptoms
Because mold on your ceiling can release spores and mycotoxins into the air, you should call a professional if you or household members develop persistent respiratory symptoms (coughing, wheezing, shortness of breath), frequent headaches, unexplained fatigue, or allergic reactions that don’t improve after cleaning.
If mold symptoms worsen or you notice severe health effects, get help.
- Persistent breathing issues
- Neurological or systemic signs
- Large or hidden infestations
What Safety Gear to Wear Before Cleaning Mold?
Before you start scrubbing, equip yourself with protective gear that keeps mold spores out of your lungs, eyes, and off your skin.
Wear safety goggles, an N95 mask, and disposable gloves. Put on long-sleeved protective clothing and closed shoes. Consider a disposable gown or washable coveralls.
Remove and bag contaminated items carefully, then wash hands and launder clothing separately after finishing.
How to Protect Furniture and Floors Under the Ceiling
Before you start scraping or spraying, cover furniture completely with plastic sheeting or drop cloths to keep mold spores and cleaning solutions off surfaces.
Tape the coverings down and wrap delicate items separately so nothing gets missed.
Protect floors thoroughly with layered drop cloths or plastic and secure seams to prevent runoff from pooling or seeping underneath.
Cover Furniture Completely
Start by clearing a few feet of space around the work area, then drape heavy-duty plastic or canvas drop cloths over every piece of furniture and the entire floor to catch falling debris, paint, or cleaning solution.
Secure edges with tape so dust and moisture can’t sneak under. Keep furniture protection and cleaning supplies nearby.
- Seal edges tightly
- Wrap delicate items
- Label covered pieces
Protect Floors Thoroughly
1. Lay down heavy-duty floor coverings—plastic sheeting or canvas drop cloths—extending beyond the work area.
Tape seams and edges to create protective barriers so dust and cleaner won’t reach flooring.
Move small furniture out or elevate on blocks; wrap items you leave with sealed plastic.
Keep a clean pathway and dispose of coverings carefully to avoid spreading mold spores elsewhere.
Fast Ways to Test the Size and Depth of the Mold
If you suspect mold on your ceiling, you’ll want to quickly determine how widespread and how deep it’s so you can choose the right cleanup method; a few simple, fast tests will tell you whether it’s a surface stain or a more serious infestation.
- Tap test: loosened paint flakes suggest deeper damage.
- Bleach spot: surface fade indicates surface mold.
- Probe small area: softness means substrate damage.
Use mold detection methods for rapid mold growth assessment before next steps.
Which Painted Ceiling Types Are Safe for DIY Cleaning?
Which painted ceilings can you safely clean yourself?
You can tackle smooth, nonporous ceiling materials like semi-gloss or satin-painted drywall and plaster using basic cleaning techniques.
Textured, popcorn, or water-damaged surfaces are trickier and can release spores or flake paint, so avoid DIY.
If in doubt, test a small area and consider a pro for compromised materials to prevent further damage.
Gentle Bleach Solution for Mold on Painted Ceilings
Although bleach can quickly kill surface mold, you’ll want a gentle, well-mixed solution to protect painted ceilings and your health.
Mix one part household bleach to ten parts water, test a hidden spot, wear gloves and eye protection, and ventilate well.
Consider bleach alternatives later for delicate finishes.
Tips:
- Patch-test first
- Rinse thoroughly
- Combine with mold prevention measures
Non-Bleach Cleaners: Vinegar and Hydrogen Peroxide Options
You can use white vinegar for many mold spots because it kills most strains without harsh fumes, and you’ll often apply it undiluted in a spray bottle.
For tougher patches, hydrogen peroxide (3%) is a stronger antiseptic—spray, let it sit, then blot and rinse.
Always wear gloves and eye protection, test a small area first, and keep the room ventilated while you work.
Vinegar Cleaning Benefits
If you want a safe, inexpensive way to tackle ceiling mold, vinegar is a strong first choice: its acetic acid inhibits many mold species without the harsh fumes or toxic residues of bleach.
You’ll appreciate vinegar properties and its role as a natural disinfectant.
Try these benefits:
- Kills many surface molds
- Safe for most painted ceilings
- Readily available and affordable
Hydrogen Peroxide Usage
One good alternative to vinegar is hydrogen peroxide, which kills mold spores and disinfects without the toxic fumes or residues of bleach.
You’ll choose an appropriate hydrogen peroxide concentration (commonly 3%) and test it on a small painted area.
For hydrogen peroxide application, spray or dab, let it sit to break down mold, then gently wipe and rinse to remove residues.
Application Safety Tips
After using hydrogen peroxide or vinegar to treat mold, take a few safety steps to protect yourself and the ceiling surface.
Follow clear application procedures and basic safety precautions:
- Wear gloves, goggles, and a mask to avoid fumes and spores.
- Test a small area first to prevent paint damage.
- Ventilate the room and avoid mixing cleaners; rinse tools after use.
When to Use a Commercial Mold Remover on Paint
Wondering whether a commercial mold remover is necessary for painted ceilings? Use one when mold is extensive, recurring, or resists DIY cleaners; commercial product effectiveness often outperforms simple solutions.
Check label for safe mold removal ingredients and compatibility with painted surfaces, follow directions, ventilate, and protect nearby finishes.
If paint flakes or discolors, stop and reassess your approach.
How to Spot-Test a Cleaner Without Harming Paint
Pick an inconspicuous test area on the ceiling, like near a corner or behind a fixture, so any damage won’t be obvious.
Mix a mild cleaner with water to the weakest strength that should still work, then apply a small amount with a cloth.
Let it dry fully and inspect the paint for color change, bubbling, or softening before treating the rest of the ceiling.
Choose Test Area
Not sure where to start? Pick a discreet test area before full treatment during mold inspection to protect paint.
Try small spots and wait 10–15 minutes for changes. Suggested test places:
- corner near vent
- behind light fixture
- inside closet ceiling
Record results (discoloration, peeling).
If paint stays intact, you can proceed confidently; if not, stop and choose a gentler method.
Prepare Mild Solution
Mix a mild cleaning solution and test it on paint before tackling the whole ceiling. Dilute a gentle detergent or vinegar with water per common cleaning product recommendations.
Apply a small amount to your chosen test patch, wait a few minutes, then blot. If paint and finish show no damage, proceed.
Document results to inform ongoing mold prevention strategies and safe cleaning choices.
Inspect Paint After Drying
Once the test patch has dried, closely inspect the paint for changes in color, sheen, or texture to make sure the cleaner didn’t cause damage.
Use simple mold inspection techniques and a paint condition assessment mindset. Compare to adjacent areas, then decide.
- Look for discoloration or loss of sheen
- Feel for tackiness or roughness
- Re-test in an inconspicuous spot if unsure
Tools You Need to Remove Mold From a Ceiling
Before you climb the ladder, gather the right tools so the job’s safe and effective: gloves, an N95 respirator or better, protective goggles, a drop cloth, a stiff-bristled brush or sponge, a spray bottle or garden sprayer, buckets, and a mild detergent or EPA-approved mold cleaner.
You’ll also want a ladder, scrapers, microfiber cloths, and tape to protect fixtures while you apply mold removal techniques and cleaning solutions.
How to Set Up Ventilation to Reduce Spores While You Work
While you work, control airflow so mold spores get carried away instead of settling back onto surfaces: open windows and exterior doors to create a cross-breeze, run a window or box fan blowing outdoors, and position another fan to draw air from the work area toward the exhaust.
Use these ventilation techniques to improve air circulation and reduce contamination:
- Aim fans toward an exterior exit
- Seal off adjacent rooms
- Wear a respirator and keep filters clean
Step-by-Step: Remove a Small Mold Patch From a Painted Ceiling
Start by protecting yourself and the room: put on gloves, goggles, and an N95 or better respirator, lay down plastic sheeting to catch debris, and turn on your ventilation setup so spores get carried outside as you work.
Inspect the spot using mold identification techniques, gently scrub with an appropriate ceiling cleaning products solution, rinse, dry thoroughly, and monitor for recurrence.
Step-by-Step: Clean Larger Mold Areas After a Leak
If the mold covers a wide area after a leak, you’ll need a more systematic approach than you used for a small patch.
Work methodically: assess mold types, isolate the room, and choose safe cleaning techniques. Follow PPE, ventilation, and containment steps.
Work methodically: identify mold, isolate the area, and use proper PPE, ventilation, and containment procedures.
- Wear respirator and goggles
- Use detergent or EPA cleaner
- Dispose contaminated materials safely
How to Clean Without Scrubbing Paint Off the Ceiling
Because wet scrubbing can strip paint, you’ll want gentler methods that remove mold without damaging the finish: use a soft-bristle brush or microfiber pad, mist with a mild mold cleaning techniques solution (vinegar or diluted detergent), blot rather than scrub, and rinse lightly with a damp cloth.
Test a small area first to protect ceiling paint care and avoid over-wetting insulation or drywall.
How Long Cleaning Solutions Should Sit on Mold
How long you leave a cleaner on mold depends on the ceiling surface—porous materials need gentler, shorter contact than hard, nonporous ones.
Stronger solutions usually need less dwell time, but you should follow the product instructions to avoid damage.
After the allotted time, rinse thoroughly and dry the area to stop mold from coming back.
Surface Type Matters
Surface type matters a lot when you decide how long a cleaning solution should sit on mold—porous materials like drywall and textured paint soak up liquids, so you’ll need longer contact time or repeated applications, while nonporous surfaces like metal or glass usually need only a short dwell time before scrubbing.
Use suitable cleaning techniques and follow mold prevention steps:
- Porous: longer contact, gentle blotting
- Semi-porous: repeat short applications
- Nonporous: brief dwell, firm scrubbing
Solution Strength Time
1–3 minutes is enough for mild mold on nonporous surfaces, but you’ll need longer dwell times or repeat applications for porous materials and heavier growths.
Match solution concentration to severity: weaker mixes for painted ceilings, stronger for stubborn stains.
Monitor cleaning duration closely and never let harsh solutions sit indefinitely.
Repeat short applications rather than one prolonged soak to protect paint and substrate.
Rinse And Dry
While cleaning solutions need time to work, you should never let them sit so long that they damage paint or substrate; generally leave mild cleaners on nonporous ceilings for 1–5 minutes, stronger solutions for up to 10–15 minutes on stubborn spots, and shorten or repeat applications on painted or delicate surfaces.
- Use gentle rinse techniques with a damp microfiber.
- Blot excess moisture, don’t rub.
- Apply quick drying methods: fans and ventilation.
How to Rinse and Dry the Ceiling Safely After Cleaning
After scrubbing away mold and applying your chosen cleaner, you’ll need to rinse and dry the ceiling promptly to remove residue and prevent regrowth. Use gentle rinse techniques with a damp microfiber and minimal water, then employ drying methods like fans and dehumidifiers. Wipe seams and corners; repeat if needed.
| Tool | Purpose |
|---|---|
| Microfiber | Gentle rinse |
| Fan | Fast drying |
| Dehumidifier | Moisture control |
Cleaning Mold From Textured or Popcorn Ceilings
Now that you’ve rinsed and dried flat surfaces, you’ll need a different approach for textured or popcorn ceilings because their uneven surfaces trap mold and resist wiping.
Use gentler cleaning techniques and avoid scraping loose texture. Protect yourself, test a small area, then proceed carefully.
- Wear respirator and goggles
- Use soft-bristled brush with mild cleaner
- Blot, don’t scrape for mold prevention
What to Do If Mold Reappears After Cleaning
If mold keeps coming back after you clean it, check for hidden moisture sources like roof leaks, plumbing issues, or condensation.
Improve air flow and reduce humidity by upgrading ventilation, using exhaust fans, or running a dehumidifier.
If problems persist, get a professional inspection to find and fix underlying issues.
Identify Underlying Moisture
When mold comes back after you’ve cleaned it, it’s a sign there’s ongoing moisture feeding it; you’ll need to find and stop that source before recleaning.
Inspect for leaks, condensation, or roof issues. Manage humidity control and remove moisture sources promptly.
Check these steps:
- Look for plumbing or roof leaks.
- Feel for damp patches and condensation.
- Monitor indoor humidity and dehumidify.
Improve Ventilation System
Persistent mold after cleaning often means airborne moisture isn’t being removed, so improving ventilation helps stop spores from settling and growing again.
You should focus on ventilation improvement by installing or upgrading exhaust fans, using window fans, and ensuring vents aren’t blocked.
Improve air circulation by opening windows, running fans after showers, and keeping interior doors open to let damp air escape and dry surfaces.
Consider Professional Inspection
Because mold keeps coming back despite your best efforts, it’s time to bring in a professional for a thorough inspection and diagnosis.
You should get a mold inspection and professional assessment to identify hidden sources, structural issues, or persistent moisture. They’ll recommend targeted remediation.
Consider asking about:
- testing for hidden contamination
- sources of recurring moisture
- long-term prevention plans
How to Repair Paint and Surface Damage Caused by Mold
Start by evaluating the extent of the damage so you know whether you can spot-repair paint or need to refinish the whole area.
After mold removal techniques, scrape loose paint, sand stained spots, and treat with a mild fungicide.
Use appropriate patching compound for surface defects, sand smooth, then follow paint restoration methods to prime and repaint for a uniform finish.
Best Primers and Paints That Resist Mold Growth
You’ll want to start with a mold-resistant primer—shellac- and epoxy-based options block stains and spores better than standard primers.
Consider paints with built-in mildewcides or ones you can mix with an approved mildewcide additive to keep new growth at bay.
Finish with a waterproofing topcoat in high-moisture areas to repel moisture and extend protection.
Mold-Resistant Primer Types
When you’re tackling a mold-prone ceiling, choosing the right mold-resistant primer and paint can make the difference between a one-time fix and repeated treatments.
You’ll want primers labeled mildew-resistant, latex-based, or oil-based, and follow correct primer application to seal stains and block spores.
- Latex mold resistant primers
- Shellac or oil blockers
- High-hide stain sealers
Mildewcide-Additive Paints
Although additives won’t make your paint invulnerable, choosing a paint with a built-in mildewcide gives you an extra protective layer that actively inhibits mold and mildew growth on painted surfaces.
You’ll appreciate mildewcide benefits when routine cleaning keeps spores away and stains from returning.
Select quality brands to boost paint longevity, follow surface prep, and repaint high-risk areas for lasting protection.
Waterproofing Topcoats
Mildewcide additives help, but they work best when paired with a waterproofing topcoat that blocks moisture from reaching spores in the first place.
You’ll want primers and paints labeled as waterproof coatings and mold resistant finishes to create a durable barrier.
Consider these options:
- High-quality acrylic waterproof coating
- Oil-based primer with mildew inhibitors
- EPA-registered mold resistant finish
Preventing Mold After Bathroom or Kitchen Moisture
After you’ve wiped up visible moisture, act quickly to keep mold from taking hold by drying the area thoroughly and improving ventilation; open windows, run exhaust fans, and leave doors ajar until surfaces are completely dry.
You should establish routine moisture control and ventilation maintenance: wipe surfaces, use dehumidifiers if needed, run fans during showers/cooking, and check that vents exhaust outdoors to prevent recurring dampness.
Fixing Leaks and Plumbing That Lead to Ceiling Mold
If a leak or persistent pipe issue is feeding moisture into your ceiling, stop the water source first: shut off the relevant valve and call a licensed plumber or repair it yourself if you’re confident and competent.
Then use leak detection and a thorough plumbing inspection to confirm fixes.
Follow up with leak detection and a complete plumbing inspection to verify repairs and ensure no further moisture returns.
- Isolate affected area
- Repair or replace damaged pipe
- Dry and monitor for recurrence
How Attic and Roof Ventilation Affect Ceiling Mold
If your attic and roof aren’t ventilated properly, warm moist air can build up and feed ceiling mold.
You’ll want to check insulation for gaps or compression that traps moisture and prevents airflow.
Properly placed ridge and soffit vents help create a continuous airflow that evacuates moisture before it reaches your ceiling.
Poor Ventilation Effects
When your attic or roof can’t vent properly, warm moist air builds up and drives condensation into ceiling cavities, creating the damp conditions mold needs to take hold.
You’ll notice higher humidity levels and poor air circulation, which let spores germinate.
Address ventilation to stop recurrence:
- Increase soffit and ridge vents
- Add attic fans
- Clear blocked vents and ducts
Insulation And Moisture
Because improperly installed or missing insulation lets warm, moist air contact cold roof sheathing, you’ll get condensation that soaks ceiling cavities and feeds mold growth. You should improve moisture control and consider insulation upgrades to stop damp air migrating into ceilings. Assess attic barriers, seal gaps, and add insulation where needed.
| Issue | Action | Benefit |
|---|---|---|
| Gaps | Seal | Prevents drafts |
| Thin insulation | Add | Reduces condensation |
| Vapor barriers | Install | Controls moisture |
| Air leaks | Patch | Limits mold |
Ridge And Soffit Vents
Sealing gaps and upgrading insulation cuts moisture at the source, but proper attic airflow is what keeps that trapped air from condensing on your ceiling sheathing.
You should guarantee continuous ridge ventilation and balanced soffit airflow so warm, humid air exhausts properly. Check vents for blockages and add baffles where needed.
- Inspect ridge vents
- Clear soffit airflow
- Install baffles and fans
How Humidity Control Keeps Ceiling Mold Away
If you keep indoor humidity between about 30% and 50%, you’ll remove the moisture mold needs to grow on ceilings and other surfaces.
Monitor humidity levels with a hygrometer, vent bathrooms and kitchens, and fix leaks promptly.
Consistent ventilation and prompt drying cut condensation and spores’ chance to settle, making mold prevention part of routine home maintenance rather than emergency cleanup.
Choosing a Dehumidifier to Prevent Ceiling Mold
When picking a dehumidifier to prevent ceiling mold, match the unit’s capacity to your room size so it can keep humidity levels steady.
Check the moisture removal rate (pints per day) to make sure it handles your space, and weigh noise and energy efficiency so it’s practical for daily use.
These factors together help you stop mold before it starts.
Room Size Matching
Pick a dehumidifier sized for the room you’re treating, because an undersized unit won’t lower humidity enough to stop ceiling mold and an oversized one will cycle so quickly it won’t remove moisture efficiently.
After a mold assessment, match capacity to room size. Consider:
- ceiling height and floor area
- typical humidity levels
- ventilation and air circulation
Moisture Removal Capacity
After matching capacity to room size, you’ll need to focus on a dehumidifier’s moisture removal rate — how many pints or liters it pulls from the air per day — because that determines whether it can actually lower indoor humidity enough to stop ceiling mold growth.
Choose a unit rated to reach and maintain targeted humidity levels; reliable moisture control and humidity regulation prevent recurrence and protect painted ceilings.
Noise And Energy Efficiency
Since you’ll likely run a dehumidifier for long stretches to keep ceiling moisture low, pay attention to both noise level and energy efficiency so the unit doesn’t become a nuisance or a big utility expense.
Choose models with sound-dampening and Energy Star ratings for noise reduction and energy savings.
Consider:
- Quiet decibel rating
- Energy-efficient compressor
- Programmable timers and auto-shutoff
How HVAC and Duct Cleaning Reduce Ceiling Mold Risk
If your HVAC system and ducts stay clean and well-maintained, they’ll cut down on the moisture and airborne spores that settle on ceilings and feed mold growth. You should schedule HVAC maintenance and regular duct inspections, replace filters, and fix leaks to reduce ceiling mold risk.
| Task | Frequency | Benefit |
|---|---|---|
| Filter change | Monthly | Fewer spores |
| Duct clean | 1–3 yrs | Less dust |
| Leak repair | As needed | Dry surfaces |
How Long to Monitor a Repaired Ceiling for Mold Return
Keeping your HVAC and ducts in good shape helps prevent mold, but you’ll still need to watch a repaired ceiling to catch any return early.
For effective mold monitoring and repair assessment, check weekly, then monthly after three months. Watch for stains, musty smells, or paint bubbling.
- Inspect visually
- Note humidity and leaks
- Schedule follow-up checks
How to Document Mold for Insurance or Landlord Claims
When you suspect mold damage that could affect a claim, document everything immediately and thoroughly: take clear date-stamped photos from multiple angles, record the room, surface, and dimensions, and note odors or health symptoms in a written log.
Then contact your insurer or landlord, submit your documenting mold evidence, keep copies, get professional inspection reports, and track repairs and communications for insurance claims.
Health Effects of Household Mold Exposure
Documenting mold for claims helps protect your financial and legal interests, but you also need to contemplate how exposure can affect your health.
You’ll face mold spores that harm indoor air quality and trigger allergy symptoms or skin irritation. Monitor for respiratory issues, immune response changes, and signs of mold toxicity that can worsen chronic conditions.
- Shortness of breath
- Rashes or dermatitis
- Persistent congestion
When to Remove Paint and Replace a Badly Damaged Ceiling
If paint is bubbling, flaking, or mold has penetrated the drywall, you’ll need to strip the finish and assess the substrate; cosmetic fixes won’t stop ongoing deterioration or health risks.
You should order a professional mold assessment before deciding on ceiling replacement.
If structural rot, persistent staining, or recurrent growth appears, remove damaged drywall, remediate mold, and replace materials to restore safety and finish.
Routine Maintenance to Keep Painted Ceilings Mold-Free
Although you mightn’t notice it day to day, regular upkeep prevents most ceiling mold before it starts: keep humidity below 50%, ventilate bathrooms and kitchens, fix leaks promptly, and wipe minor spots with a mold-killing cleaner as soon as they appear.
Although you mightn’t notice daily, simple upkeep—control humidity, ventilate, fix leaks, and clean spots—prevents ceiling mold.
Create preventive measures and a simple cleaning schedule to stay ahead:
- Inspect monthly
- Clean quarterly
- Address stains immediately
How to Pick the Right Professional Remediation Service
How do you choose a remediation service that actually solves your mold problem? You’ll focus on Choosing Services and Evaluating Credentials: check certifications, insurance, references, clear quotes, and containment plans. Ask for timelines and guarantees, and verify EPA or IICRC credentials before hiring.
| Criteria | Why it matters |
|---|---|
| Certification | Guarantees standards |
| Insurance | Protects you |
| References | Shows track record |
| Quote clarity | Prevents surprises |
| Containment plan | Limits spread |
Frequently Asked Questions
Can Mold Spores in Ceiling Paint Affect Indoor Air Quality Tests?
Yes — mold spores in ceiling paint can skew air quality tests; you’ll get elevated readings if spores become airborne, so you should control sampling locations, avoid disturbance, and consider surface testing alongside air quality measurements.
Will Mold-Cleaning Void My Home Warranty or Violate Rental Lease Terms?
I once fixed a tiny leak like patching a bike tire; you shouldn’t void coverage if you follow pros’ guidance. You must check your lease and manufacturer terms—mold removal can have warranty implications, so get approvals.
Are There Health Risks From Mold-Cleaning Residues on Painted Ceilings?
Yes — you’ll face risks from mold exposure if residues remain; you’ll irritate lungs, eyes, or skin. For cleaning safety, you should ventilate, wear PPE, rinse thoroughly, and avoid harsh chemicals that leave harmful residues.
Can Painted Ceilings With Lead-Based Paint Be Safely Treated for Mold?
Yes — but don’t panic; you’ll need strict lead paint precautions. You should avoid sanding, use HEPA-filtered containment, hire pros for safe mold removal techniques, and follow testing, proper PPE, and regulatory disposal rules.
How Soon Can I Repaint After Professional Mold Remediation?
You can repaint once professionals confirm moisture’s resolved and surfaces are dry, typically 24–72 hours after mold remediation timing is cleared; follow repaint preparation tips like priming with a mold-resistant primer and ensuring proper ventilation.
Conclusion
You’ve got the tools and knowledge to tackle mold on painted ceilings safely, and you shouldn’t ignore it — it can harm your health and ruin paint. If it’s small and surface-level, you can clean it yourself with proper gear; if it’s widespread or recurring, call a pro. Keep humidity low and inspect regularly so problems don’t sneak up on you. When in doubt, don’t play with fire—get expert help.