How to Paint a Stained Cabinet for a Smooth Professional Finish
You can get a smooth, professional finish by removing doors and hardware, degreasing thoroughly, then either stripping damaged stain or deglossing well‑adhered stain. Sand from 120 to 220 grit, repair veneer or chips, then apply a tannin‑blocking primer (shellac or acrylic) and thin, even paint coats—brush edges, roller panels, or spray for the best result. Allow proper recoat and full cure times, reinstall carefully, and follow maintenance tips to keep the finish looking new; keep going to learn exact steps.
What You’ll Achieve Painting Stained Cabinets and Who This Guide Is For
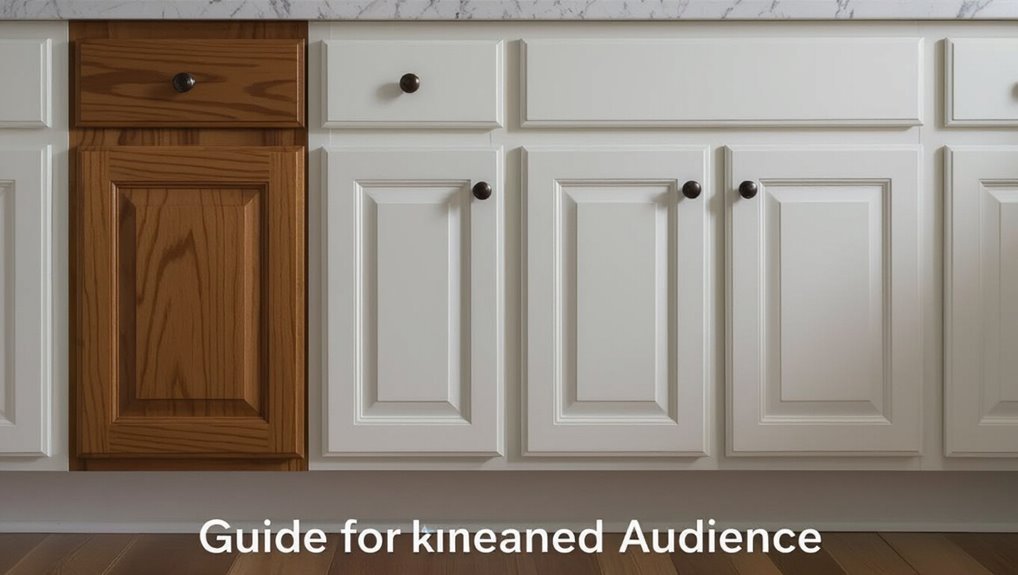
If you’re tired of dark, dated wood but not ready to replace your cabinets, painting stained cabinets gives you a fresh, modern look without the cost of a full remodel.
You’ll achieve a durable, uniform finish that matches your desired outcome and increases home appeal.
This guide’s target audience is DIYers and budget-conscious homeowners who want pro-level results with clear, actionable steps.
Should You Strip the Stain or Just Degloss?
Decide whether to strip or degloss based on how worn or sealed the current finish is and whether you need to remove stain bleed-through.
Deglossing saves time and keeps wood detail if the finish is intact, while stripping gives you a clean slate for stubborn finishes or repairs.
Always test adhesion with primer on a small area so you know which prep method will hold.
When To Strip
When you’re evaluating a stained cabinet, consider the finish’s condition and your end goal before choosing to strip or just degloss: strip when the stain is blotchy, damaged, or dark enough that it will show through paint, and degloss when the stain is even, well-adhered, and you want to save time while ensuring paint adhesion.
- Choose stripping techniques that remove stain fully.
- Inspect for damage beneath finish.
- Follow safety precautions: ventilation, gloves, disposal.
Benefits Of Deglossing
One clear advantage of deglossing is that it lets you skip full stripping while still creating a surface paint will grip, so you’ll save time and avoid harsh chemicals.
You’ll find deglossing techniques quick and effective for light finishes; they simplify surface preparation and reduce mess.
Choose deglossing when old finish is sound, saving effort while ensuring paint adhesion without heavy sanding.
Testing Finish Adhesion
Before you commit to stripping or just deglossing, test how well the existing finish will hold paint by doing a simple adhesion check on an inconspicuous spot.
You’ll confirm adhesion testing and finish compatibility quickly. Try this:
- Cut a small crosshatch, press tape, pull.
- Sand and retest if tape fails.
- Strip if large flakes or poor adhesion persist.
Choose Paint for Stained Cabinets: Latex, Acrylic, or Oil
Now you’ll pick the right paint for your stained cabinets by weighing latex versus acrylic and noting when oil-based makes sense.
Latex and acrylic dry faster and clean up with water, while oil gives tougher, smoother finishes that resist wear.
Consider application method and long-term durability to match the paint to your use and skill level.
Latex Versus Acrylic
When choosing between latex and acrylic for your stained cabinets, focus on durability, finish, and ease of use to match your project’s needs.
You’ll weigh latex benefits like easy cleanup and flexibility against acrylic durability and faster curing.
Decide based on wear and sheen you want.
- Prep: sand, clean
- Test: small area first
- Finish: choose sheen and topcoat
Oil-Based Advantages
If you liked the toughness of acrylic but worry about long-term wear, oil-based paints offer a different set of strengths for stained cabinets: they level out to a very smooth, hard finish, resist chipping and moisture better than most latex formulas, and bond well to bare wood and tannin-rich stains.
You’ll appreciate oil based benefits for longevity; learn proper application techniques to avoid brush marks.
Application And Durability
Pick the right paint with durability and application in mind: latex is forgiving and easy to clean but can show brush strokes and may not stand up to heavy wear.
You’ll weigh durability concerns against finish preference and use proper application techniques.
- Use acrylic for balance: easy application, better wear.
- Choose oil for high-traffic durability.
- Prep and prime to maximize longevity.
Pick the Right Primer for Stained Wood
Anyone painting over stained wood should start by choosing a primer designed to block tannin bleed-through and promote adhesion. You’ll compare primer types (shellac, oil, water‑based) and plan primer application for porous or oily stains. Use a small test area.
| Type | Strength | Best for |
|---|---|---|
| Shellac | Blocks well | Severe tannins |
| Acrylic | Easy cleanup | Light tannin |
Tools & Supplies for a Pro Finish
Before you start painting, gather the essential prep tools—sandpaper, tack cloths, degreaser, and quality masking tape—to make sure surfaces are clean and smooth.
Pick paint and finish supplies that match your primer and desired durability, like a high-build cabinet paint, quality brushes or a sprayer, and a durable topcoat.
Having the right gear on hand will save time and give you a pro-looking result.
Essential Prep Tools
One good set of prep tools makes the difference between a smooth, professional paint job and a finish that shows through every flaw.
You’ll need tools that support proper sanding techniques and accommodate different finish types so the paint adheres and looks even.
- Sanding block (various grits)
- Tack cloths and vacuum
- High-quality scrapers and screwdrivers
Paint & Finish Supplies
2 key choices will determine your cabinet’s final look: the paint type and the topcoat.
Choose between latex, acrylic, or oil-based paint types and pick a quality primer. For smooth results, get fine-grit sandpaper, tack cloths, high-density foam rollers, angled brushes, and a sprayer if possible.
Select topcoats and finish techniques—polyurethane or waterborne varnish—for durability and sheen.
Remove Cabinet Doors, Hardware, and Hinges Before Painting
Start by taking off every door, drawer front, hinge, and piece of hardware so you can work faster and get a smoother, more even finish.
You’ll label each door during door removal and use hardware organization to keep parts matched. Store screws in labeled bags.
Follow this quick checklist:
- Label doors and frames.
- Bag and tag hardware.
- Hang doors safely.
Clean and Degrease Cabinets the Right Way
Before you prime or sand, thoroughly clean and degrease every surface so paint will adhere and the finish stays smooth.
Use a TSP substitute or dedicated cleaning products, diluted per instructions.
Work in small sections, scrub with a microfiber cloth or nonabrasive pad, rinse with clean water, and dry completely.
Employ proven degreasing techniques to remove oils, grime, and residues before painting.
When to Strip Old Finishes Safely
Before you strip anything, check the finish for peeling, multiple layers, or signs of sanding resistance so you know if stripping is necessary.
Consider safety risks like lead paint, strong fumes, and nearby ventilation; if you’re unsure, test for lead or get professional help.
If the finish is intact and nonhazardous, you can often scuff and prime instead of stripping.
Assess Finish Condition
When you inspect a stained cabinet, look for worn spots, finish failure (like peeling, cracking, or severe discoloration), and areas where previous repairs or thick lacquer obscure the grain—these signs tell you whether a full strip is necessary.
Do a finish assessment and surface inspection to decide.
- Peeling or flaking
- Heavy buildup hiding grain
- Inconsistent adhesion or discoloration
Evaluate Safety Risks
Now that you’ve checked for peeling, heavy buildup, and adhesion problems, turn your attention to safety risks tied to stripping old finishes. You should inspect for lead paint, solvent hazards, and flammable residues. Wear proper safety gear, follow ventilation guidelines, and isolate the area. Remove finishes outdoors or in a well-vented space; test for contaminants before aggressive stripping.
| Risk | Action |
|---|---|
| Lead | Test/contain |
| Solvents | Use PPE |
| Flammables | Eliminate sources |
| Dust | Wet-sand/HEPA |
Deglossing (No Stripping): Chemical vs. Sanding
If the old finish is intact but glossy, you don’t have to strip it—deglossing will give new paint something to bite. You can choose chemical options that dull gloss without deep stripping, or use light sanding techniques to scuff surfaces.
Decide by smell, ventilation, and substrate.
Consider odor, airflow, and the surface material before choosing deglossing or sanding methods.
- Chemical options: liquid deglossers.
- Sanding techniques: fine scuffing.
- Clean and prime.
Sanding Strategy: Grits, Sequence, and Pitfalls
Start by choosing the right grits and a logical sequence so you don’t overwork the wood or leave visible scratches.
Use grit selection that begins around 120 to remove gloss, then 180–220 to smooth.
Employ sanding techniques with light, even pressure following the grain.
Avoid skipping steps, pressing hard, or using overly coarse paper—those cause gouges and uneven paint adhesion.
Repair Cracks, Chips, and Veneer Lifts Before Painting
Inspect the cabinet closely for cracks, chips, and lifted veneer so you can address structural issues before any primer or paint goes on.
You’ll perform crack repair, chip filling, and veneer restoration, then sand for surface smoothing. Follow these steps:
- Clean and glue lifted veneer; clamp until set.
- Fill chips with matching filler; shape.
- Inject epoxy into cracks; sand flush.
Fill Nail Holes and Seams for a Smooth Surface
Now that cracks, chips, and veneer lifts are fixed and sanded smooth, you’ll address nail holes and seams so the finish reads like solid wood. Use appropriate filling techniques: apply wood filler, press into holes, and feather seams; sand flush. Proper surface preparation guarantees paint adhesion and a seamless look.
| Before | After |
|---|---|
| holes | filled |
| seams | smoothed |
Primer Application for Cabinets: Brush, Roller, or Spray
Now you’ll choose the primer application method that fits your project—brush for edges, a roller for flat panels, or spray for the smoothest finish.
Each method has trade-offs: brushing gives control, rolling speeds coverage with some texture, and spraying delivers the most even coat but needs masking and ventilation.
Before priming, make sure the surface is thoroughly cleaned, sanded, and dust-free so the primer bonds properly.
Brush Versus Roller
When choosing how to apply primer to your cabinets, pick the tool that matches the surface and the finish you want: brushes give control for edges and crevices, rollers cover flat panels quickly, and sprayers deliver the smoothest, most even coat if you can mask properly.
- Use brush techniques for trim, corners, and detailed profiles.
- Use roller advantages on flat doors to save time.
- Back-roll panels after brushing to blend strokes.
Spray Application Benefits
1. You’ll love spray advantages for cabinets: faster coverage, ultra-smooth finish, and fewer brush marks.
Use proper application techniques—steady passes, overlapping strokes, correct tip size, and controlled pressure—to avoid runs and orange peel.
Mask thoroughly, work in thin coats, and allow flash-off between passes.
Spraying saves time and yields a professional, factory-like result when you practice consistent motion and setup.
Surface Prep Importance
Spraying gives a factory look, but you won’t get lasting results unless you prep and prime correctly—primer locks stain, helps paint adhere, and hides imperfections so your finish stays smooth and durable.
- Use surface preparation: clean, degloss, and remove grime.
- Apply sanding techniques: scuff with fine grit before primer.
- Choose brush, roller, or spray based on detail, speed, and control.
How to Prime for Adhesion and Stain Blocking
Because stained wood can bleed tannins and oils through thin paint layers, you’ll need a primer that both sticks well and seals contaminants; choose a high-quality bonding primer or a stain-blocking oil-based/ shellac-based primer for best results. Use proper adhesion techniques and stain blockers, apply thin even coats, dry fully, and spot-prime problem areas.
| Primer Type | Benefit | Use |
|---|---|---|
| Shellac | Fast seal | Spot-treat |
| Oil-based | Durable | Full prime |
| Bonding | Adheres | Smooth finish |
| Waterborne | Low odor | Light stains |
Sanding Between Coats: When and How
After the first coat dries, you’ll sand lightly to knock down imperfections and promote adhesion before recoating.
Use a fine grit (220–320) and a gentle, even technique so you don’t remove the paint down to the wood.
Wipe the surfaces with a tack cloth or damp rag to remove dust before applying the next coat.
When To Sand
When you apply multiple coats of paint or finish, sanding between them evens out imperfections, improves adhesion, and guarantees a smooth final look.
You’ll sand once coats feel dry to the touch but still cure slightly; adjust sanding techniques and sanding frequency by finish type.
Follow this simple checklist:
- Lightly scuff after each dry coat.
- Clean dust thoroughly.
- Recoat only when surface is smooth.
Grit And Technique
Choose the right grit and sanding method to get a flawless finish without eating through the paint or stain.
You’ll use grit selection to match coat type: 220–320 for between latex coats, 320–400 for polyurethane or lacquer.
Employ a light sanding technique—gentle, even strokes with a sanding block or fine sanding pad.
Remove dust before the next thin coat.
Clean Before Recoating
Before you add another coat, clean and sand the surface so the next layer bonds properly and looks smooth.
You’ll remove dust, fingerprints, and imperfections with the right cleaning solutions and light sanding on cabinet surfaces.
Follow this quick routine:
- Wipe with a mild cleaning solution, then dry.
- Sand lightly with 220-grit.
- Remove residue with tack cloth before recoating.
Choosing Sheen and Color for Painted Cabinets
Why pick a gloss you won’t enjoy? You should prioritize sheen selection based on durability and room light—matte hides flaws, semi-gloss cleans easier.
For color, find color inspiration in countertops, hardware, or fabric samples and test swatches under real lighting. Balance trend with timeless choices, and remember darker hues show wear differently than lighter ones.
Paint Techniques to Avoid Brush Marks and Drips
Start by thinning your paint slightly and working in long, even strokes so you minimize brush marks and prevent drips from forming.
You’ll use proper brush techniques and maintain a wet edge to achieve a smooth finish. Control load, pressure, and direction to avoid buildup.
- Load brush evenly
- Light pressure, long strokes
- Tip-off edges gently
Paint Sprayer for Cabinets: Setup, Technique, Safety
When you switch to a paint sprayer for cabinets, you’ll gain speed and a factory-smooth finish—but only if you set up and use it correctly.
Clean filters, flush lines, and follow sprayer maintenance schedules. Adjust air pressure for even atomization, test on cardboard, and move steadily.
Wear respirator, goggles, and ventilation. Mask surrounding areas and secure cabinet doors for consistent coverage.
How Many Coats You Need and When to Stop
After you’ve got your sprayer dialed in and your safety gear on, the next question is how many coats your cabinets actually need and how to tell when to stop.
Apply thin, even layers to control coating thickness and boost finish longevity. Check smoothness and coverage between coats.
Apply thin, even layers to control thickness and longevity — check smoothness and coverage between each coat.
- One: touch up thin spots.
- Two: full even coverage.
- Three: only for heavy wear.
Curing and Dry Times: Touch, Recoat, and Full Cure
Even though the paint feels dry to the touch within minutes or hours, you’ll need to respect three different timeframes—touch dry, recoat window, and full cure—because each tells you what the finish can safely handle without damage. Know touch times, recoat times, dry times and final curing times to avoid dents or tacky spots.
| Stage | Typical Hours | What to Do |
|---|---|---|
| Touch | 1–4 | Light handling |
| Recoat | 2–24 | Apply next coat |
| Full cure | 168–720 | Normal use |
Reinstall Doors and Hardware Without Damage
Carefully hang doors and refit hardware to avoid chipping fresh paint or misaligning hinges. You’ll work slowly, testing door alignment and using shim adjustments.
Carefully rehanging doors and refitting hardware—work slowly, test alignment, and use shims to protect paint and hinges.
Protect painted edges and screws for hardware protection, and tighten hinges incrementally.
- Align doors top-to-bottom, gaps consistent.
- Use felt pads or tape to shield finishes.
- Tighten screws in stages, checking swing and clearance.
Common Problems After Painting and Quick Fixes
You’ll likely see a few predictable issues once the paint dries—drips, brush marks, tackiness, or tiny chips—and most can be fixed quickly without stripping everything back.
For common pitfalls, sand drips smooth with fine grit, buff brush marks, cure tackiness with warmer, ventilated conditions, and touch tiny chips with matching paint.
These quick remedies restore a pro look fast.
Maintenance to Keep Painted Cabinets Looking New
After you’ve smoothed drips and touched up chips, keep painted cabinets looking fresh with a simple maintenance routine.
Stick to regular cabinet upkeep and occasional finish restoration to extend life and shine.
- Wipe daily with a damp microfiber, mild soap only.
- Inspect monthly for chips; touch up promptly.
- Reapply a thin protective wax or topcoat yearly for durability.
Frequently Asked Questions
Can I Paint Over Laminate or Thermofoil Cabinet Surfaces Successfully?
Yes — you can, but success needs proper laminate preparation and attention to thermofoil adhesion. You’ll sand, clean, use a strong primer or bonding agent, and choose flexible paint to prevent peeling and guarantee a durable finish.
Will Painting Cabinets Void Manufacturer or Home Warranty Coverage?
Like changing a car’s paint, you might void coverage: you’ll check warranty implications before cabinet refinishing, since manufacturers or home warranties can deny claims for altered finishes, so get written approval or accept potential loss.
How Do I Protect Adjacent Countertops and Appliances From Paint Fumes?
You’ll protect countertops and appliances by using fume containment measures: seal gaps with plastic sheeting and painter’s tape, run fans and open windows, use a HEPA air purifier, and follow ventilation tips to keep fumes away.
Can Painted Cabinets Be Refinished Later Without Full Stripping?
Yes — you can refinish painted cabinets later without full stripping. You’ll use refinishing techniques like light sanding, deglossing, and priming to guarantee paint adhesion, so new coats bond well and surfaces look refreshed.
Are There Eco-Friendly Low-Voc Paint Options That Still Hold Up?
Yes — you’ll find surprising strength in gentleness: eco friendly finishes now match traditional resilience, and low VOC durability holds up with proper prep, primers, and topcoats, so your cabinets stay beautiful and healthier for your home.
Conclusion
You’ve taken stained cabinets from tired to terrific, and with the right prep and products they’ll last like a suit of armor — tough and dependable. Keep cleaning gentle, watch for chips, and touch up promptly. Reinstall hardware carefully, follow cure times, and don’t rush the finish. With routine maintenance and fast fixes, your cabinets will stay smooth and professional-looking for years, saving you time and money while brightening your space.