How Long Does Caulk Dry Before Painting? Full Timing Guide
You should wait until caulk is fully cured—not just dry to the touch—before painting, because curing guarantees strength and paint adhesion. Cure times vary: fast acrylic latex can be paint-ready in 1–24 hours, while polyurethane or solvent‑based caulks often need 24–72+ hours, and pure silicone usually isn’t paintable without special primer. Speed drying with warmth, ventilation, and low humidity helps, but always follow the label; keep going for specific tips and troubleshooting to get a smooth, lasting finish.
Quick Answer: When You Can Paint Over Caulk
If you need a quick answer: wait until the caulk is fully cured before painting, not just dry to the touch.
You’ll check cure times per caulk types — silicone, acrylic, and hybrid — and confirm paint compatibility on labels.
Test a small area if unsure.
Painting too soon risks adhesion failures or discoloration; patience guarantees a durable, uniform finish.
Dry Vs. Cure: What Those Terms Mean
You’ll want to know the difference between dry time and cure time because paint can often go on once the surface feels dry, while the caulk still needs longer to fully cure internally.
Surface drying is just the outer skin forming, whereas internal curing is a chemical process that strengthens the bead over hours or days.
Temperature, humidity, and caulk type all affect how fast that full cure happens.
Dry Time vs. Cure Time
While caulk may feel dry to the touch within minutes or a few hours, that’s not the same as being fully cured; drying means surface moisture has evaporated, whereas curing is the chemical process that gives the caulk its final strength and flexibility.
You should wait for curing processes to finish before stressing joints or painting, since drying mechanisms only indicate surface readiness, not full performance.
Surface vs. Internal Drying
Because caulk’s outer layer loses moisture much faster than its core, you’ll often see a dry skin long before the interior has fully cured. That skin can handle light touch but doesn’t mean the joint has reached full strength or flexibility.
You should distinguish surface drying from internal drying: paint adhesion may seem okay, yet the caulk needs internal drying time to develop full bond, elasticity, and lasting seal.
Factors Affecting Cure
Although caulk may look dry on the surface, curing is a deeper chemical process that can take much longer and affects performance; you should understand the difference between drying (moisture loss) and curing (chemical crosslinking or solvent evaporation completing), because paint adhesion, flexibility, and durability depend on cure, not just surface dryness. You must consider caulk composition and environmental conditions.
| Factor | Effect |
|---|---|
| Humidity | Slows cure |
| Temperature | Speeds or stalls cure |
| Caulk composition | Dictates cure chemistry |
| Thickness | Increases cure time |
| Ventilation | Aids solvent escape |
How to Tell Paintable Vs. Non‑Paintable Caulk
When you’re deciding whether to paint over caulk, check the label and surface feel first: paintable caulk will be explicitly marked as “paintable” or “paint-ready” and usually dries to a slightly tack-free, rubbery finish that accepts primer, while non‑paintable caulk (often silicone) stays glossy or very slippery and repels paint.
Also test a small area, note caulk types, and adjust application techniques accordingly.
Acrylic Latex Caulk: Typical Paintable Times
How soon can you paint over acrylic latex caulk? You can usually paint in 2–24 hours depending on thickness and humidity.
Wait until the surface skins and feels firm; full cure takes longer but isn’t required for painting. Properly cured caulk maintains acrylic flexibility and helps paint adhesion.
For best results, follow manufacturer directions and allow extra drying time in cool or damp conditions.
Silicone and Silicone‑Blend Caulk: Paintability Limits
Silicone and silicone‑blend caulks have a much narrower paintability window than acrylics, so you’ll need to check the product label before planning to paint.
In many cases, pure silicone won’t accept paint at all, and blends can require 24–48 hours or a special primer to stick.
Don’t paint when the surface still feels tacky or the manufacturer warns against painting—doing so will cause poor adhesion and visible failure.
Paintability Window Limits
Because silicone and silicone‑blend caulks cure by reacting with moisture rather than by simply drying, you’ll find their paintability window is narrow and often unforgiving: you must wait manufacturer‑specified cure times, use proper drying techniques, and test paint adhesion on a small area.
Missed timing or poor prep ruins finish. Plan projects so painting occurs within that limited window for best results.
When Not To Paint
You’ll want to avoid painting when the caulk feels tacky, hasn’t reached the manufacturer’s full cure time, or shows visible surface bloom—those signs mean paint won’t bond and will likely peel.
For silicone and silicone‑blend caulk, check paint compatibility and proper caulk application before painting.
- Wait full cure per label
- Test small area for adhesion
- Use paintable formulations only
Polyurethane & Solvent‑Based Caulks: Wait Times
When you’re working with polyurethane or solvent‑based caulks, expect longer wait times than with water‑based products: tack‑free times range from a few hours to a full day, but full cure often takes 24–72 hours (and up to a week in thick beads or poor ventilation).
You should account for polyurethane properties and solvent based characteristics: low shrinkage, strong adhesion, and slower solvent evaporation dictate longer paint delays.
Fast‑Drying Caulks That Let You Paint Same Day
If you need to paint the same day, choose fast‑drying acrylic latex or hybrid caulks that tack up in 15–60 minutes and reach paintable cure in 1–4 hours under recommended conditions.
You’ll get reliable fast drying options if you follow proper application techniques:
- Tool and smooth within tack time
- Maintain recommended temperature/humidity
- Remove excess and clean edges before painting
Caulks That Need 24–48 Hours Before Painting
Fast‑drying formulas are great for same‑day work, but some projects call for slower‑curing caulks that need 24–48 hours before you paint.
You’ll often see silicone blends, latex‑silicone hybrids, and specialty exterior caulk types requiring longer set times. Their curing agents react slowly for better flexibility and adhesion.
Plan painting after that window to avoid tacky finish, smudges, or poor paint bond.
When to Wait Full Cure (72+ Hours)
Because some projects put extreme demands on joints and finishes, you’ll want to wait a full cure—72 hours or more—before painting certain caulks.
You’ll follow manufacturer guidance and assess caulk types and curing conditions. Wait when you need full adhesion, flexibility, and solvent off-gassing prevention.
- High-movement joints
- Exterior trim and siding
- Areas exposed to humidity or water
Temperature’s Effect on Drying and Paintability
When temperatures dip or soar, caulk cures at a very different rate and that directly affects when you can paint—cooler conditions slow the chemical cross‑linking and solvent evaporation, while heat speeds them up but can trap solvents if humidity’s high. You should monitor temperature impact and drying conditions to decide paint timing.
| Temp range | Expected cure | Paint window |
|---|---|---|
| <50°F | Very slow | >72 hrs |
| 50–70°F | Moderate | 24–48 hrs |
| >70°F | Fast | 12–24 hrs |
Humidity, Airflow, and Drying Speed
High humidity slows water-based caulk’s curing, so you’ll need to wait longer in muggy conditions.
Good airflow speeds evaporation and helps the sealant set more evenly, so aim for cross-ventilation or a fan if humidity is high.
Balancing humidity control and airflow will get you to paint-ready caulk faster.
Humidity Effects On Drying
If you’re working in a damp room, expect caulk to take considerably longer to skin over and fully cure; moisture in the air slows solvent evaporation and interferes with chemical cross-linking in many sealants.
You should monitor humidity levels and adjust drying techniques accordingly.
Tips:
- Use a dehumidifier to lower moisture.
- Warm the space modestly.
- Avoid adding wet work nearby.
Airflow’s Role In Curing
Because air movement speeds solvent evaporation and carries away moisture, increasing airflow can noticeably shorten both skin-over time and full cure for most caulks.
You should boost ventilation importance by opening windows, using fans, or running exhaust to accelerate drying.
Monitor conditions—too strong currents can deform fresh beads—so balance airflow impact with gentle, even circulation for reliable, faster cures before painting.
Bead Size, Joint Depth, and Paintable Time
When you lay a thicker bead of caulk or pack a deep joint, it’ll take longer to cure through than a thin bead, so plan painting time accordingly.
Your bead size and joint depth dictate surface tack and full cure.
Consider these tips:
- Use thinner beads where possible to speed paintability.
- Reduce joint depth with backing rod.
- Check tack before priming.
Substrate Differences: Tile, Wood, Metal, Drywall
Bead size and joint depth affect cure time, but the surface you’re caulking matters just as much — different materials absorb or repel moisture and affect adhesion and paintability.
On tile, use tile caulk that repels water and skins fast.
With wood caulk you’ll need longer for absorption.
Metal caulk needs adhesion promoters and full cure before painting.
Drywall caulk dries fastest and sands easily.
Paint Type Matters: Latex Vs. Oil‑Based Timing
If you’re painting over caulk, the type of paint you choose directly affects how long you should wait: latex paints can be applied once the caulk has cured to a firm, tack-free state (often 24–48 hours), while oil‑based paints usually require a longer full cure, sometimes up to 7 days, to avoid adhesion problems and wrinkling.
- Match caulk types to paint.
- Consider surface and application techniques.
- Allow full cure per manufacturer.
How to Test Caulk to Know It’s Ready to Paint
Choosing the right paint was a big step, but you’ll still want to confirm the caulk is actually ready before you apply it.
Gently press the bead; it should resist indenting and return, showing cured caulk flexibility. Lightly touch with a fingernail — no tackiness.
Finally, apply a small paint strip to check paint adhesion; if it lifts, wait longer and retest.
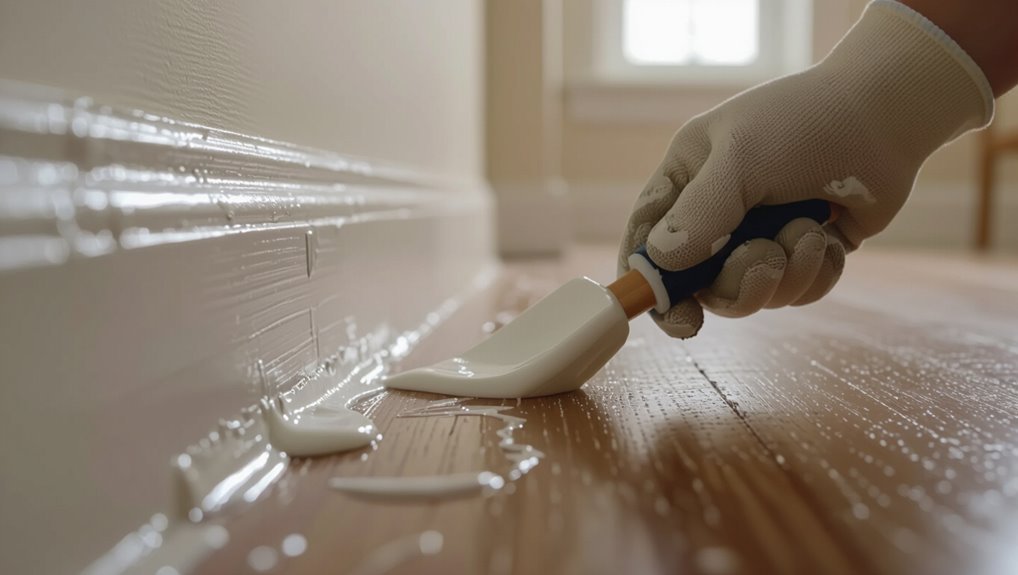
Prep Steps Before You Paint Over New Caulk
Before you paint, make sure the surface is clean and free of dust, grease, and old caulk bits so the paint will adhere properly.
Check the caulk profile and smooth any high or uneven ridges with a damp finger or a finishing tool so paint lays flat.
Once the area is tidy and the bead is uniform, you’re ready to test paint adhesion.
Surface Cleanliness Check
1 quick inspection will save you paint problems: check that the cured caulk and surrounding surfaces are clean, dry, and free of dust, grease, or old paint flakes.
Use surface preparation tips and caulk cleaning methods to prep properly. Check for adhesion and smooth seams, then:
- Wipe with mild detergent
- Scuff glossy areas gently
- Remove loose particles with a brush
Even Caulk Profile
Aim for a smooth, slightly concave caulk profile that sits flush with the surrounding surfaces so paint bonds evenly and you don’t see ridges or thin spots.
After caulk application, tool the bead with a wet finger or tool to shape it, removing excess during caulk removal.
Let it cure fully, inspect for gaps, and sand lightly only if manufacturer allows before painting.
How to Speed Up Caulk Drying Safely
Speed up caulk drying safely by improving airflow, reducing humidity, and using the right products—without cutting corners that compromise the seal.
You’ll optimize caulk application and use proven drying techniques to shorten wait times.
Try these steps:
- Increase ventilation with fans or open windows.
- Lower humidity with a dehumidifier.
- Choose fast-curing, paintable caulk rated for your surface.
Common Causes of Paint Peel After Caulking
When paint peels after caulking, it’s usually because you didn’t prepare the surface properly — dirt, oil, or loose old paint keeps caulk and paint from sticking.
Another common cause is using incompatible products, like a silicone caulk under a water-based paint, which prevents bonding.
We’ll cover how to spot these issues and fix them before you repaint.
Improper Surface Preparation
If you skip proper surface prep before caulking, paint is far more likely to peel around the seams.
You must do Surface cleaning and Surface smoothing so Application techniques and Proper application guarantee adhesion.
Consider Caulk selection and Caulk types plus Environmental conditions and Paint compatibility to avoid Adhesion issues.
- Clean, dry substrate
- Smooth joints
- Correct caulk and method
Incompatible Paint Or Caulk
Because different caulks and paints cure and adhere in different ways, they can react poorly together and cause paint to peel around seams.
You should check caulk compatibility with your chosen paint type; silicone, acrylic, and polyurethane caulks differ.
If you paint too soon or use an incompatible combo, paint adhesion fails.
Follow manufacturer specs and test a small area before full application.
Troubleshooting: Bubbles, Cracking, Poor Adhesion
While caulk’s drying time matters, bubbles, cracking, and poor adhesion usually point to surface or application problems you can fix; check for trapped air, dirty or damp substrates, incompatible paint, or overworking the bead.
Use these quick fixes to address bubbles troubleshooting, cracking solutions, and adhesion issues:
- Remove failed caulk, clean, dry surface.
- Apply steady bead, avoid air pockets.
- Match caulk and paint compatibility.
Quick Checklist and What to Look for on Labels
When you’re ready to caulk and paint, start with a short checklist: confirm the caulk’s cure time, surface temperature and moisture limits, recommended paint type and recoat window, and any joint-width or movement specifications listed on the tube.
Do a label inspection for VOCs, color match, and shelf life.
Use product comparison to pick compatible caulk, noting primer needs and cure versus dry times.
Frequently Asked Questions
Can You Paint Caulk Over Existing Painted Trim Without Removing Old Caulk?
Yes, you can paint over existing caulk if it’s intact and cured; you’ll check caulk types and paint compatibility, clean and scuff surfaces, prime if needed, and replace any cracked or incompatible silicone before repainting for best results.
Will Caulk Discolor Different Paint Colors Over Time?
Right off the bat, yes — caulk discoloration effects can cause mismatched tones over time, so you’ll want to test paint color compatibility first; don’t count your chickens, because some caulks yellow or stain lighter paints.
Is Gap-Filling Foam Caulk Paintable Like Regular Caulk?
Yes — you can paint many foam caulk types once fully cured, but you’ll need to trim and sand excess, use proper caulk application techniques, and prime the surface so paint adheres and finish stays even.
How Soon Can Caulk Be Caulked Over (Recaulking) After Removal?
Right away, like ripping off a bandage: after caulk removal you can recaulk once the joint’s dry and clean—usually 30 minutes to 24 hours depending on material. Use proper recaulking techniques for best adhesion.
Do Paint Primers Affect Caulk Adhesion or Paintability?
Yes — primer compatibility matters: you’ll choose primers based on caulk types (silicone, acrylic, polyurethane) since some primers won’t bond well. Test adhesion; use manufacturer recommendations to guarantee the caulk and primer work together for paintability.
Conclusion
You’ll love how quickly you can rush to paint—except when you can’t. Dry doesn’t mean cured, and painting too soon turns your neat caulk into a peeling, cracked mess that screams “I skipped the instructions.” So read the label, wait the recommended time for your caulk type, and don’t try to speed up miracles. In short: patience isn’t glamorous, but it’s cheaper than redoing the whole trim.