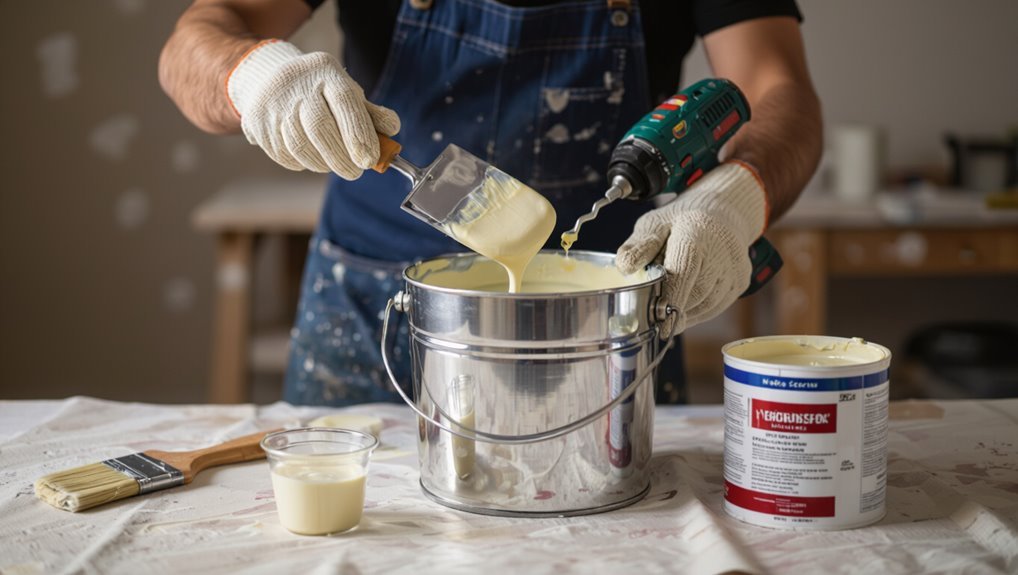
How to Mix Paint for Wall Like a Professional Painter
You can get a pro wall finish by measuring paint volumes, matching base and sheen, and stirring thoroughly until pigment is fully blended. Use a clean bucket, strain the mix, and test small swatches in different light. Thin or thicken only per manufacturer guidance, label batches, and keep identical ratios for all cans. Prime where needed and store leftovers sealed for touch-ups. Follow the next sections and you’ll learn practical steps and troubleshooting tips.
Quick Answer: Can You Mix Paint for a Pro Finish?
Wondering if you can mix paint for a pro finish? You can, but you must control paint consistency and understand color perception.
Match sheen, stir thoroughly, and test small swatches; slight shifts alter appearance.
Combine same-base paints, label mixes, and thin only with recommended mediums.
With careful measuring and sampling, you’ll achieve a seamless, professional-looking wall without unexpected hue or texture surprises.
Why Mixing Paint Matters for Wall Results
If you’ve taken care matching sheen and testing swatches, the next question is why mixing paint properly makes such a visible difference on your walls. You’ll get uniform color consistency, fewer streaks, and predictable coverage when you use consistent mixing techniques. Emotions like pride and calm come from smooth, even results.
| Feeling | Result | Tip |
|---|---|---|
| Pride | Even finish | Stir well |
| Calm | No blotches | Blend cans |
| Confidence | True hue | Test batch |
How to Mix Paint for Walls : Step-by-Step
Before you start, gather the right tools and materials — stir sticks, a drill mixer, clean buckets, and the paint and additives you’ll use.
Follow clear mixing ratios for tint, primer, and base paint, and use a steady technique to get an even color and consistency.
I’ll walk you through each step so you can mix accurately and avoid common mistakes.
Tools And Materials
Gather the right tools and materials before you start mixing—paint cans, a clean mixing bucket, a sturdy stir stick or drill mixer, measuring cups or a graduated container, paint conditioner or thinner (if required), and clean rags.
Include paintbrush types for touch-ups and label mixing containers.
- Safety gear: gloves, goggles
- Clean tools: strainers, funnels
- Prep: drop cloths, tape
Mixing Ratios And Technique
Now that you’ve got your tools and safety gear ready, it’s time to mix paint with the right ratios and technique to get consistent color and finish. You’ll measure, stir, and test small samples. Use proper mixing techniques for even pigment, thin or thicken to achieve ideal paint consistency, and note ratios for repeatable results.
| Step | Action |
|---|---|
| 1 | Measure pigments |
| 2 | Add binder |
| 3 | Stir slowly |
| 4 | Test sample |
Choose the Right Paint Type for Your Wall
Before you mix, pick the right sheen for the room—matte hides flaws, while satin or semi-gloss cleans up easier.
Make sure the paint base (water- or oil-based) matches your existing finish so the colors and adhesion work together.
Getting these choices right up front makes your mixing and final result much smoother.
Pick Paint Sheen
Because finish affects both appearance and durability, choosing the right paint sheen is one of the smartest steps you’ll take when planning a paint job.
Consider sheen selection and its sheen impact on light, wear, and cleaning. Pick based on room use:
- Matte — hides imperfections, low reflectivity.
- Satin — durable, easy to clean.
- Semi-gloss — high durability, highlights trim.
Match Paint Base
Once you’ve settled on sheen, pick the paint base that matches the room’s needs and your walls’ material.
Choose latex for moisture resistance, oil for durability, or acrylic for flexibility.
Match base to substrate to guarantee proper adhesion and uniform paint consistency.
Test a small patch to confirm color saturation and finish.
Adjust thinning or additives only as manufacturer permits.
Pick the Right Sheen for Durability and Touch-Ups
Someone’s choice of sheen can make touch-ups almost invisible and keep high-traffic walls looking newer longer.
You’ll choose based on sheen durability and room use, then apply simple touch up techniques.
- Use eggshell for moderate traffic and subtle concealment.
- Pick semi-gloss where scrubbability matters.
- Match sheen when blending repairs to avoid visible patches.
Read Paint Labels and Color Codes Correctly
You’ll want to learn how paint codes break down so you can pick the exact hue and finish you need.
Read pigment information to know coverage, tinting strength, and any special properties like UV or stain resistance.
Always check and match batch numbers when touching up or mixing to avoid subtle color shifts.
Understanding Paint Codes
Labels and color codes on paint tins can look cryptic at first, but they tell you exactly what you need to match and mix correctly.
You’ll use paint color theory and color harmony to choose the right base, undertone, and finish.
Follow these quick checks:
- Base/product code for compatibility.
- Undertone and temperature.
- Finish level and mixing ratio.
Interpreting Pigment Information
When you read a paint tin, focus on the pigment information—the pigment types, tint strength, and percentage—because they determine how a color behaves when mixed and applied.
You’ll use color theory and the color wheel to guide palette selection, undertone assessment, and hue variations.
Learn pigment properties for saturation levels, pigment blending, and practical mixing techniques to achieve consistent color harmony.
Matching Batch Numbers
After checking pigment details, turn your attention to batch numbers and color codes so your mixed paint stays consistent across cans and touch-ups.
You’ll verify labels, record codes, and avoid mismatched batches to maintain color consistency and enable smooth batch blending.
- Compare batch numbers before buying.
- Note color codes on each can.
- Blend small test batches for final match.
Match an Existing Wall Color Accurately
If you need to match an existing wall color accurately, start by evaluating the paint finish, collection of natural light at different times of day, and any fading or dirt that might be altering the hue. These factors determine whether you can sample the paint directly or must rely on color-matching tools.
Use the color wheel and color theory to assess shade variations and lighting effects. Consider color psychology, blending techniques, sample application, color perception, hue adjustment, and wall texture.
Use Swatches and Test Patches the Smart Way
Because lighting and texture change how color reads, you’ll want to test swatches and patches before committing to gallons.
Use swatch selection and sample boards to plan. Do patch testing across wall texture and note lighting effects and environmental factors.
Compare finishes for finish evaluation and color harmony. Apply consistent application techniques for fair color comparisons.
- Test morning, noon, night
- Label each patch
- Photograph angles
Calculate Paint Needed for One Wall
Start by measuring the wall’s width and height in feet, then multiply those numbers to get the square footage you’ll paint; subtract the area of doors and windows to find the net coverage needed. Use paint coverage per gallon from the can and your wall dimensions to calculate gallons; round up for full coats.
| Item | Value |
|---|---|
| Width | — |
| Height | — |
| Net sqft | — |
| Gallons | — |
Determine Batch Size to Avoid Color Shifts
First, calculate the total wall area so you know exactly how much paint you’ll need.
Then match batch volumes to that total so each mix is consistent with the same pigment ratios.
If you need multiple cans, stagger mix timing and record formulas to prevent noticeable color shifts between batches.
Calculate Total Wall Area
To avoid noticeable color shifts, you’ll need an accurate total wall area so you can order paint in as few batches as possible; measure each wall’s height and length, subtract openings like doors and windows, and add up the net square footage to determine how many gallons or liters you’ll require.
Use wall dimensions, area calculations, measurement tools, and consider wall types, textures, paint coverage, lighting considerations, design aesthetics, color psychology.
- Record precise wall dimensions and openings.
- Convert net area to paint coverage per manufacturer.
- Adjust for surface preparation and wall textures.
Match Batch Volumes
Now that you’ve totaled the wall area and accounted for texture and prep, decide how large each paint batch should be so color stays consistent across the whole room.
Choose paint volume per batch using volume estimation and precise measurements. Use consistent paint ratios and mixing techniques, apply steady blending methods, and test for batch consistency to guarantee long-lasting color uniformity.
Stagger Mix Timing
Stagger your mixing schedule so you’re never forced to finish a large area with a slightly different batch; mix only what you can apply within a single session plus a small reserve for touch-ups.
You’ll use staggered mixing and simple timing techniques to keep color consistent.
- Plan sessions by wall section
- Measure batches identically
- Label mixed cans with time and formula
Combine Multiple Cans Without Hue Change
Although combining multiple cans sounds simple, you’ll want to match tint batches precisely so the hue stays consistent across the wall.
You’ll check color consistency and paint compatibility, use blending techniques for batch blending, perform visual inspection, and make tint adjustments to achieve color matching.
Focus on hue stabilization, shade harmonization, and pigment preservation to keep seamless, professional results without reworking sections.
Mix Paint: Stick vs Mechanical Mixer
You’ll weigh the pros and cons of stirring by hand with a stick—simple, cheap, but tiring and less consistent.
A mechanical mixer gives faster, more even results and handles large batches with ease.
I’ll help you decide which method fits your job size, budget, and desired finish.
Stick Mixer Pros Cons
Anyone tackling a small paint job will find a stick mixer quick and handy: it’s lightweight, inexpensive, and lets you stir cans by hand without hauling out power tools.
You’ll appreciate stick mixer advantages like cost effectiveness, versatility, safety, compatibility, and low maintenance, but note stick mixer limitations in efficiency for large batches.
- Quick jobs
- Easy upkeep
- Small-volume limits
Mechanical Mixer Benefits
When you’ve got larger jobs or multiple cans to prep, a mechanical mixer really speeds things up and delivers a more consistent result than stirring by hand. You’ll appreciate mixer efficiency: less fatigue, faster cycles, uniform paint consistency for even coverage. It reduces air bubbles and saves time.
| Benefit | Result |
|---|---|
| Speed | Cuts prep time |
| Consistency | Smooth finish |
When To Choose Which
Although a mechanical mixer speeds things up, stick mixing still makes sense for small touch-ups or a single can—you should pick the method that matches the job size, time, and your tolerance for effort.
Use color theory and careful paint blending to match tones.
- Small touch-ups: stick mixing.
- Multiple cans: mechanical.
- Custom tints: stir by hand for control.
Proper Stirring Technique to Avoid Bubbles
Start stirring slowly and steadily, cutting through the paint from the bottom to the surface to blend pigments without whipping in air. Use proper stirring techniques and mixing tools, control mixing speed to match paint viscosity and maintain paint consistency for bubble prevention. Surface preparation matters; gentle motions aid bubble reduction.
| Tool | Purpose |
|---|---|
| Paddle | Even mix |
| Stick | Spot blend |
Strain Paint to Remove Lumps and Debris
Because solids and dried skins can ruin a smooth finish, strain your paint before you pour or load a roller to catch lumps, debris, and clumps of pigment.
Use paint strainers and simple filter techniques for effective paint sieving and lump removal. Focus on removing debris for a smooth application.
- Single-use mesh strainers
- Funnel with filter
- Fine nylon stocking
Tint Paint Correctly for Custom Shades
Start by picking the right base paint—tinted bases give stronger color while white bases need more pigment.
Measure tint ratios precisely and write them down so you can reproduce the shade later. If you’re adjusting, change color in small increments and remix thoroughly between additions.
Choosing Base Paint
1 clear base coat makes getting a custom shade much easier: pick a base that’s closest to your target color (white, off-white, or tinted base) so the tinting concentrates where it matters, reduces the amount of colorant needed, and guarantees color consistency across batches.
You should consider paint types and basic color theory when choosing.
- Match undertones.
- Choose finish.
- Check sample swatches.
Measuring Tint Ratios
Measuring tint ratios precisely is the key to reproducing a custom shade reliably: you’ll mix colorant in measured parts—by volume or weight—so each batch matches the sample. You’ll track tint consistency and guarantee measurement accuracy using scales or calibrated syringes. Record ratios, test small batches, and adjust gradually.
| Ingredient | Parts |
|---|---|
| Base | 100 |
| Red | 2 |
| Blue | 1 |
| Yellow | 0.5 |
Mix Small Touch-Up Pots From Leftovers
Gather the leftover paint from cans and trays, then combine only what you’ll need for touch-ups so the mix stays usable and color-stable.
Use careful leftover management and proper paint storage to avoid contamination.
Handle leftover paint thoughtfully and store it properly to prevent contamination and preserve quality.
Follow these quick steps:
- Strain combined paint into a clean small pot.
- Label pot with color, date, and room.
- Seal tightly and store upright in a cool place.
Thin Paint Safely for Spraying and Rolling
Thin your paint only as the manufacturer recommends and for the specific application—sprayers typically need a thinner, smoother mix than rollers do—so check the can for thinning ratios before adding any solvent.
Use measured thin paint techniques: strain, mix slowly, and test viscosity.
For spray application, aim for recommended flow, avoid over-thinning, and clean filters.
Rollers usually require little or no thinning.
Thicken Paint for Textured Rollers and Effects
When you want bold texture from specialty rollers or faux finishes, thickening your paint gives the roller something substantial to grip and lay down raised patterns.
Use texture mediums and mixing additives to raise paint viscosity, aiding textured effects and faux techniques. Focus on surface preparation, color blending, consistency maintenance and application methods.
Raise paint viscosity with texture mediums and additives to achieve bold, faux finishes—prepare surfaces, blend colors, and maintain consistency.
- Test viscosity
- Adjust additives
- Practice decorative techniques
Adjust Paint for Temperature and Humidity
When you’re mixing paint, temperature changes its viscosity—cold makes it thicker, heat thins it.
High humidity slows drying and can affect finish, while low humidity speeds drying and can cause brush marks.
Adjust thinners and additives accordingly so you maintain the right flow and drying time for the conditions.
Temperature Effects On Viscosity
Because temperature and humidity change how paint flows and dries, you’ll need to adjust viscosity before you start rolling or spraying.
Consider temperature impact and viscosity changes: heat effects thin paint, cold conditions thicken it, affecting paint flow and application ease.
Maintain mixing stability to manage consistency variation and drying speed under environmental factors.
- Thin for heat
- Thicken for cold
- Test and tweak
Humidity And Drying Time
Heat and cold shift viscosity, but humidity is the other big environmental factor that controls how fast paint dries and how it levels on your wall.
You’ll monitor humidity effects: high humidity slows curing and increases sagging risk, low humidity speeds skinning and brush marks.
For drying considerations, work in controlled conditions, schedule longer recoat times when humid, and ventilate to balance moisture.
Adjusting Thinners And Additives
If temperature or humidity shifts from ideal, adjust your thinner and additive mix so the paint flows and cures correctly. Use slower-evaporating solvents in hot, dry conditions to prevent brush marks, and add retarders or slow-drying extenders in high humidity to reduce sagging and allow leveling.
- Learn thinner types, mixing techniques, viscosity adjustments, and product recommendations.
- Note additive benefits, safety precautions, and environmental impact.
- Avoid common mistakes when measuring and blending.
Keep Sheen and Opacity Consistent Across Batches
When you mix multiple batches, match the sheen and opacity by using the same base paint, tint system, and manufacturer-specified sheen level; this prevents visible differences once the paint dries.
To guarantee color consistency, label batches, note mixing ratios, and stir thoroughly.
For smooth batch blending, blend small test amounts first, then scale up, keeping records to replicate results precisely.
Additives That Improve Flow, Leveling, and Drying
After you’ve matched sheen and opacity across batches, consider additives that help paint flow, level, and dry more evenly.
Use flow additives and leveling agents to control paint viscosity and improve pigment dispersion.
Try drying accelerators sparingly for faster cure.
Apply mixing techniques that maintain paint formulation integrity and application consistency.
Pro tip: document ratios for finish enhancement and repeatable professional tips.
- Flow additives
- Leveling agents
- Drying accelerators
When and How to Use Primers With Mixed Paint
You’ll want to prime when you’re covering stains, switching from a dark to a light color, or painting porous or repaired surfaces.
Pick a primer formulated for your topcoat and substrate—latex for most walls, oil or shellac for tough stains or mildew.
If you’ve mixed paint, make sure it’s fully cured and compatible with the primer before applying, and sand or degloss glossy areas for better adhesion.
When To Prime
Although you can sometimes skip a primer on light, well-sealed drywall, you should prime whenever the surface is porous, stained, bare, or dramatically different in color from your new mixed paint.
You’ll gain priming benefits like adhesion and uniformity; learn primer types later. Prime before mixing final tints when needed.
- New drywall
- Stains or repairs
- Dark-to-light color changes
Choosing The Right Primer
Now that you know when to prime, pick a primer that matches the surface and the mixed paint you’ll use.
Consider primer types for drywall, wood, or masonry; follow surface preparation and correct application techniques.
Check drying times, adhesion properties, and finish compatibility with your mixed paint.
Factor environmental factors like humidity and temperature, and finalize color selection to prevent bleed-through and guarantee true topcoat tones.
Priming Over Mixed Paint
If you’ve already mixed paint and want to prime over it, start by confirming the mix’s compatibility and surface condition so the primer can bond properly.
You’ll assess paint compatibility, clean and sand, then choose priming techniques that suit the mix and substrate.
Follow:
- Test adhesion on a small patch.
- Clean and sand glossy areas.
- Apply thin, even primer coats.
Prep Surfaces Before Applying Mixed Paint
Before you bring out the mixed paint, clear, clean, and repair the wall so the finish adheres and looks professional.
Perform a thorough surface inspection, use proper cleaning techniques, and address damage repair by patching holes and sanding surfaces smooth.
Protect trim with masking tape, assess wall texture, and complete primer application where needed to guarantee consistent paint adhesion and a durable result.
Apply Mixed Paint Without Streaks or Lap Marks
With the surface cleaned, repaired, and primed, you can start painting in a way that prevents streaks and lap marks.
Use correct paint consistency and respect drying time to protect finish quality.
Ensure paint is mixed to the right consistency and allow proper drying between coats to preserve a flawless finish.
Focus on application techniques: maintain wet edges, proper roller technique, and careful brush use.
Consider paint layering for even coverage.
- Work fast
- Overlap lightly
- Inspect blends
Prevent and Fix Roller Marks and Streaks
Roller marks and streaks are usually caused by uneven pressure, overworking partially dry paint, or using the wrong nap for your surface.
So check your roller type and maintain consistent, light pressure while you work.
For roller mark prevention, use wall prep essentials, match nap to wall texture considerations, account for paint drying times and absorption factors, use brush vs roller for edges, apply streak removal techniques, and touch up methods under proper lighting effects.
Blend Colors for Ombre, Accents, and Feature Walls
Once your finish is smooth and free of roller marks, you can start blending colors to create ombre effects, bold accents, or a standout feature wall.
Use ombre techniques and paint layering to manage color shifts and gradient effects, applying design principles and color psychology for visual impact and artistic nuances.
Use ombre and layered paint to control gradients, using design principles and color psychology for striking visual impact.
- Plan palette and feature wall styles
- Practice accent blending
- Feather edges for seamless flow
Mixing for Faux Finishes and Decorative Effects
Start by prepping a smooth, even base coat so your faux techniques sit right and colors read true.
Mix color glazes by thinning paint to a translucent consistency and test the tint strength on a scrap.
Combine texture medium with paint in small batches, adjusting viscosity until the application tool produces the effect you want.
Base Coat Preparation
A good base coat sets the stage for any faux finish, so mix it with the finish technique in mind: thin the paint slightly for glazes, keep it thicker for textured effects, and match sheen levels to what you’ll layer over.
You’ll control adhesion and optical depth by adjusting base coat paint consistency precisely.
- Test small area.
- Adjust with extender.
- Note drying time.
Color Glaze Blending
When you blend color glazes for faux finishes, think of them as translucent layers that modify light and texture rather than opaque covers. You’ll use color theory and blending techniques, focus on surface preparation, and practice glaze application and layering methods to achieve finish variations and texture effects. Embrace artistic freedom for artistic effects and color harmony.
| Soft | Bold | Subtle |
|---|---|---|
| Warm | Cool | Neutral |
| Smooth | Rough | Sheen |
Texture Medium Mixing
Moving from glazes that modify light to mediums that create actual surface relief, you’ll mix texture compounds to shape tactile and visual effects for faux finishes.
Use appropriate texture materials and texture tools, plan texture design and texture patterns, and practice texture layering for varied texture finishes and texture effects.
Try these:
- Trowel and compound for raised texture styles
- Sponge for subtle texture techniques
- Comb for linear texture applications
Maintain Color Consistency Across Multiple Days
Even if you can’t finish a room in one session, you can keep paint color consistent by storing mixed paint properly, labeling cans with batch details, and mixing touch-up amounts from the same batch.
You’ll monitor environmental factors and lighting changes, use sample testing, adjust drying times, apply consistent application and blending techniques, choose storage solutions and paint additives to prevent color fading and guarantee long-term color retention.
Store Mixed Paint Safely Between Coats
You’ve already covered how to keep color consistent across sessions, so now focus on storing mixed paint between coats to preserve that match.
Use proper paint storage and paint preservation methods:
Use proper paint storage and preservation methods to keep mixed colors consistent and usable between coats.
- Use clean mixing containers, tight lid sealing, and label organization for color consistency.
- Maintain temperature control and limit humidity impact to extend paint longevity.
- Practice leftover management to avoid contamination.
Label and Preserve Leftovers for Future Touch-Ups
One clear step to make future touch-ups painless is to label and preserve any leftover mixed paint right after you finish a session.
You’ll seal mixing containers, note label information (color formula, date, room), and store for color preservation under ideal storage conditions.
Use touch up kits, practice paint organization, and follow paint storage tips to guarantee paint longevity for future repairs and easy leftover labeling.
Clean Tools to Avoid Color Cross-Contamination
When switching shades, rinse your brush and tray thoroughly between colors so you don’t contaminate the next batch.
Keep a separate brush or two for trims and accents to avoid unwanted mixing.
Always clean or replace rollers after a color change to guarantee true, consistent hues on the wall.
Rinse Between Colors
Rinse your brushes and rollers thoroughly between colors to keep hues true and prevent muddy mixes; a quick, proper clean saves time and touch-ups later.
- Use warm water and mild soap to remove pigment, avoiding color contamination.
- Spin or shake rollers to expel trapped paint, then re-wet before reuse.
- Follow mixing techniques and inspect tools—dry streaks mean another rinse.
Use Separate Brushes
Keep a dedicated brush (or set) for each color you’re using to prevent tiny traces of pigment from muddying new mixes; clean tools help you trust that the shade you load on the brush is the shade that goes on the wall.
For proper Tool Selection, label brushes and store them separately.
Use precise Brush Techniques—light taps, consistent strokes—to maintain clean edges and true color application.
Clean Roller Thoroughly
Scrub your roller until it’s free of old pigment and dry before switching colors—any leftover paint can subtly shift a new mix and ruin clean changes.
You’ll prevent cross-contamination with proper roller cleaning and remove paint residue that taints blends.
Follow these steps:
- Rinse until water runs clear.
- Use a mild solvent for stubborn residue.
- Spin and dry thoroughly before reuse.
Troubleshoot Common Mixing Problems (Causes & Fixes)
When your paint won’t blend smoothly or shows streaks, you’ll usually be able to fix it quickly by identifying the root cause—too little thinning, an incompatible additive, or insufficient mixing time are the most common culprits.
Check for mixing errors, incorrect ratios, viscosity issues or paint separation.
Address color discrepancies, batch mismatches, tint adjustments, sheen variations, texture problems and drying inconsistencies with proper mixing, testing and record-keeping.
Fix Paint That’s Too Thin, Too Thick, or Separated
If your paint has separated, give the can a thorough stir or shake to recombine pigments and binder before you do anything else.
If the paint’s too thin, thicken it with the manufacturer-recommended additive or add a small amount of high-quality acrylic or latex extender; if it’s too thick, thin gradually with the proper solvent listed on the label.
Test the adjusted paint on a scrap surface and keep notes so you can repeat the fix consistently.
Fix Paint That’s Separated
Although paint can separate or change consistency over time, you can usually restore it with a few simple steps.
Use paint separation remedies and practical paint texture solutions:
- Stir thoroughly with a paint stirrer, scraping settled solids from the bottom.
- Strain through a paint filter to remove lumps.
- Add a small amount of compatible conditioner, then mix and test consistency before using.
Adjust Too Thin Or Thick
Once you’ve restored separated paint to a uniform mix, you’ll still want to check its body and adjust any batch that’s too thin or too thick before you start rolling.
Test paint viscosity and paint consistency; use mixing techniques to add thinning agents for smoother application or thickening agents for better coverage.
Choose texture adjustment and adjustment methods that prevent negative application effects and guarantee even finish.
When to Discard a Compromised Paint Batch
When a paint batch shows signs of separation you can’t fix with stirring, it’s time to contemplate discarding it; you should prioritize batch integrity and mixing safety per professional standards.
When a paint batch won’t recombine with stirring, prioritize safety and integrity—discard compromised mixes per standards.
Perform a visual inspection and smell test, note storage conditions, then decide to discard paint if compromised.
- Check paint consistency and odor.
- Log compromised batches for quality assurance.
- Follow disposal rules.
How Pros Speed Up On-Site Color Matching
After you decide to discard a bad batch, pros shift focus to keeping projects on schedule by speeding up on-site color matching.
You’ll carry calibrated sample chips, a portable light booth, and a colorimeter to verify hues under different color temperature and lighting effects.
You mix small test batches, adjust tints incrementally, and get client sign-off quickly to avoid delays.
Cost-Saving Tips Without Sacrificing Finish Quality
If you want to cut costs without compromising the look, focus on smart material choices and efficient techniques that deliver pro results.
- Use affordable materials and cost effective alternatives, sourcing mid-grade primers and trims for paint savings.
- Apply budget friendly techniques and thriftiness strategies: roll efficiently, minimize waste, and mix only needed batches.
- Practice resourceful sourcing and expense management for economical solutions without lowering finish quality.
Safety Practices for Mixing and Handling Paint
Saving money on materials and technique won’t help much if you ignore safe mixing and handling — paint chemicals, dust from sanding, and solvent fumes can harm your health and damage surfaces.
You should use Safety Equipment and Protective Gear, prioritize Ventilation Importance and Respiratory Safety, wear Eye Protection, practice Chemical Awareness, follow Spill Management and Cleanup Procedures, guarantee Safe Storage, and keep First Aid accessible.
Eco-Friendly Mixing and Low-VOC Options
Want paint that looks great without the harsh fumes? You can choose eco conscious brands with green certifications and low VOC benefits.
Use eco friendly pigments, natural additives, and sustainable practices to reduce environmental impact. Consider paint recycling and biodegradable options.
Opt for eco-friendly pigments, natural additives, and sustainable practices—think paint recycling and biodegradable options to cut environmental impact.
Pay attention to health considerations when mixing and apply techniques that prioritize indoor air quality and long-term durability.
- Compare labels
- Test small batches
- Store responsibly
Checklist Before Your Final Coat
Before you roll on the final coat, walk the room with a checklist so you catch flaws and prevent costly touch-ups later. Do a final inspection for drips, missed spots, and texture. Confirm dry time, edge crispness, and ventilation. Perform a quick quality check before rolling.
| Item | Status |
|---|---|
| Drips | ✓/✗ |
| Edges | ✓/✗ |
| Dryness | ✓/✗ |
How to Evaluate a Finished Wall for Color Fidelity
How does the color really read once the light settles and the paint’s cured?
Check color perception across times and angles, noting shifts from morning to evening.
See how the hue shifts through the day — inspect from different angles morning to evening.
Compare painted samples to swatches under actual lighting.
Verify uniformity and sheen; watch for blotches or striping caused by lighting effects.
- Inspect at multiple times
- Compare to swatches
- Assess uniform sheen
Touch-Up Strategy to Hide Future Scuffs and Repairs
Once you’ve confirmed color and sheen across different lights and angles, plan a touch-up strategy so future scuffs blend in seamlessly.
You’ll use color preservation techniques and surface repair strategies: clean, sand, prime small areas, then apply touch up applications with matching paint layering methods.
Focus on blending color gradients, scuff resistant finishes, quick fix solutions, and regular wall maintenance tips to keep repairs invisible.
When to Call a Pro Instead of DIY Mixing
If you’re dealing with large color corrections, extensive surface damage, or complex finishes, call a pro—DIY mixing can save money, but professionals handle tricky color matching, specialized primers, and spray or faux finishes that are hard to reproduce at home.
You should call a pro when you need professional judgment and mixing experience for consistent, durable results:
- Historic color matching
- Structural repairs plus painting
- Specialty finishes or spray work
Frequently Asked Questions
Can Mixed Paint Be Used on Exterior Walls Exposed to UV and Moisture?
Yes—you can use mixed paint on exterior walls if you choose high-quality formulations and add proper additives; you’ll guarantee exterior durability and moisture resistance by using UV-stable pigments, elastomeric binders, and accurate mixing ratios for lasting protection.
How Do Metallic or Pearlescent Additives Affect Color Matching?
About 70% of observers notice finish differences instantly — you’ll see metallics shift hue with viewing angle, altering color theory expectations; pigment interaction gets masked by reflective additives, so test under planned light to guarantee accurate matching.
Will Mixing Different Brands Cause Adhesion or Warranty Issues?
Yes — you’ll risk adhesion challenges and voided warranties if you mix brands without checking brand compatibility; manufacturers can refuse coverage, so always test adhesion, follow specs, and prefer same-brand products or approved cross-compatible systems to be safe.
How Long Should Mixed Paint Cure Before Applying a Protective Topcoat?
By Jove, you should wait 24–48 hours of curing time before applying a protective topcoat; you’ll guarantee proper adhesion and durability, though some formulations need up to 7 days, so always check manufacturer recommendations.
Can Pets or Children Safely Occupy a Room Painted With Recently Mixed Low-Voc Paint?
You can usually let pets and children re-enter once the room’s well-ventilated and odors subside; low-VOC paints reduce fumes, but prioritize pet safety and child health by airing out for 24–72 hours and keeping windows open.
Conclusion
Now you know how to mix paint like a pro, and you’ll get walls that look impossibly smooth—like silk stretched over a castle. Stick to the steps: pick the right paint and sheen, mix thoroughly, and run your checklist before the final coat. Inspect color fidelity, plan touch-ups, and keep repair supplies handy. If the job overwhelms you or the finish still reads off, don’t hesitate to call a pro. You’ve got this.