How to Remove Crayon From Wall Without Removing Paint Easily
You can remove crayon from painted walls without stripping paint by starting gently: try a soft vinyl eraser or a melamine sponge with light pressure, or wash the area with dish soap and warm water. For tougher marks, make a baking soda paste or dab rubbing alcohol on a cloth and blot until the wax lifts, then rinse and pat dry. Test first on a hidden spot and stop if paint softens—keep going and you’ll find more tips and fixes.
Why Paint-Safe Crayon Removal Matters
Because walls are one of the most visible parts of your home, removing crayon without damaging the paint matters: you want the mark gone but the finish intact.
You’ll prioritize paint protection to preserve color and sheen while choosing safe methods. That keeps resale value, avoids costly repainting, and encourages crayon alternatives for kids’ creativity that won’t risk long-term damage to your walls.
Quick Answer: First Try a Soft Eraser on Painted Walls
Before you try any cleaner, test a soft eraser on a hidden spot to make sure the paint won’t scuff.
Use a soft, clean eraser and work in gentle strokes rather than pressing hard. If the mark lifts without damage, continue carefully across the crayon spot.
Test On Hidden Spot
Start by finding a small, out-of-sight spot—behind furniture, inside a closet, or near a baseboard—and try your cleaning method there first. You’ll perform hidden testing to check crayon durability and paint reaction. If safe, proceed. Quick reference:
| Spot | Method | Result |
|---|---|---|
| Closet | Eraser | OK |
| Baseboard | Cloth | OK |
| Behind couch | Spot test | OK |
Use A Soft Eraser
If the hidden spot showed no paint damage, grab a soft white vinyl or art gum eraser and gently rub the crayon marks with light, even strokes—don’t press hard or you may scuff the paint.
Test different eraser types on similar wall surfaces first. Work gradually, brush away crumbs, and stop if the finish dulls; switch methods if damage appears.
Work In Gentle Strokes
Gently rub the crayon with a soft white vinyl or art gum eraser, using short, even strokes that follow the wall rather than pressing straight down; you’ll lift wax without scuffing paint if you work patiently and check your progress often.
Use gentle pressure, adapt stroke technique to wall texture and crayon type, adjust cleaning angle and tool choice, maintain motion control, monitor paint adhesion and surface sensitivity, and manage residue.
What Paint Types Scratch or Rub Off Easily
If your wall has a flat or matte finish, you’ll find it shows scuffs and can rub off more easily than glossier paints.
You should also watch out for low-quality latex, since it tends to be softer and more prone to scratching during cleaning.
Knowing your paint type helps you choose gentler removal methods to avoid making the stain worse.
Flat/Matte Finish Vulnerability
Because flat and matte paints have little to no sheen, they tend to show scuffs, rub marks, and pigment lift more readily than glossier finishes.
So you’ll want to treat them with extra care when removing crayon.
Understand flat paint vulnerabilities: gentle crayon removal techniques like soft erasers, diluted soap, or microfiber cloths prevent rubbing off pigment, avoiding abrasive scrubbing that damages finish.
Poor-Quality Latex Issues
When you use low-grade latex paint, the binder and pigments are weaker, so the surface can scratch, rub off, or develop a powdery residue when you try to remove crayon.
You’ll notice poor crayon adhesion on rough wall texture and reduced paint durability.
Test cleaning methods in an inconspicuous spot, use gentler removers, and avoid abrasive scrubbing to prevent further paint loss.
Check the Mark: Age, Wax Amount, and Location
Before you grab supplies, take a close look at the crayon mark—note how old it seems, how much wax is on the wall, and exactly where it’s located.
Assess crayon age and wax location to pick the gentlest approach. Check for nearby trim, textured paint, or high-traffic areas.
- Fresh, light smear
- Thick wax buildup
- Near trim or outlets
Gather Common Supplies Before You Start
Before you start, gather essential cleaning tools like a soft cloth, mild detergent, a magic eraser, and a plastic scraper.
Have protective materials ready—gloves, a drop cloth, and painter’s tape—to protect hands and surrounding surfaces.
Keeping everything within reach will make the cleanup faster and safer.
Essential Cleaning Tools
Gear up with a few simple items and you’ll tackle crayon marks much faster:
- Soft microfiber cloths and nonabrasive sponges — safe for different wall textures.
- Mild cleaning solutions (diluted dish soap, baking soda paste) in spray bottle for spot tests.
- Plastic scraper and cotton swabs to lift wax gently without damaging paint.
Protective Materials Ready
Gather a few protective items so you won’t trade a crayon stain for a new mess: lay down a drop cloth or old towels to catch debris, put on gloves to keep oils off the paint, and tape plastic or butcher paper over nearby trim and outlets to shield them from cleaners and scrapers. Use protective gear and wall coverings listed below:
| Item | Purpose |
|---|---|
| Drop cloth | Catch debris |
| Gloves | Protect paint |
| Plastic sheeting | Shield trim |
| Tape | Secure coverings |
| Paper towels | Quick cleanup |
No-Touch Options: Scrape and Vacuum Wax Gently
Start by loosening stray wax without touching the pigment directly: use a plastic putty knife or the brush attachment on your vacuum to gently lift flaky crayon from the wall.
Begin by gently lifting flaky wax with a plastic putty knife or vacuum brush—avoid touching the pigment directly.
Use careful scraping techniques and gentle vacuum methods to avoid smearing.
- Angle blade shallowly to lift flakes.
- Keep suction low to prevent pigment pull.
- Work outward from edges, not center.
Try a Soft Eraser or Melamine Sponge Safely
Pick a soft vinyl eraser or a melamine sponge made for walls so you don’t sand the paint.
Test it on a hidden spot first to make sure it won’t remove finish or color.
Then rub gently with light pressure, checking progress often to avoid overworking the area.
Choose The Right Eraser
While a regular pencil eraser can sometimes lift light marks, you’ll usually get better results with a soft vinyl eraser or a melamine sponge; they remove crayon without aggressively abrading paint when used gently.
- Use eraser types: soft vinyl for precision.
- Try melamine sponge for larger smudges.
- Combine gentle pressure and spot cleaning methods to protect finish.
Test On Hidden Area
Before you tackle the visible scribble, test a soft vinyl eraser or a melamine sponge on a hidden patch of wall—like inside a closet or behind furniture—so you can check for color loss or finish damage without risking the main area.
Use hidden areas for quick testing techniques: dab, wait a minute, then inspect under good light. If paint holds, proceed cautiously.
Gentle Rubbing Technique
Start gently: rub the crayon marks with a soft vinyl eraser or a lightly dampened melamine sponge using short, controlled strokes, and stop if you see paint lifting or smearing.
Use gentle pressure and a circular motion when needed.
Try these steps:
- Erase lightly with soft vinyl.
- Dab sponge, squeeze excess water.
- Wipe residue with microfiber.
Gentle Wash: Dish Soap and Warm Water Method
1 simple and safe way to remove crayon from painted walls is to mix a few drops of dish soap with warm water and gently wash the mark.
You’ll use gentle techniques and mild cleaning solutions, working from the outside in with a soft cloth or sponge.
Rinse, pat dry, and repeat briefly if needed, avoiding harsh scrubbing that could damage paint.
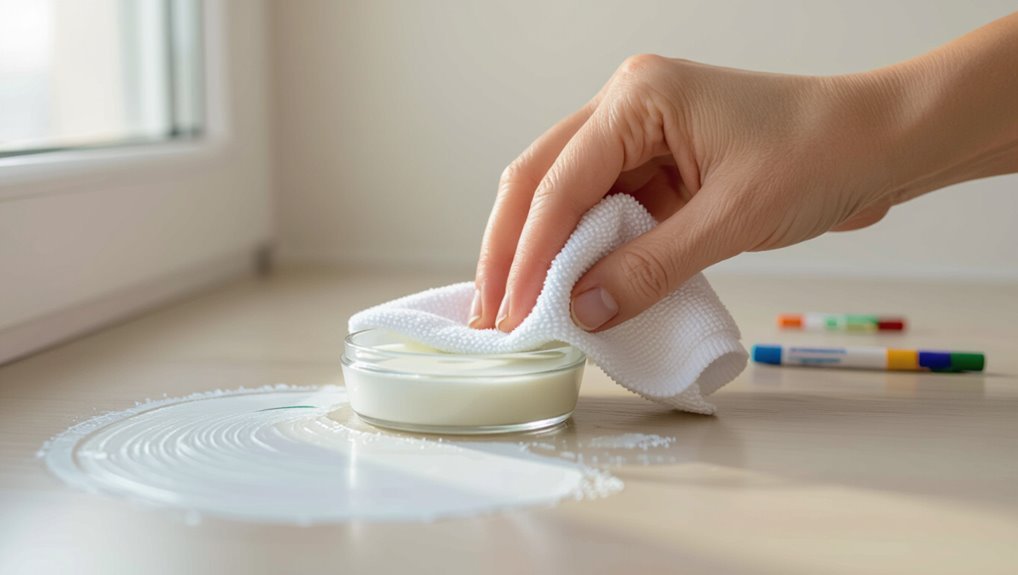
Baking Soda Paste to Lift Crayon Wax
Make a paste by mixing baking soda with just enough water to form a spreadable, toothpaste-like consistency.
Apply it to the crayon marks and use a soft cloth or sponge to gently scrub in circular motions, checking progress as you go.
Rinse the area with a damp cloth and pat dry to remove any residue.
Preparing The Baking Soda
Mix a simple baking soda paste to lift crayon wax without harsh chemicals: combine three parts baking soda with one part water (adjust to a spreadable, toothpaste-like consistency) and stir until smooth.
Use this DIY paste sparingly. Store leftovers in a sealed jar.
- Measure ingredients accurately.
- Whisk to remove lumps.
- Test a small wall spot first.
Gently Scrubbing Technique
Start by dampening a soft cloth or sponge and applying a small amount of the baking soda paste to the crayon mark; you’ll want gentle, circular strokes to lift the wax without abrading the paint. Adjust pressure for crayon types and different wall textures.
| Surface | Pressure |
|---|---|
| Smooth paint | Light |
| Textured paint | Gentle scrub |
Use White Vinegar for Stubborn Spots
If a crayon mark won’t budge with soap and water, reach for white vinegar—its mild acidity breaks down wax without harsh chemicals.
Dampen a cloth with a vinegar solution, blot stubborn stains, then rub gently in small circles. Rinse with water and pat dry.
Test first in a hidden spot to protect paint.
- Apply
- Rub
- Rinse
When to Use Rubbing Alcohol or Hand Sanitizer
When vinegar and soap haven’t shifted the wax, reach for rubbing alcohol or a gel hand sanitizer because their solvents dissolve crayon oils without harming most paints; apply a small amount to a cotton ball or cloth, dab the mark, and wipe gently until the residue lifts.
| Tool | Use |
|---|---|
| Rubbing alcohol | Fast solvent |
| Hand sanitizer | Gel control |
| Cloth | Blot and wipe |
| Cotton ball | Precise dab |
Are Olive Oil or WD‑40 Safe on Painted Walls?
After you’ve tried solvents like rubbing alcohol or hand sanitizer, you might wonder whether household oils or lubricants will work—specifically olive oil or WD‑40.
- Olive oil effectiveness: it can lift crayon but may stain or leave residue, so test first.
- WD 40 risks: it removes wax quickly but can damage finishes and attract dirt.
- Always blot, rinse, and test in an inconspicuous spot.
Use Heat Safely: Hair Dryer to Soften Wax
Warm the crayon with a hair dryer on low to soften the wax so you can wipe it away more easily.
Warm the crayon with a hair dryer on low to gently soften the wax for easier wiping.
Hold the dryer several inches away, use gentle heat settings, and move constantly to avoid paint damage.
Once softened, blot with a clean cloth or paper towel and lift softened wax.
Finish with a mild cleaner if residue remains, repeating short bursts of heat as needed.
Quick Compatibility Test: Try an Inconspicuous Spot
Before applying any cleaner or heat, test it on a small, hidden area of the wall—like behind a baseboard or inside a closet—so you can confirm the paint and finish won’t react poorly.
You’ll check compatibility with different test methods and crayon types before proceeding.
- Spot-clean with mild soap.
- Dab with solvent on a cotton swab.
- Apply heat briefly with hair dryer.
Step-by-Step Safe Removal Workflow
Now that you’ve confirmed the paint can handle mild cleaning and heat, you’re ready to follow a careful, step-by-step workflow to remove the crayon without damaging the wall. Test method, then proceed by heat, gentle wipe, and spot-clean. Consider crayon types and wall textures when choosing tools.
| Step | Action |
|---|---|
| 1 | Heat lightly |
| 2 | Wipe gently |
| 3 | Spot-clean |
Troubleshooting: Crayon Won’t Come Off Painted Walls
If the crayon won’t budge after the basic steps, don’t panic—you can take a few targeted troubleshooting actions to protect the paint while removing the mark.
Assess crayon types and wall textures first, then try gentle escalation.
- Test a hidden area with a melamine sponge.
- Use a small dab of oil-based cleaner, blotting gently.
- Try a soft eraser, working lightly.
Restore Matte or Flat Paint Finish After Cleaning
When cleaning lifts crayon residue from matte or flat paint, you’ll often notice uneven sheen or glossy spots that stand out against the surrounding finish.
To restore a uniform matte finish, gently scuff glossy areas with a fine abrasive pad, clean residue, then apply a light coat of matching flat touch-up paint.
This targeted wall restoration hides sheen differences without repainting entire walls.
Prevent Future Marks: Simple Child-Proofing Tips
To keep walls looking clean, take simple child-proofing steps that cut down on future crayon marks: designate a drawing area with washable surfaces or a chalkboard wall, keep crayons out of reach in a labeled bin, and attach inexpensive washable wall decals at kid-height to redirect scribbling.
Designate washable drawing areas, store crayons out of reach, and use kid-height washable decals to redirect scribbles.
- Use washable paint and surfaces.
- Offer crayon alternatives like washable markers.
- Store art supplies high, labeled, as part of child proofing strategies.
When to Call a Pro or Consider Repainting
Although many crayon stains come off with household cleaners, call a professional when marks cover textured surfaces, large areas, or when repeated cleaning has dulled or damaged the paint.
You’ll save time and avoid worsening the finish by letting an expert assess stubborn stains and recommend repair or spot-painting.
If DIY fails, seek professional help to evaluate repaint considerations, color matching, and finish techniques for best results.
Frequently Asked Questions
Can Crayon Marks Transfer to Furniture or Baseboards During Cleaning?
Yes — crayon transfer can happen during cleaning, so you’ve got to prevent it. Use drop cloths, painter’s tape, and soft cloths; protect furniture and baseboards with barriers and gentle techniques to guarantee furniture protection.
Will Cleaning Crayon Affect Nearby Wallpaper Seams or Adhesives?
Yes — if you’re aggressive, crayon removal techniques can loosen wallpaper seams or adhesives; you’ll want to test first and use gentle solvents, mindful of wall texture considerations to avoid lifting or staining adjacent paper and glue.
How Long Should I Wait After Painting Before Safely Removing Crayon?
Sure — you can’t rush perfection: wait at least two weeks for drying time and up to 30 days for full paint curing before aggressively removing crayon. Gentle cleaning’s safer sooner; avoid scrubbing until cure’s complete.
Can Crayons Damage Textured or Popcorn Ceilings?
Yes — certain crayon types can damage textured or popcorn ceilings if you scrub hard; oily pigments or wax press into ceiling textures, so you’ll need gentle methods and care to avoid lifting or smearing ceiling textures.
Are Stretched or Heat-Blistered Paint Layers More at Risk When Removing Crayon?
Yes — you’ll find stretched or heat-blistered paint’s weaker; testing proves lower paint durability increases risk. Use gentle removal techniques (soft erasers, mild solvents) and patch-test first to avoid lifting or further blistering.
Conclusion
You’ve got this — think of the wall as a quiet canvas, not a crime scene. Start gentle, use soft erasers or mild solutions, and watch the crayon lift like fog in morning sun. If paint thins, stop and restore the finish; if it won’t budge, call a pro. Take simple steps to prevent repeats and your walls will stay calm, bright, and ready for whatever little hands create next.