
How to Make Acrylic Paint Dry Slower for Better Blending
You can keep acrylics workable longer by changing paints, tools, and environment: use heavy‑body or “open” acrylics, work from a wet palette with a damp sponge and sealed lid, lower room temperature slightly and raise humidity, and add a small amount of retarder (start 1–5%, never overdo it). Use soft synthetic brushes, thin underlayers, and glazing for smooth wet‑on‑wet blends. Follow compatibility tips and revive tacky paint gently, and you’ll find more techniques and product choices ahead.
Quick Fixes to Slow Acrylic Drying Now
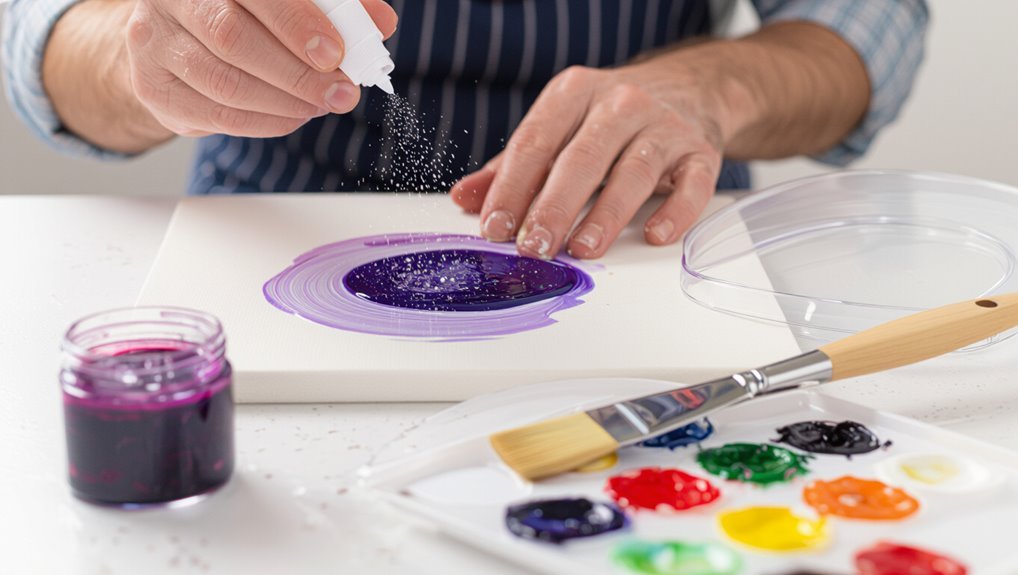
If your acrylics are drying too fast, you can slow them down right away with a few simple techniques that don’t require special mediums or tools.
You’ll adjust workspace setup and humidity control, tweak temperature effects and drying environments, use paint additives or mild drying agents sparingly, manage paint layers, refine blending techniques and color mixing, and pick appropriate brush types to keep edges workable.
When and Why Slow Acrylic Drying Matters
When you need smooth blends, extended working time, or seamless glazing, slowing acrylics matters because it gives you control over texture, color shifts, and layering without risking visible brushstrokes or unintended edges.
You’ll apply drying techniques and acrylic mediums to gain blending advantages, manage color changes and texture effects, adapt to environmental factors, optimize palette management, choose appropriate brush types, and protect artwork longevity across painting styles.
Choose Paints for Longer Open Time
When you want more working time, pick heavy body acrylics because their thicker consistency holds moisture longer.
Look for “open” acrylic lines specifically formulated for extended wet times.
Favor high-viscosity colors within those lines to maximize open time without additives.
Use Heavy Body Acrylics
Pick heavy body acrylics when you want more open time and a thicker, buttery consistency that holds brushstrokes and blends longer.
You’ll notice heavy body paints keep wet edges and slow leveling, so you can push, feather, and glaze longer before skin forms.
Their rich paint texture also supports impasto and palette knife work, giving you control without additives.
Choose Open Acrylic Lines
If you want the paint to stay workable longer, choose open (or slow-drying) acrylic lines designed specifically for extended open time.
You’ll notice open acrylic benefits immediately: longer working time, smoother shifts, and less rewetting.
Use them when practicing wet-on-wet blending techniques; they let you push edges, soften shifts, and blend colors without rushing, improving control and final results.
Pick High-Viscosity Colors
You can also extend working time by choosing thicker, high-viscosity paints that slow evaporation and stay workable longer. You’ll favor brands with rich pigment load for smoother color mixing and stable paint consistency, letting you blend edges without drying gaps. Pick heavy body or gel-medium-enhanced colors for longer open time and predictable handling.
| Type | Benefit |
|---|---|
| Heavy body | Slow drying |
| Gel mix | Improved consistency |
| Open line | Extended open time |
| High pigment | Better mixing |
Use Acrylic Retarders: Effects and Dosages
When you add an acrylic retarder to your paint, it slows evaporation and keeps the surface workable longer so you can blend, glaze, or rework edges without the paint drying into a hard crust.
You’ll use retarder applications sparingly and follow dosage recommendations to avoid softness, cracking, or adhesion issues.
- Add 1–5% for subtle slowing
- Up to 10% for longer working time
- Mix thoroughly
- Test on scrap
- Don’t overuse
Open Acrylics vs Heavy‑Body Paints: Which to Pick
If you want longer working time with a fluid, easy-blending consistency, open acrylics give you that extended wet edge.
If you prefer thick texture, strong impasto, and more body for palette knife work, heavy-body paints are the better choice.
Consider your technique and surface—choose the one that matches how you like to work.
Open Acrylics Characteristics
Paint choice shapes how you work: open acrylics give you longer blending time and softer shifts, while heavy‑body paints hold peaks and texture for impasto effects.
You’ll value open acrylics for slower drying times, consistent color consistency and nuanced pigment transparency that suit wet-on-wet blending techniques.
- Extended working time
- Smooth glaze layering
- Subtle color shifts
- Controlled edge blending
- Easier wet reworking
Heavy‑Body Paint Benefits
Open acrylics give you time for soft blends, but heavy‑body paints bring a different set of strengths you’ll want when texture and bold marks matter.
You’ll appreciate heavy body advantages like impasto retention, stronger brushstrokes, and mix stability.
These texture benefits let you sculpt paint, layer thickly, and maintain peak vibrancy while drying — ideal when expressive form and tactile surfaces matter most.
Open and Blending Mediums to Extend Working Time
When you need more time to blend and refine edges, open and blending mediums let acrylics stay workable without losing adhesion or color intensity.
You’ll adjust medium ratios to control drying factors, preserve painting consistency, and enhance paint layering.
Choose brush selection for blending techniques, manage color mixing, and pick additive choices to shape texture effects.
- open mediums
- blending techniques
- medium ratios
- paint layering
- texture effects
Glazing Medium Plus Retarder: Subtle Control Tips
If you’ve been extending working time with open or blending mediums, pairing a glazing medium with a retarder gives you subtler control over transparency and drying speed.
You’ll test retarder ratios to balance flow and tack, adjust glazing techniques for layering effects, and refine blending strategies while watching medium compatibility.
Use light texture manipulation to preserve clarity and avoid overmixing for cleaner glazes.
Stay‑Wet Palettes, Palette Papers and Airtight Tins
You can keep acrylics workable longer by choosing the right surface—stay‑wet palettes trap moisture, palette papers give you disposable, semi‑humid working areas, and airtight tins are great for transporting mixed colors.
Try a stay‑wet system for studio sessions, switch to palette paper for quick mixes or plein air, and use tins when you need to seal paint between sessions.
Each option changes how long paint stays usable, so pick the one that matches your workflow.
Stay‑Wet Palette Basics
Because acrylics dry out fast, using a stay‑wet palette, palette paper, or an airtight tin can make working time predictable and longer.
You’ll learn stay wet palette materials and simple stay wet palette maintenance to keep paints usable.
Use these tips to blend more:
- Choose correct sponge and membrane
- Keep membrane damp, not soaked
- Clean frequently
- Store in airtight case
- Replace paper or membrane
Using Palette Papers
Having a stay‑wet system in place makes switching to palette papers or airtight tins simple: these tools keep your mixes workable without a bulky setup.
You’ll test palette paper types to suit your artist preferences, adjust acrylic mediums to control drying times, and refine blending techniques for smooth color mixing.
Use papers for paint layering and subtle texture effects while keeping mixes hydrated and ready.
Airtight Tin Techniques
Airtight tins and stay‑wet palettes give you a compact, reliable way to keep acrylics workable for hours or even days: they trap humidity, slow evaporation, and let you store mixes between sessions without losing tack or color.
Use airtight tin benefits and simple storage tips to extend working time:
- Line with damp sponge
- Use palette paper sheets
- Seal after each session
- Label color mixes
- Clean edges regularly
Misting: How Often and How Much to Rehydrate
When you mist acrylic paint, aim for light, even sprays—just enough to rehydrate the surface without turning it into a runoff.
Use fine nozzles and short bursts, practicing misting techniques so you don’t oversaturate.
Use a fine nozzle and quick, light bursts—practice misting to rehydrate without oversaturating.
Check tackiness every few minutes; adjust hydration frequency to ambient heat and airflow.
Mist sparingly during blending, letting layers settle between light rehydrates for controlled slow drying.
Wet Palettes for Sessions: Setup and Recipes
If you want paint that stays workable through a long session, set up a wet palette before you start and keep it within arm’s reach.
For reliable wet palette setup focus on moisture retention: use a sealed box, a damp sponge, a double-thick parchment layer, and change water often. Recipes can include acrylic medium mixes for extended open time.
- Sealed container
- Damp sponge
- Parchment layer
- Clean water swaps
- Medium mix
Brush Techniques to Preserve Wet Edges Longer
Keeping a wet palette nearby helps your paints stay workable, but your brush technique makes the real difference in preserving wet edges on the model.
You’ll adjust brush pressure and stroke direction to maintain edge control, choose brush types for blending methods, vary paint thickness and layering techniques, and use color mixing for seamless shifts.
Mind texture variation and moisture retention to extend workable time.
Temperature and Humidity: Tweak the Room, Safely
Although acrylics dry faster in warm, dry air, you can slow them by lowering room temperature a few degrees and raising relative humidity modestly; small, controlled changes will extend working time without risking mold or damaging your gear.
- Use simple temperature control for steady drying times
- Monitor humidity levels with a hygrometer
- Balance air circulation safely
- Optimize room setup and workspace organization
- Keep paint storage sealed to limit environmental factors
Reduce Airflow (Fans, Vents) Without Health Risk
You can slow drying by temporarily blocking drafts from windows, doors, or vents to keep air movement low around your work.
Use safe, non-sealing barriers like folding screens, curtains, or a cardboard shield that redirect airflow without trapping fumes.
Make sure you still allow for occasional ventilation so you don’t compromise air quality while working.
Block Drafts Temporarily
Drafts can speed acrylics’ drying, so temporarily reducing airflow around your work speeds nothing and helps you control drying time.
Use simple draft barriers and smart airflow techniques in your workspace setup, make minor environmental adjustments, and monitor humidity control to slow evaporation safely.
- Close nearby vents briefly
- Rearrange table to block flow
- Use heavy curtains
- Group canvases together
- Keep a humidifier nearby
Use Airflow-Safe Barriers
1 simple barrier can make a big difference: place non-toxic, flame-resistant screens or folding panels to redirect or temper airflow from fans and vents so your acrylics dry more slowly without trapping fumes.
You’ll position barrier materials to break direct drafts, improving airflow control while maintaining ventilation.
Adjust distance and angle to slow drying evenly without creating stagnant air or safety hazards.
Layering Strategy for Workable Blends
When you plan your layers deliberately, you’ll get smoother, more controllable blends without battling fast-drying acrylics.
Use thin underlayers, glazing techniques, and opacity control to guide color shifts and visual depth.
Build color and depth with thin underlayers, glazes, and opacity control to guide seamless tonal shifts.
Vary brush selection and paint application to manage texture variations and layering effects.
Employ these layering techniques as core blending strategies.
- Thin glazes
- Wet-on-wet
- Scumbled midlayers
- Soft feathering
- Reserved highlights
Slow‑Dry Additives for Mediums and Impasto Work
When you need more working time for mediums or impasto, add retarder sparingly to avoid weakening the film or prolonging tackiness.
You can also mix a small amount of gloss medium to maintain body and sheen while slowing drying slightly.
Test your ratios on a scrap before applying to the final piece.
Use Retarders Sparingly
Reach for a retarder only when you need more working time for blending, glazing, or building thick impasto—these additives slow acrylics by temporarily inhibiting evaporation, but they change handling and can affect film strength if overused.
Use retarder types sparingly and refine blending techniques through small tests.
- Start with 1–2 drops
- Test on scrap canvas
- Mix thoroughly
- Avoid heavy layers
- Let films cure longer
Modify With Gloss Medium
If retarder didn’t give you the body or sheen you wanted, try mixing in a gloss medium to slow drying while boosting flow and clarity.
You’ll notice gloss medium benefits: extended open time, richer wet look, and smoother blending without thinning pigment.
Use conservative ratios, test on a palette, and employ layered application techniques for impasto or glaze work to retain texture and adhesion.
Don’t Mix Incompatible Additives (What to Avoid)
Because acrylics are water-based and rely on specific chemistries, you shouldn’t mix additives that counteract each other or the paint’s binder.
You’ll cause chemical reactions, thinning or thickening, and unexpected results. Always do compatibility testing before use.
- Incompatible additives
- Oil based mediums
- Solvent mixtures
- Drying accelerators
- Paint thickness
Reviving Tacky or Skinned Paint Safely
When additives or incompatible mixtures leave your acrylics behaving oddly, you may also end up with tacky or skinned paint that won’t spread smoothly.
Gently stir in a few drops of water or acrylic medium to restore consistency, testing on a palette.
For skinned paint, remove the film and remix; avoid solvents or oils.
Work quickly and store airtight to prevent recurrence.
Best Tools and Products to Buy for Longer Open Time
A few smart purchases will give you more control over acrylics’ open time and make wet-edge techniques easier to pull off.
You’ll want items that adjust paint consistency, retain moisture, and support blending techniques without altering color.
Consider these essentials:
- Stay-wet palette
- Slow-drying medium (retarder)
- Hydration mist spray
- Open palette box
- Soft synthetic brushes
Practice Drills to Master Wet‑On‑Wet Blending
If you want to get comfortable with wet-on-wet blending, start with short, focused drills that build control over timing, brush pressure, and paint load.
Practice blending techniques on varied canvas preparation, adjust paint thickness and layering methods, and experiment with brush strokes for texture effects.
Track drying times, refine color mixing and color shifts, and keep tidy palette organization to repeat successful results.
Frequently Asked Questions
Can I Use Household Humectants (Glycerin, Honey) to Slow Acrylic Drying?
Yes — you can use glycerin; it offers glycerin benefits like extended open time but can weaken film and attract dust. Honey alternatives work poorly (sticky, microbial). Test small mixes and use proper acrylic retarders instead.
Will Slowing Drying Affect Archival Longevity or Cause Yellowing?
Yes — if you use inappropriate additives, you’ll risk archival quality and paint stability; sticky humectants can attract dirt, yellow, or weaken film. Use manufacturer-approved retarders and test samples to preserve longevity and color.
How Do Temperature Extremes During Shipping/Storage Impact Slow‑Dry Layers?
Like a fragile cake left in sun and frost, you’ll see cracking, tackiness, or delayed curing when temperature fluctuations and humidity levels swing; you’ll need careful insulation and climate control to protect slow‑dry layers during shipping/storage.
Can Primed Canvases Be Treated to Extend Paint Open Time?
Yes — you can. You’ll modify canvas preparation by sealing with a slow‑dry primer or adding a viscous medium undercoat; that’ll affect paint application, keeping surface tackier so acrylics blend longer without altering pigment behavior.
Is Slow‑Drying Technique Compatible With Varnishing Schedules?
Yes — you can varnish after using slow‑drying techniques, but you’ll wait longer. You’ll follow varnishing techniques, guarantee drying agents fully cure, and test a swatch so you don’t trap tacky paint beneath the varnish.
Conclusion
You’ve learned quick fixes, chosen slower paints, added just the right retarder, avoided wrong additives, revived tacky mixes, and picked better tools — now paint with intention. Keep your colors wet for longer, keep your edges soft for smoother shifts, keep experimenting until blending feels effortless. Trust the process, trust your hands, trust the paint. Stay patient, stay curious, stay bold — and watch your acrylics transform into the soft, luminous work you imagine.
