How to Match Ceiling Paint for Seamless Touch-Ups
To make a ceiling touch-up disappear, first identify the paint type and sheen by testing a hidden spot, then clean, sand, and prime stained or repaired areas. Match color with samples or a color scan under the room’s lighting, use thin, feathered coats with the right nap roller, and blend texture with stippling or light rolling. Let each layer dry and reassess; keep records of the paint details so future touch-ups are easier and you can learn more techniques.
What Problems Can a Ceiling Touch-Up Fix?
When a small area of your ceiling shows stains, scuffs, or peeling paint, a targeted touch-up can quickly restore its appearance without repainting the whole room.
You can address isolated water stains, small cracks, nail pops, smoke discoloration, and scuff marks.
Use precise ceiling maintenance tips and proven touch up techniques to blend texture and color so the repair stays nearly invisible.
Quick: When to Touch Up Versus Repaint a Ceiling
Wondering whether to touch up or repaint your ceiling? You’ll weigh damage, age, and finish; use touch up frequency as a guide—sporadic chips need touch-ups, widespread wear signals repaint necessity.
Consider:
- Small isolated stains or chips: touch up.
- Large faded or uneven areas: repaint.
- Multiple repairs over time: repaint for consistency.
How to Identify the Original Ceiling Paint Type
How can you tell what type of paint is on your ceiling? Inspect a hidden area near a fixture or closet door, test a small patch with water (latex) or solvent (oil), and note texture and sheen clues.
Compare results to common ceiling paint types and use simple tools—magnifier, cotton swab—to confirm. This method aids identifying finishes without guesswork.
How to Determine the Existing Ceiling Sheen Level
Once you’ve identified the paint type, the next step is to determine the ceiling’s sheen so you can match or correct it.
Use simple sheen measurement techniques and sheen comparison methods to be accurate.
Try these quick checks:
- View under angled light to spot gloss.
- Rub with a fingertip to compare texture.
- Tape a small sample patch to confirm visual match.
Identify Original Ceiling Paint Color Without a Swatch
Want to match the original ceiling color without a swatch? Examine hidden areas (closets, attic access), photograph under natural light, and compare against known reference cards.
Use color identification techniques like smartphone apps cautiously and test with tiny ceiling paint samples applied inconspicuously.
Note aging, smoke, or yellowing that alters hue before final matching.
Use Paint Chips and Sample Pots to Match Ceiling Color
Start by collecting several paint chips from different brands and a few sample pots that match the closest swatches—you’ll need options because lighting and finish can change how a color reads on your ceiling.
Start with multiple paint chips and sample pots—test small patches to see how light and sheen alter your ceiling color.
Test small patches, compare at different times, and note sheen. Use color matching and careful sample selection to pick the best match.
- Test patches
- View in varied light
- Note sheen and aging effects
When to Use a Color-Matching Device or Paint-Store Scanner
When you’re struggling to match a ceiling color by eye, a color-matching device or paint-store scanner can give you a quick baseline.
Scan samples under the same lighting the room uses, because fixtures and natural light shift how pigments read.
Remember scanners have limits—textured surfaces, faded paint, and off-white variations may still need a sample pot or touch-up.
When To Scan
Curious if you should scan? You should when precise color matters for touch up techniques and consistent paint application.
Scan before buying samples or after removing a paint chip. Use a scanner when:
- your ceiling shade varies across the room
- you’ve tried DIY matching without success
- the area is large or visible and needs exact continuity
Best Lighting Conditions
Wondering where to place a color-matching device for the most reliable result?
Position it on a clean, flat ceiling spot under natural or full-spectrum light, avoiding shadows and direct glare.
Use lighting techniques that simulate daytime and set ideal brightness so the sensor reads true color.
Hold the device steady, scan multiple nearby spots, and compare results before buying a sample.
Matching Limitations
Although color-matching devices are great for many jobs, they’ve clear limits you should know before relying on them.
You’ll need judgment when lighting, sheen, or aging affect results. Use scanners when samples are clean and flat; rely on touch-up technique otherwise.
- Small, faded areas
- Complex color variations
- Textured or glossy surfaces
How Lighting Changes Your Ceiling Color
Because light changes how pigments reflect, your ceiling can look like a different color at different times and in different rooms.
You’ll notice lighting effects alter warmth, coolness, and contrast, so color perception shifts with daylight, incandescent, or LED sources.
Test paint samples under each fixture and at various times before matching so touch-ups blend under the actual room illumination.
How Age, Smoke, and Dirt Change Ceiling Color Over Time
You’ll notice ceilings slowly yellow as paint ages and UV light breaks down pigments.
If you’ve had smokers in the house, brownish stains and a lingering tint can develop where smoke accumulates.
Dirt and dust settle in predictable patterns near vents, corners, and light fixtures, so check those spots when matching paint.
Natural Yellowing Over Time
As paint layers age, they often take on a warm, yellow cast that’s hard to match to fresh swatches. You’ll notice yellowing effects from light exposure and chemical breakdown.
Use these quick maintenance tips to preserve tone and guide touch-ups:
- Clean gently to remove dirt without stripping finish
- Repaint small test patches before full touch-up
- Choose low-VOC, non-yellowing primers and paints
Staining From Smoke
Many ceilings pick up a brownish or gray tint over years of cigarette smoke, cooking fumes, and airborne dust, and those stains penetrate paint differently than simple yellowing. You’ll assess smoke damage, clean soot, and may need primer before repainting for effective ceiling restoration.
| Cause | Effect | Solution |
|---|---|---|
| Cigarette smoke | Deep staining | Degrease + stain-blocking primer |
| Cooking fumes | Lingering tint | Clean + prime |
| Old soot | Texture change | Sand + prime |
Grime Accumulation Patterns
Over years of living in a space, ceilings slowly collect layers of grime from dust, cooking oils, and smoke. You can often predict the source by the pattern and color: uniform yellowing comes from age-related oxidation, brownish bands near vents point to HVAC or cooking vapors, and localized soot stains betray tobacco or candle smoke.
- Identify grime patterns visually.
- Test mild cleaning techniques first.
- Note discoloration before repainting.
How to Test a Small Ceiling Swatch for a True Match
When you’re ready to confirm a true ceiling color match, test a small swatch in the room’s usual lighting rather than relying on the sample card alone.
Test a small 6×6-inch swatch on the ceiling in your room’s usual lighting before committing.
Apply a 6×6-inch swatch, let it dry, and observe at different times.
Use swatch comparison against adjacent areas for color accuracy.
Photograph the result under the room’s light and evaluate before buying more paint.
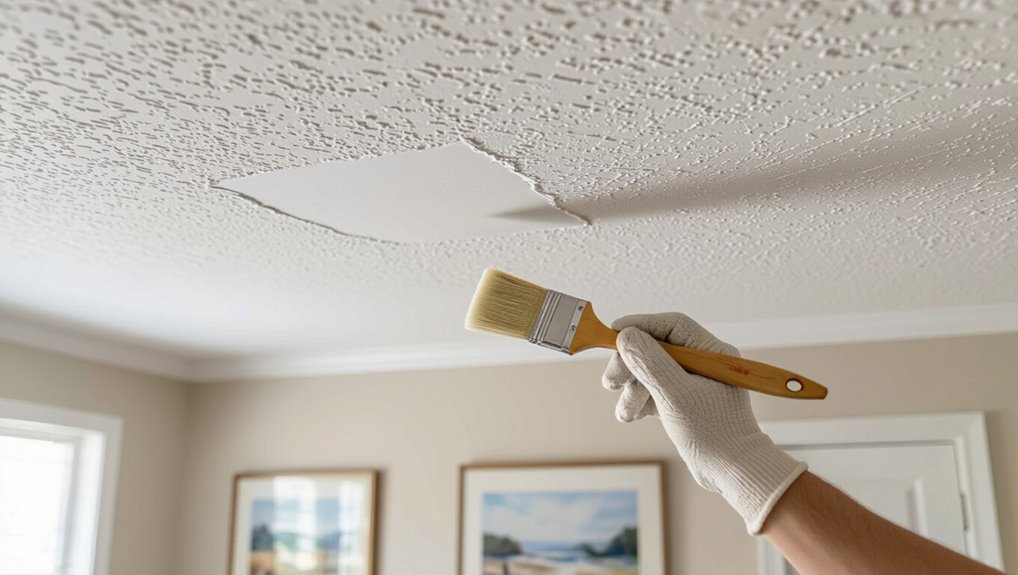
Blend New Paint Into Textured Ceilings
After you confirm the swatch matches, you’ll need to blend the new paint into the existing textured surface so the repair disappears.
Use careful texture techniques and blending methods to mimic surrounding peaks. Work quickly while paint’s wet, match application tool, and step back often.
- Dab with matching roller or brush
- Recreate texture depth
- Blend paint pressure and coverage
How to Feather Edges to Avoid Hard Lines
If you want the repair to vanish, feather the edges by gradually thinning and softening the paint application so it fades into the surrounding ceiling.
Use a dry brush or stippling motion, work outward from the patch, and remove excess paint.
This feathering technique and simple blending tips prevent visible ridges.
Let layers dry between light passes for an even, seamless finish.
Match Paint on Smooth Plaster or Drywall Ceilings
When matching paint on smooth plaster or drywall ceilings, start by checking the sheen so your new coat reflects light the same way as the old.
You’ll feather and blend the edges with a light touch and the right roller nap to hide changes. Work in small sections and step back often to confirm the finish reads uniformly.
Match Paint Sheen
Because sheen affects how light reflects off a smooth plaster or drywall ceiling, you’ll want to match it precisely to avoid visible differences between new and existing paint.
Check sheen levels and sheen types before you buy. Compare samples under room lighting. Test a small patch, then evaluate dry appearance.
- Flat, matte
- Eggshell, satin
- Semi-gloss, gloss
Feather And Blend
Feathering and blending help you hide fresh touch-ups on smooth plaster or drywall so the repair disappears into the surrounding ceiling.
Use a light feather technique with a soft brush or short-nap roller, extending paint slightly beyond the patch.
Match texture before painting, then apply thin coats and use blending methods—feather strokes, stippling, or light rolling—until the repair visually vanishes.
Match and Touch Up Popcorn or Acoustic Ceilings
Anyone touching up a popcorn or acoustic ceiling needs to match texture and paint at the same time, since repairs that blend in visually are about both surface profile and color.
You’ll probe texture, use compatible patch compounds, and feather paint carefully.
- Recreate popcorn texture from sample
- Match paint tint and opacity
- Spray or stipple to merge edges
Which Paint Sheens Work Best on Ceilings?
After you’ve matched texture and color on a popcorn or acoustic ceiling, pick a sheen that keeps repairs from standing out.
For most rooms you’ll choose flat or matte ceiling paint to minimize reflection and hide imperfections.
Satin or eggshell sheen options suit kitchens and bathrooms where washability matters, but test a small patch so repaired areas blend under your room’s lighting.
Recreate a Custom Off-White or Tinted Ceiling Color
If your ceiling’s off-white or subtly tinted, first identify the existing pigments so you know what you’re matching.
Take accurate color samples from multiple spots and bring them to the store or lab for analysis.
Then blend small test batches, apply them to the ceiling, and evaluate in different lighting before committing to a full coat.
Identify Existing Pigments
Color-matching starts with a careful look: take a clean sample of your ceiling paint or a scrap of removed material and examine it under natural light to judge undertones—warm (yellow/peach), cool (blue/gray), or neutral—so you can tell what pigments you’ll need to recreate the shade.
- Note dominant undertone
- Compare against basic color theory
- Plan pigment mixing ratios
Take Accurate Color Samples
When you’re ready to recreate an off-white or subtly tinted ceiling, collect multiple small samples from different spots, label them, and examine each under consistent natural light so you can capture true hue and sheen.
This helps you spot variations, fading, or patch repairs that a single swatch would miss.
Then use precise color matching and proven sample techniques to document undertones, gloss, and aging for accurate replication.
Blend Paint And Test
Now that you’ve gathered and labeled multiple ceiling samples, it’s time to blend paint and test small mixes until you replicate the exact off-white or subtle tint.
You’ll mix tiny batches, apply swatches, and compare under real lighting. Focus on color blending and paint testing:
- Mix incrementally
- Label each swatch
- Dry and inspect in room light
When to Tint a Sample Versus Buying Premixed Ceiling Paint
If you’re trying to decide whether to tint a small sample or buy premixed ceiling paint, weigh how close you need the match and how much time you’re willing to spend—tinting suits one-off tests and exact matches, while premixed cans save time for whole-room jobs.
Choose sample selection carefully, use controlled tinting techniques, test in real light, and buy premixed only when color tolerance is higher.
How to Prepare the Ceiling Surface Before Touching Up
Start by clearing the room and protecting floors and furniture so dust, paint chips, and primer won’t create extra work.
You’ll do a thorough Ceiling inspection, Surface cleaning, and Damage assessment before touching up.
Follow simple Repair techniques:
- Remove loose paint and dust
- Sand rough spots smooth
- Fill dents and gouges, then sand level
How to Prime Stains, Water Marks, and Repaired Drywall
Before you paint, pick a stain-blocking primer rated for water marks and tannin bleed so stains won’t bleed through your finish.
Prep the area by sanding smooth, removing dust, and making sure patched drywall is fully dry and feathered into the surrounding surface.
Seal edges and repaired seams with a thin coat of primer to create a uniform base for matching your ceiling paint.
Stain-Blocking Primer Selection
When you’re dealing with stains, water marks, or patched drywall, picking the right stain-blocking primer is the step that prevents ghosting and bleed-through later on.
You’ll want a product that delivers stain blocking benefits and straightforward primer application. Consider these choices:
- Oil-based shell for tough stains
- Water-based for low odor and quick dry
- Shellac for guaranteed seal and fast coverage
Surface Prep And Sealing
If stains, water marks, or patched drywall are visible, you’ll need to prep and seal those areas so the ceiling paint covers evenly and won’t show through later.
Start with thorough surface preparation: clean, sand, and remove loose material.
Apply an appropriate stain-blocking primer, using proven sealing techniques on water marks and repairs.
Let primer cure fully before repainting for a seamless finish.
Best Brushes, Rollers, and Tools for Ceiling Touch-Ups
Choosing the right tools makes ceiling touch-ups faster and gives cleaner results, so you’ll want brushes and rollers that hold paint well, reach comfortably, and minimize splatter.
Pick the best brush types and roller recommendations for smooth coverage. Essentials:
- Angled synthetic brush for edges
- 3/8″ nap roller for flat ceilings
- Extension pole and microfiber cloth for tidy finishes
How to Apply Touch-Up Paint for Invisible Blending
Start by feathering just beyond the damaged area so the new paint can merge with the old without a visible edge.
Use thin layers, pat and lightly brush with recommended paint application techniques to avoid ridges.
Work outward in random strokes, blending methods like stippling and feathering to match texture.
Let each thin layer dry fully before evaluating; repeat only where color or texture needs subtle adjustment.
How Many Coats You’ll Need for a Seamless Match
Now that you’ve feathered and matched texture, you’ll need to decide how many coats will give a seamless match without overpainting.
You’ll base that on paint application and coverage estimates, surface porosity, and sheen. Test a small area, then follow this guidance:
- One coat for thin, well-covered spots
- Two coats for typical ceilings
- Extra coat for high-porosity or darker backgrounds
How to Dry-Blend and Use Stippling for Texture Consistency
When you dry-blend, work quickly along the repair’s edge so fresh paint and texture merge seamlessly with the surrounding ceiling; use light, tapping motions with a slightly-damp brush or a dry sponge to break up hard lines.
Then stipple gently to reproduce the original texture pattern. Use proven dry blend techniques and varied stippling methods to match scale and rhythm, feathering until the repair disappears.
How to Troubleshoot Common Ceiling Paint Mismatch Problems
Curious why that repaired patch still jumps out even after you matched texture and paint? Check these likely causes and fixes so you can blend confidently:
- Uneven light exposure causing apparent shade shifts; reposition lighting or view at different times.
- Color fading on original areas makes new paint contrast; evaluate adjacent sections.
- Inconsistent primer or absorption; sand, prime, and feather edges before recoat.
How to Fix Sheen Mismatch Without Repainting the Whole Ceiling
If the repaired area looks shinier or flatter than the rest of the ceiling, you don’t have to repaint the whole surface to fix it; there are targeted steps you can take to blend sheens.
For instance, you can dull a glossy patch with fine sanding and a deglosser or raise a flat spot with a clear, low-sheen topcoat.
Use color theory to judge visual impact, adjust paint application (feathering, roller nap), and test small areas.
Cost-Effective Alternatives to a Full Ceiling Repainting
Fixing a sheen mismatch is often quicker than repainting the whole surface, but sometimes a full repaint still feels out of reach budget-wise—so here are practical, lower-cost options you can use to freshen a ceiling without stripping it down.
Consider these cost effective options and ceiling paint alternatives:
- Spot touch-ups with matching sheen and tinted primer
- Use ceiling-specific refreshers or paint pens
- Re-texture small areas to blend finishes
When a Full Ceiling Repaint Is the Better Option
When mismatched patches, widespread stains, or uneven texture make the ceiling look tired or draw the eye, a full repaint can be the smartest choice — you’ll get a uniform finish, better long-term durability, and a chance to address underlying issues like water damage or peeling.
Opt for a full repaint when damage is extensive, and plan regular ceiling maintenance to prolong results.
How to Document Your Ceiling Paint for Future Touch-Ups
Keep a clear paint details record—brand, color name and code, finish, date applied, and any tint or batch numbers—so you’ll know exactly what to buy for touch-ups.
Snap a photo of the painted ceiling and the labeled can, and note the room and any prep or primer used.
Store this information with your home’s maintenance files or digitally in a dedicated folder or app so you can grab it when repairs are needed.
Paint Details Record
Because you’ll inevitably need touch-ups, create a concise paint details record that stores the exact ceiling color, finish, source, and any tint or batch numbers.
Keep it simple, noting the paint finish and monitoring color fading over time.
Include:
- Manufacturer, product name, and batch/tint codes
- Surface prep and application notes
- Date and room location for future matching
Where To Store
Pick a single, reliable place to store your paint record and related samples so you can find them fast when a touch-up’s needed.
Keep sealed cans, swatches, and a written label in durable storage containers to prevent damage. Note batch numbers, sheen, and date.
Store in a cool, dry spot away from sunlight for paint preservation.
Update the record after each project.
When to Hire a Pro for Ceiling Touch-Ups
If your ceiling damage goes beyond small scuffs or isolated stains, you should consider hiring a pro for touch-ups.
You’ll want pro touch ups when issues are extensive, hard to reach, or require texture matching. Hire ceiling professionals if you can’t replicate finish or color.
Consider:
- widespread staining or water damage
- textured ceiling repair
- safety or height concerns
Frequently Asked Questions
Can I Use Leftover Wall Paint for Minor Ceiling Touch-Ups?
Yes—you can use leftover wall paint for minor ceiling touch-ups if Paint sheen matches and Color consistency is good; you’ll prep the surface, use proper Surface preparation, and apply careful Touch up techniques to blend repairs seamlessly.
Will Seasonal Humidity Affect How Ceiling Touch-Ups Dry?
Moisture matters: you’ll notice higher humidity levels slow drying time, while drier days speed it up. You’ll adjust ventilation, temperature, and fan use to control curing, preventing drips, dullness, or uneven sheen.
Are Eco-Friendly/Low-Voc Ceiling Paints Harder to Match?
They aren’t necessarily harder to match, but you’ll notice slight differences because color consistency varies with paint formulation; low‑VOC blends can alter sheen or drying, so test samples and keep original cans for best touch‑ups.
Can Ceiling Touch-Ups Hide Small Cracks or Hairline Seams?
Yes — you can hide small cracks or hairline seams using crack concealment techniques and quality touch up paint options; you’ll clean, fill sparingly, sand smooth, and feather paint so repairs blend without obvious texture or color mismatch.
How Long Should I Wait Before Assessing a Touch-Up Match?
Wait about 24–48 hours before evaluating a touch-up match; you’ll see true color fading and paint sheen stabilize by then. If humidity or low temps slow drying, give it up to seven days before final evaluation.
Conclusion
Like a patch in a quilt, a well-matched ceiling touch-up keeps your room whole — and you can do it without overhauling the whole canvas. By identifying sheen, testing paint type, and blending color carefully, you’ll seal blemishes so they disappear from across the room. Save full repaints for widespread damage, document what you learn for next time, and call a pro when texture or coverage defeats your best efforts.