How to Get Hair Dye Off a Painted Wall Without Damage
Act fast: blot fresh dye with a damp white cloth, then wash with mild dish soap and rinse, testing a hidden spot first. For set stains, try a baking soda paste, diluted white vinegar, or rubbing alcohol—always test and use soft cloths. Match your approach to the paint finish (flat needs extra care; semi-gloss tolerates firmer scrubbing). Work gently to avoid peeling; follow-up sanding and touch-up paint can hide stubborn marks, and more tips will help you finish the job.
What This Guide Helps You Do: Remove Hair Dye From Painted Walls
This guide helps you safely remove hair dye stains from painted walls without causing further damage.
You’ll learn practical methods to lift color while protecting finishes, assess paint types, and choose gentle cleaners.
Follow stepwise precautions, test spots first, and use proper tools to avoid scrubbing through paint.
Emphasize quick action and consistent wall care to restore appearance without repainting.
Immediate Steps: Remove Fresh Hair Dye From Painted Walls
Act quickly—fresh dye is far easier to lift than set-in color.
Act fast—fresh dye comes out far more easily than set-in color, so tackle spills immediately.
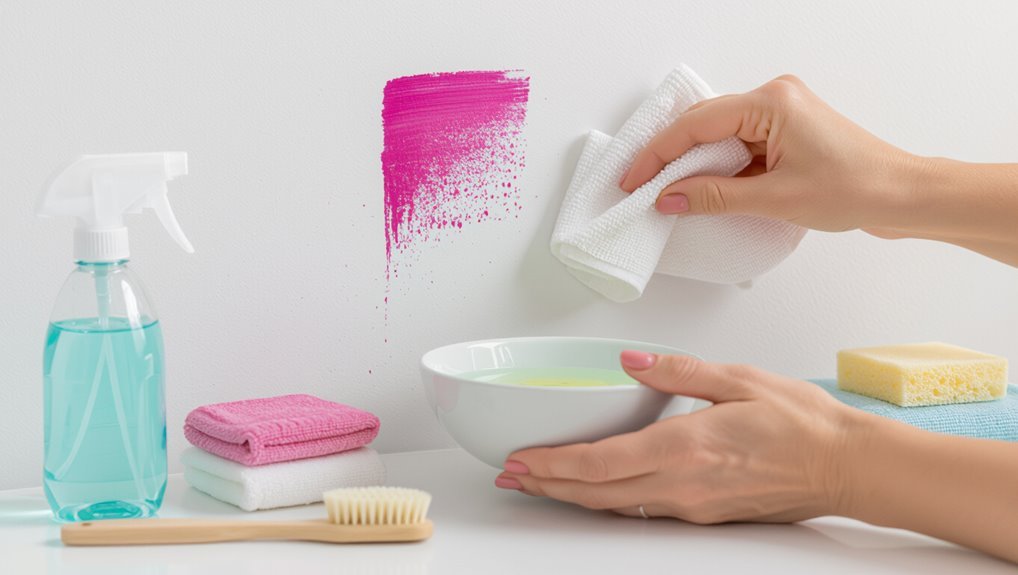
Blot gently with a damp white cloth to avoid spreading, then apply a mild dish soap solution and rinse.
Test a hidden spot first, use gentle circular motions, and switch to clean cloths as color transfers.
These hair dye removal cleaning techniques minimize paint damage while you work patiently and carefully.
Is the Stain Fresh or Set-In? How to Assess It
Once you’ve blotted and rinsed as described above, decide whether the stain is fresh or set-in—your approach will change based on how long the dye’s been on the wall.
For quick stain identification, touch the area: if color transfers to a damp cloth it’s fresh.
For dye assessment of older marks, look for feathering, deeper penetration, or faded edges to plan stronger cleaning.
Paint Finishes That Affect Cleaning: Flat, Eggshell, Satin, Semi-Gloss
Different paint finishes change how likely dye is to soak in and how well the surface holds up to scrubbing.
You’ll find flat paints are more porous and fragile, while eggshell, satin, and especially semi-gloss resist stains and tolerate stronger cleaners.
Match your cleaning method to the finish to avoid further damage.
Finish Porosity Differences
Because paint finishes range from porous to slick, they change how dye soaks in and how easy cleaning will be.
You’ll notice flat paints absorb dye deeply, while satin and semi-gloss resist surface staining.
Consider finish durability and finish maintenance when choosing cleaners: gentler methods suit porous finishes to avoid damage, while slick finishes let you scrub more confidently without letting dye penetrate.
Durability And Cleanability
While porosity tells you how much dye soaks in, the paint’s durability and cleanability dictate how aggressively you can tackle the stain; flat and eggshell finishes are less durable and scuff more easily, so you’ll need gentler cleaners and softer tools, whereas satin and semi-gloss hold up to firmer scrubbing and stronger solutions without losing sheen. You’ll assess durability factors and follow cleanability tips.
| Finish | Cleaning approach |
|---|---|
| Flat | Gentle, minimal moisture |
| Eggshell | Mild detergent, soft cloth |
| Satin | Moderate scrubbing, nonabrasive |
| Semi-Gloss | Stronger solutions, firmer scrub |
Why Finish Changes How You Clean Hair Dye Stains
If your wall has a glossy, satin, or flat finish, that sheen changes how hair dye behaves and what you can safely use to remove it.
You’ll notice dye beads on glossy surfaces but sinks into flat paint’s rough paint texture.
Choose gentler cleaning techniques for flat or matte finishes and slightly stronger, quick-action options for gloss or satin to avoid scuffing or dulling.
Do a Safe Hidden-Spot Test Before Using Cleaners
Before you apply any cleaner, pick an inconspicuous spot like inside a closet or behind furniture.
Put a small amount of the cleaner on a cotton swab and test it for color change or finish damage.
If the paint or finish reacts, stop and try a gentler method.
Choose An Inconspicuous Spot
Pick a small, hidden area—like the inside of a closet, behind a baseboard, or a corner near the ceiling—and test your cleaner there first.
Use a reliable test method in that hidden area to avoid visible damage. Follow these steps:
- Wipe gently
- Wait five minutes
- Inspect finish
- Proceed if unchanged
Test With Small Amount
Do a quick hidden-spot test with a tiny dab of the cleaner so you’ll know how the paint or wallpaper reacts without risking visible damage.
Apply one small amount, wait the manufacturer’s recommended time, then blot gently.
Check color, texture, and adhesion to test effectiveness and test longevity.
If nothing changes after 24 hours, proceed; if paint softens or discolors, stop and choose a milder option.
Household Cleaners That Are Usually Safe on Painted Walls
When you need to tackle hair dye on painted walls, reach for mild, commonly available cleaners that won’t strip or dull the finish.
Choose products with proven cleaning solutions and check paint compatibility on a hidden spot.
Try these, sparingly and with soft cloths:
- Dish soap diluted in water
- Baking soda paste
- White vinegar solution
- Rubbing alcohol (spot test first)
Use Soap and Warm Water to Lift Fresh Hair Dye
Start by mixing a few drops of mild dish soap into warm water.
Then dampen a soft cloth and gently blot the dye—don’t rub, which can spread the stain or damage paint.
Use mild soap types like dish or castile, testing an inconspicuous spot first.
Work from edges inward, rinse the cloth often, and pat the area dry to prevent moisture damage.
Make and Use a Baking Soda Paste for Dye Spots
For stubborn dye spots, mix baking soda with a little water into a thick paste you can apply directly to the stain. It acts as a gentle abrasive and mild alkaline cleaner that lifts pigment without harsh chemicals.
Follow these steps:
- Test on hidden area.
- Apply paste gently.
- Wait 5–10 minutes.
- Rinse and blot dry for effective stain removal.
Use White Vinegar Safely to Remove Dye
Before using white vinegar, test a small hidden spot to make sure it won’t damage the paint or finish.
If the test is fine, dampen a cloth with diluted vinegar and gently blot the dye—don’t scrub hard.
Rinse the area with water afterward and dry to prevent any lingering acidity.
Test On Hidden Area
Since wall finishes can react differently, always test white vinegar on a hidden patch first to make sure it won’t remove paint or leave a ring.
You should use precise test methods in hidden areas and follow steps:
- Choose an inconspicuous corner.
- Apply a tiny vinegar drop.
- Wait five minutes.
- Inspect for softening, fading, or rings before treating visible spots.
Gentle Vinegar Application
Now that you’ve confirmed vinegar won’t harm the paint, you can apply it carefully to lift dye without damaging the wall. Use diluted white vinegar, blot gently, rinse, and repeat as needed. Understand vinegar benefits and proper application techniques to avoid over-wetting.
| Step | Action |
|---|---|
| 1 | Dilute vinegar |
| 2 | Blot gently |
| 3 | Rinse area |
| 4 | Repeat if needed |
| 5 | Dry thoroughly |
Use Hydrogen Peroxide Safely on Painted Walls for Hair Dye
Hydrogen peroxide can lift fresh hair dye from painted walls without harsh scrubbing, but you’ll want to test and apply it carefully to avoid damaging the paint.
Use hydrogen benefits and precise application techniques:
- Blot excess dye immediately.
- Test an inconspicuous spot.
- Dab diluted peroxide with a soft cloth.
- Rinse and dry promptly to prevent paint dulling.
When to Use Rubbing Alcohol : and When to Avoid It
Although rubbing alcohol can remove stubborn hair dye stains quickly, you should only use it on nonporous, fully cured painted surfaces and test a hidden area first to avoid stripping finish or discoloring paint.
Use gentle rubbing alcohol applications with a soft cloth, blotting rather than scrubbing.
Follow rubbing alcohol precautions: ventilate the room, wear gloves, and stop if paint softens or color shifts.
Use Commercial Stain Removers Without Stripping Paint
If rubbing alcohol didn’t do the job—or you’re worried about damaging the finish—you can reach for a commercial stain remover formulated for painted walls.
Test first on an inconspicuous spot. Choose products marketed for paint-safe use and proven stain effectiveness. Follow label directions and rinse.
Consider:
- Patch test
- Mild formula
- Short dwell time
- Gentle blotting
Step-by-Step: Tackle Set-In or Older Hair Dye Stains
Start by evaluating the stain to determine how long it’s been on the wall and whether it’s penetrated the paint.
If the dye is set, you’ll need gentler, tested methods to avoid stripping or discoloring the finish.
Follow safe, step-by-step removal techniques—test in an inconspicuous spot, work outward from the stain, and rinse thoroughly.
Assess Stain Type
Wondering whether that stubborn spot is fresh or set in? You’ll perform quick stain analysis to decide approach, noting dye composition, color depth, and drying. Check finish type and age.
Then:
- Inspect color saturation.
- Lightly dab with damp cloth.
- Note paint sheen and porosity.
- Photograph for reference.
Use findings to choose appropriate, gentle treatment later.
Safe Removal Steps
Now that you’ve assessed the stain’s age, color saturation, and wall finish, you can move on to targeted removal steps for set-in dye.
Test a mild cleaner in an unseen spot, then work from least to stronger cleaning techniques: damp cloth, baking soda paste, diluted vinegar, or a non-abrasive commercial remover.
Rinse, blot, and check dye compatibility before repeating or repainting.
Use a Magic Eraser Safely on Painted Walls
If you’re tackling hair dye stains on painted walls, a Magic Eraser can be very effective but needs careful use to avoid removing paint along with the stain.
Follow these safety precautions and tips for magic eraser effectiveness:
Follow these safety precautions and tips to use a Magic Eraser safely and effectively on painted walls.
- Test hidden area first.
- Dampen slightly, don’t soak.
- Use light pressure, short strokes.
- Rinse residue and air dry.
When to Sand and Touch Up Small Dye-Damaged Spots
Before you sand, check the paint finish—flat, eggshell, or semi-gloss will sand and hide repairs differently.
Lightly sand just the stained spot until it’s smooth and the dye is removed, then wipe away dust.
Touch up with matching paint in thin coats so the repair blends with the surrounding wall.
Assess Paint Finish
Paint finish determines whether you can simply blot and spot-clean or need to sand and touch up: glossy and semi-gloss paints resist stains but show scuffs, while flat and eggshell finishes absorb dye more readily and often require more prep.
You should perform paint durability and color assessment, then decide action:
- Inspect sheen.
- Test a hidden spot.
- Note dye penetration.
- Record match needs.
Spot Sand And Paint
When dye has soaked into flat or eggshell paint and gentle cleaning won’t lift it, sand the stained area smooth and repaint to restore an even finish.
You’ll want to remove loose pigment, feather the edges into surrounding paint, and prime any bare spots before applying touch-up color.
For spot repair, sand gently, clean dust, apply primer, then use small brushes for paint blending so the patch disappears.
Choose Touch-Up Paint and Blend Repairs Like a Pro
Since small repairs show up more than you’d expect, pick a touch-up paint that matches both color and sheen so your fix disappears into the wall.
Use precise color matching and blending techniques. Then follow this sequence:
- Clean area
- Feather edges
- Apply thin coats
- Inspect in different light
You’ll achieve an invisible repair without overpainting surrounding surfaces.
Protect Trim, Outlets and Fixtures Before Cleaning
Before you start scrubbing, cover trim, outlets, and fixtures so cleaning solutions and dye don’t cause further damage. Use painter’s tape, plastic sheeting, and towels as protective measures; unplug and tape over outlets. Keep cleaning supplies nearby in a tray to avoid drips.
| Item | Purpose |
|---|---|
| Tape | Seal edges |
| Plastic | Catch drips |
| Towels | Wipe spills |
| Tray | Hold supplies |
Prevent Color Transfer During At-Home Dyeing
Before you start dyeing, prep the work area by covering floors and nearby walls with plastic or old towels so stray drips won’t reach paint.
Wear an old shirt, a plastic apron, and gloves to protect clothing and skin from stains.
Keep spare rags and a stain-removal kit handy in case any color escapes your setup.
Prep The Work Area
When you’re dyeing hair at home, set up a protected workspace to stop splatters and smudges from reaching walls, trim, and furniture.
Keep work area organization tight: clear surfaces, cover floors with drop cloths, and tape plastic to baseboards for surface protection.
Follow this checklist:
- Move furniture away
- Lay waterproof drop cloths
- Tape edges securely
- Keep cleaning wipes handy
Protect Clothing And Skin
With the workspace protected, turn your attention to what you and anyone helping you’re wearing and how to shield your skin—color transfer is easiest from clothes, sleeves, and exposed hands.
Wear an old shirt or disposable coveralls for clothing protection, tuck sleeves, and use gloves.
Apply barrier cream and keep a damp towel nearby for quick skin care and stain prevention.
Cleaners and Tools That Will Damage Paint (Don’t Use These)
A few common household cleaners and tools can strip or dull your paint, so don’t reach for them.
You’ll want to avoid harsh cleaning agents on different paint types.
Don’t use:
- Abrasive scrubbers or steel wool
- Strong solvents (acetone, nail polish remover)
- Undiluted bleach or peroxide
- Paint strippers or sanding tools
When to Stop: Signs You’re Risking Paint Damage
Knowing what not to use helps, but you still need to watch for signs that cleaning is harming the paint.
Stop if you see color removal, bubbling, peeling, or a soft, tacky surface.
Stop immediately if the paint shows color loss, bubbling, peeling, or becomes soft and tacky.
If abrasive scrubbing leaves scratches or sheen loss, pause.
Do a quick risk assessment before continuing; if doubt remains, quit and consult a pro to avoid further paint damage.
Document Damage for Pros or Insurance Claims
If the dye won’t come off, take clear photos from multiple angles and include a close-up so a pro or insurer can see the extent.
Date each photo and write a short note about when and how the stain happened.
Keep any receipts for cleaning supplies or repairs to support your claim.
Photograph Damage Clearly
Before you start scrubbing, take clear, well-lit photos of the stained area from several angles and distances so pros or insurers can see the full extent and context of the damage.
You’ll use photo documentation for an accurate damage assessment. Follow these steps:
- Shoot wide and close.
- Include scale (ruler/coin).
- Capture lighting variations.
- Save originals and backups.
Note Dates And Details
When you document dye damage, jot the date and specific details immediately so your records match what you (or a pro or insurer) will need later.
Note the incident time, affected area, and any cleaning attempts. Keep entries chronological for date organization and use clear labels for detail tracking.
Store photos and notes together so you can present a concise, verifiable record quickly.
Keep Repair Receipts
Keep every repair receipt and invoice you get after cleaning or fixing dye stains so you’ve got clear proof of costs for professionals or an insurer.
Keep originals and photos; store digital copies for easy access. Use repair documentation for claims and track expenses precisely.
Follow this checklist:
- Receipt originals
- Photos before/after
- Digital backups
- Expense tracking log
When to Call a Professional Cleaner or Painter
If the dye covers a large area, has soaked through multiple coats of paint, or keeps bleeding despite your cleaning attempts, call a professional cleaner or painter.
You should seek professional cleaning and an expert evaluation when stains risk structural damage, when DIY risks ruining finish, or when time and warranty concerns matter.
They’ll advise next steps and estimate costs.
How Pros Remove Dye vs. DIY: Methods and Equipment
Although pros and DIYers aim for the same result, they use different tools and techniques, and knowing those differences will help you decide whether to tackle the job yourself or call in a specialist.
You’ll compare professional techniques and DIY strategies:
- Solvent selection
- Low-abrasion tools
- Spot testing
- Protective finishes
Use this to pick methods matching paint type and damage risk.
Cost and Time Estimates: DIY vs. Professional Dye Removal
Now that you know how pros and DIYers differ in solvents, tools, testing, and finishes, you can weigh how those choices affect cost and time.
For small spots, DIY gives better cost comparison—low supplies and flexible scheduling—but may cost more time.
Pros cost more upfront but offer superior time efficiency, guaranteed results, and less risk of repainting.
Choose based on budget and urgency.
Quick Checklist: Step-by-Step Plan to Remove Hair Dye Safely
Start by gathering everything you’ll need—cleaning solution, soft cloths, cotton swabs, gloves, a plastic scraper, and a test patch area—so you can work quickly and avoid spreading the stain.
Follow this checklist using safe dye removal techniques and wall protection tips:
- Test solution on patch.
- Blot, don’t rub.
- Gently scrape dried spots.
- Rinse and dry; assess.
Common Mistakes People Make and How to Avoid Them
Because quick fixes can make stains worse, you should avoid common mistakes like scrubbing hard, skipping a test patch, or using harsh chemicals without ventilation; instead, work gently, try solutions on an inconspicuous spot, and follow product instructions so you remove dye without damaging the paint.
Don’t ignore color selection or poor application techniques; test cleaners, protect surfaces, ventilate, and stop if paint softens.
Frequently Asked Questions
Can Hair Dye Stain Wallpaper or Textured Painted Surfaces Differently?
Yes — you’ll find dye can stain wallpaper and textured painted surfaces differently; porous textures trap pigment more, so you’ll need gentler stain removal methods and careful wallpaper care to avoid damaging surfaces while lifting color.
Can Cleaning Products Affect Lead-Based or Very Old Paint?
Yes — you should assume cleaning products can harm lead-based or very old paint. You’ll test on hidden areas, choose gentle cleaning methods, and match methods to paint types to avoid stripping, discoloring, or releasing hazardous particles.
Will Ventilation or Humidity Impact Cleaning Effectiveness?
Absolutely — ventilation methods and humidity levels matter: you’ll boost drying and prevent streaks by opening windows, running fans or dehumidifiers, and avoiding humid conditions, because excess moisture lets dye spread and reduces cleaning effectiveness.
Can Pet Hair or Oils Make Dye Harder to Remove?
Yes — pet fur and oil residue will make dye absorption worse, so you’ll remove loose pet fur first, blot oils gently, then choose cleaning methods that lift dye without spreading it or damaging the paint.
Is It Safe to Use Steam Cleaners on Painted Walls?
Think of steam as a cautious diplomat: yes, you can use it, but balance steam cleaner effectiveness with painted surface safety—test a hidden spot, use low pressure and brief passes, and avoid softened or matte finishes to prevent damage.
Conclusion
You’ve got this—treat the stain like a stubborn guest: don’t panic, act fast, and be gentle. Test cleaners somewhere hidden, start with mild soap and water, then step up to hydrogen peroxide or baking soda paste if needed. Match methods to your paint finish, work patiently, and rinse well. If it’s set or the finish’s delicate, call a pro. Take it slow and steady, and you’ll restore the wall without wrecking the paint.