How to Get a Paint Sample From a Wall: Matching Color Made Easy
You can get an accurate paint sample quickly with minimal damage: decide if you need a tiny touch‑up chip, a larger flake for multi‑layer matches, or an adhesive swab for a clean pull. Clean the spot, wear gloves and an N95 if needed, scrape or peel at an inconspicuous area, label and bag the sample, and photograph it in natural light with a neutral card. Take it to a hardware store or lab for matching, and keep reading to learn the step‑by‑step process.
Which Paint‑Matching Task Are You Doing (Touch‑Up, Accent, Repaint)?
Are you touching up a small scuff, matching an accent wall, or repainting the whole room?
Decide your task first: use touch up techniques for minor blemishes, sample strips for accent color matches, and larger swatches when repainting.
You’ll choose tools, coverage method, and where to extract a sample accordingly—small blade for chips, removable tape for hidden areas, larger peel for full-room jobs.
Quick Answer: 3 Ways to Get a Paint Sample
When you need a quick paint sample, you’ve got three simple options: take a small scrape, remove a chip, or use a peel-off adhesive swab.
A small scrape gives enough paint for a match with minimal damage. Chip removal or an adhesive swab work well if you want a larger, cleaner sample.
Small Scrape Sample
A small scrape sample is the quickest way to grab paint for color-matching without tearing out drywall—just loosen a tiny chip with a putty knife, peel it off, and you’ve got enough for most hardware-store spectrometers.
You’ll preserve color consistency by sampling from an area that’s been exposed to the same light and wear. Use steady sampling techniques and label the spot.
Paint Chip Removal
If a scrape doesn’t give you enough paint or you need a cleaner edge for matching, try removing a small chip instead.
Use a sharp utility blade to lift a tiny edge, pry gently, and keep multiple layers intact for paint chip analysis.
Label the chip, store it flat, and bring it to the store to guarantee color consistency across batches.
Peel-Off Adhesive Swab
Try peeling up a small adhesive swab to lift surface paint without scraping—it’s fast, minimally invasive, and works well on smooth finishes.
You’ll press, wait, then peel for a clean sample using peel off convenience. Handle edges gently, stick the swab to a backing card, and take it to the store for match checks.
This method balances speed and adhesive accuracy.
When to Scrape a Tiny Chip Vs Pull a Larger Sample
When the paint defect is smaller than a dime and the underlying surface looks intact, scrape a tiny chip instead of pulling a larger sample—it’s faster, less destructive, and usually gives enough material for color matching or basic testing. You’ll weigh chip size against test needs and choose the least invasive sampling method.
| Situation | Size | Recommendation |
|---|---|---|
| Small spot | < dime | Scrape chip |
| Flaking paint | multi-layer | Pull larger sample |
| Unknown substrate | extensive | Pull larger sample |
Tools You Need for Safe Paint Sampling
Before you start, make sure you’ve got the right protective gear—gloves, a respirator, and eye protection—to keep yourself safe.
You’ll also want a compact sampling kit (scraper, utility knife, pry bar, and sample bags) and a checklist so you don’t miss anything.
Finally, bring surface cleaning supplies like a vacuum with HEPA filter, clean wipes, and mild detergent to prepare the area.
Protective Gear Essentials
1 essential rule: protect yourself. Wear protective gloves and safety goggles before touching paint or scraping; they’ll block chemicals and dust.
Keep a mask for fumes and a long-sleeve shirt to avoid skin contact.
- Disposable protective gloves
- Impact-rated safety goggles
- N95 or better respirator and fitted long sleeves
Sampling Tools Checklist
Gather the right tools before you touch the wall: a small, sharp utility knife or paint scraper, a clean putty knife for levering samples, a disposable container or aluminum foil to store chips, and labeled sealable bags for transport.
You’ll also want gloves, painter’s tape, a permanent marker, and a clipboard.
Use proper sampling techniques and basic color theory notes to guarantee accurate, safe results.
Surface Cleaning Supplies
You’ll want a handful of cleaning supplies to prep the area so the sample you take reflects the true paint color and condition.
For effective paint cleaning and proper wall preparation, bring gentle cleaner, soft cloths, and a mild scrub brush. Remove dust, grease, and residue before cutting or scraping to avoid contamination.
- Microfiber cloths
- Mild detergent
- Soft-bristle brush
Test for Lead Paint Before You Sample : Quick Checks
Before you cut into a wall, do a few quick checks to see if lead paint might be present so you can protect yourself and anyone nearby.
Look for chipped layers, glossy older finishes, and homes built before 1978.
Use an EPA-approved lead test kit and wear gloves, a respirator, and disposable coveralls.
Prioritize sampling safety and stop if results indicate lead.
Prepare the Wall for a Clean Paint Sample
When you’re ready to take a clean paint sample, clear a workspace around the area and remove dust, dirt, and loose paint so the cut will expose only intact layers; wipe the surface with a damp cloth, let it dry, and mark a small sampling spot about 1–2 inches square.
Use these wall preparation techniques for surface damage prevention:
- Clean and dry thoroughly.
- Tape edges to protect finish.
- Inspect for cracks or peeling.
Remove a Small Chip for a Hardware‑Store Match
Pick an inconspicuous spot that shows the true color and finish, like behind a switch plate or inside a closet.
Gently score and lift a small chip with a utility knife or razor to avoid cracking surrounding paint.
Clean and flatten the chip on a nonporous surface so the store can get an accurate match.
Choose The Right Spot
Choose a discreet spot that shows the true color and finish of the wall—an inside corner, behind a trim, or near a switch plate are good options—and plan to remove a tiny chip about the size of a pencil eraser so the hardware-store scanner can read it accurately.
Consider ideal locations and color lighting before you proceed.
- Test unseen areas
- Avoid sunlit spots
- Prefer protected edges
Remove Paint Chip Carefully
Now that you’ve found a discreet, well-lit spot, carefully remove a tiny chip about the size of a pencil eraser so the store scanner can read it.
Use gentle paint removal techniques—razor or utility blade at a low angle—to lift the layer without crushing it.
Hold the chip by the edge and place it on clean paper, following simple chip preservation methods for transport.
Prepare Chip For Matching
Prepare the chip for matching by cleaning off dust and any loose debris so the scanner or colorist can read the true hue.
Then dry and inspect the chip for gloss differences before heading to the store. Use proper paint chip preparation and matching techniques to get an accurate result.
- Wipe with a soft cloth
- Remove paint flakes gently
- Keep a flat, whole chip
Collect a Larger Flake Without Damaging the Wall
Work slowly and deliberately to pry up a larger paint flake without scarring the wall: slide a thin putty knife or paint-scraping tool under an edge, twist gently to lift, and use a piece of masking tape to reinforce the flake as you work it free.
Check paint adhesion and consider wall textures—chip size varies with adhesion; stop if substrate peels or texture tears.
Use a Razor Blade to Lift a Paint Sample Safely
Grip the razor blade at a low angle and slide it gently under the paint edge to lift a thin, intact sample without gouging the wall.
Keep steady pressure, don’t pry, and wear gloves and eye protection for razor blade safety.
Use paint sample techniques that minimize wall damage and preserve edges for color matching.
- Lift slowly
- Support beneath
- Store flat
Cut a Paint Sample for Lab Analysis
Now you’ll cut a small, layered sample that labs can analyze for pigment and binder composition. You’ll use a sharp scalpel, cut through all paint layers to substrate, and keep edges clean for paint analysis. Follow careful sample preparation: steady hand, minimal heat, and visible layer preservation. Label immediately and avoid contamination before sending.
| Tool | Purpose |
|---|---|
| Scalpel | Precise cut |
| Tweezers | Handle sample |
| Magnifier | Inspect layers |
| Glove | Prevent oils |
| Card | Support sample |
Package and Label a Sample for the Hardware Store
Make sure the sample is clean and completely dry before you pack it so the color and texture stay accurate.
Protect the edges with cardboard or bubble wrap to prevent chipping during transport.
Label the package with the room, location on the wall, and date so the hardware store can match the paint correctly.
Clean and Dry Sample
Once the paint chip is fully dry, gently wipe away any dust or loose particles so the color reads true and the hardware store can match it accurately.
For proper sample preparation, prevent moisture impact and handle by the edges. Pack and label the chip clearly.
- Use a clean, dry envelope.
- Note room and surface.
- Seal against humidity.
Protect Edges Well
1. Wrap the sample carefully for paint protection and edge sealing so flakes won’t chip. Use bubble wrap, folded cardboard, or a plastic sleeve. Seal edges with tape; avoid covering the painted face.
| Item | Purpose |
|---|---|
| Bubble wrap | Cushioning |
| Tape | Edge sealing |
| Cardboard | Flat protection |
| Sleeve | Moisture barrier |
Label With Details
Labeling the sample clearly helps the hardware store match the color quickly and accurately.
You’ll package a sealed swatch, note location and finish, and include photos showing wall texture effects and lighting.
Mention nearby trim and any paint color psychology purpose (calm, energizing).
Numbered checklist:
- Address, room, and exposure
- Finish and texture
- Desired mood and notes
Package and Label a Sample for a Paint Laboratory
Seal the sample carefully and label it clearly before sending it to the paint laboratory. For proper sample preparation and paint preservation, double-bag the fragment, add cushioning, and include a completed submission form. Keep labels concise: location, date, and contact.
| Item | Action |
|---|---|
| Packaging | Double-bag, cushion |
| Label | Location, date |
| Form | Completed |
| Care | Store upright, avoid heat |
Photograph the Wall for Accurate Color Matching
Before you remove a sample, photograph the wall in natural, even light so the lab has a visual reference for color, sheen, and surrounding context.
Use photographing techniques that minimize glare and include a neutral card for color accuracy.
Take close and wider shots, and note wall location.
- Close-up with neutral card
- Context shot
- Angled to show sheen
How Lighting Changes Perceived Color and When to Sample
Many factors—time of day, bulb type, and nearby surfaces—can dramatically change how a paint looks, so you should check color under the same lighting it will be seen in and sample when that light is present.
Walk rooms at different times, compare color temperature from natural and artificial light sources, and test small swatches where the final lighting setup exists so you get an accurate match.
How to Tell if Your Wall Has Multiple Paint Layers
If your wall feels uneven or flakes when you scrape it gently, chances are you’re dealing with multiple paint layers rather than a single coat.
You’ll want clear paint layer identification and a simple multi layer analysis. Check these steps:
- Scrape a small area to reveal color bands.
- Sand lightly to see depth differences.
- Use a flashlight to spot sheen changes.
Match Textured or Heavily Finished Surfaces
Matching textured or heavily finished surfaces takes a bit more care than sampling smooth walls, so you’ll want to capture both color and texture when you pull a sample.
Press a patch of texture into a rigid backing, include surrounding finish, and note sheen.
Send a photographed close-up with the physical chip for accurate color blending and to recreate the surface profile.
Match Flat, Eggshell, Satin, and Semi‑Gloss Sheens
You’ll want to recognize the visual and durability differences between flat, eggshell, satin, and semi-gloss so your sample matches the look and function of the original paint.
When taking a sample, cut or scrape a small, intact piece from an inconspicuous spot and keep surface buildup intact to preserve sheen.
Finally, compare finish consistency under the same lighting and, if needed, bring both a small sample and a photo to the paint counter for an accurate match.
Sheen Differences Explained
Because sheen affects how paint reflects light, it changes both the look and the perceived color of a wall—so matching sheen matters as much as matching hue.
You should note sheen types and sheen impact when comparing samples. Choose the finish that matches existing rooms to avoid mismatch.
- Flat for low reflection
- Eggshell for subtle sheen
- Semi‑gloss for durable shine
Sampling Technique Tips
Start by taking small, labeled samples from an inconspicuous spot so you can compare finishes directly.
Test flat, eggshell, satin, and semi‑gloss on the same wall under the same light to see how each reflects and hides texture.
You’ll note how color theory interacts with paint types: record appearance at different angles and times, photograph samples, and label sheen and location to guide matching.
Matching Finish Consistency
When matching finish consistency, focus on how each sheen—flat, eggshell, satin, and semi‑gloss—changes light reflection and texture visibility so you can pick the right look and durability for the area.
You’ll compare finish types and sheen levels to match repairs or samples accurately.
- Inspect surface gloss under natural light.
- Rub a fingertip test on discrete spot.
- Note washability and location requirements.
Deal With Faded or Sun‑Bleached Paint Before Sampling
If sunlight has washed out the color, don’t assume the faded surface reflects the true shade — you’ll need to expose an unfaded area before taking a sample. Gently sand or scrape a hidden spot to reveal original pigment; test there. Handle faded paint and sun bleached surfaces carefully to avoid contamination.
| Step | Action |
|---|---|
| 1 | Find hidden spot |
| 2 | Sand gently |
| 3 | Collect sample |
| 4 | Label immediately |
Avoid Common Color‑Match Mistakes at the Store
Wondering why your carefully collected paint chip still looks off once mixed? Shop lighting effects, finish sheen, and undertones mislead you. Use smart checks to avoid wasted samples.
- Compare chips under store and home lighting to account for lighting effects.
- Confirm sheen matches; gloss shifts perceived color.
- Recall basic color theory: warm or cool undertones change the final match.
Use Color‑Matching Devices and Apps Reliably
Before you scan, make sure your color‑matching device or app is calibrated to a known reference so readings stay consistent.
Hold the device at the recommended angle and use even, natural or neutral lighting to avoid shifts caused by shadows or warm bulbs.
If you’re using an app, apply its built‑in color correction tools and compare results against a physical swatch to confirm accuracy.
Device Calibration Tips
Calibrate your color‑matching device before you take any readings to confirm the results reflect the wall’s true color.
You’ll verify device calibration and improve color accuracy by following simple steps so readings stay consistent.
- Update firmware and app for stable measurements.
- Use the manufacturer calibration tile or routine regularly.
- Store the device in stable temperatures to prevent drift.
Lighting And Angle
Good lighting and the right device angle make the difference between a spot‑on match and a disappointment, so hold your color‑matching tool perpendicular to the wall and work in even, natural light whenever possible.
You’ll minimize shadow effects and glare, improving color perception. Move slowly, avoid oblique angles, block reflected light, and take multiple readings to confirm consistency before trusting a match.
App Color Correction
When you’re using a color‑matching app or device, verify its readings by correcting for white balance, ambient light, and device quirks before trusting a match.
You’ll improve color perception and get a truer hue by calibrating and testing in situ. Use consistent settings, then confirm results on another device or swatch.
- Calibrate white balance
- Control ambient light
- Compare swatch and hue adjustment
How Stores Create Color Matches From Your Sample
Once you bring a paint sample to the store, technicians scan it with a spectrophotometer to capture its precise color profile.
Then they compare that data against their database to formulate a matching recipe you can buy.
You’ll watch them factor color theory and pigment composition, select base paints, and calculate tint dosages.
You can request test pots and slight adjustments before final mixing.
When to Trust a Store Match and When to Order Lab Spectrometry
How do you know whether the store’s spectrophotometer is enough or if you should send a sample for lab spectrometry? You’ll trust a store match for simple, well-lit rooms; choose lab analysis for faded, textured, or multi-coat surfaces.
Consider:
- Single-coat, common paints — store likely OK.
- Faded, metallic, or varnished finishes — order lab analysis.
- Historic or critical matches — prefer lab analysis.
How Much Paint Sample Is Enough for an Accurate Match?
A handful of paint—about a quarter- to half-inch-thick patch measuring roughly 1–2 square inches—usually gives a store spectrophotometer enough material to read consistently; labs prefer slightly more, typically a few square inches at the same thickness to allow multiple tests and cross-checks.
You should cut or scrape smoothly, avoid contamination, and provide extra swatches if possible so sample size supports reliable color accuracy.
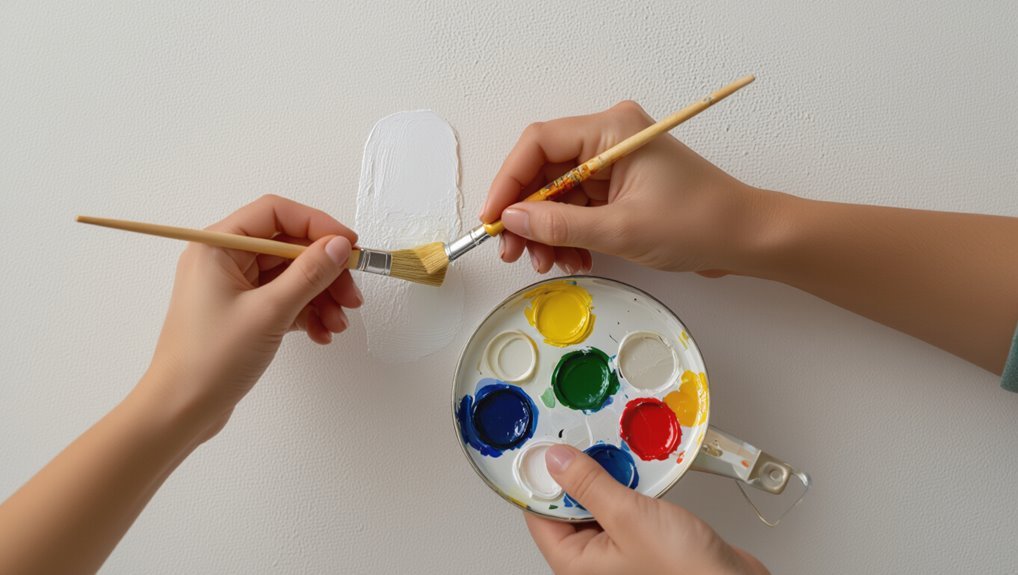
Get a Perfect Touch‑Up Kit From Mixed Paint
When you mix paint for touch-ups, make sure the sheen matches the surrounding wall so the spot blends in under the same light.
Prepare a compact kit with the mixed paint, a small brush or foam applicator, a stir stick, and a labeled container.
Test a tiny, inconspicuous area first so you can adjust sheen or color before finishing the repair.
Match Paint Sheen
Although matching color is important, getting the sheen right is what makes touch-ups virtually disappear.
So ask your paint mixer to create a perfect touch-up kit from the exact mixed paint and the same finish—flat, eggshell, satin, semi-gloss, or gloss—used on your wall. You’ll guarantee sheen types match and maintain finish durability.
- Test small area first.
- Compare dry.
- Note lighting.
Prepare Touch‑Up Kit
Start by asking the paint mixer to pour a small sample of the exact mixed color and finish used on your wall so you’ll have a guaranteed match for future touch-ups.
Build a touch‑up kit with that sample, small brush, mini roller, sandpaper, and clear instructions.
Practice touch up techniques on scrap, note color blending steps, and store labeled, airtight containers for quick repairs.
Test a Mixed Sample on Your Wall Before Buying
Before you buy a full can, try the mixed sample on a few spots of your wall to see how it looks in real light and at different times of day.
Test for color harmony and guarantee sample preservation by labeling and sealing swatches.
Apply small patches, observe morning and evening, then compare in context.
- Corner
- Mid‑wall
- Near window
Blend a Touch‑Up So It Disappears
When you touch up a spot, feather the edges so the new paint thins into the old surface.
Make sure the sheen matches the surrounding finish, because gloss differences show up even with the right color.
Use a stippling motion with a brush or sponge to blend texture and hide brush marks.
Feather The Edges
Although the patched area might look fine up close, you’ll want to feather the edges so the repair blends into the surrounding paint.
Use a soft brush or damp sponge and a light touch, applying thin, overlapping strokes with the feather technique for subtle edge blending.
- Thin coats
- Light strokes
- Blend outward
Match Paint Sheen
Feathering the edges helps the repair blend visually, but sheen differences will still give a touch‑up away—so you need to match the paint’s gloss. Check sheen types (flat, eggshell, satin, semi‑gloss) and test small swatches; sheen impact on light reveals repairs. Match gloss level, let dry, then reassess.
| Sheen | Visibility |
|---|---|
| Flat | Low |
| Eggshell | Moderate |
| Satin | Noticeable |
| Semi‑gloss | High |
Blend With Stippling
If you want the repair to vanish, use stippling to recreate the wall’s texture and break up any smooth paint edges.
You’ll dab lightly, match sheen, and feather outward so the patch merges. Practice the stipple technique on scrap first to get rhythm and pressure right.
Focus on subtle color blending and texture so the touch‑up disappears into the surrounding finish.
- Dab, don’t drag.
- Feather outward.
- Match pressure and pattern.
What to Do When Paint Won’t Match Exactly
When a new paint batch doesn’t match exactly, don’t panic—you can still make the repair blend in.
Use color theory to judge undertones, then feather edges with thin paint application layers. Test small patches, vary pressure and brush strokes, and let each coat dry before evaluating.
If mismatch persists, subtly adjust tint or mix small amounts from two cans until you reach a closer match.
Color‑Correct Faded Walls Before Sampling
Before you take a sample, look closely to assess the fading pattern so you know whether the color has changed uniformly or in patches.
Try a small restoration test in an inconspicuous spot to see how repaired pigment compares. If it helps, blend surrounding paint gradually to match the original tone before sampling.
Assess Fading Pattern
Although sunlight and room layout often cause uneven fading, you can still get an accurate color match by mapping the wall’s fading pattern before you take a sample.
Assess fading effects and check color retention across the surface so you sample representative areas. Follow these steps:
- Photograph bright and shaded zones.
- Measure distance from windows and lights.
- Note furniture placement and exposure time.
Test Small Restoration
Start by testing a small, reversible restoration on an inconspicuous area to see how well you can correct faded paint before you cut a sample.
You’ll evaluate how hue shifts affect perceived mood using color psychology and practical restoration techniques.
Work in natural light, document results, and decide if sampling’s necessary after confirming whether fading can be accurately corrected without sacrificing original finish.
Blend Surrounding Paint
When you notice faded edges or patchy tones, blend the surrounding paint so your sample reflects the wall’s true color rather than the weathered perimeter; match sheen and undertones by feathering in fresh paint with a small brush or sponge, working outward from the area until shifts disappear under natural light.
- Feather gently for color harmony.
- Match sheen to maintain visual balance.
- Recheck under different light.
Remove Stubborn Surface Paint for a Pure Sample (Minimal Stripping)
If the top coat clings stubbornly, you’ll need to remove just enough surface paint to reach the original layer without overstripping the wall.
Use gentle paint removal techniques—light sanding, a plastic scraper, or a solvent swab—testing a small area first.
Focus on surface preparation tips: clean the area, work slowly, and stop when you see the base layer to guarantee a pure, minimal sample.
Document Sample Location, Date, and Notes for Future Use
After you’ve exposed the base layer and collected the minimal sample, mark where you took it and note the date so the sample stays useful later.
After exposing the base layer, mark the sample location and date immediately to preserve its usefulness.
You’ll keep clear sample documentation for future reference by labeling, photographing, and noting conditions. Do this immediately to avoid confusion.
- Label location and date.
- Photograph context and close-up.
- Record lighting, wall orientation, and notes.
Estimate Cost and Turnaround for Lab Matching
Although labs vary, you can expect basic color-matching to cost roughly $20–$60 per sample and take 24–72 hours for standard turnaround, with rush options available for an extra fee. You’ll use cost estimation to budget and compare turnaround times.
| Service | Cost | Time |
|---|---|---|
| Standard | $20–$60 | 24–72 hrs |
| Rush | +fee | 4–12 hrs |
| Premium | $75+ | 1–2 days |
Renters: Get Permission Before Sampling
Because you’re not the property owner, always get written permission before taking paint samples from a rental—verbal OKs can lead to disputes.
You should respect renter rights and secure clear paint consent to avoid claims or deposit issues.
- Ask landlord in writing with photo and sample location.
- Keep dated replies and copies.
- Limit sampling size and repair any holes promptly.
Hire a Pro for Tricky Color‑Matching Jobs
If color matching feels beyond your comfort level, hire a professional who’ll take precise samples, use calibrated equipment, and blend paint to a near-perfect match. You’ll get color consultation, professional expertise, and faster results. Expect accurate swatches, lighting tests, and clean application.
| Service | Benefit | Timeframe |
|---|---|---|
| Sample extraction | No damage | 1–2 hrs |
| Spectrophotometer scan | Exact match | 30 mins |
| Touch-up | Seamless finish | 1–3 hrs |
Store Leftover Matched Paint Safely
Once you’ve got a matched can, store leftover paint so it stays usable for future touch-ups. Seal the lid tightly, label the can with color info and date, and keep it cool and dry to aid sample preservation and proper paint storage.
Once matched, seal the lid tightly, label with color and date, and store the can cool, dry, off concrete.
- Wipe rim, press lid down firmly.
- Label with room and formula.
- Store off concrete, away from heat.
Verify the Final Match After Painting
Now that the paint’s dry, check the match in different light and from several angles to be sure it blends with the surrounding wall.
Inspect for sheen, edge lines, and subtle hue shifts.
Perform a quick color evaluation midday and under artificial light.
If needed, make final adjustments by feathering edges or applying a thin glaze so the patch disappears and the room looks cohesive.
Checklist: Step‑by‑Step Paint‑Sampling Workflow
After you’ve confirmed the final match, gather your tools and follow a clear, step‑by‑step sampling workflow to capture an accurate paint sample without damaging the wall.
Use paint color psychology to note finish and undertone; practice proper wall preparation techniques before cutting.
- Clean, mark, and protect area.
- Cut small sample, seal in bag.
- Label, photograph, and compare under varied light.
Frequently Asked Questions
Can I Use a Paint Sample to Match Baseboard or Trim Colors?
Yes, you can use a paint sample to match baseboard or trim colors; you’ll test for color consistency across lighting and surfaces, account for trim variations like sheen and aging, and adjust with tints or primers as needed.
How Do I Handle Paint Sampling on Vintage or Lead‑Rich Homes Legally?
You should test first: in vintage homes, get professional lead testing before sampling, use licensed abatement or containment procedures, follow local regulations, keep dust minimal, and document results to stay compliant and safe.
Will Humidity or Season Affect the Color Match Outcome?
Yes — humidity and season can change color perception, so you’ll want to control environmental factors during sampling. Don’t rely on daylight alone; stabilize lighting, dry the sample, and compare swatches under consistent, neutral illumination for accurate matches.
Can Wallpaper or Primer Beneath Paint Skew a Lab Match?
Yes — wallpaper or primer beneath paint can skew a lab match. You’ll need to remove layers or provide a sample showing paint layering, since color transparency and underlying tones will alter the measured hue and reflectance.
How Long Should I Wait After Touch‑Up Before Judging the Match?
Wait at least 24–48 hours before judging the match; you’ll account for color drying and allow pigments to settle. Check under different lighting effects and at various times of day to confirm the touch‑up truly blends.
Conclusion
You’ve got this—matching paint is just method and patience. I once scraped a tiny chip from my grandmother’s faded living room wall and the hardware store matched it so well our neighbor joked the new spot was invisible. Studies show DIY matches succeed about 80% when you sample correctly, so follow the safety checks, use the right tools, and test a patch. If unsure, hire a pro; verify before you seal it.