Do Command Strips Peel Paint? Honest Answer Explained
You can use Command Strips without wrecking your paint if you pick the right strip, prep the surface, and remove it slowly per instructions. They bond instantly to clean, stable surfaces but can pull poorly adhered, old, or fresh paint—especially in high humidity or on glossy or powdery finishes. Test a hidden patch, center weight, and stretch the tab straight down when removing. Keep going and you’ll learn which paints, conditions, and techniques cut risk the most.
Do Command Strips Remove Paint?
Wondering if Command strips will pull paint off your wall? You’ll usually avoid damage if you consider Command strip durability and paint adhesion factors first.
Test a hidden spot, remove strips slowly and parallel to the wall, and avoid high humidity or fresh paint.
If paint’s weak or old, adhesive can lift flakes; proceed cautiously and choose alternative hanging methods for fragile finishes.
How Command Strip Adhesive Works
Because Command strips rely on a pressure-sensitive adhesive, they stick by forming a tight bond when you press them to a clean, dry surface.
You’ll notice adhesive properties that conform to texture, creating instant contact. Their bonding strength depends on surface prep and weight limits.
You’ll notice the adhesive molding to surface texture for instant contact; bond strength varies with prep and load.
- Conforms to microscopic surface irregularities
- Resists shear, not permanent chemical cure
- Releases cleanly with proper removal technique
Which Paints Are Most Likely to Peel
If you’ve ever pulled a Command Strip and found paint stuck to it, it’s usually because the paint itself didn’t adhere well to the wall; older, chalky, or loosely bound paints—like faded latex on drywall, poorly cured oil-based paints, or layers applied over dusty or glossy surfaces—are most likely to peel when you remove adhesive strips.
You should check paint types, surface prep, and follow peeling prevention tips to avoid damage.
How Paint Age and Cure Time Affect Risk
When paint hasn’t fully cured or has aged and become brittle, it’s far more likely to lift when you remove a Command Strip. Fresh paint can still be soft and tacky for days to weeks depending on formula and conditions, while old paint can lose adhesion to the substrate and flake away with adhesive pull.
- Check curing effects before applying strips.
- Consider paint aging and time since application.
- Wait longer for low-VOC or latex finishes.
Surface Texture and Command Strips
If your wall is smooth, Command Strips will usually make even contact and pull cleanly when removed.
On textured walls the adhesive can lock into peaks and valleys, increasing the chance of paint lifting.
Consider the texture when choosing strip size and removal technique to reduce damage.
Smooth Vs. Textured Walls
Because surface texture changes how adhesive contacts the wall, smooth and textured finishes behave very differently with Command Strips.
You’ll notice smooth finishes stick cleanly if you do proper wall preparation, while textured walls can lift paint more unpredictably.
Consider surface type before hanging items and test first.
- Use smooth surfaces for best results.
- Clean and dry thoroughly.
- Test a small area first.
Adhesive Grip On Texture
Although texture changes how adhesives bite into a surface, you can still get reliable hold from Command Strips if you match the strip type and prep the area properly. You’ll preserve adhesive longevity and guarantee texture compatibility by cleaning, flatting peaks, and choosing the right strip.
| Surface | Tip |
|---|---|
| Smooth | Use standard strips |
| Orange peel | Use heavy-duty |
| Knockdown | Prep first |
| Popcorn | Avoid |
Humidity, Temperature, and Paint Lift
You should know that humidity weakens the adhesive bond by softening paint and allowing moisture to creep between tape and wall.
Rapid temperature swings can make paint expand and contract, which stresses the adhesive and may lift flakes or whole strips of paint.
Keep both humidity and temperature stable when you plan to use Command Strips to reduce the risk of paint damage.
Humidity’s Effect On Adhesion
When humidity climbs, adhesive strength can drop and paint becomes more likely to lift from the wall.
So you should consider both moisture and temperature before applying Command Strips. You’ll assess humidity levels, temperature fluctuations, and other environmental factors to protect paint quality and adhesive performance.
- Check surface conditions and do proper wall preparation.
- Monitor seasonal changes.
- Avoid high-moisture areas.
Temperature-Induced Paint Lift
Because paint expands and contracts with temperature swings, sudden heat or cold can weaken the bond between paint and drywall and make the surface more prone to lifting under adhesive stress.
You should monitor temperature effects before applying Command Strips, since fluctuating conditions reduce paint adhesion.
If you expect big swings, wait for stable indoor temperatures, test a small area, and use lower-tension mounting options.
Which Command Strip Types and Weights Matter
Although Command Strips share a brand name, their materials and weight ratings vary, so choosing the right type matters for avoiding paint damage.
Although Command Strip types differ in material and weight capacity, selecting the right one prevents paint damage.
You should match Command strip types to wall compatibility and weight capacity, consider adhesive strength, and follow usage tips and removal techniques to minimize risk.
- Light-duty for small frames
- Medium for mirrors or shelves
- Heavy for larger items
How Load, Placement, and Movement Cause Paint Lift
When you ignore weight and load limits, the adhesive can pull against the paint and lift it off the wall.
Placing strips near edges or on uneven surfaces concentrates stress and increases the chance of paint failure.
Any movement—vibration or shifting of the object—puts repeated edge stress on the bond and makes paint peel more likely.
Weight And Load Limits
Even small differences in weight and how you place Command Strips can change whether paint peels off the wall. Exceeding the strip’s load rating, concentrating weight on one side, or allowing the hung object to sway increases peel risk.
You should respect load capacity, check command strip types and weight limits, and match wall compatibility and adhesive strength.
- Ideal placement and installation techniques
- Weight distribution and hanging tips
- Safety precautions
Movement And Edge Stress
Because edges of the adhesive see the most stress, small movements or off-center loads can pry the strip away from the paint and lift the finish, so you should minimize sway and keep weight centered on the pad. Focus on paint stability and proper wall preparation to reduce edge peel.
| Factor | Effect |
|---|---|
| Off-center load | Torque on edge |
| Movement | Adhesive fatigue |
| Poor prep | Reduced bond |
| Heavy sway | Paint lift |
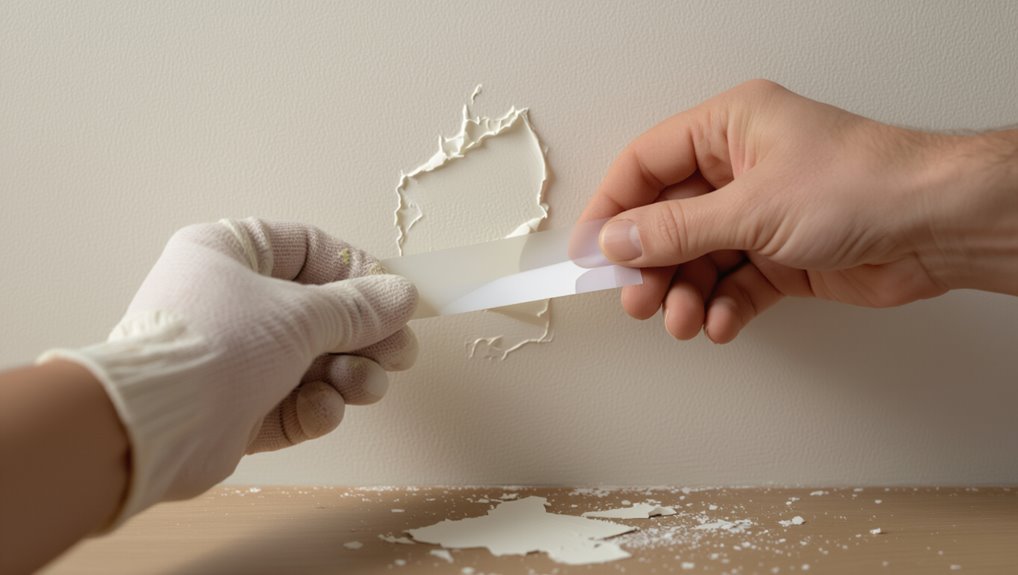
Common Failure Modes: Paint Tear, Paper Pull, Ghosting
Peeling usually shows up in three ways you should watch for: paint tear, paper pull, and ghosting.
- Paint tear: you’ll need better paint maintenance and improved wall preparation to prevent chunks pulling away.
- Paper pull: the paper layer of drywall lifts where adhesion was too strong.
- Ghosting: faint adhesive outlines remain, showing where strips sat without removing surface material.
How to Test a Small Spot First
Before you commit to using Command Strips across a whole room, test a small, inconspicuous spot first so you can see how your wall finish reacts.
Try several test methods: apply a single strip, press for the recommended time, and remove after 24–48 hours.
Compare adhesive samples on similar painted areas, note any lift or residue, and decide before wider use.
Manufacturer Removal Instructions That Reduce Damage
Read the manufacturer’s temperature guidelines before you stick or remove Command Strips, since adhesive performance changes with heat.
When you pull them off, go slow and keep the strip stretched along the wall to minimize paint lift.
If you need help, use the recommended removal tools—like a plastic scraper or floss—for a cleaner, safer pull.
Follow Manufacturer Temperature Guidelines
When you remove Command strips, follow the manufacturer’s temperature guidelines to minimize paint damage; they specify the ideal ambient and adhesive temperatures because the strip’s stretch-and-pull action works best when the adhesive is pliable.
You’ll avoid temperature extremes and help adhesive longevity by prepping conditions.
Consider these steps:
- Check room temperature before removal.
- Warm clips slightly if cold.
- Avoid direct sun or freezing walls.
Remove Adhesive Slowly
After you’ve checked temperatures and warmed the strips if needed, pull the adhesive slowly to reduce paint damage: hold the strip’s tab and stretch it straight down along the wall at a steady, slow rate rather than yanking outward. Use careful removal techniques to preserve adhesive longevity and finish.
| Step | Action |
|---|---|
| 1 | Grip tab |
| 2 | Stretch down |
| 3 | Steady pace |
| 4 | Inspect paint |
| 5 | Clean residue |
Use Proper Removal Tools
Because manufacturers design specific removal tools and steps to minimize stress on paint, you should follow their instructions and use the recommended strip tabs, plastic wedges, or release cards to take Command Strips off cleanly.
Use proper removal techniques for paint preservation and less risk of peeling.
- Follow kit instructions precisely
- Use supplied tabs or plastic wedges
- Stretch tabs slowly along the wall
How to Remove Command Strips Safely
Remove Command Strips slowly and deliberately to minimize damage to paint and wall surfaces.
You should pull the tab straight down, keeping tension low and steady. Use recommended removal techniques and follow safety precautions like supporting the item and working at eye level.
Pull the tab straight down with steady, low tension; support the item and work at eye level for safe removal
If resistance increases, stop and re-evaluate to avoid ripping paint.
Finish by cleaning residue gently with a mild solvent.
Tools and Products to Fix Pulled Paint Quickly
If a Command Strip pulls paint, you’ll want a paint touch-up kit for color-matching small chips and smudges.
Use an adhesion primer first to help new paint stick to the damaged area.
For larger flakes or areas that flex, apply a flexible spackling compound before priming and painting.
Paint Touch-Up Kit
When paint gets pulled from the wall, a compact touch-up kit helps you fix the damage quickly and cleanly.
You’ll want basic paint repair supplies and simple touch up techniques to blend the spot. Keep tools handy so you act fast and neat.
- Small putty knife and spackling
- Matching sample paint and brush
- Fine-grit sandpaper and cloth
Adhesion Primer
Because pulled paint often leaves bare or feathered edges that won’t hold new finish, you’ll want an adhesion primer to create a stable, bondable surface before repainting.
Choose based on primer types—shellac, oil, or acrylic—matching your substrate. Apply thin, even coats, let cure, then sand lightly.
You’ll get adhesion benefits: improved paint hold, reduced staining, and longer-lasting repairs.
Flexible Spackling Compound
A flexible spackling compound gives you a resilient, paintable repair that moves with the wall and resists future cracking where paint pulled away. You’ll want a product labeled “flexible” or “elastic” designed for trim, drywall, or plaster so it bonds well to feathered edges.
You’ll appreciate flexible applications and spackling benefits for quick, durable fixes.
- Apply thin, feathered layers.
- Sand lightly after cure.
- Prime before painting.
Alternatives for Fragile or Old Paint
If your walls have fragile or old paint, don’t risk Command strips—pick mounting methods that reduce stress on the surface.
You should use low-pressure wall mounting like picture ledges, adhesive putty, or freestanding easels to avoid tension.
For small items, try removable hooks with wide bases.
These choices prioritize paint preservation and let you display items without pulling or lifting fragile finishes.
Long-Term Habits to Minimize Paint Risk
When you build simple routines—like removing hanging hardware before repainting, wiping mounting surfaces clean, and rotating display locations—you drastically cut the chance that strips or hooks will pull flaky paint over time.
Use paint maintenance tips and good wall preparation to protect finishes.
- Clean and dry surfaces before applying strips.
- Inspect and replace old adhesive regularly.
- Move items periodically to rest painted areas.
Myths About Command Strips (Debunked)
Think some claims about Command strips are fact? You shouldn’t assume every story is true. You’ll learn that Command Strip Durability varies by weight, surface, and removal technique. Proper use preserves Paint Protection. Myths like “they always peel paint” or “they fail quickly” ignore prep and limits. Check this quick comparison:
| Claim | Reality | Tip |
|---|---|---|
| Always peel paint | False | Clean surface |
| Fail quickly | Sometimes | Match weight |
| Safe anywhere | Not always | Test first |
Quick Checklist: Should You Use Command Strips?
You’ve seen which Command Strip claims are myths and which depend on proper use, so now check whether they’re right for your project.
Decide by weight, surface type, and finish—think about Command strip alternatives if risky, and follow basic Wall mounting tips to avoid damage.
- Match weight to strip rating.
- Test on hidden spot.
- Clean surface and wait before mounting.
Additional Resources and Repairs Guide
If you run into peeling, residue, or stubborn marks after using Command Strips, this section points you to quick fixes, detailed tutorials, and products that actually work so you can restore your walls without guessing.
You’ll find step-by-step repair techniques for adhesive removal, patching, and repainting, plus tips on paint preservation, recommended tools, and links to reliable video guides to streamline your repairs.
Frequently Asked Questions
Can Command Strips Damage Wallpaper Instead of Paint?
Yes — they can damage wallpaper if its wallpaper adhesion is weak; you’ll risk torn paper or adhesive residue during strip removal. Test a small hidden area first, and pull slowly along the wall to reduce harm.
Will Command Strips Leave Residue on Textured Plaster?
Yes — they can leave tiny bits on textured surfaces, like stubborn glitter from a party you didn’t plan for. You’ll want removal tips: pull slowly, heat adhesive, or use rubbing alcohol to lift remaining residue carefully.
Can Command Strips Affect Exterior Paint in Sunlight?
Yes — they can. You’ll find Command strip longevity shortens with UV; sun exposure effects weaken adhesive, risking bond failure and possible paint lifting on aged or poorly cured exterior finishes, so remove cautiously and test first.
Are Command Strips Safe on Painted Metal Surfaces?
Yes — you can use Command Strips on painted metal, but you’ll want to test a small area first, verify the paint’s fully cured, clean the surface, and avoid heavy loads or prolonged sun exposure that might weaken adhesion.
Do Command Strips Damage Cabinets or Painted Trim?
Yes — they can, but usually won’t if you’re careful. If your cabinet finishes are durable and you match adhesive strength to the load, you’ll avoid damage; however, weak paint or high bond strips may peel trim.
Conclusion
So, yes — those miracle Command Strips can be both hero and villain. You’ll love how they spare your walls from nails, then curse them if a stubborn patch of paint comes off. Ironically, the fix is usually a tiny dab of elbow grease and touch-up paint — the very thing you were avoiding. Use them wisely: clean, cured surfaces and gentle removal, and you’ll keep both frames and pride intact.