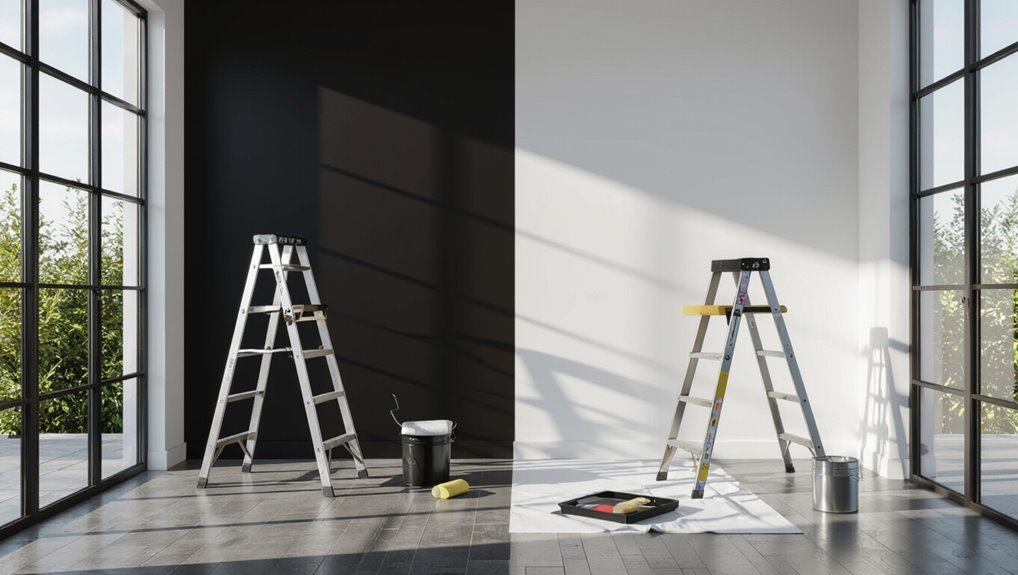
How to Paint a Black Wall White for Perfect Coverage
You can turn a black wall white with reliable results by prepping, priming, and applying thin, even coats. Clean and patch the surface, sand if needed, then use a high-hide primer to block the dark pigment. Cut in with an angled brush, roll in overlapping W patterns, and keep a wet edge to avoid lap marks. Wait recommended dry times, add a second thin top coat, and you’ll have uniform coverage—keep going for tips on troubleshooting and finishing.
What You’ll Achieve When You Paint a Black Wall White
Switching a black wall to white will instantly brighten the room and make it feel larger, fresher, and more open.
You’ll notice improved light reflection, cleaner wall aesthetics, and a calmer mood thanks to color psychology.
The space becomes a neutral backdrop that highlights furniture and art, simplifies styling, and increases perceived square footage without changing layout or decor.
Quick Plan: Coats, Time, and Cost Estimates
You’ll typically need two coats to fully cover a dark wall, with a primer sometimes replacing the first coat.
Expect a half- to full-day per room for prep, painting, and touch-ups depending on size and drying times.
Budget roughly $30–$100 in materials per average room, plus any labor if you’re hiring help.
Number Of Coats
When deciding how many coats to apply, consider the wall’s current color, the paint’s opacity, and your coverage goals—most projects need two coats for full, even coverage.
Though a high-quality primer plus one coat of white paint can suffice on a neutral or pre-primed surface. You’ll weigh coats importance and coat thickness; choose based on opacity and finish.
- Primer first
- Two top coats
- Thin even coats
- Touch-up as needed
Time Breakdown
Plan on about a half-day to a full day per coat for an average room, depending on prep and drying times; factor in primer drying (1–4 hours), each white top coat (2–4 hours to apply and tack-dry), and overnight curing if you want to move furniture back quickly.
For time management, map a clear project timeline: prep, primer, coats, touch-ups, and final cure so you stay efficient.
Cost Estimate Per Room
A quick cost estimate for an average room helps you budget materials, time, and any hired help so there are no day‑of surprises.
You’ll do a cost comparison and simple budget planning to decide costs and labor.
Estimate per room:
- Primer and paint (2 coats)
- Brushes, rollers, tape
- Labor hours (or DIY time)
- Cleanup and incidentals
Tools and Materials You Need for Full Coverage
To get full, even coverage you’ll need the right tools, from brushes and rollers to trays and extension poles.
Pick the correct primer and paint—latex or oil-based, stain-blocking or bonded—based on your wall and finish goals.
Don’t forget surface prep supplies like sandpaper, filler, tack cloths, and good-quality masking tape.
Essential Painting Tools
1 set of reliable tools will make painting your wall white faster and give you a professional-looking finish.
Gather painting supplies and essential tools so you work efficiently and avoid mistakes. Bring quality items and replace worn gear.
- High-density roller and tray
- 2–3 angled brushes (cutting in)
- Painter’s tape and drop cloths
- Extension pole and sanding block
Primer And Paint Types
Primer choice and paint type make the difference between a streaky, patchy job and a smooth, durable white finish.
You’ll pick between primer types: high-hide bonding primers for black-to-white coverage or oil-based primers for stubborn stains.
Choose paint finishes based on room use—eggshell or satin for walls, semi-gloss for trim.
Use quality products to reduce coats and achieve even, lasting coverage.
Surface Preparation Supplies
Before you start painting, gather the right tools and materials so surface prep doesn’t slow you down or ruin the finish. You’ll need items that guarantee thorough surface cleaning and promote paint adhesion.
Verify quality and compatibility before use.
- Trisodium phosphate or mild cleaner
- Sandpaper (120–220 grit) and sanding block
- High-quality primer and brush/roller
- Caulk, putty knife, and patching compound
How to Inspect the Wall and Identify the Existing Paint
Start by giving the wall a close visual and tactile inspection to spot issues that will affect adhesion and finish—look for peeling, chalking, mildew, glossy or satin areas, and uneven texture.
Run your hand over the surface to feel for bumps, loose paint, or soft spots. Note paint types and wall texture, test adhesion with tape, and mark repairs needed before priming.
Clean and Degloss the Surface Before Repairs
You’ll want to remove dirt, grease, and loose particles so new paint can stick properly; wash the wall with a mild detergent solution, rinse well, and let it dry fully.
Then focus on surface cleaning and gloss removal before repairs.
Steps:
- Test a small area
- Use deglosser or sandpaper
- Wipe residue with a damp cloth
- Allow thorough drying
Repair Holes, Cracks, and Uneven Texture
Start by evaluating the extent of damage so you know what tools and materials you’ll need.
Patch holes promptly with spackling or joint compound, and let repairs dry fully before sanding.
Smooth any uneven texture so the white paint goes on consistently and hides flaws.
Assess Damage Extent
Walk the wall slowly and note every hole, crack, and uneven patch so you can prioritize repairs before priming or painting.
You’ll do a quick damage assessment and wall inspection to decide materials and effort. Check size, depth, texture variance, and moisture.
- tiny nail holes
- hairline cracks
- larger gouges
- textured/skim areas
Patch Holes Quickly
Gather your patching kit and tackle holes, cracks, and uneven texture methodically so the wall’s surface reads as one before primer goes on.
Use suitable patching techniques: clean edges, apply lightweight filler in thin layers, and score larger holes with mesh.
Sand between coats, wipe dust, and choose quick drying compounds to speed progress.
Inspect for gaps, then prime patched areas before painting.
Smooth Uneven Texture
Fix uneven texture by targeting low and high spots so the wall reads flat under primer. You’ll do texture smoothing and precise wall preparation: remove loose paint, fill holes, sand changes, and feather edges.
Follow this quick checklist:
- scrape flaking areas
- apply lightweight filler
- sand smooth with fine grit
- wipe dust before priming
These steps guarantee an even surface for white paint.
Choose a Primer That Blocks Dark Pigment
Start by picking a primer formulated to block stains and heavy pigments so you won’t need multiple coats of white paint to cover the old color.
Choose a high-hide, stain-blocking primer designed for dark pigment—oil-based or high-quality shellac and shellac-variant waterborne options work.
Test one coat for coverage, then spot-prime as needed before applying your white topcoat.
Best White Paint Types and Sheens for Hiding Black
Once you’ve sealed the dark pigment with a high-hide primer, pick a white paint that’s formulated to cover heavy colors—these are typically labeled “high-hide” or “hide” formulas and use higher pigment loads and opacity.
Choose among white paint options and follow sheen recommendations to balance hide and washability:
- Flat for maximum hide
- Eggshell for low sheen, easy touch-ups
- Satin for durability
- Semi-gloss for trim
Protect Trim, Floors, and Furniture Before You Paint
Before you start rolling, cover baseboards thoroughly with painter’s tape or a thin drop cloth so you don’t get white paint on the trim.
Protect floors completely with a larger drop cloth or rosin paper taped at the edges to catch drips and spills.
Move furniture out of the room or shield pieces with plastic and tape to keep them clean while you work.
Cover Baseboards Thoroughly
Cover your baseboards completely so paint splatters and drips don’t ruin trim, floors, or nearby furniture—use painter’s tape along the top edge, lay down a continuous drop cloth or plastic sheeting against the wall, and tuck or weigh it down at the floor to prevent gaps.
Follow baseboard preparation and painting techniques:
- Clean and sand trim
- Apply quality painter’s tape
- Seal tape edges with a putty knife
- Remove tape while paint’s tacky to avoid chips
Protect Floors Completely
Now that your baseboards are taped and prepped, protect the floors and nearby furniture to keep paint off surfaces you want to stay clean.
Lay heavy canvas or plastic drop cloths flat, overlap seams, and secure edges with painter’s tape.
Use cardboard or rosin paper in high-traffic zones for extra floor protection.
Keep a damp rag handy for quick drips and smudges.
Move Or Shield Furniture
Move as much furniture out of the room as you can, and for pieces that stay, pull them away from the walls and wrap them in plastic sheeting or old sheets to block dust and stray paint.
Use smart furniture placement and sturdy protective coverings. Consider:
- Moveable pieces to center
- Heavy items wrapped and taped
- Protect trim with painter’s tape
- Cover floors with drop cloths
Priming Tips for Brush, Roller, and Sprayer
Start by choosing the right primer and application method for your surface and tool—brushes work best for trim and tight spots, rollers handle large flat areas quickly, and sprayers give the most even coverage on textured surfaces.
For primer application, use proper brush techniques for edges, exploit roller advantages for speed and texture, and rely on sprayer efficiency for uniform coats.
Clean tools thoroughly afterward.
Painting Technique: Cutting In, Rolling Patterns, and Avoiding Lap Marks
Cut a clean edge by painting a 2–3 inch strip along trim and corners with a steady, angled brush before you roll, keeping a wet band you can blend into so the roller won’t show lap marks; use consistent pressure and overlap.
Cut a 2–3 inch wet band along trim with a steady angled brush, then roll and blend to avoid lap marks.
Use cutting techniques and rolling strategies to maintain even sheen.
- Work top to bottom
- Keep a wet edge
- Use W or N roll
- Light, even passes
When to Apply a Second Coat and How to Check Coverage
Once your first pass is dry to the touch and you’ve checked for lap marks and uneven sheen, decide whether a second coat is needed by inspecting coverage in good light; hold a flashlight at a low angle to reveal thin spots, streaks, or the old color showing through.
For second coat timing, wait manufacturer-recommended dry time, then perform coverage testing across the wall and touch up thin areas.
Fix Common Problems: Bleed-Through, Streaks, and Seams
Don’t panic if you spot discoloration, streaks, or visible seams—these issues have straightforward fixes.
Don’t worry—discoloration, streaks, or seams are fixable with simple, targeted prep and touch-ups.
You can correct them quickly with targeted steps:
- Prime problem areas for bleed through solutions before repainting.
- Sand seams lightly, dust, then repaint.
- Use even brush or roller strokes for streak prevention.
- Apply thin, overlapping coats and inspect under good light to verify uniformity.
Time- and Cost-Saving Tips Plus Maintenance and Touch-Ups
Saving time and money on a white paint job comes down to smart prep, the right tools, and routine touch-ups that stop small issues from becoming big repairs.
You’ll save by priming thoroughly, using high-quality rollers, and batching rooms.
Follow simple maintenance tips: clean smudges, fix chips promptly with matching paint, and learn basic touch up techniques for seamless blends to avoid repainting.
Frequently Asked Questions
Can I Paint Over Black Wallpaper Instead of Removing It?
Yes, you can paint over black wallpaper, but you shouldn’t skip wallpaper removal if it’s loose; you’ll prime properly to improve paint adhesion, use a high-build primer or lining paper, and guarantee seams are secure for best results.
Will Painting a Black Wall White Affect Room Temperature or Light?
Yes—you’ll notice brighter rooms as white boosts light reflection, while darker walls increase heat absorption. Think of walls as mirrors and ovens; swapping black for white shifts mood, making spaces feel cooler and more luminous.
How Long Before I Can Hang Pictures on the Newly Painted White Wall?
You can hang pictures after paint’s fully cured—typically 7 days—though paint’s dry-to-touch in a few hours; follow proper surface preparation, wait recommended curing time, and use appropriate anchors so frames stay secure and finish isn’t damaged.
Is Odor From Primers or Paints Harmful to Pets or Plants?
Worried about fumes? You shouldn’t ignore paint safety: keep pets out, use low-VOC primers/paints, move sensitive plants away, ventilate rooms well, and follow pet precautions and plant care for days until odors fully dissipate.
Can I Use Leftover White Paint From Another Room for This Project?
You can, but you’ll check paint quality first; leftover white may differ in sheen or base. If tinting’s needed, avoid random color mixing—test a sample coat and use a proper primer for uniform coverage and adhesion.
Conclusion
So you tackled turning a black wall white — bold move. You’ll get perfect coverage if you prep, prime, and layer patiently, though it’s funny how the simplest projects demand the most fuss. Expect a few touch-ups, some careful cutting-in, and a humbled realization that primer is your new best friend. In the end, the room brightens, you learn patience, and you quietly gain respect for paint — and for every wall that once looked “easy.”