How to Fix Paint Runs on Wall for a Smooth Finish
You can fix paint runs quickly by evaluating whether they’re cosmetic or structural, then sanding shallow runs smooth or scraping raised drips and sags, filling low spots with spackle, feathering edges, priming the repaired area, and repainting with thin, even coats while keeping a light brush or roller load; protect surroundings, wear a dust mask, and allow full drying between steps to avoid repeat issues — keep going to learn detailed techniques and troubleshooting.
Quick Fix: Repair Paint Runs in Three Simple Steps
If you spot a paint run, don’t panic—you can fix it quickly with just a few tools.
First, sand the run smooth once dry, matching the surrounding paint finish types.
Second, wipe clean and prime any exposed substrate.
Third, apply thin, even coats to avoid future paint run causes.
Let each coat dry fully for a seamless repair.
What This Guide Covers and Who It’s For
This guide helps you whether you’re a DIY beginner or have some painting experience, and it points out the basic tools you’ll need.
You’ll get a clear scope of what fixes are covered—minor runs, sanding, priming, and repainting—and what situations are best left to pros.
Who This Guide Helps
When you’ve noticed unsightly paint runs or want to prevent them on future projects, this guide walks you through practical fixes and prevention tips for homeowners, renters, DIYers, and small-time contractors.
You’ll find clear steps aimed at DIY Enthusiasts and a concise Homeowners Guide approach so you can quickly assess runs, choose solutions, and restore smooth walls without guessing or unnecessary complexity.
Skill And Tool Needs
Now that you know who benefits from these fixes, let’s look at what you’ll need in skill and tools to get the job done.
You’ll need basic painting techniques knowledge, steady hands for sanding and feathering, and familiarity with wall preparation.
Essential tools: sandpaper, putty knife, mild filler, primer, quality brush or roller, and a clean cloth.
Practice guarantees consistent results.
Scope And Outcomes
Because paint runs can happen from small touch-ups to full-room repaints, you’ll get clear, step-by-step fixes here that suit beginners through confident DIYers.
This guide covers diagnosing run types, sanding and feathering, priming, and repainting for a smooth finish.
You’ll learn paint run prevention tips and practical repair techniques, plus expected time, materials, and outcomes so you can plan and succeed.
How to Tell a Paint Run From a Drip or Sag
Although paint runs, drips, and sags all look like unwanted streaks, you can tell them apart by their shape, location, and how the paint settled. For clear paint run identification, inspect edges: a run vs. drip shows elongated trails; drips are rounded blobs; sags form broad, shallow waves. Use the quick reference below.
| Feature | What to look for |
|---|---|
| Shape | Elongated vs rounded |
| Location | Vertical trail vs pooled |
| Edge | Tapered vs bulbous |
| Texture | Thick ridge vs thin sheen |
Quick Severity Check: Is the Run Cosmetic or Structural?
You’ll first decide whether the run is just a visual blemish or a sign of surface damage by looking for texture changes, peeling, or soft spots.
Runny paint that only affects sheen and can be smoothed is cosmetic, but cracks, bubbling, or paint that flakes off point to underlying issues.
Use a fingernail or a gentle scrape to check firmness and inspect nearby joints for signs of movement.
Visual Vs. Surface Damage
When you’re evaluating a paint run, start by checking whether the issue is purely visual or actually affects the wall’s surface—cosmetic runs sit on top of the paint film and can be sanded and recoated, while structural problems like bubbling, cracking, or paint that pulls away signal adhesion or moisture issues that need fixing first. Use visual assessment and surface evaluation to decide next steps.
| Type | Look | Action |
|---|---|---|
| Cosmetic | Glossy buildup | Sand, prime, repaint |
| Surface stain | Discoloration | Clean, test adhesion |
| Suspect | Soft/peeling | Investigate moisture |
Quick Structural Indicators
If a paint run looks suspicious, start with a quick hands-on check to tell whether it’s just cosmetic or a sign of deeper damage: press gently around the run, probe for softness, and tap for hollow sound.
If the substrate feels solid and surface cohesion holds, it’s cosmetic.
If you find crumbling, moisture, or compromised structural integrity, address the underlying issue before repainting.
Decide: Sand, Scrape, or Repaint – Easy Criteria
Because paint runs vary in size, adhesion, and location, deciding whether to sand, scrape, or repaint comes down to three quick checks: how deep the run is, whether the surrounding paint is firmly stuck, and how visible the flaw will be after repair.
If shallow and smoothable, use sanding techniques; if raised or loose, apply scraping methods; if extensive or obvious, plan to repaint.
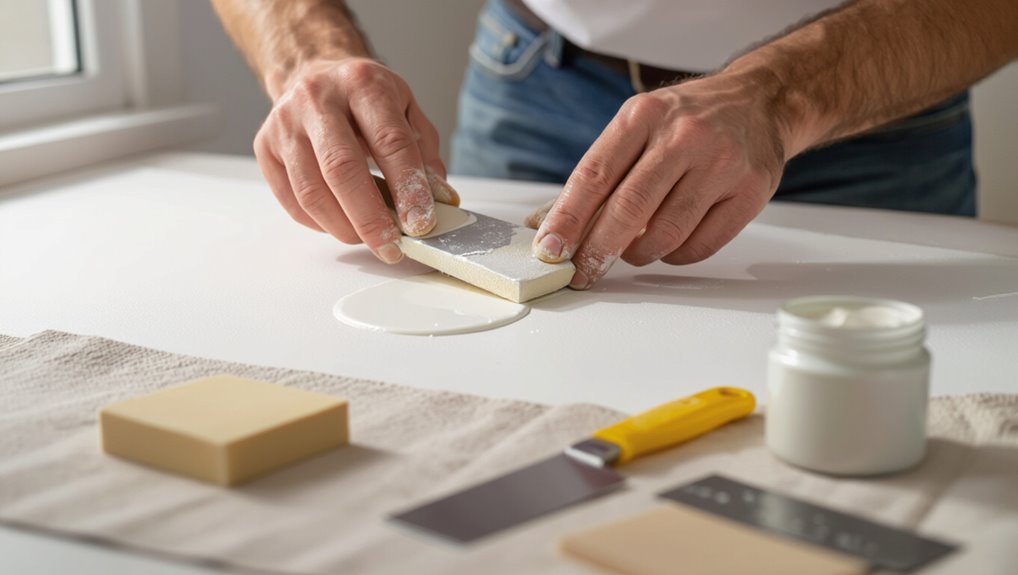
Tools You Need to Fix Paint Runs
You’ll need a handful of basic tools to remove runs cleanly and restore a smooth finish: a sanding block (or assorted sandpaper grits), a flexible putty knife or paint scraper, a lightweight filler or spackling compound, tack cloths or a vacuum, and quality painter’s tape and drop cloths to protect surrounding surfaces.
Use:
- Sanding for contouring
- Scraping for stubborn runs
- Filling for seamless repair
Follow these wall finish tips and paint run prevention habits to keep results professional.
Materials Checklist Before You Start Repairing Paint Runs
Before you start sanding or scraping, gather the essential materials so the repair goes quickly and cleanly: sandpaper (various grits), putty/patching compound, primer, matching paint, brushes/rollers, and a damp cloth. Consider paint types and wall textures to choose compatible primer and finish.
| Item | Purpose | Notes |
|---|---|---|
| Sandpaper | Smooth runs | Assorted grits |
| Putty | Fill dents | Fast-dry |
| Primer | Seal patch | Tint if needed |
Safety and Prep: Protect Floors, Trim, and Yourself
Safety first: cover floors and furniture with drop cloths or plastic sheeting and tape edges securely so dust and paint don’t spread. Mask trim and outlets with painter’s tape, and wear gloves, safety glasses, and a dust mask while sanding or scraping to protect yourself from particles and chemical exposure.
Protect work areas and maintain workspace organization:
- floor protection for spills and debris
- trim safeguarding to avoid damage
- personal safety: PPE and tidy tools
When to Wait: Drying Times Before You Touch a Run
When you spot a paint run, don’t rush to touch it—let the paint dry enough to firm up so you can remove or sand it without smearing or digging in.
Check paint type and label for recommended drying times, and monitor room temperature and moisture levels.
Wait longer in high humidity or cool conditions; touch only when the surface feels tack-free and resists light pressure.
Wet Sanding: Flatten Tiny Runs With a Damp Cloth
Before you wet sand, make sure you’ve prepped the area by cleaning and lightly scuffing the paint so the cloth won’t drag.
Use a soft, damp cloth and gently rub the raised run in one direction to flatten it without removing surrounding paint.
Feather the edges carefully so the repair blends smoothly before you touch up or repaint.
Prep Surface First
Start by softening the run so you can smooth it without removing surrounding paint: dampen a clean, lint-free cloth or fine-grit sanding sponge and gently rub the raised edge in a circular motion until the excess paint levels with the wall.
Before you begin, do surface cleaning and a quick wall inspection.
- Remove dust
- Mark stubborn runs
- Protect nearby trim
Use Damp Cloth
If a run is small and the paint’s still slightly tacky, dampen a clean, lint‑free cloth and gently rub the raised edge in a circular motion until the excess levels with the surrounding paint.
Use light pressure, keep the cloth just damp, and change sides to avoid dragging.
These damp cloth techniques are simple cleaning methods to flatten tiny runs without abrading adjacent finish.
Feather Edge Carefully
When a small run has just a raised lip, you can feather the edge carefully by wet sanding with a damp cloth to blend the excess into the surrounding paint; keep the cloth barely moist and work gently in light, circular strokes so you remove only the high spot without scuffing the finish.
You’ll use a precise feathering technique for subtle blending edges.
- Work light, slow
- Check progress often
- Dry and inspect before touch-up
Sanding Medium Runs: Step‑By‑Step
Before you sand a medium run, make sure the area is fully dry and clean so you don’t trap moisture or dust under fresh paint. You’ll use gentle sanding techniques and proper surface preparation: sand the high edge, smooth transitions, wipe dust, apply primer where needed, then repaint. Stay patient; small strokes yield a seamless repair.
| Hope | Relief |
|---|---|
| Tension | Calm |
| Frustration | Pride |
| Mess | Order |
| Worry | Confidence |
Which Sandpaper Grits to Use at Each Stage
Start with a coarse grit to quickly knock down the raised paint run without gouging the wall.
Then switch to a medium grit to smooth the area and blend edges into the surrounding surface.
Finish with a fine grit to feather the repair and prepare it for priming and repainting.
Start With Coarse Grits
Grab a coarse grit to remove the bulk of the paint run quickly and level the surface — typically begin with 60–80 grit for heavy runs, move to 100–120 grit for medium imperfections, and finish the shaping with 150–180 grit before switching to fine grits for smoothing.
Use coarse grits and proper sanding techniques, then:
- Remove high ridges first
- Keep even pressure
- Check progress often
Smooth With Medium Grits
Move to medium grits to refine the shape and remove coarse scratches left by the heavier paper; use 120–150 grit to blend the 60–100 grit cuts.
Then follow with 180–220 grit to even the surface before fine sanding. You’ll use consistent sanding techniques, light pressure, and overlapping strokes.
Proper grit selection prevents gouges and readies the wall for the final smoothing step.
Finish With Fine Grits
Finish with fine grits to erase the last visible scratches and create a silky, paint-ready surface: use 240–320 grit to smooth the 180–220 grit scratches. Then go over problem spots with 400–600 grit for a near-polished finish before wiping with a damp cloth.
Keep light pressure, consistent strokes, and a clean sanding block to avoid reintroducing marks.
- Choose grits by task: progression matters
- Practice consistent sanding techniques
- Inspect frequently, adjust grit selection
Using a Scraper or Putty Knife on Thick Runs
When a paint run has built up into a thick ridge, scrape it down carefully with a flexible putty knife or a paint scraper so you can level the surface without gouging the drywall or wood underneath.
Use gentle scraper techniques, holding the putty knife nearly flat and working from the thin edge of the run.
Remove flakes, wipe dust, and lightly sand for a smooth finish.
When to Apply a Skim Coat or Spackle
Check the damage to decide how deep the runs go and whether the surface is uneven.
If the flaws are widespread or the texture’s been ruined, you’ll want to apply a skim coat for a smooth, uniform finish.
For small, localized runs or shallow gouges, spackle is usually the quicker, cleaner fix.
Assess Damage Severity
Before you decide on a skim coat or spackle, take a close look at the run and the surrounding surface to gauge depth, width, and texture.
You’ll assess damage types and pick repair techniques accordingly.
Consider:
- Shallow, narrow runs: easy fill, light sanding.
- Deep gouges: more material, layered repair.
- Textured areas: match profile, feather edges.
Choose Skim Coat
Decide on a skim coat when the run has left an uneven surface that sanding and spot-filling can’t hide.
You’ll prep by cleaning and sanding the area, then choose skim coat techniques suited to wall texture and depth.
Apply thin, even layers with a broad knife, following application tips for drying times and feathering edges so the repair blends seamlessly before priming and repainting.
Opt For Spackle
Reach for spackle when the paint run is shallow, narrow, and the surface remains mostly smooth—it’s quicker to apply than a skim coat and hides minor dips and pinholes effectively.
You’ll use simple spackle techniques for quick repairs and choose spackle applications based on depth.
- Feather thin for invisible edges
- Sand between layers for smoothness
- Prime before repainting to seal spots
How to Sand and Smooth a Skim Coat
Start by letting the skim coat cure fully, then inspect the surface for high spots, ridges, and trowel marks you’ll need to remove.
Use progressive sanding techniques: begin with 120–150 grit to level, then 180–220 grit to refine. Sand lightly in overlapping strokes, keep a flat block or pole sander, vacuum dust, and wipe with a damp cloth before priming to guarantee an even finish.
Feather Edges to Blend Repairs Seamlessly
Feather the repair edges by tapering the joint compound thinly out from the patch so it blends into the surrounding wall; you’ll work from the center outward with a wide knife, gradually thinning each pass until the repair disappears into the existing surface.
Use feathering techniques and test blending colors so shifts stay invisible.
- Thin, continuous passes
- Match texture
- Light touch sanding
How to Prime Repaired Areas for Even Coverage
Before priming, you’ll clean, sand, and wipe the repaired area so the primer bonds evenly.
Choose a primer formulated for your wall type and the repair—stain-blocking for discoloration, bonding primer for glossy surfaces.
Apply a thin, even coat and let it dry fully before repainting.
Surface Preparation Steps
Once you’ve sanded and cleaned the patched area, apply a primer that matches the wall type—latex for latex paint, oil-based or shellac for stubborn stains or knotty wood—so your repair blends seamlessly with the surrounding finish.
You should follow surface cleaning and wall inspection, consider paint selection and texture assessment, and control moisture and temperature for proper primer application and drying conditions.
- Clean thoroughly
- Check texture
- Monitor humidity
Selecting Right Primer
When you’re priming repaired areas for even coverage, choose a primer that matches both the original paint type and the repair’s substrate so the patch won’t show through or repel finish coats.
You’ll select between oil, latex, and shellac primer types based on adhesion and stain blocking. Apply thin, even coats; let dry fully.
Primer benefits include uniform sheen, improved topcoat adhesion, and color consistency.
Match Paint Sheen and Color for Invisible Touch‑Ups
If you want your touch‑ups to vanish, match both the paint color and the sheen exactly—different finishes reflect light differently, so even a perfect color match can stand out if the gloss level is off.
You’ll use color matching and careful sheen selection before you paint. Consider:
- Test small swatches in real light
- Use same brand and batch
- Match sheen, not just color
Feather New Paint to Blend With the Old Finish
When you feather new paint, use light, overlapping strokes to thin the edge and avoid a hard line.
Focus on blending the edges so the repair disappears into the surrounding finish.
Match the wall’s texture—stippling or rolling as needed—so the patch reads like the rest of the surface.
Feathering Technique Basics
Start by lightly dragging a barely loaded brush or roller tip over the wet edge to soften the changeover between the new paint and the existing finish.
You’ll use feathering techniques to taper paint, avoid ridges, and control sheen while blending edges.
Practice these steps:
- Light, consistent strokes
- Reduce paint load frequently
- Cross-hatch gently to merge tones
Blend Edges Seamlessly
Although the new paint still looks wet, feather the edge by dragging a barely loaded brush or roller lightly outward from the fresh stroke to blend it into the existing finish.
You’ll use edge blending techniques that soften shifts; work quickly, keep light pressure, and overlap thinly.
These seamless repair methods prevent hard lines and help the touched area disappear into the surrounding coat.
Match Paint Texture
Once you’ve feathered the edge, focus on matching the wall’s texture so the repair disappears.
You’ll tweak paint consistency and application to mirror the original finish. Test on scrap paper, adjust thickness, and replicate strokes.
Don’t overwork the area; let it dry and reassess.
- Match spray, stipple, or brush patterns
- Adjust paint consistency for blend
- Work light, build thin layers
Best Brushes and Rollers for Seamless Touch‑Ups
Choosing the right brush or roller makes touch-ups look professional instead of patched, so pick tools that match your paint type and the wall’s texture.
You’ll want premium quality brushes with appropriate brush shapes for edges and mini rollers among roller types for flat areas.
Match material compatibility to paint finishes and use precise application techniques so repairs blend seamlessly with surrounding finish.
Thin Paint Correctly to Avoid Future Runs
After you’ve picked the right brushes and rollers, make sure your paint’s viscosity won’t cause runs.
Thin paint only as needed, following label ratios, and test a sample. Adjust for your application techniques to keep even coverage.
Thin paint sparingly—follow label ratios, test a sample, and tweak thinning for even coverage.
Consider:
- Add small amounts of thinner progressively
- Stir thoroughly between additions
- Test flow and recoil on a scrap surface before starting
How Temperature and Humidity Affect Drying Times
Because paint dries through chemical evaporation and film formation, temperature and humidity directly change how fast that happens and how the finish looks.
You’ll notice temperature effects: cold slows curing, warm speeds evaporation but can cause blushing or skinning.
Humidity impacts drying by trapping moisture, prolonging tackiness and promoting runs or sagging.
Control ventilation and timing to get an even finish.
Adjusting Technique: Latex vs. Oil‑Based Paint
When you’re fixing runs, you’ll use different brush strokes for latex versus oil-based paint because latex levels out faster while oil holds brush marks longer.
With latex, work quickly and use lighter, sweeping strokes to avoid reworking the area; with oil, you can feather more slowly but must watch for sagging.
Time your touch-ups around each paint’s drying window so you don’t create new runs.
Brush Stroke Differences
Although both latex and oil‑based paints aim to give you a smooth finish, they behave differently under the brush, so you’ll need to adjust your stroke speed, pressure, and overlap accordingly.
You’ll refine brush technique and edge blending to prevent runs. Apply these practical tips:
- Use lighter pressure with latex to avoid tracks.
- Slow, deliberate strokes for oil to level.
- Overlap minimally, feather edges.
Drying Time Management
Since drying times differ a lot between latex and oil‑based paints, you’ll need to adapt your timing and technique to prevent runs and lap marks.
For latex, work faster, apply thinner coats, and use fans to accelerate drying techniques.
For oil‑based, allow longer flash and cure times, avoid rebrushing, and maintain ideal conditions—moderate temperature and humidity—to guarantee smooth blending and fewer touchups.
Cutting‑In Tips to Avoid Runs at Edges and Corners
1 simple trick will save you a lot of cleanup: load your brush with a thin, even amount of paint and tap off the excess before you cut in at edges and corners.
Use steady strokes, feather for edge blending, and practice corner techniques.
- Control pressure
- Keep a wet edge
- Remove drips immediately
Apply Multiple Thin Coats Instead of One Heavy Coat
Before you paint, make sure the wall is clean, sanded, and primed so each coat adheres properly.
Apply thin, even coats with a loaded brush or roller rather than one heavy swipe to prevent runs.
Let each coat fully dry before the next to build smooth, durable coverage.
Prep Surface Properly
Start with thin, even layers instead of trying to cover everything in one heavy pass; multiple light coats dry faster, level better, and cut down on runs and drips.
Before painting, prep surface properly: clean, sand, and repair based on surface materials and wall textures so coats adhere.
- Remove dust and grease
- Fill dents and sand smooth
- Prime porous areas
Use Thin, Even Coats
Apply several thin, even coats rather than one heavy pass to prevent runs and get a smoother finish.
You should check paint consistency, thin if needed, and use proper application techniques like light, overlapping strokes with a loaded brush or roller.
Let each coat level briefly before adding the next so you build coverage without sagging, maintaining control and an even surface.
Allow Full Drying
Once you’ve built coverage with thin, even coats, let each layer dry completely before adding the next so paint can cure and bonds can set without trapping moisture.
You’ll control drying conditions and paint absorption to avoid runs. Wait recommended times, check humidity, and test touch-dry status.
- Monitor humidity and temperature
- Allow full paint absorption
- Sand lightly between coats
Preventing Paint Runs With Sprayers and Paint Pads
When you’re using a sprayer or a paint pad, control and technique matter most to prevent runs—keep the tool moving at an even speed, hold it at the recommended distance or angle, and use thin, consistent passes rather than heavy, slow strokes.
Practice sprayer techniques to overlap passes evenly and thin coats.
Rely on paint pad advantages for flat areas, keeping edges feathered to avoid buildup.
Fixing Paint Runs on Textured Walls and Stucco
Because textured surfaces hide and hold paint differently than smooth walls, you’ll need a different approach to remove runs without damaging the texture.
Focus on careful surface preparation and wall preparation to respect stucco finishes and textured surfaces. Use gentle repair techniques, texture matching, and consider paint absorption and paint compatibility for finish types.
Key steps:
- Assess texture and absorption
- Blend repairs seamlessly
- Match finish and aesthetics
Repairing Glossy or Semi‑Gloss Finishes Without Ghosting
If you’re tackling runs in a glossy or semi‑gloss finish, plan for precision: high‑sheen paints reflect light and reveal even tiny mismatches, so sand and feather carefully, use compatible primers, and apply touch‑up coats with the same sheen and formula to avoid ghosting. Use these repair techniques and patience.
| Step | Action |
|---|---|
| 1 | Sand light |
| 2 | Clean |
| 3 | Prime |
| 4 | Match sheen |
| 5 | Feather blend |
Handling Runs Near Trim, Windows, and Switches
Although trim, windows, and switches create tight edges that make runs harder to fix, you can get seamless results by working deliberately and using the right tools.
Use fine sandpaper, angled brushes, and painter’s tape for precise trim techniques. Focus on window edges and switch placement to avoid smears. Quick wet-edge blending aids run prevention.
- steady hand
- proper tools
- patience
Spot‑Check Repairs Under Different Lighting
When you spot‑check paint repairs under different lighting, move around the room and view the wall from multiple angles so you can catch runs, texture mismatches, or sheen differences that hide in flat light.
Use varied lighting conditions—natural, angled, and artificial—to judge repair visibility.
Take notes, mark imperfections lightly, and retouch only where differences remain noticeable under those lights.
Dealing With Stubborn Runs After Repainting
Don’t panic if a few stubborn runs reappear after repainting—you can still fix them without stripping the whole wall. Assess paint types, drying conditions, and surface issues.
Use precise fixing techniques and smart tool selection to overcome repair challenges.
- Lightly sand high edges
- Feather thin primer and topcoat
- Match sheen and cure fully
You’ll restore a smooth, uniform finish.
Time‑Saving Workflow for Multiple Repairs at Once
If you’ve handled a few isolated runs, you can scale that same care to tackle several spots efficiently. Plan stages: prep, sand, prime/paint. Use efficient techniques and multi repair strategies—group similar tasks, work in zones, keep tools ready.
| Task | Tool | Time |
|---|---|---|
| Prep | Cloth | 10m |
| Sand | Block | 15m |
| Paint | Brush | 20m |
Cost‑Effective Alternatives for DIYers on a Budget
Budget-friendly fixes let you repair paint runs without breaking the bank.
You can use simple, budget friendly solutions and DIY techniques to sand, fill, and repaint like a pro.
Choose affordable tools and right materials to save time and money.
- Sand lightly with fine grit
- Use spackle or filler sparingly
- Recoat with thin, even layers
Common Mistakes That Make Paint Runs Worse
While it’s tempting to keep brushing over a visible drip, doing so often pushes wet paint into a bigger run and makes repairs harder.
Don’t overload your brush or roller; poor paint application causes sagging.
Avoid rushing with heat or fans—incorrect drying techniques trap solvents and wrinkle finish.
Also don’t skip light sanding between coats or neglect leveling strokes; both worsen runs.
Quick Troubleshooting Guide for Run‑Related Issues
When you spot a run, act fast: stop further brushing, blot excess with a clean, dry cloth, and assess whether the paint is tacky or fully wet.
Then decide corrective steps based on drying and finish. Consider:
- If wet: lift excess, smooth with proper paint application technique.
- If tacky: await tack-free stage, gently level.
- If dry: sand and recoat after proper wall preparation.
Preventive Maintenance: Keep Walls Smooth Long Term
To keep walls smooth long term, stay proactive with routine inspections and quick touch-ups so small imperfections don’t turn into full repaints.
You’ll use preventive techniques like sealing moisture sources, maintaining proper ventilation, and repairing chips promptly.
Schedule seasonal checks, clean surfaces gently, and touch up thin spots.
These long term solutions prevent paint runs, extend finish life, and save time.
When to Call a Pro: Signs You Need Professional Help
If you notice widespread bubbling, peeling, large or repeated paint runs, or staining that keeps returning despite your fixes, call a pro—these are signs the problem goes deeper than surface touch-ups.
If you see widespread bubbling, peeling, recurring runs, or persistent stains, call a pro — it’s more than a surface issue.
You’ll weigh When to DIY versus hiring: Gauging skill, Costs of hiring, Repair timelines, Professional techniques, Evaluating texture.
Signs of urgency and Identifying issues guide decisions.
- get expert diagnosis
- prevent larger damage
- save time and money
Frequently Asked Questions
How Long After Repair Can I Hang Pictures or Shelves on the Wall?
You can hang pictures or shelves after the repaired area fully cures, typically 24–72 hours; follow hanging guidelines and respect weight limits, and wait longer if using multiple coats or heavier fixtures to guarantee secure adhesion and stability.
Will Wallpapering Over Repaired Runs Hide Imperfections?
Yes — you can almost make the wall vanish like magic: you’ll rely on wallpaper durability to mask minor paint texture, but deep runs still show through unless you sand, skim, or use heavy-duty lining paper first.
Can Paint Runs Cause Mold or Moisture Problems Behind the Paint?
Yes — paint runs can trap moisture and promote mold growth if underlying dampness isn’t addressed; you’ll want to remove affected paint, dry the substrate thoroughly, and fix moisture issues to prevent future mold and moisture problems.
Are There Eco‑Friendly or Low‑Voc Products for Repairing Runs?
Yes — you can; imagine a fresh meadow scent as you pick eco friendly paints and low VOC options for repairing runs, and you’ll find plant‑based primers, water‑based fillers, and low‑odor sealers that cure cleanly.
How Do I Fix Paint Runs on Ceilings Without Neck Strain?
Use an adjustable pole with ceiling tools like extension rollers and angled brushes, work standing on a sturdy platform, take short breaks, use ergonomic grips, and apply painting techniques in small sections so you won’t strain your neck.
Conclusion
You’ve probably bumped into a paint run the minute you thought the room was done — ironic, right? If it’s tiny, sand, feather, and repaint; if it’s big, scrape and redo. Use gentle pressure, fine grit, and matching sheen, and you’ll hardly spot the fix. Keep tools clean and paint thin to prevent repeats. If runs keep appearing despite care, call a pro before small flaws turn into bigger headaches.