Can You Sand Textured Walls? What You Need to Know
You can sand textured walls, but whether you should depends on the texture and the finish you want. Light textures like orange peel and mild skip can be smoothed with fine-grit sandpaper and careful spot sanding, while knockdown needs blending and heavier grit. Popcorn and deep textures are inefficient to sand and are better removed or skim-coated. Use a pole sander, dust control, and proper primer for paint-ready results, and keep reading to learn the best methods and when to hire pros.
Sanding Textured Walls: Quick Verdict
Yes—you can sand textured walls, but whether you should depends on the texture and your goal.
You’ll perform a quick texture assessment to decide if smoothing’s practical. For light orange peel or subtle knockdown, targeted sanding techniques with fine-grit abrasives work.
Heavy popcorn or thick knockdown usually defeats sanding and risks damage, so choose alternate plans when assessment shows depth or adhesion issues.
When Sanding Is Practical : And When It’s Not
When is sanding a textured wall a sensible choice? You should sand when small imperfections or feathering are needed, using proper sanding techniques to avoid damage. Skip sanding if texture removal requires stripping or retexturing. Assess texture depth, time, and finish needs before you start.
| Situation | Practical? | Note |
|---|---|---|
| Minor bumps | Yes | Light sanding works |
| Deep texture | No | Prefer removal |
| Prep for paint | Yes | Smooth selectively |
| Heavy popcorn | No | Not efficient |
Which Method to Use for Each Texture Type
For lighter, smooth textures you can sand carefully to even out imperfections and prepare for paint.
For heavy or deeply textured surfaces, skip aggressive sanding and consider skim-coating or using a drywall compound instead.
I’ll explain the best tools and steps for each approach so you can pick the right method.
Sanding Smooth Textures
Start by identifying the exact texture you’re dealing with—orange peel, knockdown, or popcorn—because each needs a different sanding approach, tools, and level of aggression to get a smooth finish without damaging the drywall or surrounding areas. Use sanding techniques suited to texture removal: light sanding for orange peel, gentle knockdown blending, and avoid aggressive sanding on popcorn; consider patching and primer.
| Texture | Recommended Method |
|---|---|
| Orange peel | Light sanding, 220 grit |
| Knockdown | Blend edges, 150–180 grit |
| Popcorn | Avoid heavy sanding |
Skipping Heavy Textures
Because heavy textures can hide imperfections and make sanding inefficient, you’ll want to pick a removal method tailored to the texture: skim-coat or drywall replacement for thick orange peel, careful scraping and feathered drywall compound for knockdown, and complete removal or covering for popcorn rather than aggressive sanding.
You’ll assess texture types, choose appropriate sanding techniques sparingly, and prioritize repair over brute sanding to save time.
Popcorn, Knockdown, Orange Peel, and Heavy Skip: What to Expect
If you’ve got popcorn ceilings, expect major dust and a high risk of damaging the pattern if you try to sand it.
Knockdown textures are easier to smooth, but you’ll need a light touch and fine-grit sanding to avoid flattening the characteristic peaks.
Orange peel and heavy skip respond best to spot sanding and skim-coating rather than aggressive sanding.
Popcorn Texture Challenges
When you tackle popcorn, knockdown, orange peel, or heavy-skip textures, expect different sanding challenges and plan for each before you begin. For popcorn removal you’ll face dust and fragile material; consider texture alternatives instead of aggressive sanding. Protect surfaces, use dust containment, and test a small area to judge effort and finish.
| Texture | Challenge | Tip |
|---|---|---|
| Popcorn | Dusty | Contain |
| Orange peel | Uneven | Light sand |
| Heavy-skip | Deep | Patch |
Sanding Knockdown Patterns
Although knockdown patterns can look straightforward, sanding them demands a different touch than smoothing flat drywall. You’ll need patience, the right grit, and careful technique to preserve the design while removing high spots.
You’ll work slowly with fine sandpaper or a pole sander, target only high points, and use spot sanding to avoid flattening texture.
Learn knockdown techniques for controlled texture removal and minimal damage.
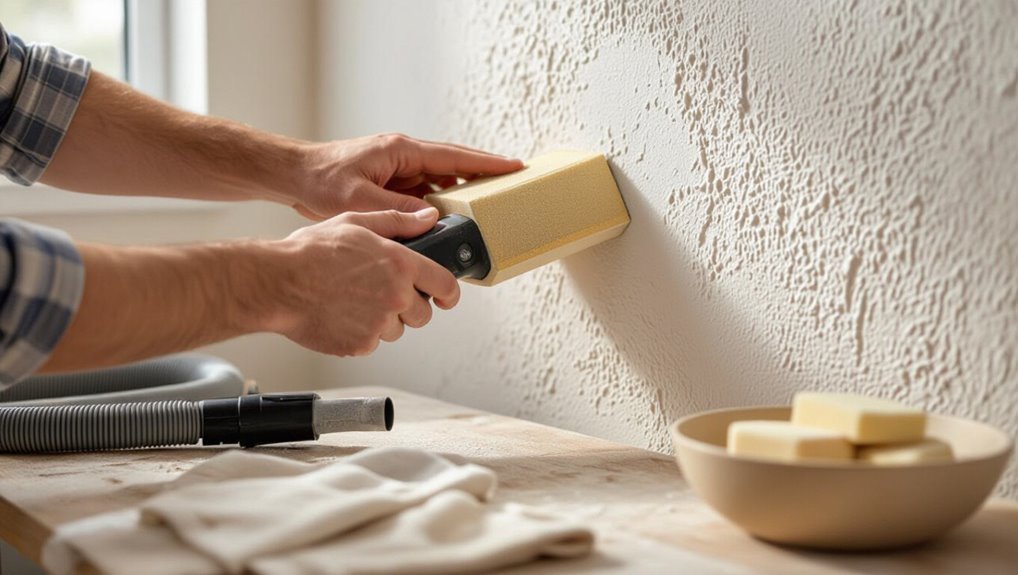
Tools for Sanding Textured Walls Safely
You’ll need the right tools to sand textured walls safely and get consistent results.
You’ll need the right tools to sand textured walls safely for consistent, professional results.
Choose a pole sander with interchangeable heads, sanding blocks for detail, and assorted grit sandpaper (80–220).
Use a vacuum-compatible random-orbit sander for broader areas and hand tools for edges.
These support proper sanding techniques and efficient wall preparation without damaging texture or underlying drywall.
Dust Control and Safety Gear (Respirators, Containment, Cleanup)
Because sanding textured walls kicks up a lot of fine dust, you should control the mess and protect your lungs before you start.
Use proper dust management and follow safety measures: a fitted N95/half-mask respirator, sealed plastic containment, and wet-clean or HEPA-vacuum cleanup.
Don’t rely on regular vacuums—keep windows closed and label the work area.
- N95/half-mask respirator
- Plastic containment
- HEPA vacuum cleanup
Sanding Steps for Light–Medium Textures
Start by evaluating the texture and prepping the area so you know what grit and tool will work best; for light to medium textures that just need smoothing, use a sanding block or pole sander with 120–150 grit wrapped in mesh or sandpaper designed for drywall. Follow even strokes, check texture types, and adjust sanding techniques as needed.
| Tool | Grit | Motion |
|---|---|---|
| Block | 120 | Even |
| Pole | 150 | Overlap |
| Sponge | 220 | Light |
Removing Heavy or Stubborn Textures Without Endless Sanding
If light sanding didn’t tame the surface, you’ll need methods that remove heavy or stubborn textures without wearing you out.
You can choose texture removal techniques that save time and effort, combining mechanical and chemical options as alternative smoothing methods to prep walls for finishing.
- Power scraping with a variable-speed tool
- Use of approved stripping solution and scraper
- Wet sanding with drywall rasp and dust control
When to Skim-Coat or Replace Drywall
If the texture’s shallow and the drywall is sound, you can skim-coat to get a smooth surface without tearing things up.
But if the drywall has deep damage, large seams, or multiple patched layers, it’s often faster and cheaper long-term to replace the sheetrock.
Consider time, labor, and material costs—skim-coating is cheaper but more labor-intensive, while replacement costs more upfront but gives a clean start.
When To Skim Coat
When wall damage is limited to minor dents, nail pops, or small seams, you can often avoid replacing drywall by skim-coating—the technique smooths surface imperfections with a thin layer of joint compound so paint or texture goes on evenly.
You’ll want to weigh skim coat benefits and choose proper skim coat techniques for lasting results.
- Patch, sand, then skim coat
- Feather edges for blend
- Prime before painting
When To Replace Drywall
Skim-coating fixes small blemishes, but there are times you’ll need to replace drywall instead of patching it. If water, mold, sagging, or crumbling exceed a skim-coat’s repair, replace the board. Consider drywall lifespan and visible drywall damage when deciding. Use this quick visual:
| Sign | Action |
|---|---|
| Mold | Replace |
| Sagging | Replace |
| Crumbling | Replace |
| Hairline cracks | Skim-coat |
Cost And Time Considerations
Because time and money often drive the decision, weigh the cost and labor of skim-coating against replacing drywall before you start.
You’ll do a strict cost analysis and use realistic time estimates to decide. Consider skill level, room size, and finish quality so you don’t underbid work or overcommit time.
- DIY vs. pro cost
- Project time estimates
- Repair longevity and resale impact
Prep, Patching, and Priming for a Paint-Ready Finish
Before you toss on a roller, clear, repair, and prime the surface so paint will adhere evenly and look professional.
Inspect for loose texture, fill holes and gouges with patching compound, sand only where needed, and remove dust.
Use a high-quality primer suited to your wall texture techniques to promote paint adhesion and uniform finish.
Choose a high-quality primer matched to your wall texture to ensure even adhesion and a smooth, uniform finish
Let primer dry fully before painting.
Common Mistakes and How to Avoid Them
When you rush into sanding, patching, or priming without a plan, you’ll likely create more work and a less professional finish. Common mistakes include over-sanding texture, using the wrong primer, skipping dust removal, and applying paint before repairs fully cure.
You should learn common pitfalls and effective techniques to avoid them.
- Inspect lighting and surface before work
- Remove dust thoroughly between steps
- Match primer and patch type to texture
Time, Cost, and Troubleshooting: DIY vs. Hiring a Pro
After you’ve inspected lighting, removed dust, and matched patch and primer types, decide whether to tackle textured wall repair yourself or hire a pro.
Weigh DIY advantages—lower cost, flexible timing, learning experience—against professional expertise for complex textures, quicker fixes, and guaranteed results.
Budget for tools, materials, and unexpected repairs. If troubleshooting stalls, calling a pro often saves time and prevents costly rework.
Frequently Asked Questions
Can Textured Walls Hide Mold or Moisture Damage?
Yes — textured walls can hide mold or moisture damage, but you’ll miss early signs; use mold detection tools and address moisture prevention promptly, since hidden growth can worsen and require more extensive remediation later.
Will Sanding Remove Lead-Based Paint Hazards?
Better safe than sorry: you shouldn’t rely on sanding to remove lead paint hazards. You’ll spread toxic dust unless you use specialized sanding techniques, containment, and certified abatement—so hire pros or follow strict lead-safe protocols.
Can Textured Ceilings Be Safely Sanded Without Scaffolding?
You can, but you shouldn’t. You’ll need proper sanding techniques, fall protection, stable ladders or mobile scaffold, dust containment, respirator, and a helper for ceiling safety; consider hiring pros for high or lead‑paint risks.
How Do Repairs Affect Home Resale Disclosure Requirements?
Repairs can change repair implications and disclosure obligations: you’ll need to disclose material repairs, hidden defects you uncovered, and permits obtained; failing to disclose can lead to liability, so document work and consult local disclosure laws.
Can Renters Alter Textured Walls Without Losing a Deposit?
Yes — you can alter textured walls cautiously, but you’ll want to check rental agreements first. Use reversible wall treatments, get written landlord approval, document condition, and avoid permanent changes to protect your deposit.
Conclusion
Sanding textured walls can be sensible sometimes, but sometimes skim-coating or replacement serves smarter. You’ll save stress by spotting surface severity, selecting suitable sanding systems, securing safety gear, and sticking to proper patching, priming, and painting. Avoid aggressive abrasion that creates dust dramas; hire help for high, heavy, or hazardous jobs. Ultimately, sensible setup, steady strokes, and skilled solutions produce a polished, paint-ready plane rather than a messy, maddening mishap.