How to Fix a Scratch on a Painted Wall Easily
You can fix most painted-wall scratches yourself quickly: first check if it’s a surface nick (no paint lift) or a deep gouge that exposes drywall. Clean the area, apply lightweight spackle or wood filler for deeper cuts, smooth with a putty knife, sand when dry, prime if needed, then touch up with matching paint, feathering the edges for an even finish. Keep furniture pads to prevent future dings, and keep going for step-by-step tips and timing.
Can You Fix This Scratch Yourself? Quick Decision Guide
Wondering if you can fix that scratch yourself? You can often handle minor marks with DIY scratch techniques and simple paint repair strategies.
Assess visibility and location quickly: if it’s shallow and small, prep, fill, sand, and touch up. If the damage affects texture or exposes drywall, consider pro help.
You’ll save time and money by choosing the right approach.
Identify the Scratch: Surface Nick vs. Deep Gouge
First check whether the mark is a surface nick or a deep gouge by looking for broken paint or exposed drywall.
Press your fingernail gently into the scratch—if it catches you’ve likely got a gouge that needs filler; if it just skims the paint, it’s probably a superficial scratch.
Also consider the wall material (plaster, drywall, or wood) since repair steps change with depth and substrate.
Surface Nick Or Scratch
When you inspect the mark closely, a surface nick will look like a shallow scrape that only disrupts the paint film and maybe the primer underneath, without cutting into the wallboard or leaving loose material. You can use simple repair techniques and small touchups with matching paint options.
| Evidence | Action |
|---|---|
| Shallow | Light sanding |
| No debris | Spot paint |
Depth And Wall Material
Check the depth of the damage and the wall material to decide whether you’re dealing with a surface nick or a deep gouge: press around the scratch to feel if it’s only the paint and primer that’s broken or if the drywall (or plaster) beneath is indented, crumbling, or exposing joint compound or backing.
Surface nicks are shallow and clean, while deep gouges cut into the substrate and need filling and more extensive repair.
- Note wall composition.
- Assess scratch resilience.
- Plan appropriate filling.
Test With Fingernail
Curious whether the scratch is just in the paint or deeper into the wall? Run a fingernail test: gently drag your nail across the mark.
If your nail catches and you feel a groove, it’s a deep gouge needing filler. If it barely skims and paint flakes, it’s a surface nick you can touch up.
This quick assessment guides repair steps.
Touch Up or Repaint: When to Do Each
Decide whether you’ll touch up or repaint by checking how deep the scratch is and whether it only affects the surface.
Make sure you can match the paint’s finish and color before attempting a small repair.
Also weigh the time investment—touch-ups are quicker, but repainting gives a more consistent result for larger or multiple scratches.
Assess Scratch Depth
1 quick look will tell you whether a scratch needs a simple touch-up or a full repaint: run your fingernail over the gouge—if it catches or you can see the underlying drywall or primer, plan to repaint; if the mark is superficial and only disturbs the topcoat, a targeted touch-up will usually do the trick.
- Light: surface only — scratch assessment, easy fix.
- Medium: primer visible — depth measurement, fill then paint.
- Deep: drywall exposed — repair, sand, prime, repaint.
Match Paint Finish
Now that you know how deep the scratch is, the next step is matching the paint finish so your repair blends in.
Check the paint sheen on the wall—flat, eggshell, satin, semi-gloss—and match it.
Small scratches usually need a touch up with the same finish; larger or uneven areas often require repainting to unify finish types and avoid visible patches.
Consider Time Investment
Because the time you invest affects both the outcome and your schedule, weigh touch-up speed against repainting’s reliability: touch ups take minutes to a few hours and work well for small, shallow scratches when the surrounding paint matches, while repainting can take a day or more (including drying and curing) but gives a seamless finish for larger, deeper, or patchy areas.
- Prioritize quick fixes for minor blemishes to optimize time management.
- Choose repainting when appearance matters or damage is extensive.
- Align choices with your repair priorities and available time.
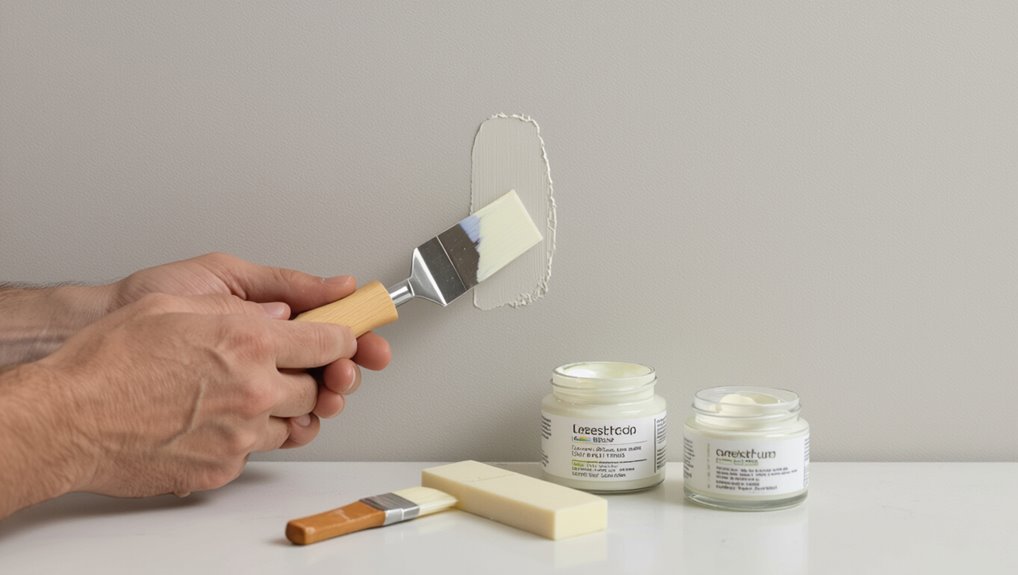
Gather Tools and Materials for a Quick Fix
Before you start, gather a small kit of tools and materials so the repair goes quickly and cleanly: fine-grit sandpaper, a putty knife, spackling compound or filler, matching paint (sample or touch-up), a small brush or foam applicator, painter’s tape, a damp cloth, and a disposable mixing surface or paper plate.
Use tool selection tips and material considerations to pick quality, compatible items for efficient, neat repairs.
How to Clean Paint Scratches: Products and Technique
Before you touch the scratch, pick a cleaner that’s safe for your paint—mild dish soap or a dedicated wall cleaner usually works, and avoid harsh solvents that can strip finish.
Use a soft cloth or sponge and gently work from the edges toward the center to avoid widening the mark.
Test your cleaner in an inconspicuous spot first so you don’t accidentally damage the paint.
Choose The Right Cleaner
1 good cleaner can make the difference between fading a scratch and fully restoring the finish; pick a product formulated for painted walls—mild dish soap, a pH-neutral cleaner, or a dedicated wall cleaner—so you remove dirt and oils without stripping paint.
Choose eco friendly cleaners when possible and know cleaner types to match finish.
- Mild soap solution
- pH-neutral cleaner
- Dedicated wall cleaner
Gentle Cleaning Technique
Start by gathering a soft microfiber cloth, a gentle cleaner (mild soap solution or pH-neutral product), and a spray bottle of clean water so you can work methodically and avoid over-wetting the wall.
Lightly mist the area, use the soft cloth to perform a gentle scrub in circular motions, rinse with clean water, and pat dry.
Repeat only if necessary.
Remove Loose Paint Safely (No Extra Damage)
Work carefully to remove any loose or flaking paint so you don’t widen the damage.
Use gentle tools and test a small area to preserve surrounding finish. Focus on edges for good paint adhesion before repair techniques. Clean the area, then proceed.
- Scrape carefully with a plastic scraper.
- Use a soft brush to remove dust.
- Wipe with a damp cloth.
Sand Scratches for a Smooth Blend
Pick the right sandpaper grit—start with a fine grit like 220 for shallow scratches and step down only if you need to remove rough edges.
Gently feather the sanding out from the scratch so you blend the damaged area into the surrounding paint. Keep light, even strokes and check often so you don’t sand through the finish.
Choose The Right Grit
Choosing the right grit matters because it determines how smoothly the repair will blend with the surrounding paint; you’ll typically move from a coarser grit to a finer one to remove roughness without scarring the surface.
Use proper sanding techniques and careful grit selection to avoid over-sanding.
- Start 120–150 grit for leveling.
- Move to 220–320 grit for smoothing.
- Finish 400+ for delicate surfaces.
Feather And Blend Edges
Once the scratch is leveled, sand outward from the repair in progressively lighter strokes so the patched area fades seamlessly into the surrounding paint.
Use the feather technique: start with medium grit, then switch to fine grit and very light pressure.
Check edges for visible lines, continue gentle edge blending until the repair disappears, then wipe dust before priming or painting.
Choose the Right Filler for Nicks and Gouges
If a nick or gouge is shallow and you want a fast, simple fix, use a lightweight spackling compound.
For deeper damage, grab a vinyl- or epoxy-based filler that resists cracking and shrinks less as it dries.
Choose based on substrate and paint. Consider filler types and application techniques to get lasting results.
- Spackling — small nicks
- Vinyl — medium gouges
- Epoxy — structural repairs
Apply Spackle or Wood Filler (Step‑by‑Step)
Pick the correct filler for the job—spackle for small scratches and wood filler for deeper gouges—and read the product directions first.
You’ll prep the damaged area by cleaning and slightly roughening it, then apply the filler with a putty knife and smooth it flush with the wall.
Once it’s dry, sand lightly, wipe away dust, and paint to match the surrounding finish.
Choose Correct Filler
Material choice matters: you’ll want to use spackle for small surface scratches and dents, and a wood filler for deeper gouges in trim or wooden surfaces.
You’ll pick based on material, depth, and paintability. Consider filler types and application techniques to guarantee a smooth repair.
- Spackle — fine scratches
- Wood filler — deep gouges
- Lightweight filler — quick fixes
Prep The Damaged Area
Clear the area around the scratch and remove any loose paint or debris so the filler will bond properly.
Do a quick damage assessment to determine depth.
For surface preparation, wipe with a damp cloth, let dry, and widen tiny grooves slightly with a putty knife.
Apply spackle or wood filler in thin layers, pressing firmly to fill voids, and remove excess before it sets.
Smooth, Sand, Paint
Start by smoothing the filler so it’s flush with the wall surface—work quickly while the spackle or wood filler is still pliable, pressing and dragging a putty knife to remove excess and shape the repair.
Let dry, sand smooth, and paint to match. Follow these steps for effective scratch repair and ongoing paint maintenance:
- Dry fully before sanding.
- Use fine-grit sandpaper.
- Feather paint edges for blend.
Feather Edges So Repairs Disappear
When you feather the edges of your patch, you’re blending the repair into the surrounding paint so it becomes invisible; use a flexible putty knife or sanding block to taper the filler thinly toward the unblemished wall, working in light, overlapping strokes.
You’ll apply feathering techniques and blending methods to remove ridges, check shifts, and lightly sand until the repair reads flush and seamless with the wall.
Prime the Repair for Reliable Adhesion
Before you paint, clean the repaired area thoroughly to remove dust, grease, or loose particles so the primer can bond.
Choose a primer formulated for your wall surface—stain-blocking for marks, or a bonding primer for slick patches.
Apply it thinly and let it dry fully to guarantee reliable adhesion of the topcoat.
Clean Surface Thoroughly
Prep the area by removing dust, grease, and loose paint so the primer and patching compound will stick. You’ll use simple cleaning techniques and smart surface preparation to guarantee adhesion.
Follow these steps:
- Wipe with a damp cloth and mild detergent, then dry.
- Lightly sand rough edges and vacuum residue.
- Degrease stubborn spots with rubbing alcohol before patching.
Use Appropriate Primer
Now that the surface is clean and smooth, pick a primer that matches your wall’s material and the paint you’ll use so the repair bonds and looks even.
Choose based on substrate and finish using primer selection tips: oil-based for stained areas, latex for most drywall.
Apply thin, even coats, let dry fully, and sand lightly between coats.
Follow recommended primer application techniques for best adhesion.
Match Paint Color Like a Pro at Home
If you want the repair to disappear, match the paint color precisely—start by taking a small sample from an inconspicuous spot (or from the trimmed edge behind a switch plate) to compare at the store or to scan with a color-matching app.
Use color matching techniques and paint sample tips to get a perfect match.
Use smart color-matching methods and paint-sampling tips to achieve a flawless, invisible repair.
- Test small swatches.
- Check under natural light.
- Buy a slightly larger batch.
How to Blend Touch-Up Paint Seamlessly
When your color match is ready, feather the repair into the surrounding finish by thinning the touch-up paint slightly and applying it in light, overlapping strokes so the edges blur into the existing wall.
Use gentle pressure, build thin layers, and step back to inspect under different light.
These paint blending techniques and practical touch up tips help you achieve an invisible, uniform finish.
Brush, Foam, or Mini Roller: Which to Use
Curious which tool will give the smoothest, least noticeable repair? You’ll choose based on scratch size and finish.
Consider brush types for narrow precision, foam advantages for delicate finishes, and roller benefits for flat, even coverage.
Match application techniques: feather with a small brush, dab with foam for texture control, or light-roll with a mini roller for uniform paint.
Painting Small Spots vs. Larger Patches
Although small touch-ups can often be blended with a tiny brush or dabbed foam, larger patches need more prep and technique to avoid obvious edges.
You’ll match sheen and feather edges outward, sand and prime patched areas, and use appropriate painting techniques for consistent texture.
For small spots, spot-painting works; for bigger repairs, follow repair methods that include sanding, priming, and blending for seamless results.
Drying and Curing Times to Avoid Rework
Once you’ve matched sheen and smoothed edges, let paint and primer fully set before calling the job done—rushing the next step will often force you to redo work.
Use proper drying techniques and respect curing times to avoid tacky spots or adhesion failure.
Respect curing times and gentle drying to prevent tackiness and ensure lasting adhesion.
- Wait manufacturer-recommended drying times.
- Use gentle airflow, not direct heat.
- Test a small area before finishing.
Repairing Scratches on Textured Walls
When you’re working on textured walls, matching the texture is as important as matching the color.
Start by identifying the texture type and gathering the right tools—putty knife, texture spray or compound, and a stiff brush.
You’ll clean the scratch, apply appropriate scratch repair materials, recreate texture with textured wall techniques, sand lightly when dry, then touch up paint to blend.
Fixing Scratches on Semi‑Gloss and High‑Sheen Paint
Start by evaluating the sheen and the scratch depth: semi-gloss and high-sheen finishes highlight imperfections, so you’ll need precise prep and repair to avoid obvious touch-up marks.
Use careful scratch repair techniques and paint maintenance tips.
- Clean, sand lightly, and wipe dust.
- Fill gouges with fine putty; sand smooth.
- Feather with matching gloss paint; apply thin coats.
Troubleshooting Streaks and Color Mismatch
If streaks or slight color differences show after you touch up a semi‑gloss or high‑sheen area, don’t panic—you can usually correct them by matching sheen and blending edges.
Feather new paint into surrounding areas, use a small roller for consistent sheen, and compare under natural light.
For persistent color mismatch, adjust tint slightly or repaint the whole panel, focusing on precise color matching and texture blending.
Quick Scratch Fixes When You’re Short on Time
Although you don’t have time for a full repaint, you can often hide minor scratches quickly with a few simple moves:
Although you’re short on time, minor scratches can be quickly concealed with a few simple, effective tricks.
- Use a damp microfiber cloth to clean, then rub a crayon or colored pencil that matches the paint for quick fixes.
- Dab lightweight spackling, smooth, and touch up with matching paint.
- Blend edges with a fingertip of clear furniture wax to disguise the line and save time management.
Preventing Future Scratches: Everyday Tips
When you want to keep your walls looking fresh, a few simple habits go a long way: use furniture pads, hang bumpers behind doors, and route cables away from painted surfaces.
Adopt preventive measures like gloves when moving items and soft cloths for cleaning. Make these daily habits routine to minimize scuffs and scratches, prolonging paint life and reducing repair needs.
When Should You Call a Professional Painter or Contractor?
How do you know it’s time to call a pro? You should seek a professional assessment or contractor consultation when damage exceeds simple touch-ups.
Consider calling one if:
- The scratch exposes drywall or large areas need patching.
- Matching textured or specialty paint is required.
- Structural issues, moisture, or recurring damage suggest deeper repair.
DIY Cost and Time Estimate for Scratch Repairs
A small jar of touch-up paint and a few minutes can often save you a trip to a contractor. You’ll spend $5–$30 for supplies and 15–60 minutes per scratch.
For deeper damage, factor in putty and sandpaper for $10–$25 and extra drying time.
Consider budget considerations like spare paint and use time saving tips: work on multiple scratches at once.
Frequently Asked Questions
Can I Use Nail Polish to Touch up Tiny Paint Scratches?
Yes — you can use nail polish for tiny paint scratches, but you’ll need careful nail polish application and good color matching; test on a hidden spot first, apply thin coats, and blot excess before it fully dries.
Will Wood Filler Work on Drywall Scratches?
No — you shouldn’t use wood filler on drywall scratches; you’ll want a drywall repair compound because it’s formulated for drywall, sands smoothly, and guarantees proper paint adhesion so your touch-up won’t crack or peel later.
Can Temperature or Humidity Affect Touch-Up Paint Drying?
Yes — temperature and humidity change paint drying speed: high humidity or low temps slow drying, while warm, dry conditions speed it up. You’ll want to control environmental factors to guarantee even cure and avoid tacky finish.
Is It Safe to Use a Heat Gun to Remove Flaking Paint?
You can use a heat gun for paint removal, but you’ll prioritize heat safety: wear gloves, eye protection, a respirator, keep the gun moving, avoid overheating, test a small area, and ventilate well to prevent fumes and burns.
How Do I Repair Scratches Near Electrical Outlets or Switches?
Think of it like sewing a small tear: you’ll switch power off, remove the cover, follow outlet precautions, sand lightly, apply filler, sand again, paint, reinstall the cover, and turn power back on—ensuring safe scratch repair.
Conclusion
You can handle most wall scratches yourself—about 60% of minor paint blemishes are fixed with simple touch-ups, so grab a rag, fine sandpaper, matching paint, and filler. If it’s just a surface nick, clean and dab on paint; for deeper gouges, fill, sand, prime, then paint. Quick fixes save time and money, but call a pro for extensive damage. With these steps, your wall will look like new again.