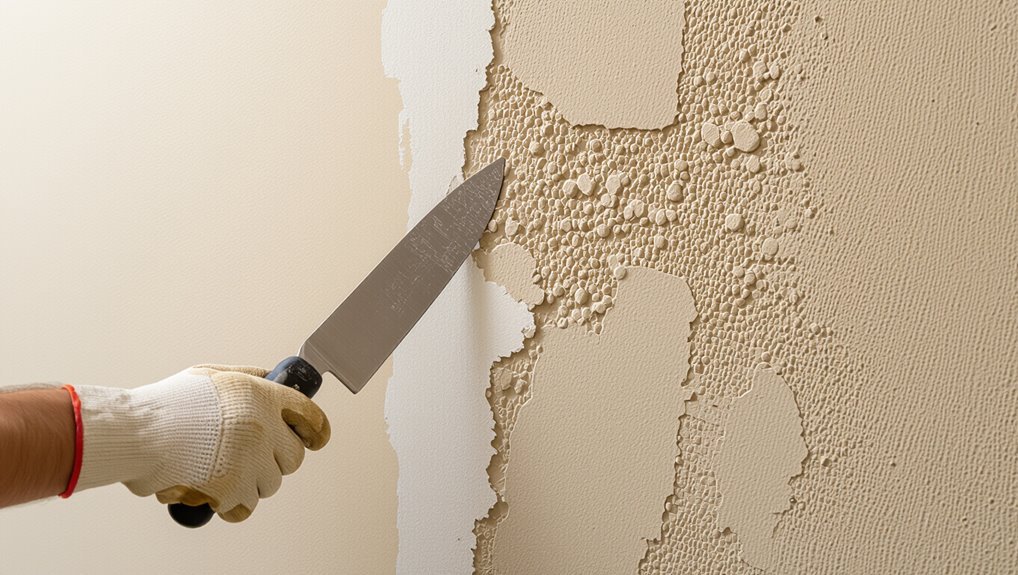
Can You Texture Over a Painted Wall? What You Should Know
You can texture over a painted wall, but only if the existing paint is sound and prepped properly. Test for flaking or poor adhesion with a scratch or peel check, sand glossy areas, clean grease, and patch holes before applying a bonding primer or compatible texture mix. Latex is usually easier to cover than oil, which needs sanding and priming. Allow sufficient drying time and avoid heavy textures on unstable layers—keep going for tips on testing, prep, and when to strip.
Can You Texture Over Painted Walls? Quick Answer and Caveats
Yes—you can texture over painted walls, but how well it turns out depends on the paint’s condition and type.
You should assess surface adhesion and smoothness before applying texture techniques, since glossy or poorly bonded paint risks peeling.
Choose products and preparation steps that guarantee paint compatibility, like deglossing or bonding primers, so your new texture adheres and looks consistent.
Test Paint Adhesion and Compatibility
Before you texture, test the existing paint with simple peel and scratch checks to see if it’s firmly bonded or prone to flaking.
If you find loose spots, you’ll need to spot-prime and patch those areas so the new texture has a stable surface to adhere to.
These quick tests prevent adhesion failures and save you time and materials down the line.
Peel And Scratch Tests
When you’re preparing to texture over an existing painted wall, peel and scratch tests quickly tell you whether the old paint will hold up or need removal.
Perform a peel test by lifting a corner of paint with a blade; do a scratch test by scraping firmly with your fingernail or a coin.
If paint flakes or chips easily, strip or sand before texturing.
Spot Prime And Patch
If your peel and scratch tests showed mostly sound paint with a few weak spots, you’ll want to spot prime and patch those areas before applying texture.
You should scuff loose edges, clean dust, use compatible patch materials, and apply a bonding primer to tested spots.
That guarantees new texture techniques bond evenly and prevents future flaking, giving a durable, uniform finish.
Can You Texture Over Latex vs. Oil Paint?
If your wall has latex paint, you’ll usually find it bonds well to most texture compounds with just light scuffing.
If it’s oil-based, you’ll need to strip or thoroughly sand and prime to guarantee the texture adheres.
Start by testing a small patch so you can judge bonding and prep needs before tackling the whole surface.
Latex Paint Bonding
Because latex paints form a slightly flexible, porous film, you can usually texture over them without special prep—but oil-based paints behave differently and need extra attention.
For latex paint bonding, you’ll enjoy latex paint benefits like easier adhesion and quicker drying.
Make certain the surface is clean and sound to preserve latex paint durability; scuff glossy areas and repair any peeling before applying texture.
Oil Paint Preparations
Start by recognizing that oil-based paints need more prep than latex before you can texture over them.
You’ll identify oil paint types and test adhesion.
Sand glossy surfaces, clean with solvent, and degloss or prime with a bonding primer.
These preparation techniques guarantee texture compounds stick and prevent peeling.
Follow manufacturer drying times before applying texture to achieve durable results.
How Gloss, Flaking, and Age Change Your Approach
When you’re evaluating a wall, gloss level, flaking, and age each change what tools and prep you’ll need: high-gloss surfaces demand scuffing or deglossing before paint will adhere.
Flaking areas need scraping and stabilizing, and older finishes might hide lead or multiple brittle layers that call for more cautious removal.
Scrape loose paint and stabilize surfaces; older finishes can conceal lead or brittle layers, so remove with extra caution.
- Assess gloss effects for adhesion.
- Address flaking issues first.
- Inspect aging surfaces for hazards.
- Match texture compatibility to sound substrate.
Surface Prep Checklist Before Texturing Painted Walls
Before you grab a trowel, walk the wall and note gloss, flaking, repairs, and any old coatings that might contain lead or asbestos so you know what prep steps are nonnegotiable.
Then perform surface inspections, remove loose paint, sand glossy spots, patch holes, and clean dirt or grease.
Gather prep materials—fillers, sandpaper, cleaners, and protective gear—before you start texturing.
Best Primers and Bonders for Painted Surfaces
Although previously painted walls can look uniform, they often need a primer or bonding coat to guarantee texture products adhere and hide variations.
Choose a primer formulated for adhesion to glossy or alkyd finishes, a high-build bonding primer for chalky surfaces, or a shellac or oil-based sealer for stain-blocking.
- Acrylic bonding primer — great surface compatibility.
- High-build latex — fills minor imperfections.
- Shellac sealer — blocks stains, bonds well.
- Oil-based primer — for tough, slick finishes; review primer types.
Choosing the Right Texture Product for Painted Walls
With the right primer or sealer in place, your next step is picking a texture product that’ll bond to the painted surface and give you the look you want.
Consider texture types, paint compatibility, surface variations and wall conditions.
Match texture tools and application techniques to desired texture finishes, factor drying times and product longevity, and follow maintenance tips for lasting results.
Step-by-Step: Applying Texture Over Paint
Before you start, make sure you clean, sand, and prime any glossy spots so the texture will stick.
Mix and test your chosen texture product on a scrap board, then apply evenly using the recommended tools and pressure.
Finish with consistent passes and light touch-ups to blend seams and achieve the look you want.
Surface Prep Steps
Start by inspecting the painted wall for peeling, glossiness, or uneven patches that would keep texture from adhering properly.
Then follow these surface prep steps so your texture sticks and looks good:
- Sand glossy areas using proper sanding techniques until dull.
- Patch holes and skim uneven spots.
- Perform thorough wall cleaning to remove dust and grease.
- Prime repaired areas before texturing.
Texture Application Tips
1. You’ll choose product selection and texture tools, matching texture styles and finish types.
Follow wall preparation, clean and prime.
Practice application techniques on scrap, control texture consistency and wet edge.
Work systematically, section by section, watching drying times to avoid lap marks.
Adjust tools and pressure for desired pattern, then sand or seal once fully cured for a uniform result.
How Long Before You Can Paint Over New Texture?
How long should you wait to paint over new texture? You should wait for texture drying—usually 24–72 hours depending on thickness, humidity, and ventilation.
Wait 24–72 hours for new texture to fully dry—longer for heavy coats or high humidity.
Choose paint types (latex vs. oil) after it’s fully dry.
- Thin texture: 24 hours
- Heavier texture: 48–72 hours
- High humidity: add extra drying time
- Prime before painting if recommended
Common Mistakes That Make Texture Fail
Even if you follow the instructions on the bag, a few common mistakes will still make your texture crumble, crack, or peel—usually because of poor surface prep, wrong mix consistency, or applying texture to a damp or unstable substrate.
You’ll cause texture failures by not cleaning, failing to prime incompatible paint, or using mismatched tools. Check paint compatibility, dry conditions, and batch uniformity before you start.
Repairing and Spot-Fixing Textured Paint Surfaces
When a section of textured paint gets dinged or starts to flake, you can often fix it without redoing the whole wall by matching the texture, feathering the edges, and blending the finish so the repair disappears.
Do a surface evaluation, clean, and prep. For texture repair, follow these steps:
- Clean and sand
- Mix matching compound
- Apply and texture
- Prime and blend
When Stripping Paint Is Necessary Before Texturing
If the existing paint is peeling, has multiple uneven layers, or creates a glossy barrier that prevents adhesion, you should strip it before applying new texture.
You’ll evaluate substrate condition and use appropriate paint removal techniques—chemical, heat, or mechanical—while reviewing surface compatibility considerations like drywall paper, plaster, or masonry.
Strip to a sound, clean substrate so new texture bonds reliably.
Cost, Time, and Durability Trade-Offs to Expect
Because your choice of texture method and prep affects budget, schedule, and longevity, you’ll want to balance up-front costs against ongoing maintenance and finish life.
- Do a cost analysis: materials vs repair frequency.
- Check time estimates: DIY saves money but takes longer.
- Compare durability comparison: heavy textures hide flaws but may chip.
- Factor labor considerations: pros speed work and improve longevity, raising initial cost.
Frequently Asked Questions
Will Textured Walls Hide Drywall Imperfections Permanently?
Yes — textured walls can hide many drywall imperfections, but they won’t fix structural issues. You’ll still need proper drywall repair for deep damage. Use suitable texture materials and techniques, and imperfections will stay well concealed.
Can I Texture Over Painted Wallpaper?
Yes — you can, if you enjoy surprises: you’ll still need serious wall preparation, not shortcuts. You’ll want to attempt wallpaper removal first; otherwise textures may peel, trap moisture, and mock your shortcuts with bubbling, cracking, and regret.
Are Textured Finishes Compatible With Radiant Floor Heating Rooms?
Yes — you can use textured materials in radiant heating rooms, but you’ll want products rated for heat and flexible adhesives; you should test compatibility, follow manufacturer specs, and guarantee textures won’t trap excessive heat or impede floor performance.
How Does Humidity Affect Curing of Textured Coatings?
High humidity slows curing times and can prevent textured coatings from drying evenly, while low humidity speeds curing but risks cracking; you’ll monitor humidity levels and adjust ventilation, heating, or additives to guarantee proper cure and finish.
Do Textured Walls Change Home Resale Value?
Yes — textured walls can affect resale value. Like a book with a distinctive cover, they follow resale trends and buyer preferences; you’ll appeal to some buyers but risk alienating others, so neutral, subtle textures sell best.
Conclusion
Think of your painted wall as a garden bed: if the soil’s healthy, you can sow texture right over it; if it’s glossy, flaking, or oil-soaked, you’ll need to dig up and amend first. Test adhesion, sand glossy spots, prime where needed, and patch defects before you plant new texture. With the right prep, your wall will flourish; skip it, and the seeds of failure will sprout. Choose carefully and tend the surface.