Is Chipped Paint Normal Wear and Tear? What Homeowners Should Know
Yes — small paint chips are usually normal wear and tear from everyday use, but responsibility depends on size, location, surface, and any lease or ownership terms. Tiny chips and nail holes typically call for simple touch‑ups you can handle; large peeling areas, widespread damage, or neglect may require professional repainting and fall to the owner. Note surface type, paint age, and climate when evaluating cause, and keep photos and records — if you keep going, you’ll get practical repair, cost, and dispute tips.
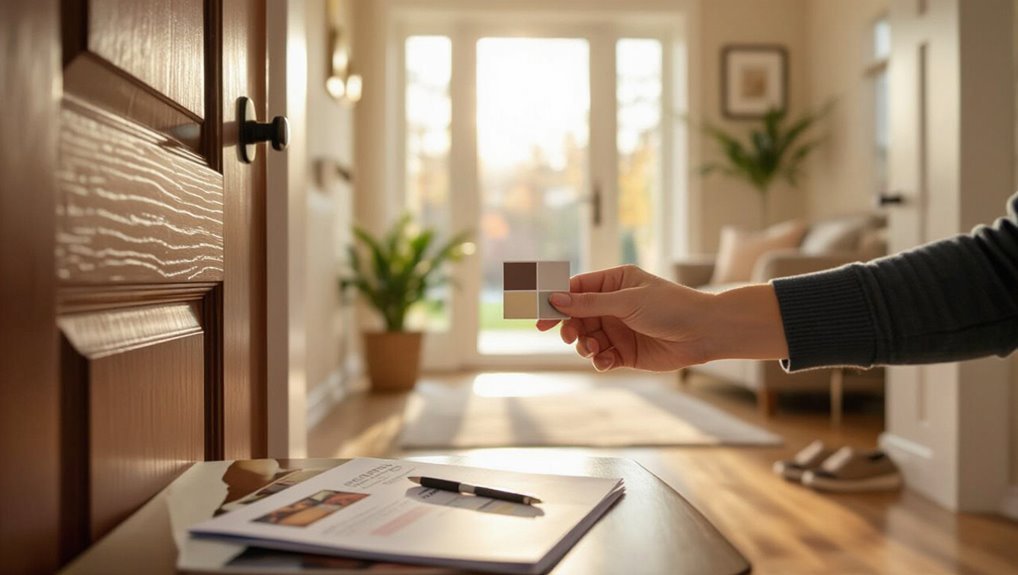
Who This Guide Is For and How to Use It
Who’s this guide for?
You’re a homeowner, renter, or property manager wanting clear guidance on chipped paint.
This section defines the guide audience and provides concise usage tips so you can quickly find relevant sections—diagnosis, responsibility, and repair options.
Use the headings and bullet points to jump straight to practical steps, avoiding unnecessary detail until you need it.
Quick Answer: Are Paint Chips Normal Wear and Tear?
Yes — minor paint chips from everyday use are common and often expected over time.
Whether you’re responsible for repairs usually depends on how quickly the damage appears after you move in and what your lease or contract says about maintenance timelines.
Check your agreement and document any chips promptly so you’re not stuck paying for damage that wasn’t caused during your tenancy.
Everyday Use Effects
Although small paint chips are common from everyday use, whether they count as “normal wear and tear” depends on their cause, size, and location.
You should track damage from regular activities versus neglect. Good paint maintenance reduces chips, and routine cleaning plus gentle handling prevents small dings.
For chip prevention, use bumpers, avoid abrasive cleaners, and inspect high-traffic areas so issues don’t worsen.
Repair Responsibility Timeline
After you’ve tracked how chips happen and kept up regular maintenance, the next question is when each repair becomes your responsibility.
You’ll follow repair timelines tied to maintenance schedules, insurance terms, and lease rules. Prioritize prompt fixes to prevent bigger damage.
- Normal wear: cosmetic touch-ups.
- Neglect: owner pays.
- Damage: liable party assessed.
- Lease: check clauses.
How Landlords, Buyers, and Insurers Define Paint Chips
You’ll want to know how each party defines a paint chip before you make repairs or file a claim.
Landlords use damage standards to decide if chips go against a deposit. Buyers expect cosmetic issues to be noted on inspection reports. Insurers have specific claim criteria for when paint damage is covered.
Understanding these differences helps you set realistic expectations and avoid surprises.
Landlord Damage Standards
When landlords, buyers, and insurers assess chipped paint, they look for clear criteria that separate normal wear from tenant damage. You’ll find they focus on size, quantity, location, and cause rather than subjective impressions.
- Size thresholds tied to landlord standards.
- Number of chips per wall influences rulings.
- Location (high-traffic vs. hidden) matters.
- Cause documentation shapes damage definitions.
Buyer Inspection Expectations
Although buyers, landlords, and insurers each bring their own priorities to an inspection, you’ll usually find they judge paint chips by the same concrete factors—size, number, location, and documented cause—and expect you to provide clear evidence when claiming normal wear.
You should meet buyer expectations by documenting condition, repairs, and timing, and by aligning photos and receipts with prevailing inspection standards to avoid disputes.
Insurer Claim Criteria
Buyers, landlords, and insurers may look at the same paint chips but apply different standards when deciding whether to file or deny a claim.
You’ll need to know how insurer policies and claim processes set thresholds for size, depth, cause, and timing. Assessments vary, so document damage and get estimates before filing.
- Size threshold
- Cause determination
- Policy exclusions
- Timing limits
How Surface Type Affects Paint Chips
Because the substrate determines how well paint bonds and flexes, different surfaces show chips in distinct ways.
You’ll notice brick, wood, metal and drywall vary in surface durability and influence paint longevity.
Match repair techniques to substrate—sanding, priming, sealants—and focus on chip prevention like proper prep and flexible coatings so repairs last and future chipping is minimized.
Interior vs Exterior Paint: Different Expectations
When you’re comparing interior and exterior paint, expect different performance standards and maintenance needs.
When comparing interior and exterior paint, expect different performance standards and maintenance needs.
You’ll notice interior expectations focus on aesthetics, easy cleaning, and minor scuffs, while exterior expectations prioritize weather resistance and longer lifespan.
Consider care routines and inspection frequency to match each.
- Durability
- Maintenance
- Finish choice
- Inspection schedule
Size Matters: Small Chips vs Large Peeling Areas
Shifts in expectations between interior and exterior paint also change how you judge damage size: a tiny chip is handled differently than broad peeling.
You’ll treat a single small blemish as a minor cosmetic issue—chipped aesthetics—easily touched up.
Widespread peeling signals neglect or substrate problems and often needs stripping and repainting.
Prioritize chip prevention to avoid escalation and higher repair costs.
Location Matters: High‑Traffic vs Hidden Spots
If a chip shows up on a high-traffic spot like a hallway wall or stair railing, you’ll notice it fast and tenants or visitors will hold it against you; chips in hidden areas—behind furniture or in closets—are less likely to affect impressions or lease disputes.
Consider location when evaluating responsibility and repair urgency:
Consider where damage appears—high-traffic spots demand prompt fixes, hidden areas can wait, and common spaces are the landlord’s concern.
- high traffic areas: address quickly
- hidden locations: lower priority
- common areas: landlord concern
- private rooms: negotiate responsibility
Causes: Impact, Neglect, or Age‑Related Flaking
Because chips can come from very different sources, you need to look for telltale signs to decide whether impact, neglect, or simple age caused the damage.
You’ll perform an impact assessment by checking localized dents or sharp edges.
Note neglect factors like peeling near moisture or ignored maintenance.
Age related flaking shows widespread, fine cracking and powdery residue across larger surfaces.
Underlying Materials: Drywall, Wood, Metal, Stucco
When you inspect chipped paint, pay attention to the substrate because drywall, wood, metal, and stucco each show damage differently.
Drywall often peels in thin, irregular flakes. Wood can splinter or form clean chips depending on grain and impact. Metal and stucco typically show sharp-edged chips or surface pitting.
Noting these patterns helps you determine whether the damage is simple wear or indicates a structural issue.
Drywall: Chip Patterns
Drywall chip patterns tell you a lot about what lies beneath and how the damage happened: small crescent-shaped flakes usually mean a weak joint compound or impact near a seam, while larger, irregular chips often expose the gypsum core or lath behind the surface.
Use chip identification techniques and drywall maintenance tips to assess causes and fixes.
- Inspect edges
- Tap for hollow spots
- Check seams
- Note paint layers
Wood: Splintering Vs. Chips
Those same chip-detection skills you used on drywall—checking edges, tapping for hollows, noting paint layers—also help you read damage in wood, but the failure modes look different: wood tends to splinter, sending long, fibrous shards, while chips leave cleaner, often angular fragments.
You should assess grain direction, moisture exposure, and impact force, then prioritize wood maintenance and chip prevention with sealants, sanding, and timely repairs.
Metal And Stucco Chips
Metal and stucco chips behave differently from drywall or wood, so you’ll want to spot the telltale signs quickly:
- Metal: flaking exposes rust; metal durability matters for longevity.
- Stucco: surface pitting can widen if ignored; stucco maintenance prevents moisture intrusion.
- Drywall: chips are cosmetic unless damp.
- Wood: chips may precede rot; seal and repaint promptly to protect underlying material.
Paint Age and Quality: Why Older Paint Chips More
Because paint deteriorates over time, older finishes lose flexibility and adhesion, so they chip more easily than newer coatings.
You’ll notice fading, brittleness, and surface cracking as binders break down; these paint durability factors mean chips form from normal use.
Choosing high-quality coatings, proper prep, and timely touch-ups are effective chip prevention techniques that’ll extend life and reduce visible wear.
How Climate Affects Paint Durability
When your paint faces extreme sun, humidity, freeze-thaw cycles, or salt air, its binders and pigments break down faster and adhesion weakens, so chips and peeling become more likely.
Extreme sun, humidity, freeze–thaw cycles, and salt air degrade binders and pigments, weakening adhesion and causing paint to chip.
You should understand climate impact on surfaces and plan for reduced paint longevity.
Consider these factors:
- UV exposure
- Moisture and humidity
- Temperature swings
- Coastal salt exposure
Maintenance History and Paint Chip Responsibility
Understanding the climate’s role helps explain why paint fails, but your maintenance history often determines who’s responsible for chips. You should document maintenance tips and record repair techniques used; that record shows care or neglect. Keep receipts, photos, and dates to prove proactive upkeep or deferred action.
| Proof | Emotion | Action |
|---|---|---|
| Photos | Relief | Fix |
| Receipts | Trust | Hire |
| Dates | Confidence | Prevent |
Tenant Responsibilities vs Landlord Obligations
You’re responsible for fixing small issues you caused, like a scuff or a single chipped spot from accidental impact.
The landlord must handle routine maintenance and paint needed from normal wear.
When evaluating chips, focus on whether the damage exceeds expected wear and who caused it.
Tenant Repair Duties
Although tenants are expected to keep their unit reasonably clean and handle minor fixes like changing light bulbs or unclogging sinks, major repairs and issues related to building systems typically fall to the landlord.
You should know your tenant responsibilities and repair expectations:
- Patch small nail holes promptly.
- Touch up chipped paint from everyday use.
- Report larger damage immediately.
- Document repairs and communications.
Landlord Maintenance Obligations
When something in your rental building breaks or affects habitability—like a leaky roof, broken furnace, or faulty electrical system—the landlord’s responsible for arranging and paying for the repair.
Tenants should handle everyday upkeep and minor wear but must report larger issues promptly so the landlord can act.
You should know landlord responsibilities and tenant rights: document requests, allow reasonable access, and expect timely, professional fixes.
Damage Versus Wear
After you report larger repair needs and the landlord arranges fixes, the next question is who pays for what: ordinary wear and tear or tenant-caused damage.
You should request a clear damage assessment and wear evaluation. Document everything, then discuss responsibilities.
Consider these steps:
- Photograph the issue
- Compare to move-in condition
- Request written assessment
- Negotiate repair payment
What Buyers Expect During Home Inspections
Curious how chipped paint affects a home inspection? You’ll face buyer concerns about underlying issues and aesthetics. Inspectors note visible chips under inspection standards but won’t flag minor cosmetic wear unless it indicates damage, rot, or lead risks. You can address concerns proactively by documenting repairs, providing paint touch-up plans, and being transparent to keep buyers confident.
| Concern | Inspector focus | Seller action |
|---|---|---|
| Cosmetic chips | Visual notes | Touch-ups |
| Potential rot | Moisture check | Repair |
How Insurers Treat Paint Chips in Claims
Because insurers focus on covered perils and not everyday wear, chipped paint usually isn’t a standalone claim unless it’s tied to a covered event like wind-driven debris, a fallen tree, or sudden water intrusion.
You should review insurer policies and prepare for possible claim disputes by documenting cause and scope.
- Verify policy coverage
- Prove covered cause
- Estimate repair costs
- Negotiate with adjuster
Documenting Paint Chips: Photos and Timestamps
When you document paint chips, take clear close-up photos that show the damage’s edges and texture.
Make sure each image includes a visible timestamp and note the exact location and size of the chip.
These details will strengthen your record for insurers or repairs.
Capture Clear Close-Ups
Start by taking multiple close-up photos of each paint chip, holding your camera steady and filling the frame so the damage is clear and detailed.
You’ll document chipped paint and address homeowner concerns by capturing scale and context. Follow these steps:
- Use macro or close-focus mode.
- Include a ruler or coin for scale.
- Guarantee even lighting.
- Take several angles and distances.
Include Visible Timestamps
How will anyone verify the timing of damage without a clear timestamp on your photos? You should add visible timestamps to document paint longevity and show the aesthetic impact over time. Timestamps strengthen claims, help track progression, and support repair or dispute processes.
| Date | Time | Condition |
|---|---|---|
| 2026-04-01 | 09:12 | Minor chip |
| 2026-05-10 | 14:05 | Spread |
| 2026-06-20 | 08:30 | Fading |
| 2026-07-30 | 16:45 | Discoloration |
Record Location And Size
1 clear photo per chip should show exactly where the damage sits and how big it is, so include a ruler or coin in the frame for scale and shoot from a straight-on angle to avoid distortion.
You’ll timestamp and note location, then describe surface and likely repair techniques.
- Photo with scale
- Visible timestamp
- Exact location note
- Surface/repair techniques mention
Move‑In / Move‑Out Checklists That Prevent Disputes
Because you and your landlord can’t rely on memory, a clear move‑in/move‑out checklist documents the property’s condition, sets expectations for repairs, and makes deposit disputes far easier to resolve. Use move in guidelines and move out responsibilities to note chipped paint, photos, and signatures.
| Item | Status |
|---|---|
| Walls | Photo |
| Trim | Noted |
| Signatures | Collected |
Estimating Cost: DIY Touch‑Up vs Professional Repaint
When deciding whether to patch chipped paint yourself or hire a pro, weigh the size and visibility of damage, your skill level, and the true costs—including supplies, time, and potential redo work—so you can choose the most cost‑effective route.
- DIY Techniques: small fixes save money but need proper Paint Types matching.
- Cost Comparison: estimate supplies versus labor.
- Quality Assessment: pros offer lasting finish.
- Time Investment: factor hours and Repair Strategies.
Tools and Materials for Touch‑Ups
Before you start, gather the essential touch-up tools like brushes, small rollers, sandpaper, and putty knives so you won’t interrupt the job to hunt for supplies.
Pick the right paint and primer—match sheen and base (oil vs. latex) to the existing finish for a seamless repair.
Prep materials such as cleaners, patching compound, and masking tape will make sure the surface is clean, smooth, and ready to accept paint.
Essential Touch-Up Tools
A small kit of the right tools makes paint touch-ups quick and professional-looking, and you don’t need a workshop to get started.
You’ll master touch up techniques with a few essential materials and steady hands. Gather compact, multipurpose tools so repairs stay neat.
- Fine brushes
- Small rollers
- Putty knife
- Sanding sponge
Paint And Primer Selection
1 clear choice will make touch-ups last: match both the paint type and a suitable primer to the surface and damage.
You’ll pick water‑based or oil‑based paint to guarantee adhesion and color match. Use a primer that blocks stains and improves bonding — primer benefits directly boost paint longevity.
Buy small quantities of matching sheen and test in an inconspicuous spot first.
Surface Preparation Materials
Matching paint and primer sets you up for a durable repair, but you’ll still need the right tools and materials to prepare the surface properly.
Use proper surface preparation techniques and quality paint adhesion products to guarantee longevity.
Gather essentials:
- Sandpaper (various grits)
- Tack cloths
- Spackling compound and putty knife
- Primer and brush/roller for touch-ups
Quick Step‑By‑Step Fix for Small Interior Paint Chips
Grab a small dab of touch-up paint and get ready—fixing minor interior chips is quick and straightforward if you follow a few simple steps.
Clean the area, lightly sand edges, and apply primer if bare.
Use a fine brush or toothpick for paint, employing touch-up techniques and subtle blending methods to feather edges.
Let dry, add a second thin coat, then inspect.
When to Repair Underlying Damage First
Before you patch paint, check for rot and other hidden damage so the fix actually lasts.
If wood or drywall is soft, sagging, or crumbling, you’ll need to repair or replace that material first.
Structural issues left unaddressed will just make the paint chip again.
Inspect For Rot
When you find chipped paint, check the substrate for rot right away—paint won’t stick or protect wood that’s already decaying.
Do a rot detection and moisture assessment before repainting; probe soft spots, smell for mildew, and use a moisture meter.
If decay’s present, repair or replace the affected area first.
- Probe for softness
- Use a moisture meter
- Look for discoloration
- Smell for mildew
Address Structural Damage
If your probe or moisture meter shows deeper problems, don’t just repaint—fix the structural damage first.
You should assess and repair framing, sheathing, or joists to restore structural integrity before cosmetic work. Ignoring underlying issues lets moisture and rot spread, causing higher costs and safety risks.
Prioritize repairs, then replace paint and trim for a lasting finish.
Priming and Color‑Matching Best Practices
Want your touch-ups to vanish instead of stand out? Use proper primer selection and precise color matching before painting.
Make touch-ups disappear: pick the right primer and match color and sheen before painting.
Prep the area, remove loose paint, and sand lightly. Choose compatible primer (stain‑blocking or bonding) for the surface.
Match sheen and undertone, test small patches, and let primer cure fully.
- Prep
- Primer choice
- Color test
- Sheen match
How to Blend Touch‑Ups So They’re Not Noticeable
Blending touch-ups so they disappear takes careful feathering and attention to edges; start by extending your prep beyond the damaged spot so the new paint can gradually merge with the old. Use light strokes, thin coats, and proper Blending techniques with precise Color matching to avoid halos.
| Step | Action |
|---|---|
| 1 | Clean area |
| 2 | Sand edges |
| 3 | Feather paint |
| 4 | Blend coats |
Repairing Exterior Paint Chips to Prevent Water Damage
When you spot exterior paint chips, act fast with a quick patch: clean the area, sand any rough edges, and apply filler if needed.
After smoothing, prime the bare spot so the topcoat adheres and won’t peel.
Finish with a weatherproof sealant to lock out moisture and prevent water damage.
Quick Patch Steps
Start by cleaning and drying the chipped area so the patch will stick and keep water out.
Then follow quick patching techniques and smart paint selection to restore protection.
Do these steps:
- Sand edges smooth.
- Apply filler and level it.
- Let cure fully.
- Lightly sand and repaint the spot.
You’ll stop moisture intrusion and extend the exterior’s life.
Sealant And Primer
After you’ve smoothed, filled, and sanded the chip, sealant and primer are the next steps to lock out moisture and promote proper paint adhesion.
You’ll perform sealant application along edges and gaps to prevent water intrusion, then choose primer types suited to surface and topcoat.
Use a bonding primer for glossy spots or an oil-based primer for bare wood, then repaint promptly.
When Chips Signal Bigger Issues: Peeling and Moisture
If you notice paint chips accompanied by peeling or damp spots, don’t dismiss them as mere cosmetic flaws—these signs often point to moisture getting behind the finish, which can cause widespread damage if left unchecked.
You should act quickly to assess underlying moisture issues and peeling paint causes:
- Inspect for leaks or poor ventilation.
- Check exterior siding and caulking.
- Probe soft or swollen wood.
- Monitor humidity levels.
Preventive Maintenance to Reduce Future Chipping
When you keep up with routine maintenance, you’ll cut down on chips before they start: clean surfaces regularly, touch up small nicks promptly, and maintain proper caulking and trim to keep moisture and dirt from undermining the paint.
Use preventive strategies like seasonal inspections, gutter clearing, and gentle cleaning.
Follow practical maintenance tips — address hardware rubbing, repair loose siding, and schedule timely touch-ups to prevent escalation.
Choosing Durable Paint Finishes by Room
For rooms with heavy use, you’ll want finishes that stand up to scuffs and frequent cleaning.
In bathrooms and kitchens, pick moisture-resistant paints that resist peeling and mold.
Choosing the right finish for each room helps prevent chips and keeps surfaces looking fresh longer.
High-Traffic Area Finishes
Because high-traffic rooms take the most abuse, you’ll want paint that stands up to daily scuffs, scrubs, and dents without losing color or finish.
Choose high traffic solutions focused on finish durability.
Pick finishes by room and activity. Consider:
- Satin for hallways
- Semi-gloss for trim
- Eggshell for living rooms
- Durable matte for bedrooms
Moisture-Resistant Options
If rooms regularly face humidity or splashes, pick paints formulated to resist moisture and mildew so surfaces stay sound and stain-free. You’ll want products labeled for bathrooms, kitchens, or high-humidity areas and finishes that balance water resistance with the right sheen for the space.
Choose coatings with built-in moisture barriers, cleanable finishes, and proper prep to maximize paint longevity and prevent peeling.
When to Hire a Pro for Repainting
When should you call in a pro? You should when damage is extensive, surfaces need a professional assessment, or safety risks exist.
When damage is extensive, surfaces require expert assessment, or safety risks are present, call in a pro.
Also hire pros if you want a precise cost evaluation and guaranteed finish.
- Large-scale peeling or multiple rooms
- Structural or moisture-related damage
- High ceilings or tricky access
- Desire for warranty and long-lasting results
How to Get and Compare Contractor Estimates
How do you get reliable contractor estimates without losing time or money?
Ask for written bids from multiple pros, list exact tasks, materials, and timelines, and insist on estimate clarity.
Evaluate contractor communication—responsiveness, detail, and willingness to explain differences.
Compare line-item costs, warranties, and expected start/completion dates to pick a fair, transparent quote you trust.
Negotiating Deposit Deductions and Repair Charges
Make sure you document any preexisting chips and scuffs with photos and a dated inventory before you move out.
If a landlord or contractor wants to deduct from your deposit, ask for itemized estimates and compare them to your evidence.
Negotiate firmly for reasonable charges, pointing out normal wear-and-tear versus damage.
Document Preexisting Damage
Before you move in or out, photograph and list every chip, scratch, and stain so you can prove those issues existed before your tenancy ends.
You should record preexisting conditions and use reliable documentation methods to protect your deposit. Share dated photos with your landlord and keep originals.
- Time-stamped photos
- Room-by-room checklist
- Signed move-in report
- Stored digital backup
Negotiate Reasonable Charges
Wondering what counts as reasonable when your landlord proposes deductions?
You should request itemized repair estimates, compare them to market rates, and use clear negotiation strategies.
Present photos, dated move-in records, and independent quotes to challenge excessive charges.
Stay calm, document every exchange, and, if needed, escalate to mediation or small claims to recover unfair deductions.
Local Tenancy Laws That Decide Who Pays
Because local tenancy laws vary, who pays for chipped paint often depends on where you rent and the specific statutes or ordinances that apply.
You should know tenant obligations and landlord rights, inspect move-in condition, and document damage.
Check local statutes, consult housing agencies, and keep records to support or contest charges.
- Review statutes
- Check leases
- Document condition
- Contact local agency
Real Examples: Normal vs Chargeable Paint Chips
Now that you know how local laws and documentation affect responsibility, let’s look at concrete examples so you can tell ordinary wear from chargeable damage.
A small scuff or tiny paint flakes near a window often count as normal wear.
Deep gouges, multiple chipped areas from neglect, or themes of deliberate damage are chargeable damages.
You should document and photograph each case promptly.
Record‑Keeping Templates for Owners and Landlords
A clear, consistent record-keeping template helps you document paint condition, tenant communication, and repair costs so disputes stay factual instead of emotional.
Use simple record keeping methods and landlord templates to track dates, photos, estimates, and signed notices. Keep files digital and backed up.
- Move-in/out checklist
- Photo log with timestamps
- Repair invoice tracker
- Communication record
Presenting Repaired Areas When Selling
When you’re preparing to sell, present repaired areas so buyers see quality work, not quick fixes. Clean edges, matching paint, and neatly finished trim signal care and reduce questions during inspections.
You should document repair strategies, stage spaces to highlight seamless patches, and disclose work to build trust.
Prioritize aesthetic considerations—consistent color and texture—so repairs look intentional, not rushed.
Paint‑Focused Cost‑Saving Alternatives Before Sale
If you want to cut prep costs before listing, focus on targeted, paint-centered fixes that give big visual payoff without a full repaint.
Use cost effective solutions and DIY alternatives to boost curb and interior appeal quickly.
- Touch-up kits for small chips
- Spot priming and matching paint
- Rollers for accent walls
- Caulk and repaint trim edges
Myths Landlords and Tenants Believe About Paint Chips
Why does everyone assume every paint chip equals big damage and a huge bill? You’ve heard myths: any chip means tenant neglect, instant forfeited deposit, or mandatory full repaint.
That’s inaccurate. Use myth debunking and tenant education to set clear standards, document baseline condition, and separate normal wear from abuse so disputes stay factual, fair, and quicker to resolve.
Immediate Checklist After Spotting New Paint Chips
Because catching paint chips early keeps small issues from becoming bigger ones, start by taking clear photos and noting the date and exact location the moment you spot them.
Then follow this quick checklist to guide paint chip prevention and routine maintenance tips:
- Inspect surrounding area for moisture or impact.
- Clean area gently.
- Tape and measure chip size.
- Log repairs and schedule touch-up.
Resources: Dispute Templates, Sample Estimates, Inspectors
Once you’ve documented paint chips and scheduled touch-ups, gather the right resources to protect your case and get accurate repairs.
Use dispute resolution templates to formalize claims, attach photos, and cite lease terms.
Obtain sample estimates from local painters for clear cost estimation, and hire a neutral inspector if needed.
Keep records, timelines, and receipts to support any negotiation or small-claims filing.
Frequently Asked Questions
Can Lead Paint Be a Factor in Paint Chipping Hazards?
Yes — lead paint can heighten chipping risks and create health hazards; you’ll need to follow safety regulations, address deteriorating surfaces promptly, and fulfill homeowner responsibilities like testing, safe removal, or hiring certified contractors.
Do Paint Chips Affect Historic Designation or Preservation Rules?
Like a guardian’s frown, yes — you’ll need to follow historic preservation rules; you’re required to perform paint maintenance per guidelines, and paint chips can trigger review, repairs, or penalties if they alter historic character.
How Do HOA Rules Influence Paint Repair Responsibilities?
HOA guidelines usually define maintenance responsibilities, so you’ll follow paint standards and file repair requests when needed; your HOA can require specific colors, timelines, and contractor approvals, and may enforce compliance with fines or reminders.
Are Allergy or Health Concerns Linked to Paint Dust From Chipping?
Yes — like a whispering storm, paint dust can drift into lungs; you’ll face health risks especially from lead or prolonged exposure, so clean carefully, ventilate, and use masks to protect household members and pets.
Can Pets Cause Paint Chips and Who Is Liable for Repairs?
Yes — pets can cause paint chips through scratching, chewing, or rubbing; you should document pet behavior and discuss repair responsibilities with your landlord or insurer, since liability often depends on lease terms and damage assessments.
Conclusion
In short, chipped paint isn’t automatically normal wear and tear — it’s a gray area that depends on surface, location, and timing. Think of your home like a book: a few dog‑eared pages are expected, but torn chapters aren’t. Know the definitions landlords, buyers, and insurers use, document damage promptly, and try inexpensive fixes before selling. That way you’ll avoid surprises and keep disputes—and costs—from flipping the story.