Why You Get Bubbles When Painting Your Nails And How to Fix It
You get bubbles in your nail polish when air, moisture, or solvent vapors get trapped in thick or improperly mixed formulas, or when you shake the bottle, paint over damp or oily nails, or work in hot or humid conditions. To fix it, roll the bottle gently, thin coats, let each layer cure, and use a cool fan or LED lamp if appropriate; keep products fresh and seal the edges—keep going to learn step-by-step prevention and fixes.
Quick Answer Why You Get Bubbles When Painting Your Nails
You usually get bubbles because air, moisture, or oil gets trapped under or in the polish.
Shaking the bottle, painting over wet base coats, or applying thick layers will also create bubbles.
Fixing those sources prevents the problem.
Short, direct explanation of the most common causes
When bubbles form while you paint nails, it’s usually from trapped air or uneven drying—shaking the bottle, applying thick coats, painting over oily or damp nail surfaces, or working in hot, humid conditions all cause them.
You might ask why do I get bubbles when I paint my nails; common causes include:
- Shaking polish vigorously
- Thick or multiple coats
- Oily or damp nails
- Heat or humidity
- Old or separated polish
How Nail Polish Bubbles Form (Basic Understanding)
When you see tiny bumps in wet polish, those are bubbles trapped in the film as solvents evaporate or gases form from chemical reactions.
Temperature, solvent evaporation rate, and the polish’s chemistry control how quickly bubbles form and collapse, while your brushing motion, air flow, and humidity can mechanically introduce or preserve them.
Understanding these scientific and practical factors lets you spot causes and change your technique to reduce bubbling.
What are nail polish bubbles?
Air trapped under drying lacquer shows up as tiny, raised bubbles that break the smooth finish and dull the shine.
You’ll notice them as pinpricks or larger blisters scattered across the nail. They form within the polish layer, disrupting pigment and gloss, and can flake off or create uneven texture.
You can usually remove or prevent them with proper technique.
Scientific and physical factors behind bubbling (temperature, solvents, evaporation, chemical reactions)
Although the tiny bubbles look random, they’re driven by clear physical and chemical processes you can control.
- Temperature shifts change solvent evaporation rates.
- Fast solvent loss traps air pockets.
- Volatile solvents create vapor bubbles during film formation.
- Immiscible ingredients cause micro-droplet separation.
- Exothermic reactions or curing gradients produce localized gas release.
You can adjust formulation and drying to minimize these effects.
Mechanical and environmental contributors (brush technique, air flow, humidity)
If you press too hard or load the brush with uneven polish, you’ll trap tiny pockets of air and create surface disturbances that turn into bubbles as the film levels and dries.
You should control technique and environment to avoid them:
- Use light, even strokes
- Wipe excess from the brush
- Paint in steady airflow, not drafts
- Work at moderate humidity
- Let layers dry between coats
Common Causes Categorized
Now you’ll look at the common causes of bubbles grouped into four clear categories: product-related, application-related, nail-surface and prep-related, and environmental/external causes.
Knowing which category a problem falls into helps you spot the root cause faster.
We’ll go through each category and show the specific issues and fixes.
Product-related causes
When bubbles appear in your nail polish, they’re often caused by the products themselves rather than your technique; poor formulation, old or improperly stored polish, and incompatible base or top coats can all trap air or change drying behavior.
- Thick or separated polish
- Expired or heat‑damaged bottles
- Shaky, high‑solvent formulas
- Incompatible base/top coats
- Contaminated brushes or caps
Application-related causes
Product issues often start the bubbling problem, but how you apply polish can make things worse or hide those flaws.
You can fix most application errors by changing technique:
- Shaking polish vigorously
- Applying thick coats
- Not allowing layers to dry
- Brushing too fast or with heavy strokes
- Sealing edges improperly
Adjust these habits and you’ll reduce bubbles considerably.
Nail-surface and prep-related causes
Because your nails are the foundation for every coat you apply, prep and surface issues often cause bubbling before you even touch the brush. You can prevent bubbles by fixing the nail itself:
- oily or dirty nail plate
- leftover polish or remover residue
- uneven or ridged surface
- lifted or peeling tips
- insufficient buffing and cleaning
Address these and you’ll get smoother, bubble-free polish.
Environmental and external causes
Fixing nail-surface issues is only part of the battle; external factors around you can also cause polish to bubble.
You should control surroundings and habits to prevent issues.
- High humidity or steam
- Extreme temperatures (hot or cold)
- Direct fan or dryer airflow
- Contaminated polish or tools
- Touching wet polish or exposing nails to dust
Step-by-Step How to Prevent Bubbles Before You Paint (Preparation)
Before you pick up polish, make sure you clean, dry, and lightly buff nails, then apply a proper base coat so paint adheres smoothly.
Check product labels and expirations, choose a reliable formula, and set up a controlled workspace with comfortable temperature, low humidity, and good ventilation.
Have the right tools ready—quality brushes, a drop of thinner for thickened polish, and a curing lamp if you use gel—to keep the process efficient and bubble-free.
Proper nail preparation sequence (clean, dry, buff, base coat)
Start by prepping your nails in a steady sequence: clean to remove oils and old polish, dry thoroughly so no moisture’s trapped, gently buff the surface for adhesion, then apply a thin base coat.
Work one hand at a time, wipe with lint-free remover, let nails air for a minute, buff lightly, and seal with a thin, even base layer before painting.
Choosing the right products and checking expiration
When you pick your polish and tools, prioritize formulations designed for smooth application and check their manufacture or expiration dates — old or separated products are a common cause of bubbling.
Replace thick, separated polish and discard cloudy topcoats. Follow label storage. Use compatible base/top brands. Test a quick swatch before a full manicure.
- Check expiration dates
- Inspect for separation
- Avoid overly thick polish
- Match base/top brands
- Swatch first
Ideal environmental setup (temperature, humidity, ventilation)
If you’re painting in a room that’s too hot, cold, or humid, your polish can dry unevenly and trap air—so set up a stable, moderate environment before you paint.
Control temperature, humidity, and airflow to prevent bubbles:
- Keep room 68–72°F (20–22°C)
- Aim for 40–60% humidity
- Avoid direct drafts or fans
- Use gentle ventilation
- Let polish acclimate to room conditions
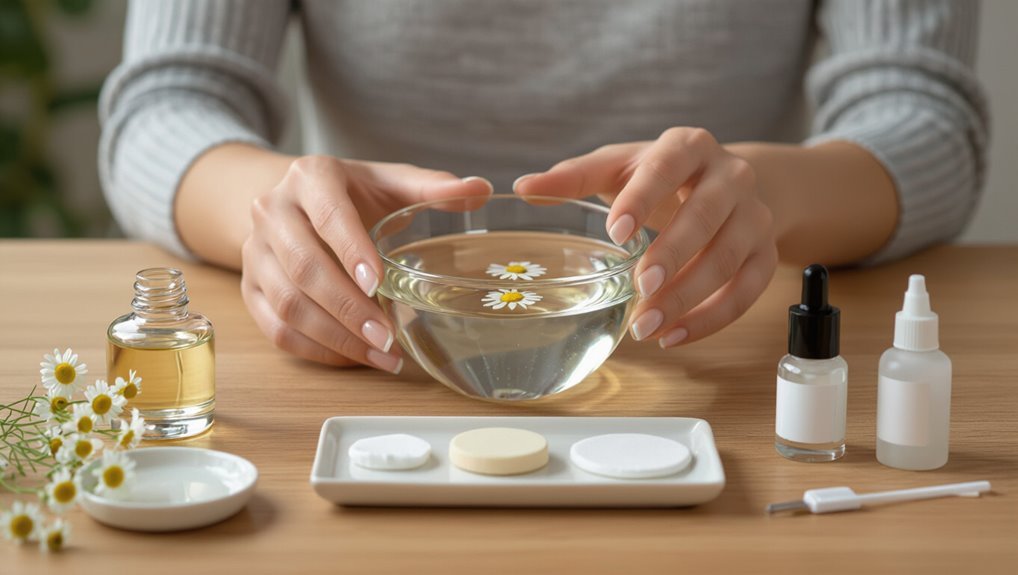
Tools to have on hand (brushes, thinner, lamp)
Before you open any bottles, gather the right tools so you won’t have to improvise mid-application: a few quality brushes (including a clean-up brush and a thin detail brush), a bottle of polish thinner to restore viscosity, lint-free wipes, a tack-free base and top coat, and a UV/LED lamp if you’re using gel.
Having these on hand lets you address streaks, clogs, or thickened polish immediately and prevents hurried fixes that trap air.
- Clean-up brush
- Detail brush
- Polish thinner
- Lint-free wipes
- UV/LED lamp
Step-by-Step Application Technique to Avoid Bubbles
You’ll want polish at the right consistency—thin enough to flow but not watery—and you can restore thickened polish safely with a few drops of nail polish thinner.
Load the brush sparingly and use smooth, single strokes from cuticle to tip, building color in thin, even layers while checking tackiness between coats.
Finish with an appropriate drying method—air, fan, or LED/UV—following the recommended order so each layer cures fully without trapping bubbles.
Ideal polish consistency and how to restore it safely
When your polish has the right consistency—smooth, fluid enough to spread but not so thin it runs—you’ll get even, bubble-free coats; restoring that balance safely means thinning gently with the correct product and avoiding heat or shaking that traps air.
Use a few drops of proper nail polish thinner, stir gently with the brush handle, test on a nail, and repeat sparingly.
Correct brush loading and stroke technique
1 simple rule governs brush loading and strokes: less is more—load just enough polish to coat the brush but not drip, then wipe one side on the bottle neck to remove excess.
You’ll paint smoothly by controlling pressure and direction. Follow these quick tips:
- Start at the cuticle, pull straight to tip
- Use three strokes per nail
- Light pressure avoids bubbles
- Don’t rebrush wet areas
- Keep wrist steady
Layering strategy: thin coats, drying time, and tackiness checks
Because thin, controlled layers dry evenly, you’ll cut down on trapped air and surface tackiness that cause bubbles.
- Apply very thin base coat; avoid flooding cuticles.
- Wait 60–90 seconds between thin color layers.
- Lightly press brush to spread, don’t scrub.
- Check tackiness by gentle fingertip touch; if gummy, wait.
- Finish with a thin topcoat once layers feel dry to the touch.
Drying methods and order (air dry vs. fan vs. LED/UV)
After your thin, tack-free layers are in place, choose the drying method and order that best fits the polish type and your schedule.
Pick methods that reduce heat and movement to prevent bubbles:
- Air dry for regular polish, avoiding drafts
- Use a cool fan for gentle acceleration
- Apply quick-dry drops sparingly
- LED/UV cures for gel layers only
- Finish with a sealant topcoat to lock edges
Fixing Bubbles After They Appear
If you spot a few minor surface bubbles, you can often smooth them out with a quick topcoat or gentle buffing.
For deep or widespread bubbling you’ll need to remove the affected layers and redo the polish to prevent recurrence.
Learn when to thin a gummy polish with a few drops of thinner versus when to strip and use remover so you choose the right fix.
Minor surface bubbles: quick fixes and smoothing techniques
A few small bubbles on a finished nail aren’t a disaster—you can usually smooth them out without starting over.
- Gently warm the nail with a hairdryer for a few seconds.
- Roll a soft fingertip over the bubble to flatten it.
- Use a small dot of topcoat and drag over the spot.
- Cure under LED/UV if applicable.
- Lightly buff and reapply topcoat for a seamless finish.
Deep or widespread bubbling: removal and redo workflow
When deep or widespread bubbles appear, don’t try to patch them—strip and redo the layer to prevent lifting and uneven texture.
You’ll need to remove polish fully, prep the nail, and apply thin, even coats. Follow these steps:
- Soak or remove polish completely
- Gently buff and clean the nail
- Apply dehydrator/primer if used
- Use thin coats, curing between layers
- Finish with topcoat and proper dry time
When to use polish thinner vs. remover
After you strip and redo a layer for deep or widespread bubbles, you’ll often face smaller, localized bubbling that doesn’t require a full removal.
Use thinner when polish is too thick or gloopy; use remover when adhesion fails or many bubbles persist.
Quick fixes:
- Dab with thinner on a brush
- Smooth small bubbles
- Remove if spread
- Reprep nail surface
- Reapply thin coats
Comparison of Common Solutions and Their Effectiveness
You’ll compare quick fixes and long-term prevention to see which tactics actually stop bubbles, not just mask them. Below is a concise comparison of common consumer products and their typical effectiveness for immediate fixes versus lasting results. Use the table to guide which option fits your routine and patience level.
| Product type | Typical use | Effectiveness |
|---|---|---|
| Thinner | Smooths thick polish | Good for application issues, short-term |
| Top coat (fast) | Quick seal | Fast glossy finish, moderate prevention |
| Top coat (long-wear) | Durable seal | Strong prevention, slower to dry |
| Drying spray | Speeds curing | Immediate set, variable long-term results |
Fast fixes vs. long-term prevention
Though quick tricks can rescue a bubbled manicure in minutes, they rarely address the root causes; deciding between fast fixes and long-term prevention means weighing immediate appearance against durability.
You can smooth bubbles with a top coat or gentle heat for instant improvement, but to stop them you’ll need consistent prep: clean nails, thin coats, proper drying time and humidity control for reliable, lasting results.
Consumer products compared (thinner, top coat types, drying sprays)
Once you’ve chosen between quick fixes and structural prevention, look at the products that actually help: nail polish thinner, different top coat formulas, and drying sprays each play distinct roles in preventing or repairing bubbles.
Use thinner to restore viscosity and reduce trapped air; pick leveling, fast-dry top coats to smooth surfaces; and apply silicone-based drying sprays sparingly to flatten residual bubbles without wrecking shine.
Mistakes That Make Bubbling Worse
Watch for common application mistakes you might be making—thick coats, shaking the bottle, or not letting layers dry—that actually trap air and worsen bubbling.
Don’t rely on product misuse tips or DIY myths like overheating polish or adding solvents, because those often break formulas and create more problems.
I’ll cover which habits to stop and what safe alternatives to use.
Top application mistakes to avoid
A few common application mistakes—like skipping base coats, applying polish too thickly, or working in a humid room—directly cause bubbling and make it worse.
- Shaking the bottle vigorously
- Not wiping excess from the brush
- Layering before the previous coat dries
- Painting over oily or unclean nails
- Using old, separated polish
Follow thin, even coats and proper drying time to prevent bubbles.
Product misuse and DIY myths that cause more harm
While it might seem harmless to fix polish problems with shortcuts, several common product misuses and DIY myths actually make bubbling worse.
You’ll ruin results if you:
- Shake polish vigorously
- Apply thick layers to speed drying
- Use expired or contaminated bottles
- Skip base/top coat for “save time”
- Mix different brands or homemade “thinners”
Follow proper steps instead and bubbles will drop.
Best Practices and Pro Tips from Nail Technicians
To keep bubbles at bay, you should stick to a simple routine of nail prep and regular maintenance between appointments.
If you run into stubborn bubbling, pros use specific techniques like thinner layers, controlled drying, and targeted buffing that you can try or ask your technician to perform.
For products, look for reliable base/top coats and solvent-balanced polishes from reputable brands and avoid off-brand thinners that can cause issues.
Routine maintenance for bubble-free manicures
Because small habits make big differences, keeping your manicure bubble-free comes down to consistent prep, gentle upkeep, and smart product choices you apply between salon visits.
- Wipe nails with alcohol before polish.
- Use thin, even coats and let each dry.
- Avoid shaking bottles; roll them instead.
- Keep cuticles moisturized to prevent lifting.
- Store polish upright in a cool, dark place.
Professional techniques for stubborn conditions
If you’re dealing with persistent bubbling despite solid home prep, nail technicians use targeted steps—like controlled airflow, precise product layering, and heat management—to fix the root causes rather than mask them.
- control salon airflow and temperature
- thin, even application with flash cures
- dehydrate and bond the nail plate
- avoid overworking edges
- finish with proper post-cure cooling
Recommended product types and brands (general guidance)
Once you’ve tightened your technique around airflow, layering, and heat, pick products that support those steps so problems don’t keep coming back.
Choose quality, breathable base coats, medium-viscosity polishes, fast-evaporating topcoats, and reliable removers. Consider pro brands known for consistency.
- Breathable base coat (e.g., Orly)
- Medium-viscosity polish (Zoya)
- Fast-dry topcoat (Seche Vite)
- Gentle remover (Acetone-free)
- Quality brush set
Troubleshooting Scenarios (Case-Based)
If you’re short on time, I’ll show fast steps to get a smooth at-home mani without bubbles.
You’ll also get a stepwise rescue plan for old or thick polish so you can still use it safely.
Finally, you’ll learn simple adjustments for humid or cold conditions to prevent bubbling.
Scenario: Quick at-home manicure with time pressure how to avoid bubbles
When you’re rushing a quick at-home manicure, tiny mistakes—like thick coats, not waiting between layers, or using old polish—are the most common causes of bubbles.
So prioritize thin, even strokes, brief drying time between coats, and warm-but-not-hot hands to keep polish smooth.
Work one nail at a time, wipe excess from the brush, avoid shaking the bottle, and finish with a fast-dry topcoat.
Scenario: Using old/thick polish stepwise rescue plan
Even with thin, careful layers, you can still hit a snag if your polish has thickened with age; here’s a compact, step-by-step rescue plan to get it back to usable consistency and avoid bubbles.
Add a drop of polish thinner, roll bottle between palms (don’t shake), test viscosity, thin gradually, wipe brush rim, apply thin coats, allow full drying between layers.
Scenario: Humid or cold environment adaptations to prevent bubbling
Because temperature and humidity change how polish levels and dries, you’ll need to tweak your technique when it’s cold or muggy to stop bubbles from forming.
Work in a warm, dry room or use a portable heater/desk fan. Apply thinner coats, wait longer between layers, and avoid breathing directly on nails.
Warm the bottle in your hands briefly to improve flow.
Frequently Asked Questions (FAQ)
You probably have a few quick questions about bubbling, so let’s clear up the most common ones.
Below are five FAQs that will help you troubleshoot bubbling and protect your nails.
Read them to learn when bubbles mean a problem and when they’re just cosmetic.
- Why do I get bubbles only on some nails?
- Can nail polish bubbles damage my natural nail?
- Is shaking polish bad and does it cause bubbles?
- How long should I wait between coats to prevent bubbles?
- Can top coat or gel polish eliminate bubbling entirely?
Why do I get bubbles only on some nails?
Why do bubbles appear on some nails but not others? It’s usually about nail and application differences: oil, lotion, or sweat on one nail, uneven buffing, thicker polish on certain nails, or brushing technique that traps air.
Dominant-hand strokes, temperature variations, or an old bottle can affect individual nails.
Clean, even prep and consistent strokes prevent uneven bubbling.
Can nail polish bubbles damage my natural nail?
Could tiny bubbles in your polish harm your natural nail? Minor bubbles themselves won’t damage your nail, but they can trap moisture or debris that leads to lifting, chipping, or uneven wear.
Repeated poorly applied layers may weaken the topcoat and encourage peeling.
Remove bubbled polish gently, prep nails properly, and use thin, even coats to protect your nail health.
Is shaking polish bad and does it cause bubbles?
Although shaking a bottle seems like the quickest way to mix polish, it can introduce tiny air bubbles that show up on your nails; instead, roll the bottle between your palms or gently invert it several times to combine pigments without aerating the formula.
Shaking often creates foam and uneven texture, so take a little extra time to mix gently for smoother application and fewer imperfections.
How long should I wait between coats to prevent bubbles?
After you’ve mixed your polish gently, give each layer time to set so trapped solvent or tiny air pockets don’t form bubbles when you apply the next coat.
Wait about 2–3 minutes between thin coats; thicker layers need 5–7 minutes. If the polish still feels tacky, pause longer.
Drying aids (fan, cool air) help, but avoid heat which can create bubbles.
Can top coat or gel polish eliminate bubbling entirely?
Can a top coat or gel polish completely stop bubbling? Not always. A quality top coat or gel can reduce surface bubbles and seal imperfections, but it won’t fix bubbles caused by improper prep, thick layers, or contaminated polish.
To minimize bubbling, clean nails, thin coats, proper drying or curing, and correct application are essential—top coats help, but they aren’t a cure-all.
Conclusion and Actionable Checklist
You’ve seen the key fixes for preventing nail polish bubbles—clean nails, proper temperature, thin coats, and slow drying.
Use this quick checklist before and during painting to stay on track: prep, thin layers, wait between coats, and avoid heat or shaking.
Try these steps and share your results, or consult a pro if bubbles persist.
One-paragraph summary of key fixes
Though bubbles can feel inevitable, you can largely prevent them by controlling prep, product, and technique: clean, dry nails; thin, even coats; avoid shaking bottles; wait between layers; use quality formulas and fresh polish; work in moderate temperature; cap tips and seal edges.
If bubbles appear, lightly buff and reapply or remove and start fresh to restore a smooth finish.
Quick checklist to follow before and during painting
1 simple checklist will keep bubbles from ruining your manicure: prep thoroughly, work in thin layers, control product temperature, avoid shaking, and give each coat time to set.
- File and clean nails, remove oils
- Use room-temperature polish
- Roll bottles gently instead of shaking
- Apply thin, even coats
- Wait fully between layers and before topcoat
Call to action: try these steps and share results / consult a pro if persistent
Those simple steps will make a big difference—try them on your next manicure and compare the results.
Follow the checklist: clean, dry nails; thin coats; proper drying time; avoid heat and shaking.
Note what changes. If bubbles persist despite consistent technique, consult a pro or your nail technician to check products, tools, or nail health.
Share your results to help others.