
How to Store Finished Diamond Paintings So They Stay Flawless for Years
Store finished diamond paintings flat in a clean, dry place with acid-free backing and archival tissue, or roll face-out around a sturdy tube with acid-free interleaving if you must; cover with a clear protective sleeve or rigid folder to prevent dust, pests, and bead loss. Keep them away from direct sun and heat, maintain 65–75°F and 40–50% humidity, check them every few months, and seal edges or use a non-yellowing spray for extra protection—keep going to learn detailed methods.
Quick Answer How to Store Finished Diamond Paintings So They Stay Flawless
Store your finished diamond painting flat in a clean, dry place away from direct sunlight to protect the adhesive and colors.
Use acid-free tissue or a clean sheet between paintings and keep them in a rigid portfolio or shallow box to prevent bending.
Check them occasionally for dust or humidity so you can address any issues before they cause damage.
One-sentence summary of best practice
For long-term protection, keep finished diamond paintings flat in a clean, dry place, covered with their protective plastic and sealed in a rigid or padded folder to prevent dust, moisture, and bead displacement.
Store them away from direct sunlight and heat, avoid stacking heavy items, check periodically for humidity, and use acid-free backing or mounting when framing to guarantee how to store finished diamond paintings preserves color and adhesion.
Why Proper Storage Matters
A finished diamond painting is your completed canvas with every resin “diamond” glued into place to create the full image.
You’ll want to protect it because dust, fading from sunlight, warping from humidity, bead loss, and even pests can all damage the work.
Proper storage stops those risks so your piece stays vibrant and intact for years.
What is a finished diamond painting?
Finished diamond paintings are the sparkling, textured artworks you’ll want to protect—they’re made by affixing thousands of tiny resin drills to a sticky canvas to create a raised, mosaic-like image.
Once finished, you’ll have a sturdy, tactile piece that reflects light and adds dimension. You’ll treat it like framed art: clean hands, minimal handling, and proper resting/storage to preserve appearance and adhesion.
Common risks to finished pieces (dust, fading, warping, bead loss, pests)
Because your diamond painting combines adhesive, tiny resin drills, and a textured surface, it’s vulnerable to specific threats: dust that dulls sparkle, sunlight that fades colors, humidity or heat that warps the canvas and weakens glue, accidental bead loss from bumps or handling, and pests that can chew the backing or nest in storage.
Store pieces flat or framed, use acid-free materials, control light and humidity, and handle minimally.
Essential Preparation Before Storage
Before you store your diamond painting, do a quick cleaning and final inspection checklist to pick up dust, misaligned drills, or stray adhesive.
Secure any loose drills and reinforce the edges so nothing shifts during storage.
Finally, consider whether to seal or varnish—know the pros and cons for added protection versus potential changes to shine or texture.
Cleaning and final inspection checklist
A quick, methodical cleaning and inspection will keep your diamond painting pristine for storage and future display—so take your time to check every section.
Wipe dust with a soft brush, spot-clean smudges gently, scan for missing or misaligned drills, and confirm adhesive areas are tacky. Record any issues for repair before packing.
- Brush surface
- Spot-clean
- Scan drills
- Check adhesive
Securing loose drills and reinforcing edges
1. You’ll secure any loose drills and reinforce edges before storage to prevent loss and peeling.
- Press loose drills back with a tool and tweezers.
- Apply tiny dabs of craft adhesive under stubborn drills.
- Tape or fold-back canvas edges with archival tape.
- Add a thin cardboard frame around the piece for edge protection during handling and storage.
Options for sealing or varnishing pros and cons
Once your drills are secure and the edges are protected, you’ll want to contemplate sealing or varnishing to lock everything in place and guard against dust and moisture. You can use spray sealant (quick, even), brush-on varnish (thick, protective), or adhesive sheets (removable, less durable).
| Type | Benefit | Drawback |
|---|---|---|
| Spray | Even coat | Fumes |
| Brush | Strong bond | Texture |
| Sheet | Reversible | Less seal |
Best Storage Methods
Now you’ll learn the best ways to store your diamond paintings so they stay flat, clean, and damage-free.
I’ll cover flat storage materials and step-by-step packing, when and how to roll a canvas safely, plus framing/display tips and choosing archival boxes or folders.
Follow these methods and your work will stay ready to enjoy or display for years.
Flat storage: materials and step-by-step process
Flat storage keeps your diamond paintings wrinkle-free and protected, and it’s simple to set up with a few basic materials: acid-free backing board, archival tissue or glassine, clear plastic sleeves or zip-top bags, and a flat box or portfolio.
- Clean hands, lay painting face up.
- Cover with archival tissue.
- Sandwich between backing boards.
- Slide into sleeve, store flat in box.
Rolled storage: when to use it and how to roll safely
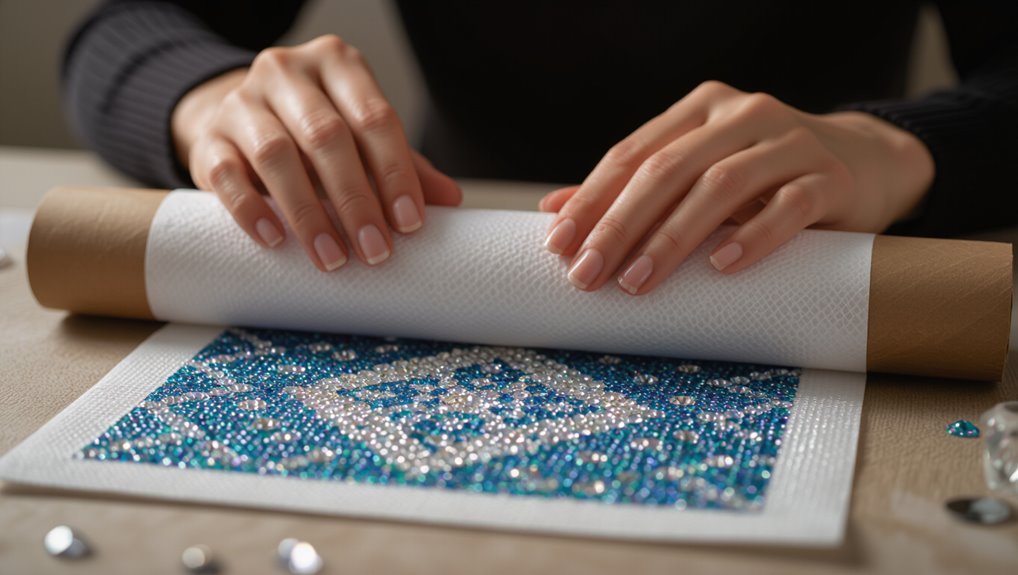
If you don’t have room to keep a finished diamond painting perfectly flat, rolling can be a safe alternative for certain pieces—especially works on flexible canvases or those that aren’t fully framed.
Roll with the painted side out, use acid-free interleaving, a firm tube, and gentle tension to avoid creases.
Store horizontally in a cool, dry spot.
- Paint side out
- Acid-free layer
- Firm tube
- Gentle tension
Framing and displaying long-term: techniques to prevent damage
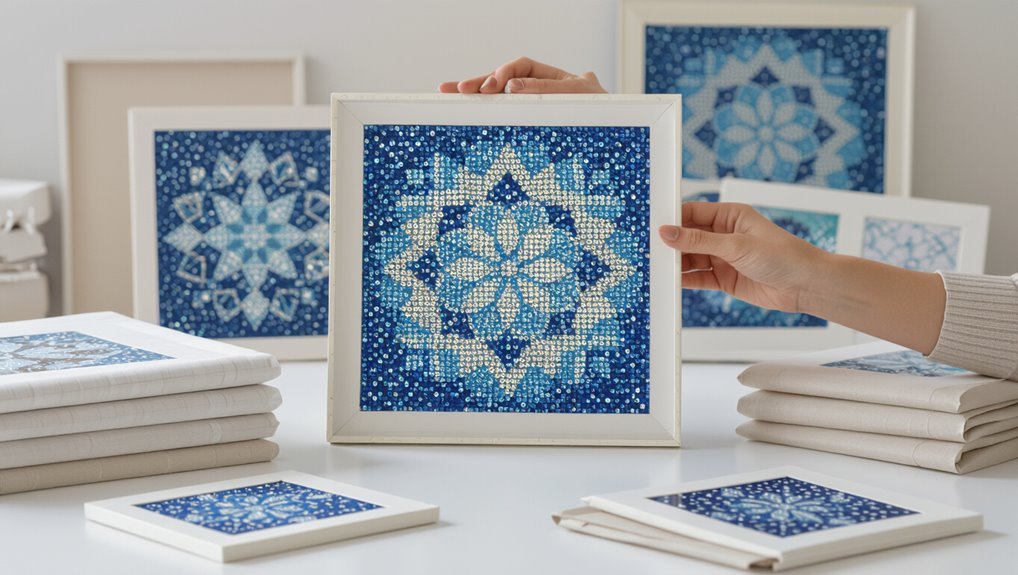
1 reliable way to keep your diamond painting safe for years is to mount and frame it correctly, and you’ll want to do this with materials that protect rather than harm the piece.
Use UV glass, acid-free mounting board, a spacer to avoid contact, and secure backing.
- UV-protective glass
- Acid-free mat/board
- Spacer or float mount
- Sealed, sturdy backing
Using archival boxes and folders: selection and packing steps
When you want long-term, safe storage without framing, archival boxes and folders give structured protection against light, dust, and acid damage.
Choose acid-free, lignin-free boxes slightly larger than the painting; use pH-neutral tissue; lay flat or upright with rigid supports; label externally.
Follow these packing steps:
- Clean hands, wear cotton gloves.
- Wrap in pH-neutral tissue.
- Add rigid board support.
- Seal and label clearly.
Environment and Location: Where to Store Finished Diamond Paintings
You’ll want to store finished diamond paintings in a stable environment with moderate temperatures, low humidity, and minimal direct light to protect adhesives and colors.
Don’t use basements, attics, or high-traffic spots where moisture, temperature swings, or accidental damage are likely.
For short-term storage a cool, dark closet works fine, while long-term storage calls for climate-controlled spaces and protective packaging.
Ideal temperature, humidity, and light conditions
Although diamond paintings are sturdy, they’re still sensitive to their surroundings, so aim for a stable, moderate environment:
- Keep temperature around 65–75°F (18–24°C) to prevent adhesive breakdown.
- Maintain relative humidity near 40–50% to avoid warping or mold.
- Avoid direct sunlight; use low UV exposure to prevent fading.
- Guarantee gentle, consistent air circulation; avoid rapid temperature or humidity swings.
Avoiding basements, attics, and high-traffic areas
Because basements, attics, and busy hallways often have poor climate control, you should pick a more stable, low-traffic spot for finished diamond paintings to protect the adhesive, canvas, and drills from moisture, temperature swings, dust, and accidental bumps.
- Choose interior walls away from doors and windows.
- Avoid laundry, garage, and entryway areas.
- Use a dedicated display or storage closet.
- Keep paintings off floors and away from vents.
Short-term vs long-term storage considerations
Having picked a stable, low-traffic spot, consider how long you’ll store each finished piece—short-term needs differ from long-term ones.
For short-term (weeks to months), keep paintings flat or upright in protective sleeves, away from sunlight and humidity.
For long-term (years), use acid-free backing, archival boxes, silica gel, and climate-controlled storage; check periodically for pest or moisture signs.
Materials and Supplies Recommended
You’ll want protective layers like acid-free tissue, clean paper, or foam to keep the canvas and drills safe from dust and pressure.
Use proper fasteners, straps, and sturdy storage containers to prevent shifting and bending during storage.
Keep basic inspection and maintenance tools on hand—soft brushes, tweezers, and a magnifier—so you can check and care for your pieces periodically.
Protective layers (paper, acid-free tissue, foam)
Protective layers keep your diamond painting safe from dust, scratches, and adhesive transfer during storage or transport.
You’ll layer materials to prevent abrasion and acid damage, and to cushion edges without sticking to drills. Choose acid-free tissue, soft paper, and closed-cell foam for long-term protection.
- Acid-free tissue between canvas and covers
- Soft craft paper wrap
- Thin foam sheet padding
- Smooth interleaving sheets
Fasteners, straps, and storage containers
After layering acid-free tissue and foam to shield the canvas, secure everything with the right fasteners, straps, and containers to prevent shifting, moisture, and creasing.
Use soft cotton straps or adjustable webbing to avoid pressure points, archival tape sparingly, and rigid plastic or acid-free boxes for long-term storage.
- Cotton straps
- Adjustable webbing
- Archival tape
- Rigid acid-free box
Tools for inspection and maintenance
One set of simple tools will keep your diamond paintings looking their best: a soft-bristled brush and microfiber cloth for dusting, a handheld magnifier or loupe to check for loose drills, a small LED inspection light to spot adhesive problems, and a pair of fine-tipped tweezers and wax picker for minor repairs.
- Magnifier/loupe
- LED inspection light
- Tweezers & wax picker
- Soft brush & microfiber cloth
Common Mistakes and How to Avoid Them
Don’t store canvases face-to-face without a protective barrier, or the drills and adhesive can stick and cause damage.
If you roll a piece, use a rigid core so the canvas doesn’t crease, and avoid tight rolling.
Also skip non-breathable plastics and set reminders to check your paintings periodically so moisture and pests don’t ruin them.
Mistake: Storing face-to-face without protection prevention
If you press two finished diamond paintings face-to-face without any protective barrier, you’ll likely end up with scratched drills, flattened resin facets, or adhesive sticking them together — damage that’s hard to reverse.
Don’t stack unprotected pieces. Place a sheet of acid-free tissue, glassine, or protective film between paintings, store flat in a rigid box, and label to prevent shifting or accidental contact.
Mistake: Rolling without a rigid core prevention
When you roll a finished or partially finished diamond painting without a rigid core, the canvas can bend unevenly and the drills may shift, crease, or pop off; always use a tube or stiff poster core so the canvas curves gently and maintains even tension.
Secure ends with soft ties, avoid tight wrapping, and label the tube to prevent unnecessary unrolling or pressure during storage.
Mistake: Using non-breathable plastic prevention
Because non-breathable plastic traps moisture and heat, storing your diamond painting in it can warp the canvas and loosen or cloud the drills; instead, choose breathable materials like acid-free paper, cotton cloth, or archival sleeves with ventilation.
Leave a small gap for airflow, avoid sealed bags, and store flat in a cool, dry place.
Inspect packaging occasionally to catch humidity issues early.
Mistake: Neglecting periodic checks prevention
Although you might finish a project and tuck it away, neglecting periodic checks lets small problems become irreversible—loose drills fall out, moisture can creep in, and adhesive can degrade without you noticing.
Check storage every 3–6 months: inspect edges, press down any lifting drills, replace silica packets, air panels briefly, and record issues.
Catching problems early preserves shine and prevents costly restoration.
Maintenance and Long-Term Care
You should inspect your stored diamond painting every few months, checking for dust buildup, loose drills, or lifting adhesive.
Use a soft brush or gentle air to remove grime and a barely-damp cloth for stubborn spots, avoiding excessive moisture.
If drills come loose, press them back with tweezers and a small dab of clear craft glue to secure minor repairs.
How often to inspect and what to look for
When you inspect your diamond painting regularly, you’ll catch small issues before they become permanent—check weekly if it’s displayed or handled often, and every 1–3 months if it’s stored away.
- Check for loose or missing drills at edges and focal areas.
- Look for adhesive lifting or bubbling.
- Inspect backing for creases or moisture stains.
- Verify frame mounts and hanging hardware are secure.
Cleaning dust and surface grime safely
A soft, regular dusting keeps your diamond painting sparkling and prevents grit from scratching drills or embedding in the adhesive; use gentle tools and light touch so you don’t dislodge beads or loosen the canvas.
- Use a soft brush or microfiber cloth.
- Work outward from the center.
- Avoid liquids unless spot-testing first.
- Keep pets and smoking away to reduce residue.
Re-securing loose drills and minor repairs
Spot loose drills quickly and act before more adhesive gives way; addressing small gaps early saves time and keeps your painting intact.
Use tweezers and a dab of clear craft glue to replace drills, press gently, and let cure. For larger areas, reapply adhesive sheet, flatten, and weigh overnight.
- Clean area first
- Match drill color
- Use minimal glue
- Protect while curing
Storage Solutions by Scenario
When you’re choosing storage, think about whether you have a small collection or need bulk solutions, and what you’ll need if you’re packing for shows or moves. Below is a quick comparison to help you pick the right approach. Use the option that fits your space and transport needs.
| Scenario | Best Container | Key Tip |
|---|---|---|
| Small collection | Sturdy portfolio or hanging rack | Easy access, breathable cover |
| Bulk storage | Flat archival boxes | Stackable, labeled, acid-free |
| Transport-ready | Padded tube or rigid carrier | Secure edges, waterproof wrap |
Small collection vs bulk storage recommendations
If you only own a few diamond paintings, store them where you can access and admire them easily—flat in a shallow drawer or upright in a portfolio sleeve—while larger collections need space-saving, clearly labeled systems like rigid flat files or stackable archival boxes that protect drills and canvases.
For small sets, rotate displays and keep acid-free tissue between pieces; for bulk, catalog, label, and monitor humidity.
Transport-ready packing for shows or moves
Packing diamond paintings for shows or moves calls for gear that keeps canvases flat, drills secure, and your work easy to find.
Use rigid portfolio cases or shallow, padded art boxes; place anti-slip layers between canvases.
Seal loose drills in labeled, resealable bags and tuck tools in a zip pouch.
Cushion edges, avoid stacking heavy items, and clearly tag each piece for quick setup.
Quick Tips and Best Practices
A few simple habits will keep your diamond paintings safe and ready to display: store flat in a dust-free container, keep drills separated and labeled, and avoid direct sunlight or high humidity.
Follow these quick tips to maintain shine and prevent damage.
- Clean hands before handling.
- Use acid-free backing.
- Seal edges with archival tape.
- Rotate displayed pieces periodically.
Frequently Asked Questions (FAQ)
You probably have specific questions about lifespan, wrapping, sealing, repairs, and rolling—let’s answer them.
I’ll explain how long paintings last in storage, whether regular cling film or spray sealants are safe, and the best way to fix missing drills after long storage.
I’ll also cover whether you can permanently store a painting rolled.
How long can a diamond painting last in storage?
How long will your diamond painting stay usable in storage?
Properly prepped and stored—flat, in a cool dry place, sealed from dust and pests—it can last decades.
Adhesive may slowly weaken after many years, but keeping it away from heat, sunlight, humidity, and extreme temperature swings preserves both gems and canvas.
Check periodically and re-adhere loose drills as needed.
Can I use regular plastic wrap or cling film?
Storing your finished or in-progress diamond painting flat and sealed helps it last decades. However, you might be wondering if regular plastic wrap or cling film will do the job.
You can use cling film short-term to block dust and moisture, but it can trap condensation and stick to the canvas.
For long-term storage, choose archival materials or acid-free protective sheets instead.
Is it safe to use spray sealants on my finished piece?
Wondering whether a spray sealant will harm your finished diamond painting?
You can use a clear, non-yellowing archival spray designed for crafts, applied in light, even coats from 12–18 inches away.
Test on a scrap first, ventilate the area, and protect surrounding surfaces.
Avoid heavy saturation, solvent-based sprays, and prolonged exposure that could soften adhesive or dull drills.
How do I repair missing drills after long storage?
Lost drills after long storage?
First, inspect under good light and gently clean the area.
Use your original drill tray or sorters to match colors by symbol.
Apply a tiny dab of craft adhesive or clear-drying glue on the exposed canvas dot, then press the replacement drill firmly in place.
Let dry flat, avoid handling until fully set.
Can diamond paintings be stored rolled permanently?
Can you keep a diamond painting rolled up indefinitely? You shouldn’t.
Rolling stresses adhesive, distorts canvas and can loosen drills over time. If you must roll for short periods, roll with the face outward around a sturdy tube, cover with acid-free paper, and store flat in a cool, dry place.
For long-term preservation, store flat or framed to maintain shape and adhesion.
Conclusion and Call to Action
You’ve seen the key steps: clean, secure, and store your diamond painting flat in a cool, dry place.
Now inspect your work, gather the right supplies, and prepare it for long-term storage.
Take action today so your piece stays vibrant and ready to display.
Summary of top storage steps
1 clear plan will keep your diamond paintings safe, organized, and ready to enjoy—start by grouping projects by size and completion status.
Use flat, acid-free storage or rigid tubes for rolled canvases, label everything, and store in a cool, dry place away from direct sunlight.
Protect edges with corner guards, use breathable covers, avoid heavy stacking, and check periodically for dust or pests.
Encourage reader action (inspect, prepare, store)
Before you pack anything away, inspect each painting for loose gems, creases, or dust so you can fix problems now rather than later; prepare simple supplies—clean cloth, tweezers, corner guards, and acid-free sleeves—and then store with the methods that suit each piece (flat for finished works, rolled in a rigid tube for flexible canvases).
Act now: check, repair, label, and place in proper storage to protect your work.
