How to Paint Ceiling Trim for a Sharp, Professional-Looking Finish
You’ll get a crisp, professional ceiling trim by prepping, using the right tools, and painting in thin, even coats. Clean and sand the trim, fill gaps with caulk, and prime bare spots. Use a quality angled sash brush, load it lightly, and follow the trim profile with long, steady strokes. Apply two thin coats, sand between if needed, and remove tape while the final coat is slightly tacky for sharp lines — keep going to pick up advanced tips and troubleshooting.
How to Paint Ceiling Trim for a Sharp, Professional-Looking Finish
You want a crisp, professional-looking ceiling trim, so start with the quick answer: clean, sand, prime, use a steady brush or angled brush, and apply thin, even coats.
Focus on the most important steps at a glance—prep, steady technique, and proper drying between coats—to avoid drips and visible brush marks.
Repaint when you see cracking, yellowing, scuffs, or gaps where caulk has failed.
Quick Answer The Most Important Steps at a Glance
Start by prepping the area: remove dust, tape the wall and ceiling edges, and lay down a drop cloth to protect floors.
Next, sand lightly, fill gaps with caulk, and prime any bare spots.
Use a high-quality angled brush and steady strokes; paint two thin coats, sanding lightly between.
Remove tape before fully dry for crisp lines—this is how to paint ceiling trim efficiently.
When to Repaint Ceiling Trim (Signs it’s Needed)
Even if the paint on your ceiling trim looks fine from across the room, inspect it up close for cracking, peeling, yellowing, or visible nail holes—those are clear signs it’s time to repaint.
You should also repaint if you notice dirt buildup, water stains, flaking caulk, or mismatched sheen after repairs.
Repainting prevents damage and refreshes the room’s overall look.
Understanding Ceiling Trim: What It Is and Why Finish Matters
Ceiling trim comes in styles like crown molding, plain trim, and cove, and each profile changes how light and shadow define your room.
Materials—wood, MDF, PVC, or plaster—take paint differently, so you’ll need to adjust prep and product choices accordingly.
Finally, sheen and paint type influence durability and appearance, so pick a finish that matches the look and maintenance you want.
Types of Ceiling Trim (Crown Molding, Plain Trim, Cove, etc.)
Trim shapes set the tone for a room, and knowing the main types—crown molding, plain trim, cove, and beadboard—helps you pick a style and finish that fits your space.
You’ll choose based on scale and look: ornate crown for formality, simple trim for modern rooms, cove for soft shifts.
Consider visual impact:
- Crown molding — decorative, bold
- Cove — curved, subtle
- Beadboard — rustic, textured
Common Materials (Wood, MDF, PVC, Plaster) and How They Affect Painting
Once you pick a shape, the material you choose will change how the molding looks and how you should paint it.
Wood takes stain or primer and smooth sanding; MDF needs sealing and fine primer to avoid swelling; PVC wipes clean, accepts flexible primer and paint without sanding; plaster requires careful patching, sanding, and a bonding primer.
Choose prep to match material.
Finish Choices (Sheen Levels and Paint Types) and Their Visual Impact
When you pick a finish for crown molding and other ceiling trim, the sheen and paint type will change how much the details stand out, how durable the surface is, and how it reads in different lighting. Choose satin or semi-gloss for durability and crisp highlights; use matte to hide imperfections. Compare quickly:
| Sheen | Effect |
|---|---|
| Matte | Conceals flaws |
| Satin | Soft sheen, durable |
| Semi-gloss | Sharp highlights |
| Gloss | Very reflective |
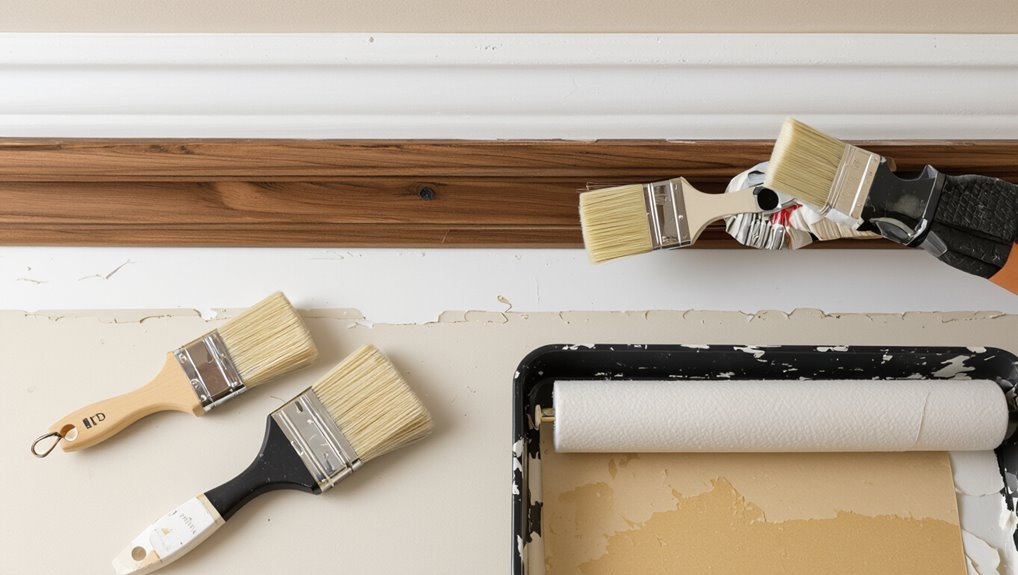
Tools, Materials, and Prep Checklist
Before you start, gather the essential tools and materials—paint, primer, sandpaper, a small roller, and good-quality trim brushes.
Consider optional pro tools like a caulk gun, painter’s paddles, and specialty trim brushes to speed the job and improve the finish.
Don’t forget safety gear and ladder best practices so you can work steady and injury-free.
Essential Tools and Materials
You’ll want a compact set of reliable tools and the right materials to get clean, durable results on ceiling trim; gather a steady ladder, angled sash brush (1–2 inches), high-quality trim paint, a small roller with a smooth cover, painter’s tape, drop cloths, spackle and a putty knife, sandpaper (120–220 grit), and a damp rag for quick cleanups.
- Clean, sand, fill
- Tape edges, protect floor
- Brush then roll for smooth finish
Optional Tools for Pro Results (Caulk Gun, Painter’s Paddles, Trim Brushes)
After you’ve cleaned, sanded, and taped, reach for a few optional pro-grade tools that speed the job and sharpen the finish: a caulk gun for neat bead control, painter’s paddles for quick, even pressure when spreading caulk or smoothing compound, and a set of dedicated trim brushes (angled sash and small pointed rounds) for crisp corners.
- Caulk gun: steady beads
- Paddles: smooth fills
- Trim brushes: precise edges
Safety Gear and Ladder Best Practices
Because painting ceiling trim often puts you up on a ladder and working above your head, prioritize personal protective gear and correct ladder setup to keep the job safe and steady.
Wear goggles, a dust mask, gloves, and non-slip shoes. Secure ladder on firm ground and lock hinges.
Follow this quick checklist:
- PPE
- Stable ladder
- Clear workspace
Step-by-Step Painting Process
Start by inspecting the trim for nail holes, gaps, or damage and make the necessary repairs so the surface’s ready.
Then clean the trim and surrounding ceiling and walls, sand or scuff for good adhesion, and mask floors and adjacent surfaces.
Finally, decide if the trim needs primer and apply it correctly before you begin painting.
Step 1 Inspect and Repair Trim (Nail Holes, Gaps, Damage)
Walk the trim with a flashlight and your hands, looking for loose nails, gaps, dents, and any old caulk that’s cracked or missing.
Hammer or reset loose nails, then countersink and fill holes with paintable wood filler.
Smooth dried filler, replace damaged trim pieces if needed, and apply fresh, paintable caulk to gaps.
Sand seams lightly for a seamless, paint-ready surface.
Step 2 Clean Trim and Surrounding Ceiling/Wall Surfaces
Now that your trim is repaired and sanded, clean surfaces so paint will adhere properly and look smooth.
Remove dust, cobwebs and grease with a dry brush, vacuum, then wipe with a lint-free cloth and mild trisodium phosphate solution or diluted dish soap.
Rinse with clean water and let fully dry.
Protect floors and furniture with drop cloths before proceeding.
Step 3 Sanding and Surface Scuffing for Adhesion
Lightly scuffing and sanding the trim creates the key tooth that helps paint stick, so use fine-grit sandpaper (120–220 grit) or a sanding sponge and work with the grain until glossy surfaces lose their shine.
Sand gently, remove dust with a vacuum and tack cloth, fill small imperfections with lightweight wood filler, sand smooth again, and guarantee a clean, dull surface for primer.
Step 4 Masking and Protecting Ceiling, Walls, and Floor
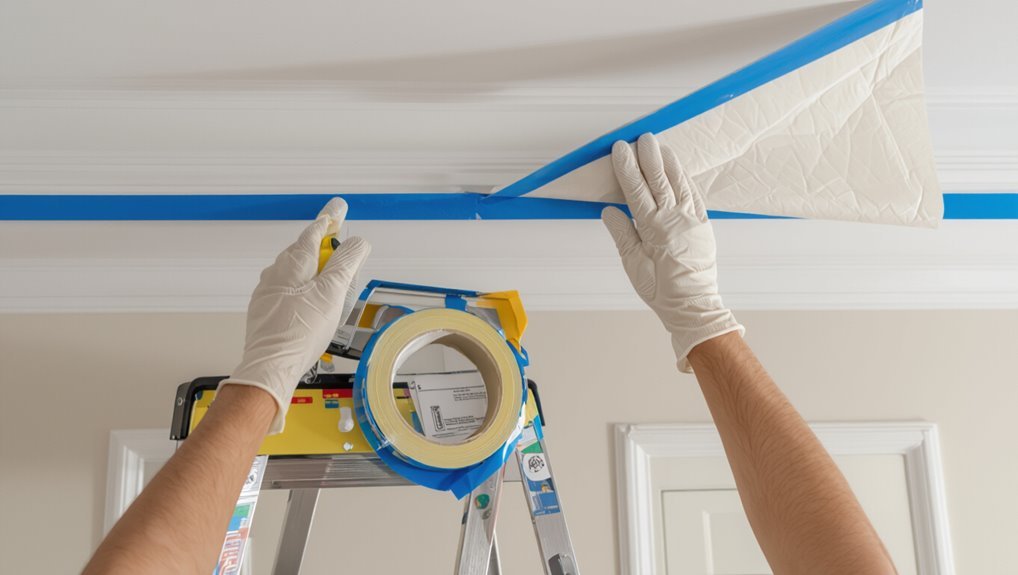
1. Before painting, cover floors with drop cloths and tape seams to prevent slips.
Use painter’s tape along the top edge of the trim where it meets the ceiling, pressing firmly to seal.
Tape walls below the trim, smoothing to avoid paint bleed.
Protect nearby fixtures and vents with plastic sheeting.
Work methodically so masking stays secure while you paint.
Step 5 Priming Trim (When and How to Prime)
Before you paint, decide whether the trim needs primer—especially if it’s bare wood, stained, previously unpainted, or covered with glossy or oil-based paint—because primer guarantees better adhesion, uniform color, and fewer coats of finish.
Sand lightly, clean dust, and use a bonding or stain-blocking primer as needed. Apply thin, even coats, allow full drying, then sand lightly before finish coats.
Step 6 Cutting In vs. Brushing: Best Techniques for Edges
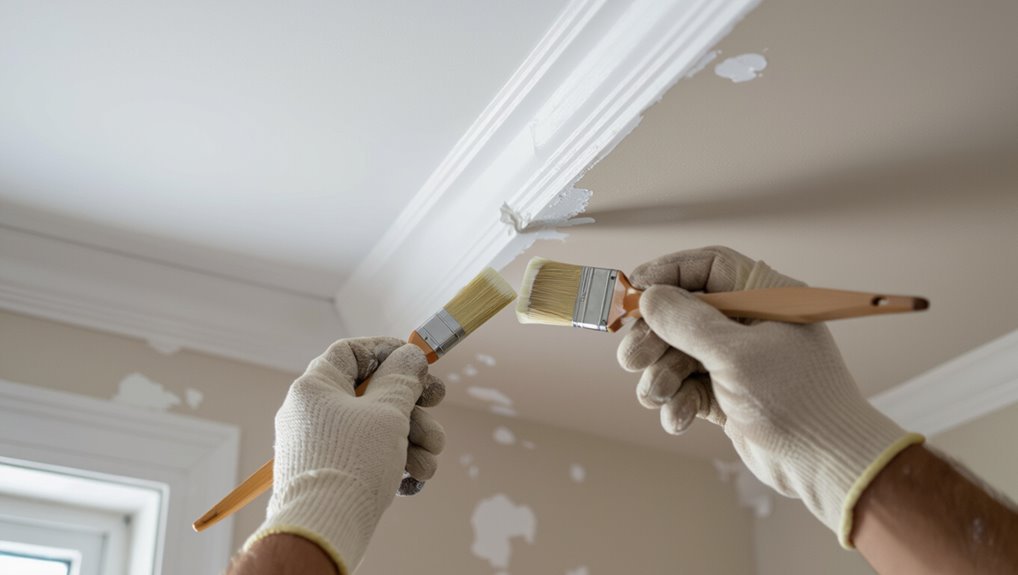
A steady brush and a steady hand will make the difference when you tackle edges: cutting in gives you crisp lines where ceiling meets wall, while brushing smooths the trim’s face for an even finish.
Use a quality angled sash brush for control, steady your wrist, load sparingly, and work in short, confident strokes.
Feather edges to avoid buildup and touch-ups.
Step 7 Applying Paint (Brush Strokes, Number of Coats, Dry Times)
Start by loading your brush or roller lightly and work from one end of the trim to the other, using long, even strokes that follow the profile so paint lays down uniformly and you avoid lap marks.
Apply thin coats, usually two for full coverage. Let each coat dry per manufacturer instructions—typically 2–4 hours—sand lightly between coats if needed for a smooth finish.
Step 8 Removing Tape and Touch-Ups Without Damaging Edges
Clean edges matter, so peel the tape while the final coat is slightly tacky to avoid pulling paint.
Pull tape back on itself at a 45° angle, steady and slow.
Inspect edges immediately; use a small angled brush and matching paint for tiny nicks.
If paint lifted, feather the repair into both surfaces.
Let repairs dry fully before any further handling.
Step 9 Clean-Up and Final Inspection
Once the tape’s removed and touch-ups are dry, you’ll move on to wrap things up and inspect the job closely.
Clear brushes, rollers, and trays with the appropriate solvent, store leftover paint sealed, and clean drop cloths.
Vacuum or sweep debris, wipe trim edges with a soft cloth, and check for missed spots or drips.
Make final touch-ups, then admire your crisp, professional finish.
Advanced Techniques for a Flawless Edge
You’ll get cleaner lines when you load and angle an angled trim brush properly, then use back-brushing and tipping to smooth the paint without creating ridges.
For larger runs, switch to a paint pad or mini-roller to lay down even coverage before finishing with the brush.
When working on high ceilings or crown molding, use extension poles, secure footing, and controlled strokes to maintain that flawless edge.
Using an Angled Trim Brush Correctly
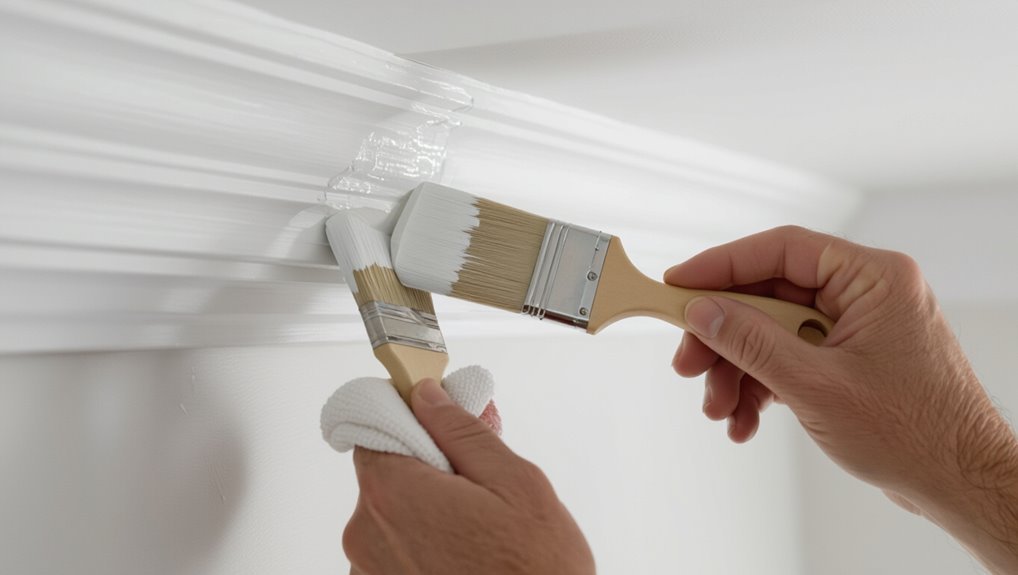
Master the angled trim brush and you’ll get crisp, consistent edges along your ceiling without resorting to tape.
Hold the brush at a 30–45° angle, load it lightly, and remove excess on the can rim.
Use short, controlled strokes toward the ceiling edge, keeping bristles flat against trim.
Reload frequently for even coverage and steady pressure to avoid drips.
The Back-Brushing and Tipping Technique
Combine back-brushing and tipping to get a salon-smooth shift between trim and ceiling that hides brush marks and prevents lap lines.
Load your angled brush lightly, pull paint along the trim, then immediately tip with short, feathered strokes into the ceiling edge.
Work in small sections, keep a wet edge, and overlap subtly so the finish reads continuous and crisp.
Using a Paint Pad or Mini-Roller for Smooth Coverage
Switch to a foam paint pad or a 4–6″ mini-roller when you want an ultra-smooth, brush-free finish along the ceiling edge; these tools lay down paint evenly and cut drying ridges that brushes can leave.
Work in short, overlapping passes, keeping a light, consistent pressure. Feather the pad into the ceiling line, reload sparingly, and immediately smooth any excess for a crisp, uniform trim.
Techniques for Painting High Ceilings or Crown Molding
1 straightforward shift in setup will make painting high ceilings or crown molding far easier: get the right ladder, tools, and reach.
Use an extension pole with a mini-roller for broad strokes, then a sash brush for crisp edges.
Work in sections, keep a wet edge, and brace your arm for steady lines.
Inspect from below and touch up any drips promptly.
Common Problems and How to Fix Them
You’ll encounter brush marks, drips, runs, visible seams, peeling, and uneven sheen if you rush or skip prep, but each problem has a simple fix.
You’ll prevent brush marks and runs with proper loading and thin coats. Repair seams and gaps with caulk and feathering, and address peeling by sanding, priming, and using compatible paint.
If color or sheen is uneven, you can correct it with a uniform topcoat or spot-sanding and recoat for a consistent finish.
Brush Marks, Drips, and Runs Prevention and Repair
Prevent brush marks, drips, and runs by keeping a consistent, moderate paint load on your brush and working in short, controlled strokes; if a flaw appears, address it immediately while the paint is wet to smooth it out before it dries.
Lightly drag a clean, nearly dry brush over imperfections, wipe excess paint, and sand minor ridges after curing. Recoat thinly if needed.
Visible Seams and Gaps Caulking and Feathering Fixes
When seams between trim pieces or gaps where trim meets ceiling show through the paint, they draw the eye to imperfections and make even a neat job look unfinished.
You can fix most of these issues with careful caulking and feathering. Run a bead of paintable acrylic caulk, smooth with a wet finger or tool, wipe excess, let cure, then sand lightly and skim with primer before repainting for an invisible joint.
Paint Peeling or Poor Adhesion Causes and Remedies
If paint starts to peel or won’t stick to your ceiling trim, it’s usually because of contamination, moisture, or inadequate surface preparation — and you can fix most of it with the right prep and products.
Remove loose paint, sand glossy surfaces, clean with TSP or a mild detergent, dry thoroughly, prime with a bonding primer, then repaint with a compatible ceiling or trim paint.
Uneven Sheen or Color How to Correct
Noticing patchy gloss or mismatched color on your ceiling trim?
Light sanding with fine-grit paper, then wiping with a tack cloth, evens texture. Use a quality primer if stain-through or previous sheen varies.
Apply paint in consistent strokes and maintain a wet edge; match sheen (eggshell, semi-gloss) to surrounding trim.
Finish with thin, even coats and proper drying between layers.
Best Practices, Tips, and Time-Saving Hacks
Pick a trim sheen that stands up to scuffs while keeping ceilings and walls in a different finish for best contrast or a seamless look.
Plan color choices to either highlight trim or blend it in, and tackle painting room-by-room to keep tools and drying times organized.
If the trim is intricate or you’re short on time, consider hiring a pro rather than forcing a rushed DIY.
Choosing the Right Paint Sheen for Trim vs. Ceiling/Wall
Wondering which sheen to use where? Choose semi-gloss or satin for trim—both resist scuffs and highlight profiles for a crisp edge.
Use flat or matte for ceilings to hide imperfections and reduce glare.
Walls usually suit eggshell or low-sheen satin for durability without excessive shine.
Match finish durability to traffic and lighting; test a small patch first.
Color Selection Tips for Contrast or Seamless Look
When you want trim to stand out, choose a higher-contrast color (often a brighter white or a deeper shade than the wall); if you prefer a seamless look, select a trim tone that’s within one to two shades of the wall or ceiling to keep lines subtle.
Test swatches near natural and artificial light, consider undertones, and match trim to architectural style for balanced impact.
How to Work Efficiently Room-by-Room
Once you’ve settled on trim colors, plan your work by tackling one room at a time to keep tools, paints, and cleanup contained.
Clear furniture, mask edges, and work from ceiling corners inward. Follow a steady sequence to save time and avoid drips.
- Prep: move coverings, sand, wipe
- Paint: cut in, roll, back-brush
- Clean: remove tape, touch up, store supplies
When to Hire a Pro vs. DIY
Need help deciding whether to tackle ceiling trim yourself or call in a pro?
If you’ve got steady hands, basic tools, and a few hours per room, DIY saves money and gives control.
Hire a pro if trim is ornate, ceilings are high, you lack time, or you want flawless seams and fast completion.
Get quotes and check reviews before committing.
Cost, Time Estimate, and Materials Calculator
You can expect a clear time breakdown for a standard room—prep, painting, and cleanup—so you can schedule the job realistically.
I’ll show estimated material costs based on trim length and type (wood, MDF, or polyurethane) and a simple calculator to sum them.
Also note when specialty paints, primers, or tools raise the price or extend the timeline.
Typical Time Breakdown for a Standard Room
A standard 12×12 room with average 8-foot ceilings usually takes about 3–5 hours to paint the ceiling trim if you’re working steadily and have everything prepped; that estimate covers light sanding, caulking, priming (if needed), and two coats of paint. Plan tasks, pace yourself, and allow drying time between steps.
| Task | Time |
|---|---|
| Sanding | 30–45 min |
| Caulking | 20–30 min |
| Priming | 30–45 min |
| Paint coat 1 | 45–60 min |
| Paint coat 2 | 45–60 min |
Estimated Material Costs by Trim Length and Material
Estimating material costs by trim length and material helps you budget and avoid last-minute trips to the hardware store; use per-foot prices for moulding, primer, caulk, and paint plus a small waste allowance to get an accurate total.
Measure total trim length, multiply by material unit costs, add primer and paint coverage based on square footage, include caulk tube count, then round up for contingency.
When special materials or tools change cost/time
When special materials or tools are required, they can considerably shift both your budget and schedule, so adjust your cost and time estimates before you start.
Add costs for primers, specialty paints, caulk, scaffolding or corner sanders.
Estimate extra hours for setup, curing and detailed masking.
Use a simple calculator: materials + tool rental + 15–25% contingency for unexpected needs or access challenges.
FAQ Frequently Asked Questions
You probably have a few quick questions before you start, like whether ceiling paint works on trim and how many coats you’ll need.
You’ll also want to know if it’s smarter to paint trim before or after the walls, how to avoid getting paint on the ceiling, and which sheen hides trim imperfections best.
I’ll answer each so you can finish the job cleanly and confidently.
Can I use ceiling paint on trim?
Curious whether ceiling paint will work on trim? You can use ceiling paint in a pinch, but it’s formulated for flat, low-sheen surfaces and won’t resist scuffs or clean well.
For trim, choose a durable, semi-gloss or satin trim paint that adheres better and wipes clean.
If you must use ceiling paint, expect less durability and more frequent touch-ups.
How many coats of paint do I need on trim?
How many coats of paint do you really need on trim?
Usually two coats suffice: one thin, even base coat for coverage and adhesion, then a second for uniform color and durability.
If you’re switching from dark to light or using a lower-quality primer, add a third.
Sand lightly between coats and allow full drying for a crisp, professional finish.
Is it better to paint trim before or after walls/ceiling?
Prefer painting trim after the walls and ceiling so you can cut in clean edges and touch up without worrying about smudging fresh trim work; if you’re doing ceilings first, paint trim last to protect those crisp lines.
But when using painter’s tape and careful technique, you can do trim first on smaller projects to save time.
Choose the order that minimizes touchups and fits your workflow.
How do I avoid paint on the ceiling when painting trim?
Want to keep paint off the ceiling when you’re cutting in trim? Use a sharp angled sash brush and steady, light pressure, painting away from the ceiling edge.
Press painter’s tape firmly along the ceiling if needed, removing it while paint’s still tacky.
Keep a damp cloth or small artist’s brush nearby to quickly lift any stray strokes for a clean line.
What sheen is best for hiding imperfections on trim?
Although a higher-sheen finish reflects more light and can call attention to flaws, you’ll usually hide imperfections best with a satin or low-luster semi-gloss that balances durability and subtlety.
Choose satin for modest sheen and easy touch-ups; pick low-luster semi-gloss where durability matters, like bathrooms.
Flat finishes hide flaws more but lack cleanability; avoid high gloss on textured trim.
Quick Troubleshooting Flowchart and Visual Guide
If a paint issue pops up while you’re working on ceiling trim, use the quick troubleshooting flowchart and visual guide to identify the problem fast and choose the right fix.
Check symptoms: drips, brush marks, orange peel, lap lines, or poor adhesion.
Match the visual cue to solutions: sanding, thinning, drying time, better technique, or primer.
Act promptly to prevent rework.