How to Paint a Brick Wall Mural That Looks Stunning in Any Room
You can create a stunning brick wall mural by prepping the surface, choosing masonry primer and flexible paint, and planning a design that works with the brick’s texture and mortar lines. Clean, repair, and prime porous or previously painted brick, transfer your design with a grid or projector, block in base colors, then layer highlights, shadows, and brick-specific techniques like dry brushing. Follow proper sealing, maintenance, and safety, and keep going to uncover detailed tips and troubleshooting.
How to Paint a Brick Wall Mural That Looks Stunning in Any Room
Yes—you can paint a mural directly on brick, and with the right prep and materials it’ll look fantastic.
Start by cleaning and priming the surface, choose acrylic or masonry paints that flex with the brick, and use brushes and rollers suited for textured surfaces.
With a clear design, good lighting, and patient layering, your mural will pop in any room.
Quick Answer Can you paint a mural on brick and how to get great results?
Wondering whether you can paint a mural on brick and still get smooth, striking results? You can—follow steps for how to paint a brick wall mural that lasts.
Prep, prime, and adapt technique to texture. Key tips:
- Clean and repair mortar for a flat base
- Use masonry primer and flexible exterior paint
- Apply thin layers and seal for durability
Understanding Brick Walls and Murals
Before you start sketching, consider why brick makes a great mural surface — its warmth, character, and permanence can enhance your design.
Check what kind of brick you’re working with (exposed, painted, sealed, or faux) because each affects prep and paint choices.
Also note the texture and mortar joints, since rough faces and deep seams change how paint adheres and how your image will read.
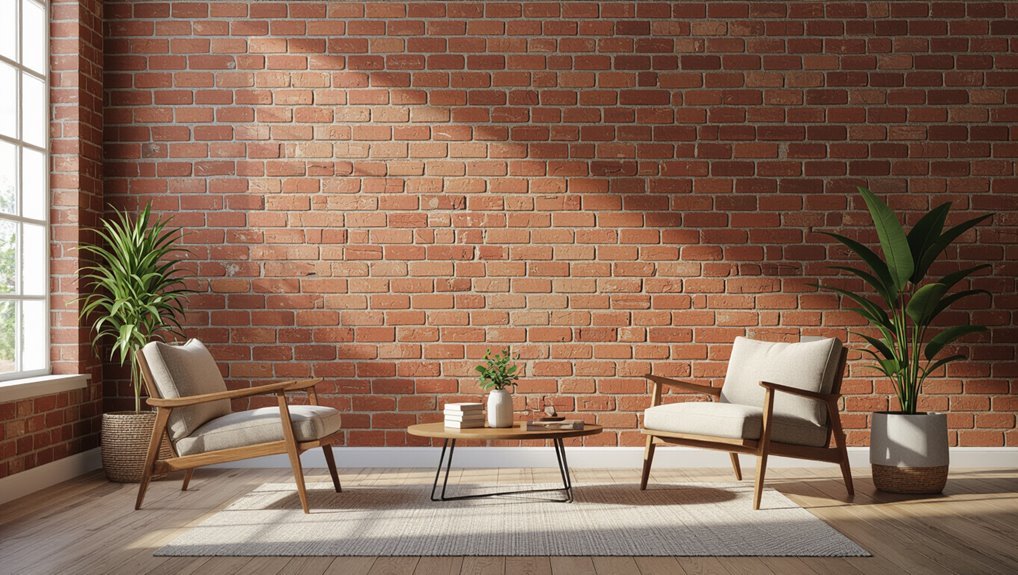
Why choose a brick wall for a mural?
Because brick adds texture, scale, and history to your design, choosing a brick wall for a mural makes the artwork feel rooted and resilient.
You’ll leverage natural pattern and depth to create visual interest, contrast, and focal points.
Brick’s permanence and character let your mural age gracefully, tying contemporary imagery to architectural context while giving your room warmth, authenticity, and lasting impact.
Types of brick surfaces (exposed, painted, sealed, faux brick)
Having chosen brick for its texture and permanence, you’ll next want to identify the kind of brick surface you’re working with—exposed, previously painted, sealed, or faux brick—since each demands different prep and paint approaches.
- Exposed brick: porous, needs cleaning and maybe primer.
- Painted brick: remove loose paint, scuff and prime.
- Faux or sealed brick: test adhesion, strip sealer or use bonding primer.
How brick texture and mortar joints affect mural design and paint adhesion
When you plan a mural on brick, remember the surface itself will shape both your design and how the paint behaves: rough, uneven faces and recessed mortar joints break up fine details and catch more paint, while smooth or tuck-pointed surfaces let you render tighter lines and expect more even coverage.
Adjust composition for joints, choose flexible primer and thicker paint, and test brushes for texture.
Materials and Tools You’ll Need
Before you start painting your brick mural, you’ll want the right paints—masonry or acrylic exterior/interior—and a good primer.
Gather brushes, rollers, sprayers and any specialty tools for working with brick, plus cleaners, wire brushes, grinders, and patching compounds for surface prep.
Don’t forget safety gear and drop cloths to protect yourself and the workspace.
Paint types: masonry paint, acrylic exterior/interior, primers
If you want your mural to last and look vibrant on brick, choose the right paints and primers: masonry paint and acrylics each have specific strengths for exterior or interior walls, and a good primer guarantees adhesion and breathability so moisture doesn’t get trapped.
You’ll pick based on exposure, texture, and finish:
- Masonry paint for porous, weathered brick
- Exterior acrylic for UV and moisture resistance
- Interior acrylic with breathable primer for indoor murals
Brushes, rollers, sprayers, and specialty tools for brick
A few well-chosen tools will make painting brick faster and give you cleaner results: brushes for detail and mortar lines, rollers for broad coverage, sprayers for fast, even coats on large or rough surfaces, and specialty items like masonry combs, tuckpointing brushes, and extension poles to handle texture and height.
Use:
- angled sash brushes for edges and grooves
- ¾” nap rollers for rough brick
- a HVLP sprayer with variable tip for control
Surface preparation supplies: cleaners, wire brushes, grinders, patching compounds
Start with the right cleaning and repair supplies so the paint will stick and the mural lasts. You’ll clean, de-grease, remove loose mortar, and fill gaps before painting.
Essential tools include:
- Heavy-duty cleaner and trisodium phosphate alternative for grime removal.
- Wire brush and grinder to free flaking paint and roughen surfaces.
- Masonry patching compound and trowel to repair cracks and holes.
Safety gear and workspace protection
Before you touch paint, gear up with PPE and protect the surrounding area so you stay safe and the mural doesn’t damage nearby surfaces.
Put on goggles, respirator, gloves, and knee pads. Tape and drop cloths shield floors and furniture. Secure ventilation and lights.
- N95 respirator or mask
- Safety goggles and work gloves
- Drop cloths, painter’s tape, plastic sheeting
Planning Your Brick Mural Design
Start by choosing a design that works with the brick’s texture and the room’s style so the mural feels integrated, not forced.
Measure the wall and create a scaled grid or plan for projection, then pick colors and contrasts that stay visible on rough brick.
Finally, factor in lighting and how far viewers will stand so details and hues read correctly from typical viewing distances.
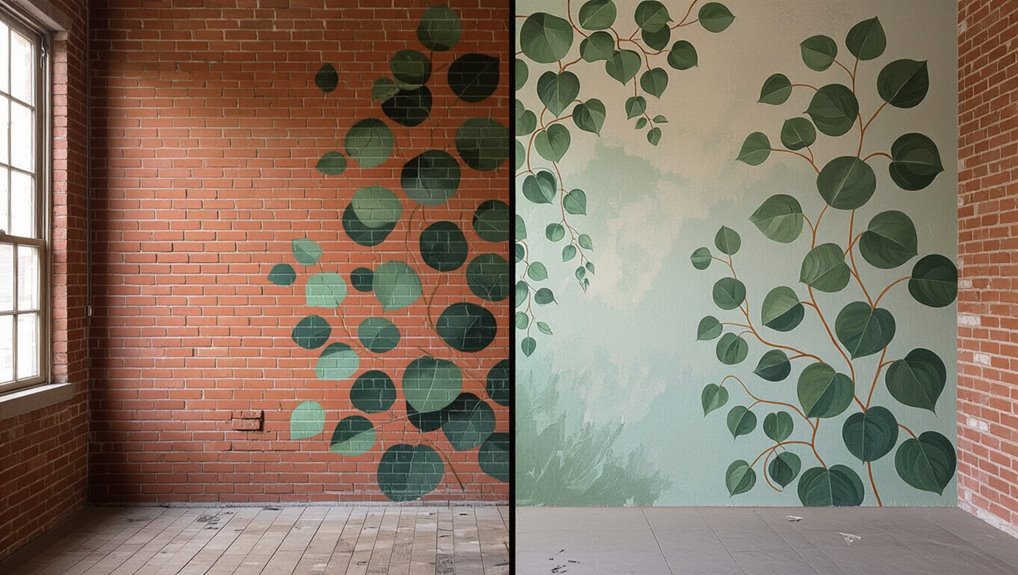
Choosing a design that suits brick texture and room style
While the uneven grooves and raised mortar of brick add character, they also shape which designs will read clearly from a distance.
So pick a concept that works with—not against—the wall’s texture and the room’s style. You’ll consider scale, contrast, and mood.
Visualize options:
- Bold geometric shapes that bridge mortar lines
- Soft botanical motifs that flow over relief
- Graphic typography with high contrast
Measuring the wall and creating a scaled grid or projection plan
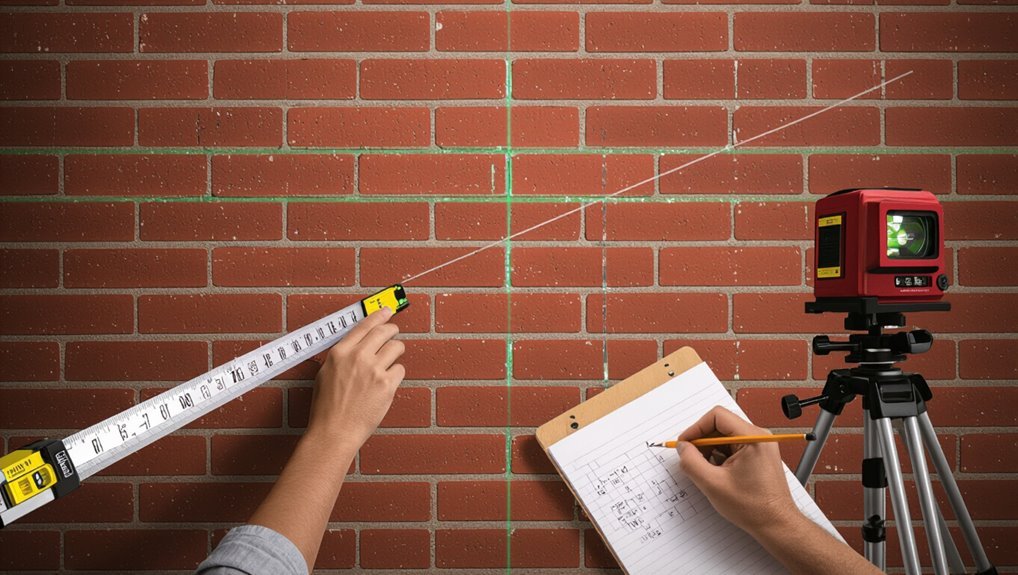
Measure the wall precisely and you’ll save hours during layout and painting; grab a tape measure, note the height and width in feet (or meters), and mark any interruptions like windows, doors, outlets, or vents.
Translate dimensions to a scaled grid on paper or use a projector to trace the design.
Label key reference points, brick courses, and centerlines to guide accurate transfer and proportion.
Color selection and contrast strategies for visibility on brick
Because brick soaks up and scatters paint differently than smooth surfaces, you’ll choose colors and contrasts that read clearly from a distance and up close.
Test values on a scrap, favor high-contrast outlines, and use muted fills where mortar texture shows.
Consider:
- Bold, saturated accents for focal shapes
- Mid-tone grounding colors to unify bricks
- Pale highlights to suggest form and lift elements
Considering lighting and viewing distance in rooms
If you know where people will stand and how the light falls, you can design a mural that reads well from any vantage point in the room.
Consider sightlines, scale, and illumination to guarantee clarity. Test your design at typical distances and lighting conditions.
- Place focal elements at eye level for standing or seated viewers
- Use stronger contrast for dim areas
- Avoid tiny details far from viewers
Surface Preparation Step-by-Step
Before you pick up a brush, walk the wall and check for damage, moisture, or white powdery efflorescence so you know what needs fixing.
Clean the brick with a pressure washer or scrub by hand, then repair cracks, replace damaged bricks, and repoint mortar where needed.
Finish by applying a primer or masonry sealer as appropriate and test paint adhesion on a small sample area before you start the mural.
Step 1: Inspecting the wall for damage, moisture, and efflorescence
Step 1: inspect the brick closely for cracks, crumbling mortar, moisture stains, and white powdery efflorescence so you can identify problems that’ll affect adhesion and longevity.
You’ll note issues, mark repairs, and decide if a pro is needed.
Look for:
- hairline and structural cracks
- soft or missing mortar joints
- damp patches or powdery efflorescence
Step 2: Cleaning the brick (pressure washing vs. manual cleaning)
2 approaches will get your brick ready for paint: pressure washing for speed and power, or manual cleaning for delicate or detailed surfaces.
You’ll choose based on brick age, mortar strength, and indoor access. Pressure washing removes grime fast; manual scrubbing with a stiff brush and trisodium phosphate is gentler.
Consider ventilation and drying time.
- pressure washing: fast, high flow
- manual scrubbing: controlled, low risk
- rinse and dry thoroughly
Step 3: Repairing cracks, replacing damaged bricks, and repointing mortar
With the brick clean and fully dry, inspect the wall for cracks, crumbling mortar, and any bricks that need replacing so your mural will sit on a sound surface.
Tackle repairs before painting:
- Fill hairline cracks with flexible masonry caulk and smooth flush.
- Remove and replace severely damaged bricks, matching size and texture.
- Repoint mortar joints, compacting new mortar and tooling neatly for strength.
Step 4: Applying primer or masonry sealer when and how
Before you paint, apply a primer or masonry sealer so the surface will accept paint evenly and resist moisture; choose a product labeled for masonry and follow the manufacturer’s instructions for coverage and drying times.
You’ll work methodically:
- Use a stiff brush or roller to get sealer into pores and joints.
- Apply two thin coats, letting the first dry fully.
- Mask adjacent areas to avoid drips.
Step 5: Testing paint adhesion with a small sample area
Now test a small sample area to confirm the primer accepts your chosen paint and that adhesion, color, and finish meet your expectations.
Paint a 6×6 inch patch, let it cure 24 hours, then inspect for bonding, color shift, and sheen.
If issues appear, adjust primer, paint type, or surface prep.
- 6×6 inch patch
- 24-hour cure
- Adhesion, color, sheen checks
Painting the Mural Step-by-Step Execution
Now that the wall’s prepped, you’ll transfer your design using a grid, projector, or freehand to get accurate proportions.
Then block in base colors and background areas before using brick-specific techniques like dry brushing and layered glazing to marry paint with texture.
Finish by refining mortar edges, adding details, and applying highlights and shadows to create believable depth.
Step 1: Transferring the design: grid method, projector, or freehand
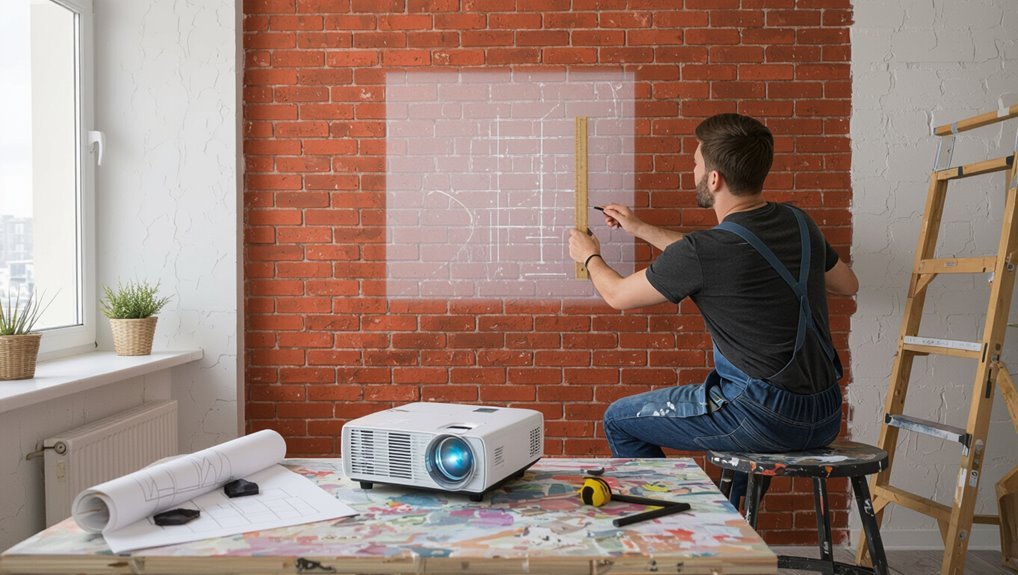
Step 1 lays out how you’ll get your sketch from paper to brick — choose the grid method, a projector, or freehand based on the wall size, level of detail, and the time you have.
You’ll align reference points, mark key contours, and guarantee proportions before painting.
- Grid: break design into squares, transfer square by square.
- Projector: trace projected lines at night.
- Freehand: sketch lightly, adjust as you go.
Step 2: Blocking in base colors and background areas
Start by painting the largest shapes first so you establish the mural’s overall color story and keep subsequent layers clean.
Block in flat tones, cover background expanses, and use crisp edges where shapes meet. Work from background to foreground, letting each area dry before refining.
- broad background washes
- main silhouette colors
- masked edges and shifts
Step 3: Working with brick texture blending, dry brushing, and layering techniques
With your base colors laid in and edges masked, it’s time to bring the wall to life by working the brick texture through blending, dry brushing, and layered glazing.
You’ll build depth and worn character using these focused moves:
- Soft blending with a damp brush to smooth changes and highlight planes
- Dry brushing to lift roughness and simulate grit
- Thin glazes to shift tone and unify layers
Step 4: Detailing and edge work around mortar lines and relief
Now you’ll refine the mural by sharpening mortar lines and carving relief so the brickwork reads convincingly from a distance and up close.
Focus on clean edges, subtle chiseling, and consistent spacing to sell realism.
- Use a fine brush for crisp mortar edges.
- Scrape tiny chips with a palette knife.
- Soften shifts with a dry, light touch.
Step 5: Adding highlights, shadows, and texture effects for depth
Bring depth to the brickwork by layering highlights, shadows, and textured accents that read correctly from both close up and afar; you’ll place light where the sun would catch edges and deepen recesses where mortar meets brick to create believable relief.
Use glazes and stippling to vary tone, then:
- Lift edges with a thin highlight to suggest bevel.
- Darken mortar junctions for shadow.
- Add gritty texture with sponge and drybrush.
Step 6: Final touches and touch-up strategies for uneven surfaces
Tackle the final pass by walking the wall, squinting to spot uneven patches and paint breaks, and fixing them systematically so the mural reads flawlessly from a distance and up close.
You’ll blend edges, retouch texture, and protect areas with sealant. Use small brushes and feathering strokes, step back often, and correct glaze mismatches.
- Feather edges with a dry brush
- Fill pits with thin grout
- Lightly sand raised drips
Finishing and Protecting Your Mural
Now that the painting’s done, you’ll want to pick a clear coat or sealer suited for indoor brick to lock in color and block moisture.
Decide between gloss and matte based on how much sheen and protection you want, since gloss boosts durability while matte hides texture.
Finally, set a simple maintenance plan for gentle cleaning, periodic retouches, and checking the seal every few years.
Choosing the right clear coat or sealer for indoor brick murals
Before you seal your indoor brick mural, decide what level of protection and look you want—glossy, satin, matte, or invisible—because the right clear coat needs to balance appearance, durability, and breathability.
Choose breathable sealers for moisture release, use water-based for low odor, and pick UV-stable formulas near windows.
Consider:
- Lightweight breathable acrylic for interiors
- Water-based polyurethane for easy cleanup
- Breathable silane/siloxane mixes
Applying protective finishes gloss vs. matte considerations
When you choose between a glossy or matte protective finish, think about how sheen will change color, contrast, and texture perception—gloss will deepen colors and highlight brushstrokes, while matte will mute glare and hide imperfections.
You’ll pick based on room light and style. Consider:
- Gloss: vibrant, reflective, shows texture
- Matte: subtle, soft, conceals flaws
- Satin: balanced sheen, versatile
Maintenance plan: cleaning, retouching, and long-term care
Although a good finish protects your mural, you’ll still need a simple maintenance plan to keep it looking fresh: wipe dust monthly with a soft microfiber, spot-clean stains gently with mild soap, and inspect yearly for chips or fading.
Retouch small areas with matching paint and reseal as needed to preserve vibrancy and adhesion.
- Monthly dusting
- Gentle spot-cleaning
- Annual inspection and touch-ups
Common Problems and How to Fix Them
If you spot issues like flaking paint, fading colors, or moisture stains, don’t panic—there’s usually a fix.
You’ll want to diagnose adhesion problems, address discoloration, stop water intrusion, and learn quick repairs for vandalism, chips, or accidental damage.
In the next section we’ll cover causes and step-by-step remedies so you can restore your mural properly.
Paint flaking, peeling, or poor adhesion diagnosis and remedies
Because brick and paint interact differently than smooth surfaces, flaking, peeling, or poor adhesion usually means something’s wrong with surface prep, moisture, or the materials you used.
Inspect and fix by removing loose paint, testing for dampness, and ensuring proper primers and masonry paints. Follow these steps:
- Scrape, sand, and clean to sound substrate
- Repair mortar and seal leaks
- Use breathable masonry primer and paint
Color fading or discoloration causes and corrective steps
When sunlight, moisture, or improper paint react with your mural, colors can fade, yellow, or shift unevenly over time. You’ll want to identify the cause before repainting.
Inspect the surface, test small patches, then act.
Common fixes include:
- Remove chalky or oxidized layers, clean, prime.
- Use UV-resistant, colorfast paints and satin/semi-gloss sealer.
- Spot-tint, blend, or repaint affected areas uniformly.
Moisture-related issues and prevention
Although brick absorbs moisture readily, you can stop most mural damage by finding and treating the water source before repainting.
Inspect for leaks, efflorescence, and damp patches; dry and seal with breathable masonry primer. Prevent recurrence with good ventilation and exterior drainage.
- check flashing and gutters
- use vapor-permeable sealers
- maintain indoor humidity under 60%
Repairing vandalism, chips, or accidental damage
Fixing vandalism, chips, or accidental damage starts with evaluating the problem so you can choose the right repair method.
Clean the area, remove loose paint, and match texture before patching. Use spackle or mortar for chips, sand smooth, prime, then blend paint. Consider sealant for protection.
- Small graffiti: solvent, repaint
- Deep chip: mortar, texture match
- Scrape damage: sand, prime
Best Practices and Professional Tips
For large brick murals, you’ll want time-saving techniques like rolling base coats, using grid or projector guides, and staging work in sections to avoid fatigue.
Plan how you’ll work around windows, outlets, and trim, and know when irregular features mean you should call a pro muralist or mason.
Finally, set realistic budgets and timelines up front so you can weigh DIY savings against the speed and expertise a professional brings.
Time-saving techniques for large brick murals
When you’re tackling a large brick mural, planning and the right tools will save you days of work.
Map sections, use rollers for broad coverage, and stencil details selectively. Prep efficiently, block out color zones, then refine texture.
Suggested workflow:
- Roll base coats fast with extension poles
- Use spray primers for porous brick
- Stencil or sponge small details last
Working around architectural features (windows, outlets, trim)
Although architectural features can interrupt your stencil lines and color blocks, treating them as design elements rather than obstacles will keep the mural cohesive and professional.
Plan around openings, cut stencils for trim, and paint edges neatly. Use tape and small brushes for detail.
Consider these approaches:
- Integrate window frames into the composition as borders
- Paint outlets to match background or highlight them
- Wrap color around trim for continuity
When to hire a professional muralist or mason
If the wall has structural damage, complex surfaces, or you want a large, detailed design, hire a professional muralist or mason to guarantee durability and a polished result.
You should also call a pro when:
- mortar needs repair or sealing before painting
- precision, perspective, or large scaffolding is required
- you want long-lasting exterior finishes and expert color matching
Budgeting and timeline expectations for DIY vs. pro projects
Because cost and time vary a lot between DIY and pro mural projects, plan your budget and schedule up front so you won’t be surprised by overruns. Decide materials, prep, and drying time; factor labor if hiring help. Use realistic timelines and a contingency fund.
| Item | Estimate |
|---|---|
| DIY materials | $50–$300 |
| Pro labor | $300–$2,000 |
| Time (DIY) | 2–7 days |
| Time (pro) | 1–3 days |
Inspiration and Real-World Examples
Think about room-specific mural ideas—how a cozy living room scene, a calming bedroom motif, a kitchen food-themed accent, or an energizing office mural would change the vibe.
Consider color palettes and current style trends that work well on textured brick so your design reads clearly from a distance.
We’ll also look at mini case studies with before-and-after photos and practical lessons learned you can apply to your own project.
Room-specific mural ideas: living room, bedroom, kitchen, office

When you choose a mural for a specific room, consider how color, scale, and subject will support that space’s function and mood. A living room mural can invite conversation, a bedroom should soothe, a kitchen can spark creativity, and an office ought to boost focus.
Pick motifs that fit each use:
- Living room: bold focal scene to anchor seating.
- Bedroom: soft, minimal imagery for calm.
- Office: geometric or nature accents to sharpen focus.
Color palettes and style trends that work on brick
A well-chosen palette and style can turn rough brick into a striking backdrop or a subtle textural partner, so pick colors that respect the wall’s warmth and mortar lines.
You’ll want cohesive trends that suit scale and light. Consider these combinations:
- Warm terracotta with muted teal for rustic-modern contrast
- Chalky pastels for soft, vintage vibes
- Monochrome grays for industrial chic
Mini case studies: before-and-after scenarios and lessons learned
Although brick can feel forbidding at first, these short case studies show how simple choices—scale, palette, and prep—transform tired masonry into memorable murals, and they’ll give you concrete takeaways you can apply to your own project.
You’ll see practical fixes and clear results:
- Small geometric repeat brightened a cramped kitchen.
- Oversized botanical softened a sunroom.
- Bold typographic mural unified a chaotic foyer.
FAQ
You probably have practical questions before you start, like whether painted brick needs stripping or which interior paint will last longest.
You’ll also want to know how to keep paint out of mortar lines, whether the mural can be removed without harming the brick, and how long the paint takes to fully cure.
I’ll answer each of these so you can plan the prep, materials, and timeline.
Can I paint a mural on painted brick or does it need to be stripped?
Wondering whether old paint means you have to strip the brick first? You don’t always.
If the existing paint is sound, clean, and well-adhered, you can prime and paint directly. If it’s flaking, chalky, or incompatible, remove loose material and roughen the surface.
Test adhesion with a small patch, and address moisture or efflorescence issues before starting your mural.
What paint lasts longest on interior brick?
When you want paint to last on interior brick, choose a high-quality acrylic latex formulated for masonry or a mineral-based silicate paint, since both bond well, resist moisture, and tolerate the brick’s slight movement and breathability.
Prime with a breathable masonry primer, apply two thin coats, and maintain ventilation while curing.
Clean gently and touch up chips promptly to preserve the finish.
How do I prevent paint from seeping into mortar lines?
If you want clean edges on your brick mural, block the mortar lines before painting so pigment can’t wick into the joints.
Tape the mortar with low-tack painter’s tape or use liquid mask applied with a small brush.
Press tape firmly into crevices, seal edges with a thin paint layer, then paint bricks.
Remove masking carefully once paint’s tacky, not fully cured.
Can I remove a mural later without damaging the brick?
Masking mortar lines carefully will help later removal, too: the less paint that soaks into joints or rough brick pores, the easier you’ll strip the mural without harming the masonry.
Use breathable primers, quality masonry paint, and test a discreet patch first.
When removing, try gentle methods—soaps, low-pressure washing, or chemical strippers made for brick—and avoid abrasive blasting that can erode surfaces.
How long does it take for a mural on brick to fully cure?
How long will your brick mural really take to cure? Expect surface dryness in 24–48 hours, but full cure typically takes 30–90 days depending on paint type, humidity, temperature, and masonry porosity.
Acrylics cure faster; oil-based paints take longer. Keep ventilation steady, avoid rain or freezing, and don’t apply sealers until the paint’s fully dry to the touch and hard enough to resist fingernail pressure.