Can You Paint Interior Walls When It’s Raining? The Honest Answer
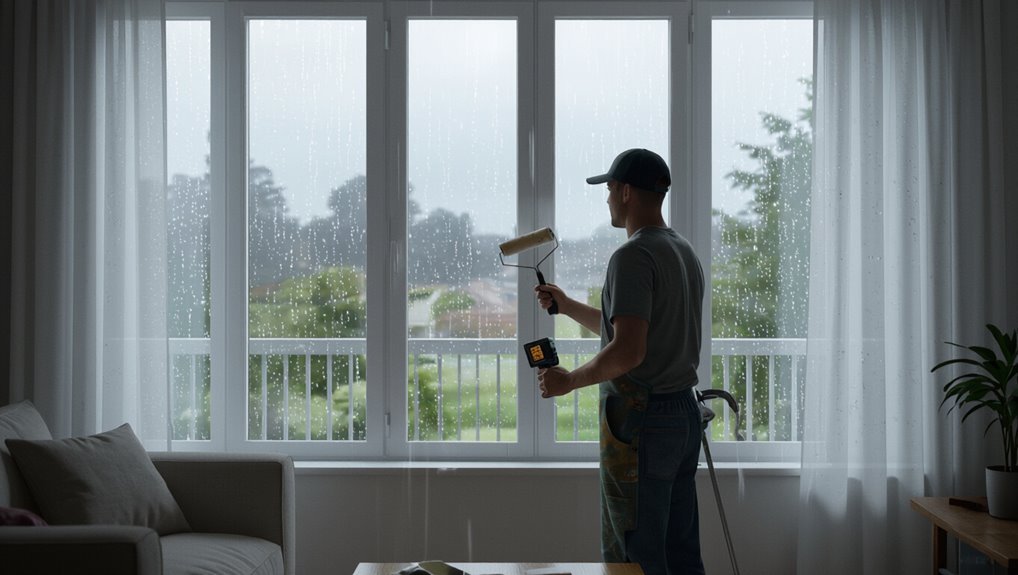
You can paint interior walls when it’s raining, but you’ll need to control indoor humidity and ventilation so the paint can dry and cure properly. Check that indoor humidity is roughly 40–60% and temperature is within the paint’s recommended range; use fans, open windows if possible, or run a dehumidifier. Apply thin coats, use fast-drying or mildew-resistant formulas, and monitor tackiness between coats. Keep an eye on moisture issues, and keep going to learn practical tips and troubleshooting.
Can You Paint Interior Walls When It’s Raining? Quick Answer
Yes—you can often paint interior walls when it’s raining, but you should check humidity and ventilation first.
You’ll be fine if the room stays dry, has good airflow, and you’re using low-humidity-friendly paint; postpone if condensation, poor ventilation, or extreme dampness are present.
As a renter or homeowner, prioritize drying conditions to avoid poor adhesion, long drying times, or mold risk.
Direct short answer for homeowners and renters
If your home stays dry and you control indoor humidity, you can paint interior walls when it’s raining outside; just expect longer drying times and take steps like using a dehumidifier, opening windows when possible, and running fans to speed curing and avoid problems like tackiness or mildew.
You can proceed as a homeowner or renter, but monitor humidity and ventilation closely to guarantee proper drying.
When painting is generally safe vs. when to postpone
You can usually paint inside during rain, but you should know when it’s safe and when to wait.
If humidity stays below about 60%, ventilation’s good, and surfaces are dry, go ahead.
Postpone if windows stay closed, condensation forms, or drying is slow—high humidity risks tacky finish, mildew, and longer cure times.
Choose dehumidifiers or wait for better conditions.
How Weather and Humidity Affect Interior Painting
When it’s raining outside, you’ll often get higher indoor humidity and poorer ventilation unless you boost airflow.
That extra moisture slows down drying and curing, which can lead to tacky or uneven finishes.
Latex, oil, and enamel paints each react differently, so you’ll need to adjust timing and ventilation based on the type you’re using.
What rain does to indoor humidity and ventilation
Because rain increases the moisture load your home has to shed, indoor humidity often climbs and ventilation struggles to keep air dry. That shift can slow paint drying, affect finish, and promote adhesion problems.
You’ll notice musty air, fogged windows, and reduced airflow when vents intake damp outdoor air.
Boost mechanical ventilation, run dehumidifiers, and limit activities that add moisture.
How high humidity impacts paint drying and curing
Higher indoor humidity doesn’t just make the room feel muggy — it changes how paint behaves from wet film to fully cured.
You’ll notice slower evaporation, longer tacky times, and higher risk of sagging or drip marks.
Moisture can trap solvents, delay hardening, and increase chance of mildew on fresh paint.
Improve ventilation and wait for lower humidity before starting.
Effects on different paint types (latex, oil, enamel)
If you’re painting indoors, the type of paint you choose changes how humidity and temperature affect drying and final performance. You’ll find latex dries faster but reabsorbs moisture, oil cures slower and tolerates humidity better, and enamel hardens to a durable finish but needs stable conditions.
| Paint Type | Weather Tip |
|---|---|
| Latex | Fast dry; avoid humid days |
| Oil | Tolerant; slow cure |
| Enamel | Stable finish; steady temps |
Assessing Your Specific Situation Before You Start
Before you grab a brush, check the room’s temperature and indoor relative humidity so drying conditions are suitable.
Look at ventilation and airflow, inspect for any leaks or condensation, and fix moisture issues first.
Finally, consider the paint type, sheen, and the manufacturer’s recommendations to guarantee proper application and curing.
Check indoor relative humidity and temperature
Humidity and temperature in the room directly affect how paint dries, so check them before you open a can.
You’ll want to confirm conditions to avoid long dry times or adhesion problems.
- Aim for 40–60% relative humidity.
- Keep temperature between 50–85°F (10–29°C).
- Use a hygrometer/thermometer to monitor changes throughout the job.
Evaluate ventilation and airflow in the room
While rain raises outdoor moisture, you can still get good results indoors by evaluating ventilation and airflow so paint dries evenly and fumes don’t build up.
Open windows and doors where possible, run fans or HVAC to circulate air, and aim for cross-ventilation.
Position exhaust fans near work areas, avoid stagnant corners, and monitor airflow during drying to prevent uneven curing and lingering odors.
Inspect for existing moisture problems (leaks, condensation)
If you’re planning to paint while it’s rainy outside, start by checking for existing moisture problems like leaks, damp spots, or persistent condensation—these issues can ruin fresh paint and hide deeper damage.
Inspect ceilings, corners, behind furniture, and around windows. Trace stains to their source, feel surfaces for dampness, and fix leaks or improve ventilation before painting to guarantee a lasting finish.
Consider paint type, sheen, and manufacturer’s recommendations
Before you open a can, check the paint type, sheen, and the manufacturer’s guidance so you know how the product will behave in wet weather.
Use water-based paints when humidity’s high; they dry faster and resist mildew. Flat finishes hide imperfections but absorb moisture; satin or semi-gloss resist dampness better.
Follow temperature, humidity, and recoat intervals the maker specifies.
Step-by-Step Guide: How to Paint Interior Walls Safely When It’s Raining
Before you start, you’ll want to measure and control indoor humidity and temperature so drying stays predictable.
Improve ventilation with fans, open windows, or a dehumidifier, then prep surfaces by cleaning, repairing, and priming any problem areas.
Finally, pick paints and additives made for damp conditions and apply thin coats with proper drying time between layers.
Step 1 Measure and control indoor humidity and temperature
Humidity and temperature control are the first things you should tackle because they determine how paint dries and adheres. You’ll measure conditions and adjust settings before starting.
Check readings and aim for stable ranges.
- Use a hygrometer and thermometer to read values.
- Keep humidity under 60% and temperature between 50–85°F.
- Recheck periodically to avoid dew or slow curing.
Step 2 Improve ventilation: fans, open windows, dehumidifiers
While you control temperature and humidity, you’ll also need to move moisture out of the room—so set up ventilation with fans, open windows where possible, and run a dehumidifier to speed drying and prevent condensation on fresh paint.
Position an exhaust fan to pull damp air outside, use box fans for circulation, and empty the dehumidifier regularly so drying stays consistent and paint cures properly.
Step 3 Prepare surfaces properly (cleaning, repairs, priming)
Start by giving the walls a thorough clean and inspection so paint will stick and dry evenly despite the damp conditions.
Remove dirt, mildew and grease with a mild detergent or mildew cleaner.
Repair cracks, fill holes, sand smooth and vacuum dust.
Apply a compatible primer to promote adhesion and block moisture.
Let each layer dry fully before painting to avoid trapping dampness.
Step 4 Choose suitable paint and additives for damp conditions
Once the walls are cleaned, repaired, and primed, pick paints and additives designed to handle higher indoor moisture so your finish lasts and dries properly.
Choose high-quality eggshell or satin acrylic latex with mildew resistance, and use fast-evaporation retarders sparingly only if humidity spikes.
Add a mildewcide additive when recommended, follow manufacturer ratios, and label mixed containers for safety and consistency.
Step 5 Optimal application techniques (thin coats, drying time)
Because damp air slows drying, apply paint in thin, even coats and resist the urge to overload the roller or brush so each layer can set properly; this lets you control sagging, reduce tackiness, and shorten recoat intervals when humidity’s high.
Work methodically, maintain light pressure, and feather edges. Allow recommended drying windows between coats, monitor tack, and avoid heavy second coats until the first feels dry to touch.
Step 6 Post-paint curing and monitoring
After painting, you’ll need to monitor curing closely to verify humidity hasn’t trapped moisture in the film and caused problems like prolonged tackiness, blushing, or poor adhesion.
Check daily for tack, color shifts, or soft spots. Use dehumidifiers and fans as needed, keep ventilation steady, and avoid cleaning or heavy use for the manufacturer’s recommended cure time to guarantee a durable finish.
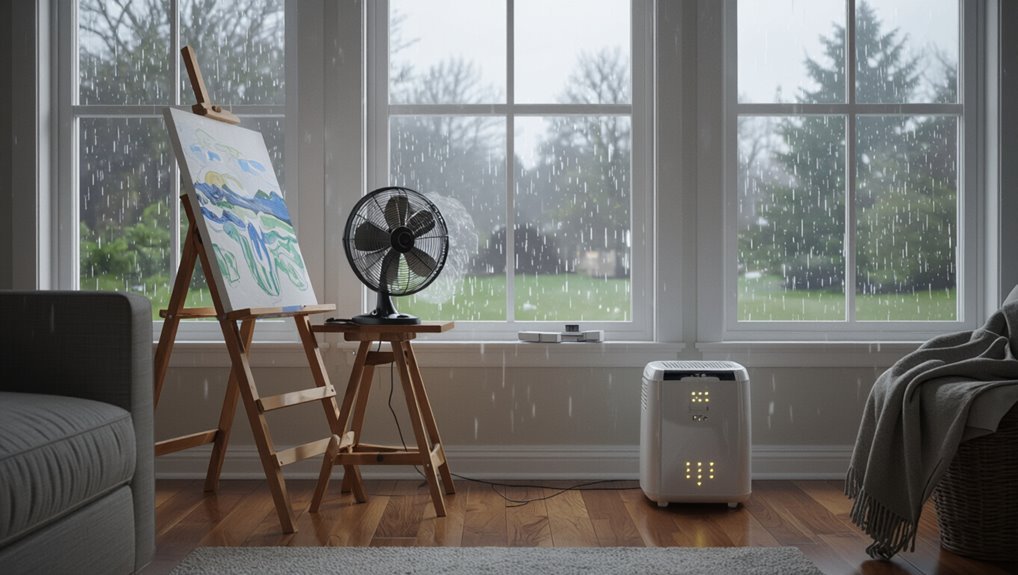
Tools, Materials, and Products Recommended for Rainy-Day Painting
When you’re painting inside on a rainy day, choosing the right tools and products makes the job easier and faster.
Use powerful dehumidifiers, directional fans, or space heaters to control humidity and speed drying, and pick fast-drying or moisture-tolerant paint formulations.
Also bring moisture meters, hygrometers, and flexible ventilation ducts to monitor conditions and channel damp air away from your workspace.
Best dehumidifiers, fans, and heaters for drying
If you’re painting on a rainy day, controlling moisture and airflow is the fastest way to get paint to dry properly.
Choosing the right dehumidifier, fan, and heater will cut tack time and reduce the risk of blistering or mildew.
Use a 50–70 pint dehumidifier for medium rooms, oscillating box fans for circulation, and a thermostatic electric heater set low to avoid overbaking paint.
Recommended paint types and fast-drying formulations
Paint cans labeled “fast-dry” and waterborne alkyds give you the best chances of success on a damp day—their formulations curb surface tack and shorten cure times so you can avoid rework.
Choose products that resist humidity and self-level quickly. Consider:
- Waterborne alkyds for faster cure and durable finish
- Fast-dry acrylic latex for easy cleanup
- High-solids primers to speed topcoat adhesion
Helpful accessories (moisture meters, hygrometers, ventilation ducts)
Although the walls may look dry, you’ll want a few key accessories to confirm conditions and control moisture: a good moisture meter to check drywall and studs, a hygrometer to track room humidity, and portable ventilation (axial fans or ducting) to speed drying and disperse damp air.
Also bring a dehumidifier for stubborn humidity, quick-dry rollers, and sealing tape for trim and vents.
Common Problems When Painting During Rain and How to Fix Them
When you’re painting on a rainy day, you’ll likely face slow drying, adhesion issues like blistering or peeling, and the risk of mildew.
Address slow drying by increasing ventilation and using fast-drying formulas or dehumidifiers, while fixing adhesion problems requires sanding, proper priming, and choosing high-quality, moisture-tolerant paints.
Prevent and treat mildew by controlling humidity, using mildew-resistant paints or additives, and cleaning affected areas with a mildew-safe cleaner before repainting.
Problem: Paint takes too long to dry solutions
One common issue you’ll face if you paint while it’s raining is that coatings take much longer to dry, leaving you with tacky surfaces, drips, and a higher risk of dust and dirt sticking to the finish.
To speed drying, raise indoor temperature, run dehumidifiers and fans for airflow, pick fast-drying or low-VOC paints, apply thinner coats, and delay topcoats until surfaces feel fully dry.
Problem: Blistering, peeling, or poor adhesion remedies
Slower drying doesn’t just inconvenience you—it can trap moisture under the paint and wreck adhesion, leading to blisters, peeling, or paint that flakes off days or weeks later.
To fix this, strip failed areas, sand to sound substrate, let surfaces dry fully, apply a high-quality primer designed for damp or alkaline walls, and repaint under better humidity or with a dehumidifier running.
Problem: Mildew or mold development prevention and treatment
Because damp conditions encourage spores to settle and grow, you’ve got to prevent moisture from lingering on freshly painted surfaces to avoid mildew or mold.
Ventilate rooms, run dehumidifiers, and wait for lower humidity before painting.
Use mold-resistant primer and paint, clean any existing growth with diluted bleach or a commercial mildew remover, then dry thoroughly.
Inspect regularly and address leaks promptly.
Mistakes to Avoid When Painting Interior Walls in Wet Weather
Don’t make common mistakes that’ll ruin a rainy-day paint job — check conditions first and pick the right materials.
Watch for these specific pitfalls:
- Skipping moisture checks
- Using the wrong paint for high-humidity environments
- Over-relying on closed windows without airflow
Addressing these will help your paint cure properly and avoid peeling or mildew.
Skipping moisture checks
If you skip checking for moisture before you paint, you risk trapping damp behind the new finish and inviting peeling, bubbling, or mildew.
You should test walls with a moisture meter or peel a paint spot to inspect plaster or drywall.
Wait for readings within manufacturer guidelines, dry surfaces thoroughly, and address leaks or condensation first—otherwise your fresh paint won’t last.
Using wrong paint for high-humidity environments
When you pick paint that isn’t formulated for high humidity, you’re inviting peeling, blistering, and mildew because regular interior paints can’t handle constant moisture.
Choose moisture-resistant or mold-inhibiting formulas designed for bathrooms and basements to protect the finish and indoor air quality.
Also select semi-gloss or satin sheens for easier cleaning, confirm VOC levels for health, and follow manufacturer drying-time guidance.
Over-relying on closed windows without airflow
Because stagnant air traps moisture and slows paint drying, keeping windows shut without any airflow can ruin a job in wet weather.
You should create cross-ventilation with fans and occasional open windows to remove humid air. Relying solely on closed windows increases tackiness, blistering, and mildew risk.
Monitor humidity and use dehumidifiers if needed to guarantee finishes cure properly and look professional.
Best Practices and Preventive Strategies
Plan your painting around reliable weather forecasts so you’re not battling high indoor humidity.
Upgrade insulation and ventilation to control long-term moisture, and use dehumidifiers during wet seasons to keep conditions stable.
Stick to simple maintenance—fix leaks, clean vents, and touch up paint—to prevent future humidity-related failures.
Scheduling painting around weather forecasts
If you’re scheduling interior painting, sync your timeline with reliable weather forecasts so humidity and temperature swings won’t ruin drying and adhesion.
Check short-term hourly models and a seven-day outlook, and aim for at least 24–48 hours of stable, moderate conditions after each coat.
Plan paint days on drier, milder windows, monitor real-time updates, and postpone if forecasts predict sudden humidity spikes.
Long-term home moisture control (insulation, ventilation upgrades)
When you upgrade insulation and ventilation, you’re cutting off the root causes of indoor moisture instead of just treating symptoms; better insulation keeps warm and cold surfaces closer to room temperature to prevent condensation, while improved ventilation moves humid air out before it can damage paint, drywall, or framing.
Seal leaks, add vapor barriers where appropriate, and install balanced mechanical ventilation to protect finishes long-term.
Maintenance tips to prevent future humidity-related paint failures
Upgrading insulation and ventilation gives you a big head start, but ongoing care keeps paint doing its job.
Regularly check for leaks, fix flashing and seals, and run exhaust fans during showers and cooking.
Use dehumidifiers when needed, touch up damaged spots quickly, and clean vents and gutters seasonally.
Schedule annual inspections to catch moisture issues before paint fails.
When to Postpone Painting or Call a Professional
If you spot peeling paint, persistent damp spots, or a musty odor, don’t start painting—those are red flags that need fixing first.
If water intrusion, extensive mold, or structural damage is present, you should postpone the job and call a contractor or mold specialist.
When in doubt, get a professional assessment so you don’t waste time or make problems worse.
Red flags that require delaying the job
Although small drips and a little humidity can be handled, you should postpone painting or call a pro whenever conditions or surface problems threaten adhesion, finish, or your health.
Delay if walls are damp, peeling, flaking, or powdery; if condensation persists; if ventilation is poor; if strong odors or chemical sensitivities affect you; or if exterior leaks or active water intrusion aren’t fixed.
Situations where a contractor or mold specialist is recommended
When water damage, visible mold, persistent musty odors, or structural issues are present, call a contractor or mold specialist before you touch paint — these problems can hide behind drywall, trim, or paint and will keep new paint from adhering or create health risks.
If leaks, sagging drywall, or recurring mold exist, don’t paint; get inspections, repairs, and proper remediation so paint lasts and you stay safe.
Cost and Time Considerations
Expect that rain-driven humidity can slow drying, cause tacky finishes, and lead to repainting or repairs that add costs.
You’ll need to budget extra time for extended drying and full curing before reassembling the room or applying additional coats.
Factor those timeline adjustments into your schedule and estimate to avoid surprises.
Potential delays and added costs from humidity-related issues
If humidity spikes during a painting project, you’ll likely face slower drying times that can push back completion and raise costs. You may replace tacky paint, rent dehumidifiers, or reschedule crews. Track moisture and budget contingency.
| Issue | Likely Cost/Delay |
|---|---|
| Tacky finish | Rework time, small cost |
| High RH | Dehumidifier rental, delay |
Estimating timeline adjustments for drying and curing
Because humidity slows evaporation, you’ll need to build extra drying and curing time into your schedule rather than assuming manufacturer times will hold.
Add at least 24–48 hours per coat in high humidity, longer for thicker applications.
Use dehumidifiers and fans to reduce delays, and plan buffer days before sanding, recoating, or moving furniture so moisture-related issues don’t force costly rework.
Frequently Asked Questions (FAQ)
You probably have a few quick questions about painting when it’s wet outside, and this FAQ will answer the most common ones.
You’ll learn whether a dehumidifier alone is enough during heavy rain, how long to wait after rain, and if rainy-day painting affects warranties.
We’ll also cover painting bathrooms or basements in wet seasons and how to spot moisture damage that ruins a paint job.
Can I use a dehumidifier alone to paint during heavy rain?
Though a dehumidifier helps lower indoor moisture, it usually won’t be enough alone to guarantee good paint adhesion and drying during heavy rain.
You should also control ventilation, temperature, and eliminate damp sources. Use fans, run heating if safe, seal drafts, and wait for stable indoor relative humidity below about 50% before painting.
Monitor conditions with a hygrometer for best results.
How long should I wait after rain to paint interior walls?
If the rain’s stopped and your home’s interior has good ventilation and heating, you can often start painting once relative humidity drops below about 50% and surfaces feel dry to the touch—typically 24–72 hours after heavy rain, but sometimes sooner after light showers.
Check windows, trim, and behind furniture for lingering dampness; use a moisture meter or touch test.
Don’t rush; uneven drying causes adhesion issues.
Will rainy-day painting void paint manufacturer warranties?
Wondering whether painting on a rainy day will void your paint’s warranty?
Check your manufacturer’s terms—most require proper surface prep, temperature, and humidity ranges. If you paint outside those specs and damage occurs, warranty claims can be denied.
Document conditions, follow instructions, and contact customer support before starting. Proper application under recommended conditions preserves warranty coverage.
Can I paint bathrooms or basements during rainy seasons?
Can you paint a bathroom or basement during a rainy season? Yes, but you need to control humidity and ventilation.
Use a dehumidifier, run exhaust fans, open windows when possible, and pick paint formulated for high-moisture areas.
Avoid painting during peak dampness and allow extra drying time between coats.
Monitor surface temperature to prevent condensation and guarantee proper adhesion.
How do I know if moisture has already ruined a paint job?
When moisture’s already done damage, you’ll usually see clear signs: bubbling or peeling paint, blistering, discolored or dark patches, chalky residue, or persistent damp smell.
Touch and press suspect areas—softness or powdery crumb means substrate failure.
Check for mold or efflorescence and recurring stains after drying. If these appear, you’ll need to address moisture sources and repair before repainting.
Quick Checklist Before You Start Painting During Rainy Weather
Before you pick up a brush, run through a short checklist to make certain humidity, ventilation, and surface prep won’t ruin the job.
Check these quickly:
- Measure indoor humidity (aim under 50%) and delay if too high.
- Ensure cross-ventilation or run dehumidifiers and fans.
- Inspect and fully dry surfaces; scrape, sand, and prime any damp spots before painting.