Can You Paint Over Soot on Walls? The Right Way to Do It
You can paint over soot, but only after you clean, seal, and prime the surface so stains, odors, and poor adhesion don’t ruin the finish. First inspect for heavy charring, warped drywall, mold, or chemical residues—call a pro if those appear. Remove loose soot with a brush and vacuum, wash with soap then TSP or a specialty cleaner, rinse, let dry, then apply a high-adhesion stain-blocking primer and topcoat. Keep reading to learn the proper steps.
Can You Paint Over Soot on Walls? Quick Answer and When It’s Possible
Yes — you can paint over soot, but only after proper cleaning, sealing, and sometimes priming to prevent stains and odors from bleeding through.
You shouldn’t just slap paint on heavy, greasy, or charred soot — in those cases repairs, professional cleaning, or plaster replacement may be needed.
Read on to learn which situations are safe to repaint and which require more work or expert help.
Direct answer summary yes, but only with proper preparation
If you’re dealing with soot-stained walls, you can paint over them — but only after you’ve cleaned, sealed, and primed the surface properly.
Yes, can you paint over soot on walls? You can, provided you remove loose soot, wash with degreaser, apply a stain-blocking primer, and let surfaces dry fully.
Proper prep prevents bleeding and guarantees lasting results.
Situations where painting over soot is not recommended
You can often salvage soot-stained walls with cleaning, sealing, and priming, but there are clear cases where painting over soot isn’t a good idea.
- Heavy structural damage or charred drywall that compromises integrity.
- Persistent smoke odor after cleaning, indicating deep contamination.
- Mold, asbestos, or chemical residues that need professional remediation before repainting.
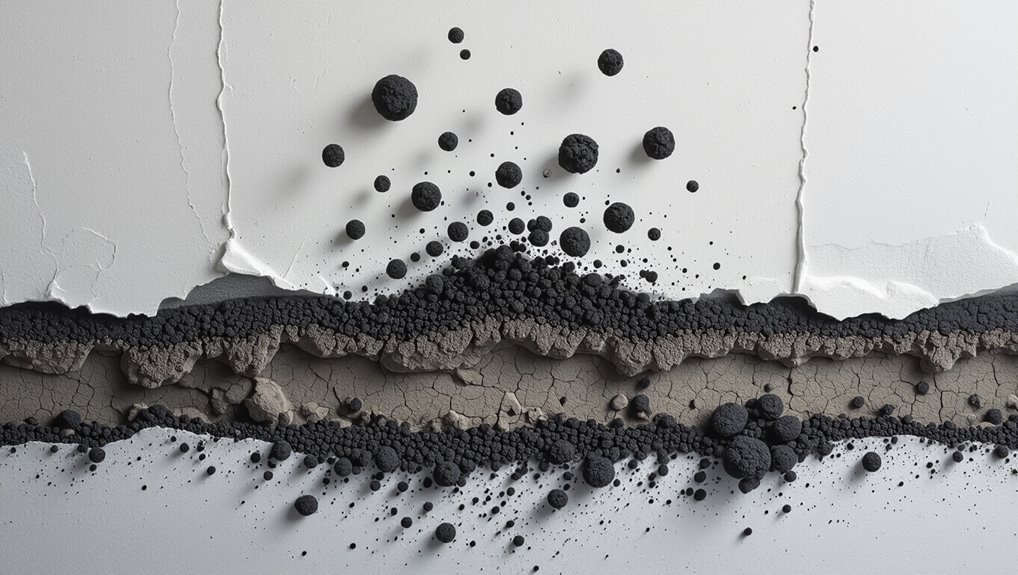
Understanding Soot: What It Is and Why It Matters
Soot is a mix of carbon particles, chemicals, and oily residues from sources like candles, cooking, cigarettes, and fires, and you’ll want to know where it came from before tackling it.
It can prevent paint from sticking, stain through finishes, and worsen indoor air quality if left untreated.
Different stains—dry soot, oily soot, nicotine buildup, and heavy smoke residue from fires—each need specific cleaning and priming steps before repainting.
What soot is (composition and sources)
Fine black dust and oily film that collect on walls after fires or long-term combustion come from a mix of tiny carbon particles, unburned hydrocarbons, ash, and other combustion byproducts.
You’ll also find metals, soot-bound organic compounds, and aerosolized residues from candles, cooking, furnaces, or wildfires.
Sources vary by fuel, temperature, and ventilation, influencing soot’s texture and chemical makeup.
How soot affects paint adhesion and indoor air quality
Those tiny carbon particles and oily residues don’t just look bad—they interfere with paint’s ability to stick and can keep harmful compounds in your home’s air.
You’ll get poor adhesion, peeling, and uneven finish if you paint over soot. Particles also act as carriers for irritants and odor-causing chemicals, lowering indoor air quality until you clean, seal, or remove the contamination properly.
Types of soot stains (dry, oily, nicotine, smoke from fire)
Although it all looks dark and similar at first glance, soot comes in distinct types you’ll want to recognize before cleaning or repainting:
Dry soot is powdery and brushes off.
Oily soot smears and resists paint.
Nicotine stains yellow and sticky over time, and smoke-from-fire residues carry char, odors, and acidic compounds.
You’ll choose cleaning and priming methods based on the type.
Assessing the Damage: When to Clean vs. Replace
Start by doing a quick visual and smell check for soot patterns, discoloration, and lingering odors so you can spot areas that need more attention.
If you see charring, warped drywall, or persistent smells after cleaning, that can signal underlying structural or fire damage and mean parts should be replaced.
Use simple home tests—like rubbing a damp white cloth to check for staining and airing or vinegar wipes to test for lingering odors—to decide whether cleaning will be enough.
Visual and olfactory inspection checklist
Wondering whether you can salvage walls affected by soot or if replacement’s necessary? Do a quick visual and smell check to decide.
Look for:
- heavy staining that rubs off or penetrates paint
- persistent smoky odor after cleaning or ventilation
- warped, bubbling, or crumbly drywall indicating deeper contamination
If two or more apply, consider professional cleaning or replacement.
When soot indicates underlying structural or fire damage
If soot’s confined to surface stains and a light cleaning removes it, you can usually repaint; but when soot comes with charred framing, distorted drywall, or lingering smell that won’t abate, you’re likely facing structural or fire damage that needs more than cosmetic fixes.
Inspect studs, joists, and electrical wiring for heat damage, loose fasteners, or warped members.
Call professionals for repairs and safety clearance.
Testing for residual odors and stains (simple home tests)
After you’ve ruled out structural or heat damage, check whether odors and stains are truly gone or just masked—simple home tests can tell you if cleaning will suffice or if replacement is needed.
Smell rooms with doors closed after airing; press clean white cloths on walls for transfer; dab diluted vinegar to detect persistent smoke; run a charcoal or baking soda odor trap for 24 hours.
Materials and Tools You Need Before Starting
Before you start, gather the right cleaners and solvents—TSP, degreasers, or a specialty soot cleaner—to remove residue effectively.
You’ll also need stain-blocking primers or sealers (shellac or oil-based options), appropriate paints and finishes, and proper protective gear plus ventilation equipment.
Having these materials on hand will keep the job safe and guarantee the soot stays sealed under your finish.
Cleaning agents and solvents (trisodium phosphate, degreasers, specialty soot cleaners)
1 essential category of supplies you’ll need is cleaning agents and solvents—these break down soot’s oily residue so paint will adhere properly. Use TSP for heavy buildup, citrus degreasers for mild deposits, or specialty soot cleaners for stubborn stains. Test in a hidden spot first, wear gloves, and rinse thoroughly.
| Product | Best for |
|---|---|
| TSP | Heavy soot |
| Citrus degreaser | Light soot |
Sealers and primers (stain-blocking primers, shellac, oil-based options)
Once you’ve removed as much soot as possible with cleaners, you’ll need sealers and primers to lock in any remaining stains and create a reliable base for paint.
Choose a stain-blocking primer or shellac-based product for severe nicotine or water marks; oil-based primers also work well.
Apply per manufacturer instructions, ensuring full coverage and proper drying before painting.
Protective gear and ventilation equipment
You’ll need proper protective gear and good ventilation to keep yourself safe while dealing with soot—respirators with P100 or N95 filters, chemical-resistant gloves, eye protection, and disposable coveralls or washable work clothes are essential.
Keep windows open and use fans or a mechanical ventilator to exhaust particles outside.
Follow this checklist:
- Fit-tested respirator and spare filters
- Chemical-resistant gloves and eye shield
- Portable exhaust fan or HEPA air purifier
Paint types and finishes suitable after cleanup
Before you reach for paint, pick products meant to seal and hide soot stains—an oil-based stain blocker or a shellac-based primer works best for stubborn smoke residues.
High-quality acrylic latex paints are suitable once priming’s done. Choose eggshell or satin finishes to mask imperfections and allow cleaning; use semi-gloss in high-moisture areas.
Match paint to substrate and recoat per manufacturer instructions.
Step-by-Step: How to Properly Clean Soot from Walls
Before you grab cleaners or a brush, prepare the room by ventilating, removing or protecting furniture, and covering floors and vents.
Start with dry removal—vacuum with a soft brush attachment and gently brush soot away—then use recommended wet cleaners at proper mix ratios, rinse, and let walls dry completely while checking for remaining stains.
Call a professional if soot is widespread, smells persist, or you suspect toxic residue or structural damage.
Step 1 Prepare the room and protect surfaces
Start by clearing the room of furniture, loose items, and anything fragile so you have space to work and nothing gets ruined by cleaning or paint.
Then seal floors, vents, and trim, and wear PPE.
Use these simple protections:
- Lay down drop cloths or plastic sheeting.
- Tape off baseboards and outlets.
- Cover HVAC vents and light fixtures.
Step 2 Dry removal techniques (vacuuming, brushing)
Begin by gently removing loose soot with dry methods to prevent smearing and pushing particles deeper into the paint.
Use a soft brush and low-suction vacuum to lift particles without abrading the surface. Work top-to-bottom, overlapping strokes.
Take care around edges and trim.
- Soft-bristle brush for loosening
- Vacuum with brush attachment
- Disposable microfiber cloths for final pass
Step 3 Wet cleaning methods and suggested cleaners (mix ratios, techniques)
Once you’ve removed loose particles, it’s time to wash the remaining soot with wet methods that lift stains without damaging paint.
You’ll work from the least to most aggressive cleaner, testing a hidden spot first. Start with mild soap, then trisodium phosphate (TSP) diluted, then degreaser for stubborn marks.
- Mild dish soap (1 tbsp/1 qt water)
- TSP (follow label)
- Commercial degreaser
Step 4 Rinse and dry thoroughly; verifying cleanliness
After rinsing away soap or cleaner residue from the previous step, you’ll need to flush the wall with clean water and remove moisture quickly to prevent streaks, re-soiling, or paint damage.
Work top to bottom with a clean sponge and fresh water, blot with microfiber towels, then use fans or a dehumidifier.
Inspect visually and by touch; repeat rinsing if any soot persists.
Step 5 When to call a professional for deep cleaning or hazard assessment
If soot covers large areas, smells strongly of combustion, or you notice health symptoms such as persistent coughing or headaches, call a professional to assess hazards and handle deep cleaning.
They’ll evaluate structural damage, hidden contamination, and air quality, recommend containment, HEPA filtration, or remediation, and guarantee safe disposal.
Don’t risk health or improper cleanup—hire certified fire or environmental cleaners when in doubt.
Step-by-Step: Painting Over Soot After Proper Preparation
Now that the soot’s cleaned and the surface is prepped, you’ll pick the right stain-blocking primer or sealant to trap any remaining residues.
Apply the primer evenly, respect coverage and drying times, then choose a durable topcoat and apply the recommended number of coats.
After painting, check for lingering odors and allow proper curing time before returning furniture or using the room.
Step 1 Choosing the right primer for soot/sealant application
Because soot carries stains and lingering odors, choosing the right primer or sealant is the most important step before you paint.
Pick a high-adhesion, stain-blocking oil-based or shellac primer designed for smoke damage. Look for products labeled “odor-sealing” or “stain-blocking.”
For heavy soot, use a smoke-specific sealant. Always confirm compatibility with your topcoat and the surface material.
Step 2 Applying primer correctly (coverage, drying times)
As you get ready to prime, work methodically across the surface so each coat overlaps slightly and covers all soot-stained areas evenly.
Use even strokes, keep a wet edge, and don’t skimp on coverage. Observe drying times before recoat to avoid trapping residue.
- 2 coats for heavy staining
- 1 coat for light staining
- 24-hour cure before topcoat
Step 3 Selecting and applying topcoat paint (type, number of coats)
1. Choose a high-quality, stain-blocking latex or oil-based topcoat—latex for ease, oil for stubborn stains.
Match sheen to room use (eggshell for living spaces, semi-gloss for kitchens).
Apply two thin, even coats after primer dries, allowing manufacturer-recommended recoat time.
Use a roller for flats and a brush for edges.
Inspect between coats and touch up as needed.
Step 4 Post-paint odor checks and curing considerations
Wondering how long that fresh paint will smell and when the room will be truly ready?
You’ll ventilate immediately—open windows, run fans, and use an air purifier.
Check odors after 24, 48, and 72 hours; low-VOC dries faster.
Avoid heavy activity for a week to let paint cure fully.
If smells persist, recheck sealers and increase ventilation.
Comparison: Primers and Sealers for Soot Stains
You’ll want to match primer type to the kind of soot: shellac-based primers seal nicotine and oily residue best, oil-based primers handle moderate stains and are more forgiving, and acrylic/stain-blocking primers work for light smoke or touch-ups.
Consider pros and cons by scenario—shellac is fast and effective but smelly and tricky to clean, oil-based offers durability but longer curing, and acrylic is low-odor but may not block heavy or oily soot.
I’ll compare performance, application tips, and when to choose each so you can pick the right product for your situation.
Shellac-based vs. oil-based vs. acrylic/stain-blocking primers
When you’re dealing with soot, choosing the right primer matters because each type—shellac-based, oil-based, and acrylic/stain-blocking—handles stains, smells, and adhesion differently; shellac seals and kills odor fast, oil offers strong stain resistance and leveling, and acrylic blockers give easier cleanup and lower VOCs but can struggle with heavy nicotine or intense smoke.
| Type | Strength | Notes |
|---|---|---|
| Shellac | Odor seal | Fast, brittle |
| Oil | Stain hide | Durable, slow dry |
| Acrylic | Cleanup | Low VOC, less seal |
Pros and cons by scenario (nicotine, oily soot, heavy smoke)
Having picked a primer type, next match it to the kind of soot you’re facing—nicotine residue, oily soot from combustion appliances, or heavy smoke damage—because each scenario stresses different properties: odor sealing, stain-blocking strength, and adhesion under grimy, sometimes greasy conditions.
For nicotine, shellac seals odor and stains but can yellow; oil primers handle oily soot; latex stains struggle with heavy smoke—use high-build, oil-modified sealers.
Common Mistakes to Avoid When Painting Over Soot
Don’t skip thorough cleaning and sealing, because trapped soot or grease will bleed through new paint.
Make sure you’re using a primer and paint formulated for smoke and stain blocking, not ordinary interior paint.
Also address odor sources, check for hidden residue, and keep good ventilation and safety gear on hand.
Skipping proper cleaning or sealing
If you skip proper cleaning or sealing before painting over soot, the new coat won’t stick well and stains will bleed through, leaving you with patchy, discolored walls.
You should remove loose soot, degrease surfaces, and let walls dry.
Then apply an appropriate sealer to lock contaminants in.
Skipping steps forces repeat work and wastes paint, time, and money.
Using the wrong primer or paint
Once you’ve cleaned and sealed the surface, choosing the right primer and paint becomes the next make-or-break decision.
Don’t grab a generic latex primer or cheap paint; they won’t block soot stains or tannins and may peel.
Use a high-hide, stain-blocking, oil-based or shellac-based primer, then a durable topcoat designed for stain resistance so your finish lasts and looks clean.
Ignoring odor sources or hidden residue
What happens when you paint over soot without tracking down lingering smells or hidden residue? You’ll trap odors and oily stains beneath fresh paint, causing discoloration, blistering, and persistent smoke smell.
Inspect for embedded particles in insulation, behind trim, or in air ducts. Clean and deodorize affected areas, replace contaminated materials if needed, then seal with an appropriate stain-blocking primer before repainting.
Poor ventilation and safety oversights
When you skip proper ventilation and safety steps, you’re inviting lingering smoke odors, trapped fumes, and health risks into your home while you paint over soot.
You should open windows, run fans, and wear an N95 or respirator.
Turn off HVAC to avoid spreading particles, cover vents, and use proper lighting.
Don’t rush—protect your lungs and prevent recontamination.
Prevention and Long-Term Maintenance
To keep soot from coming back, you should adjust hearth use, cooking practices, and smoking habits to reduce smoke at the source.
Do routine spot-cleaning and quick-wipe strategies to catch stains before they set, and schedule deeper cleaning at regular intervals.
Arrange professional inspections when you notice recurring soot, persistent odors, or after any significant smoke event.
How to prevent future soot buildup (hearth, cooking, smoking habits)
Although you can’t eliminate every speck, you can greatly reduce future soot by changing how you use heat, cook, and smoke indoors.
Use properly seasoned wood, maintain chimneys and vents, and switch to cleaner-burning fuels or sealed stoves.
Vent kitchens with range hoods, cook at moderate temperatures, and avoid frying without exhaust.
If you smoke, do so outdoors to keep walls cleaner.
Regular maintenance and quick-clean strategies
1 simple habit you can adopt is a quick wipe-down of high-risk surfaces after smoky activities; doing this regularly prevents soot from settling into paint and cut cleaning time later.
You should also:
- Keep microfiber cloths and mild cleaner handy for spot wipes.
- Vacuum vents and upholstery weekly to stop redistribution.
- Address stains immediately to avoid long-term discoloration.
When to schedule professional inspections
When you’ve had a significant smoke event, noticed recurring soot buildup, or smell smoke that won’t go away, schedule a professional inspection promptly to catch hidden damage and air-quality issues before they worsen.
Have inspectors assess vents, insulation, and HVAC systems; test for lingering particulate and odors; get documented recommendations.
Follow their remediation timeline and recheck annually after major incidents or persistent problems.
Cost and Time Estimates
You can often tackle light soot cleanup and repainting yourself in a weekend for the cost of cleaners, primer, and paint, while hiring professionals raises labor and service fees.
Expect prices to climb if damage is widespread, smoke odor needs specialized remediation, or structural repairs are required.
I’ll compare typical DIY budgets and timelines with professional estimates and highlight the main cost drivers.
Typical DIY time and material costs vs. professional cleaning/painting
Tackling soot removal and repainting yourself can shave hundreds off the bill, but it’ll cost you time and some specific supplies: degreasing cleaner or trisodium phosphate (TSP), stain-blocking primer, quality paint, respirators, gloves, rags, and brushes or rollers.
| Task | Typical DIY vs Pro |
|---|---|
| Cleaning | 2–6 hrs DIY / 1–3 hrs pro |
| Prep | 1–4 hrs DIY / 1–2 hrs pro |
| Materials | $50–$200 DIY / included pro |
| Painting | 2–8 hrs DIY / 2–5 hrs pro |
| Total cost | $100–$500 DIY / $400–$1,200 pro |
Factors that increase cost (extent of damage, odor remediation, structural repairs)
Severity matters: the more widespread the soot, the more time and specialized labor you’ll need, and that drives up costs quickly.
You’ll pay more for deep cleaning, encapsulating primers, and disposal of contaminated materials.
Odor remediation—ozone or thermal treatments—adds fees.
If soot caused structural or electrical damage, expect contractors and permits.
Get itemized estimates to compare remediation versus replacement.
FAQ Common Reader Questions
You’ll want clear answers to common concerns like whether paint can permanently seal soot odor, how long to wait after a fire before painting, and whether latex paint alone hides nicotine or oily soot.
You’ll also need to know if it’s safe to clean soot yourself and when odor-eliminating products can substitute for proper sealing.
Below are straightforward FAQs to help you decide the right cleanup and painting steps.
Can paint permanently seal soot smell?
Can paint alone permanently seal soot smell? No — paint can trap odors temporarily, but soot molecules often penetrate drywall, trim, and porous surfaces.
You’ll need thorough cleaning, odor-neutralizing treatments (like HEPA vacuuming, trisodium phosphate, or enzymatic cleaners), and sometimes professional odor encapsulants or removal of contaminated materials.
Otherwise the smell can outgas through painted surfaces over time.
How long after a fire should I wait to paint?
Although you may be keen to repaint, don’t rush into it — wait until the space is fully cleaned, dried, and free of lingering smoke odor and soot staining.
Typically that means waiting at least 2–4 weeks after professional cleanup, longer if materials stayed damp.
Confirm surfaces are odorless, structurally sound, and dry; consult your restoration contractor before priming and painting.
Will latex paint cover nicotine or oily soot without primer?
Wondering if plain latex paint will hide nicotine or oily soot?
You’ll find latex alone usually won’t block stains or odor; nicotine and oily soot bleed through over time.
You should clean surfaces thoroughly and use a stain-blocking primer or sealer designed for nicotine/grease before painting.
Skipping primer risks visible discoloration and reduced durability of your new paint finish.
Is soot hazardous to clean myself?
How risky is cleaning soot yourself? You can remove light soot, but it’s messy and can irritate lungs, eyes, and skin.
Wear an N95 mask, gloves, goggles, and work in ventilated areas. Avoid dry sweeping; use HEPA-filter vacuuming and damp wiping with mild detergent.
For heavy deposits, structural damage, or fire-related soot, hire professionals to reduce health and contamination risks.
Can I use odor-eliminating products instead of sealing?
Can you rely on odor-eliminating sprays or gels instead of sealing soot stains? You shouldn’t.
Odor products mask smells temporarily but don’t stop soot’s oils from bleeding through paint or prevent lingering staining. Sealers lock stains, block odor sources, and create a stable surface for paint.
Use odor eliminators only as a supplement after proper cleaning and sealing, not as a substitute.
When to Hire a Professional and What to Expect
If the soot is widespread, smells strongly, or has affected HVAC or structural elements, you should call a restoration specialist.
Ask contractors about their experience with soot remediation, the specific services they’ll provide (cleanup, odor removal, repairs), and whether they offer written estimates and timelines.
Look for certifications like IICRC fire and smoke credentials and verify adherence to local safety and insurance standards.
Signs you need a restoration specialist
When the smell of smoke lingers, paint peels, or dark staining keeps spreading despite your cleaning efforts, it’s time to call a restoration specialist.
Hire one if soot covers multiple rooms, HVAC or insulation smells burned, health symptoms appear, or structural materials feel compromised.
They’ll assess contamination, recommend remediation, handle deep cleaning, and document damage for insurance so you avoid missed hazards.
Questions to ask contractors and what services they provide
After you decide to call a restoration pro, you’ll want to know exactly what they’ll do and how they’ll protect your home and health.
Ask concise questions about scope, timeline, and safety. Expect clear answers on cleaning, sealing, and disposal.
Typical services include:
- Soot removal and surface cleaning
- Odor control and HEPA filtration
- Surface priming and repair
Certifications and standards to look for in fire/soot remediation professionals
Because soot and smoke damage can hide health risks and structural problems, you’ll want technicians who follow recognized certifications and industry standards.
Look for IICRC S500 training, EPA lead-safe practices, and fire-restoration experience. Certified pros document scope, use proper containment, and provide post-remediation testing so you’ll know it’s safe.
- IICRC S500
- EPA/RRP or lead-safe
- Fire/restoration certification