How to Clean Cement Walls Before Painting for Better Adhesion
You can get lasting paint adhesion on cement walls by thoroughly cleaning and preparing the surface first. Start by removing loose paint, dust, and dirt with a stiff brush or pressure washer, treat mold or efflorescence with a suitable cleaner, rinse well, and let the wall fully dry. Patch cracks, sand rough spots, then prime with a masonry primer for best results. Keep going to learn detailed steps, tools, and safety tips that’ll make the job easier.
Quick Answer Can You Clean Cement Walls Before Painting and Why It Matters
Yes—you can and should clean cement walls before painting; start by sweeping or brushing loose debris, washing with a mild detergent or trisodium phosphate solution, rinsing thoroughly, and allowing the surface to dry.
Doing this removes dirt, efflorescence, and loose paint that would prevent proper adhesion.
Clean, prepared concrete helps your new paint stick better and last longer, saving time and money down the road.
Short step-by-step summary for immediate action
Start by removing loose dirt and grime with a stiff broom or brush.
Then rinse the wall with a hose to loosen surface debris.
Scrub with a mild detergent or trisodium phosphate solution, rinse thoroughly, and let dry.
Patch cracks, sand rough spots, and sweep away dust.
Prime porous areas, then paint.
This concise how to clean cement walls before painting gets you ready fast.
Key benefits of proper cleaning for paint adhesion and durability
Once you’ve cleared dirt, rinsed, and repaired the surface, cleaning pays off by giving paint a stable, adherent base.
You’ll get better coverage with less paint, fewer peeling or blistering problems, and longer-lasting color. Proper cleaning removes contaminants that cause adhesion failure, helps primers bond, and reduces maintenance needs.
Basic Understanding What Is a Cement Wall Surface?
A cement wall surface can be concrete, stucco, or a render finish, each with its own texture and porosity you’ll need to recognize.
You’ll want to know how porosity, dust, efflorescence, and other contaminants affect paint adhesion so you can choose the right cleaning and priming steps.
Understanding these differences makes it easier to get a long-lasting, even paint job.
Composition and common surface types (concrete, stucco, render)
Although cement walls can look similar at a glance, their composition and finish—concrete, stucco, or render—give each surface different porosity, texture, and repair needs.
You’ll want to know which you’re working with before you clean or paint.
Concrete is dense and smooth, stucco is rough and layered, and render is a mortar coat; each requires tailored cleaning, patching, and priming.
How porosity, dust, efflorescence, and contaminants affect paint adhesion
Because cement surfaces vary in porosity and carry dust, salts, and other contaminants, they don’t all accept paint the same way and you’ll need to address each issue before coating.
High porosity soaks primer unevenly, causing blotches. Dust prevents bonding. Efflorescence pushes finish off and signals moisture; salts must be removed.
Oils, mold, and paint residues block adhesion and need proper cleaning or remediation.
When to Clean Signs Your Cement Wall Needs Cleaning Before Painting
Before you paint, look for visible issues like stains, efflorescence, mold, or peeling paint that signal cleaning is needed.
You can run simple tests—wipe the surface to see if dirt rubs off, watch for water beading, or use adhesion tape to check for loose material.
If any of these signs show up, clean and prepare the wall before applying paint.
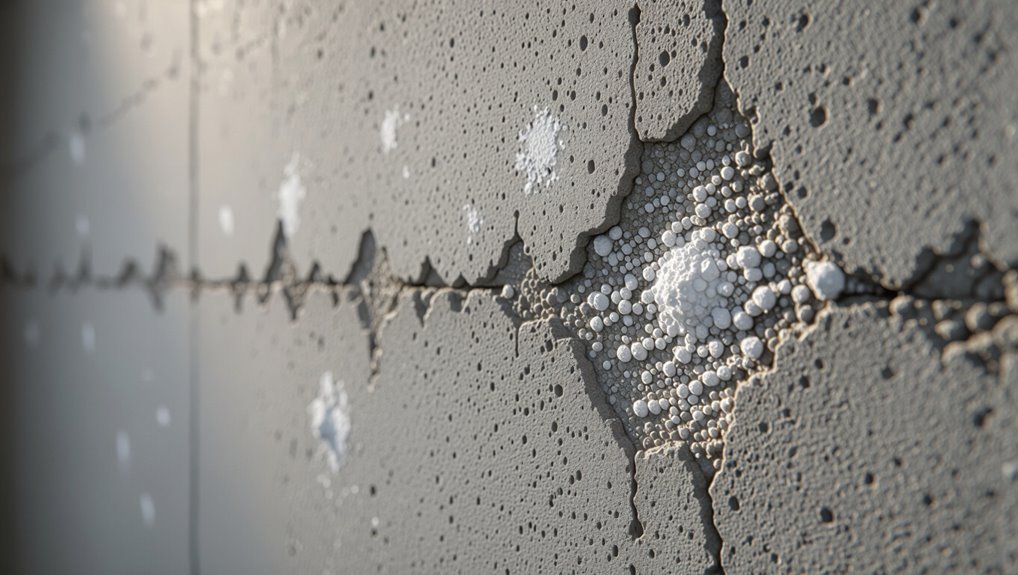
Visual indicators (stains, efflorescence, mold, peeling paint)
Stains, efflorescence, mold spots, and peeling paint are the clearest signs you need to clean a cement wall before painting.
You should look for white powdery salts, dark or fuzzy mold patches, discolored water stains, and any flaking or bubbling paint.
These issues compromise adhesion and appearance, so address them with proper cleaning, repairs, and drying before you prime and paint.
Simple tests to check surface readiness (wipe test, water beading, adhesion tape)
When you’re ready to verify a cement wall’s surface, a few quick tests will tell you whether cleaning (or repairs) are still needed:
Wipe test — rub a damp cloth; if dirt or chalk comes off, clean.
Water beading — pour a little water; absorption indicates porosity, beading suggests contaminants.
Adhesion tape — press and peel; loose material means you must remove debris before painting.
Tools, Materials, and Safety Preparations
Before you start, gather the right cleaning tools and equipment—brushes, pressure washer or hose, scrapers, and a checklist for any specialty items.
Choose cleaners carefully, weighing standard detergents and chemical options against eco-friendly alternatives that still remove mold, efflorescence, and stains.
Don’t forget personal protective gear (gloves, eye protection, masks) and guarantee good ventilation when using strong cleaners.
Cleaning tools and equipment checklist
You’ll need a compact kit of tools, materials, and safety gear to prep cement walls properly.
- Stiff-bristle brush or push broom
- Adjustable pressure washer or hose nozzle
- Scraper and wire brush for loose mortar
- Bucket, sponges, and microfiber cloths
- Protective gear: gloves, goggles, mask, knee pads
Use each item for targeted cleaning, debris removal, and personal safety before painting.
Chemical cleaners, detergents, and eco-friendly options
Now that you’ve gathered brushes, scrapers, and protective gear, pick the right cleaner for the job: a mild detergent or biodegradable concrete cleaner will handle general grime.
A trisodium phosphate (TSP) substitute works for grease and old paint residues.
Diluted muriatic acid or a commercial concrete etcher is reserved for heavy mineral stains and efflorescence.
- Mild detergent or biodegradable cleaner
- TSP substitute for grease
- Diluted muriatic acid for efflorescence
- Commercial concrete etcher
- Eco-friendly oxygen bleach for mildew
Personal protective equipment and ventilation requirements
Because many cleaners and dusts can irritate your skin, eyes, and lungs, you should gear up with proper PPE and set up ventilation before you start scrubbing or sanding cement walls.
Wear N95 or P100 respirators, chemical-resistant gloves, goggles, and long sleeves.
Use exhaust fans or open windows to create cross-ventilation, and consider a portable air scrubber for enclosed spaces.
Step-by-Step Cleaning Process
Start by closely inspecting the wall and patching any cracks so cleaning will be effective and paint will adhere.
Then you’ll remove loose dust and dirt with stiff brushes, follow with pressure washing at recommended settings, and treat persistent stains or efflorescence with appropriate chemicals or gentler vinegar alternatives.
Finish by using proven mold and mildew removal techniques and a safe biocide when needed to guarantee a clean, stable surface for painting.
Step 1 Surface inspection and patching cracks
Before you begin scrubbing or priming, inspect the entire cement surface for cracks, chips, and loose material so you can prioritize repairs that will affect adhesion and finish.
You’ll patch, fill, and level defects before cleaning. Follow these steps:
- Mark cracks and chips.
- Remove loose material.
- Widen hairline cracks slightly.
- Apply cement patch or filler.
- Smooth and cure before painting.
Step 2 Dry cleaning: brushing and dust removal

With cracks patched and surfaces smoothed, you can move on to removing loose dust and debris so cleaners and primers will adhere properly.
Use a stiff-bristled brush or push broom to sweep vertical and horizontal surfaces, working top to bottom.
Vacuum or wipe remaining dust with a dry microfiber cloth.
Check corners and crevices, and repeat brushing until no loose particles remain.
Step 3 Pressure washing: best practices and pressure settings

Grab a pressure washer to blast away embedded dirt, mildew, and old flaking paint so the primer can bond properly.
Use 1500–2500 PSI for masonry; test a small area first. Keep the nozzle 12–24 inches away, use a 25°–40° tip, move in even overlapping strokes, and work top to bottom.
Wear goggles, gloves, and avoid saturating nearby structures.
Step 4 Chemical cleaning for stains and efflorescence (muriatic acid, vinegar alternatives)
Now you’ll tackle stubborn stains and efflorescence with chemical cleaners that remove mineral deposits and organic growth left after pressure washing.
You’ll choose safe options, protect surfaces, dilute properly, rinse thoroughly, and test a small area first.
- Wear PPE and protect plants
- Use diluted muriatic or acid alternatives
- Try vinegar for light deposits
- Neutralize after treatment
- Rinse until clear
Step 5 Mold and mildew removal techniques and safe biocide use
Once you’ve removed surface debris and neutralized any acid treatments, tackle mold and mildew by applying a suitable biocide and scrubbing the affected areas in small sections so you can control contact time and rinsing.
Wear gloves, goggles, and a respirator, test the biocide on a hidden spot, follow label directions, work top-to-bottom, and repeat treatment for stubborn growth until the surface looks clean and sound.
Step 6 Rinsing, neutralizing, and drying time requirements
After you’ve treated and scrubbed away mold or mildew, you’ll need to rinse thoroughly, neutralize any chemicals left on the surface, and let the wall dry fully before painting.
Use clean water and a pressure washer on low to remove residue.
Apply an appropriate neutralizer if you used acids or bleach, then allow 24–72 hours of drying depending on humidity and temperature.
Step 7 Final surface preparation: sanding, etching, and primer consideration
Move over the rough spots with a quick sanding or apply a mild etch to guarantee the paint will bond—this final prep removes lingering dust, flaky paint, and smooths out high spots so primer and paint adhere properly.
After cleaning, wipe with a damp cloth, let fully dry, spot-repair cracks, then choose a masonry primer compatible with your paint and substrate for uniform adhesion and durability.
Common Problems During Cleaning and How to Solve Them
You’ll often run into issues like stubborn efflorescence that keeps coming back, cement that’s been damaged or crumbles after cleaning, and streaks or surface erosion from pressure washing.
For each problem you’ll need to identify the root cause, choose the right repair or prevention method, and follow careful techniques to avoid making it worse.
Below are practical fixes and steps to help you address each situation effectively.
Stubborn efflorescence that returns root causes and fixes
If white, powdery deposits keep reappearing on your cement despite repeated cleaning, it’s likely efflorescence driven by persistent moisture and soluble salts in or beneath the wall; tackling the symptom without fixing the water source will only give temporary results.
Diagnose leaks, poor drainage, or rising damp.
Remove deposits with a stiff brush and mild acid wash, then stop water intrusion, apply breathable sealers, and monitor regularly.
Damaged or crumbling cement after cleaning repair strategies
When cleaning exposes crumbling or chipped cement, don’t panic—you can usually stabilize and repair the surface without a full rebuild; remove loose debris, brush dust away, and apply a bonding agent.
Patch with a cement repair mortar or polymer-modified patch, press firmly, smooth, and cure per instructions.
Sand or feather edges when dry, then prime before painting to guarantee adhesion.
Pressure wash streaks or surface erosion prevention and recovery
Start pressure washing with care to avoid streaks or surface erosion: aim the nozzle at a 45-degree angle, keep the wand moving, and hold it at least 12–18 inches from the wall to prevent gouging the cement.
If streaks appear, rinse gently with lower pressure and a wide spray.
For mild erosion, patch with cement repair compound, then sand and prime before painting.
Best Practices for Ensuring Optimal Paint Adhesion
To get paint to stick well, you’ll want to pick a primer formulated for masonry and cement surfaces.
Make sure temperature and humidity are within the paint manufacturer’s recommended range before you start, and don’t paint if the wall feels damp.
Allow the recommended drying time and perform a moisture test to confirm the substrate is fully dry.
Choosing the right primer for cement walls
Although cement soaks up moisture and paint differently than drywall, picking the right primer makes adhesion reliable and long-lasting.
You should choose primers that match surface condition and paint type. Consider:
- Masonry or acrylic primers for porous cement
- Bonding primers for smooth, sealed surfaces
- Stain-blocking primers for efflorescence
- High-alkali primers for fresh cement
- Waterproofing primers for damp areas
Ideal environmental conditions for painting after cleaning
When you paint cement after cleaning, pick conditions that let primer and paint cure properly—moderate temperatures, low humidity, and good ventilation are key to strong adhesion and a smooth finish.
Work when temperatures are within the paint manufacturer’s recommended range, avoid direct sunlight or wind that dries paint too fast, and guarantee steady air circulation to prevent trapped moisture and uneven bonding.
Recommended drying times and moisture tests before painting
Because moisture trapped in cement ruins adhesion, you should confirm surfaces are thoroughly dry before priming or painting; follow manufacturer drying times, then verify with simple moisture tests (like a hammer or hygrometer) to avoid peeling, blistering, or mold problems.
Allow at least 7–28 days after cleaning or new cement. Use a calcium chloride or relative-humidity test for accuracy, and retest after wet weather.
Cost, Time, and When to Hire a Professional
For a small section you can clean cement walls in an hour or two, while whole-room or exterior jobs can take a day or more depending on prep and drying time.
Expect costs for cleaners, brushes, pressure-washer rentals, and occasional patching, with pros charging hourly or per-job rates that often include equipment and warranty.
Call a pro if the wall is large, damaged, hard to access, or if using high-pressure equipment or chemicals could create safety or permit issues.
Time estimates for DIY cleaning by wall size
Estimating how long it takes to clean cement walls depends mostly on wall size and the soil level, so you can plan your day and budget more accurately. For DIY: small walls (1–2 hrs), medium (3–5 hrs), large (6+ hrs). Pace varies with tools and drying time; take breaks and inspect for stubborn stains.
| Size | Time estimate | Notes |
|---|---|---|
| Small | 1–2 hrs | Porch, short fence |
| Medium | 3–5 hrs | Garage, single wall |
| Large | 6+ hrs | Exterior sides, long fence |
Cost factors: materials, rentals, and professional rates
Several factors will determine what you’ll spend cleaning cement walls: materials (cleaners, brushes, sealers), tool rentals (pressure washers, mixers), and whether you hire pros.
Budget common cleaners and scrapers at low cost, rent a washer for a day if needed, and factor labor rates per hour or per job.
Include disposal, patch supplies, and minor unexpected expenses.
When to call a pro: complexity and safety thresholds
You’ve weighed materials, rentals, and labor costs, but sometimes the scope or risks of cleaning cement walls push the decision to hire a pro.
Call a pro when mold is widespread, structural cracks exist, lead or asbestos might be present, or you need high-pressure washing above ground level.
Pros save time, guarantee safety, and prevent costly mistakes that can ruin paint adhesion.
Mistakes to Avoid
Don’t use the wrong acid strength or cleaner — it can etch the cement or leave residues that ruin paint adhesion.
Don’t paint over damp or contaminated surfaces, because moisture and dirt will cause peeling and stains.
And don’t skip primer or ignore needed repairs, since unprimed or damaged areas will lead to uneven coverage and premature failure.
Using the wrong acid concentrations or cleaners
If you pick the wrong acid strength or cleaner for your cement, you’ll damage the surface or create hazardous fumes.
Test cleaners on a small inconspicuous patch, follow manufacturer dilution instructions, and use pH-appropriate products.
Don’t mix acids with bleach or ammonia.
Wear goggles, gloves, and a respirator.
Rinse thoroughly and neutralize acids per guidelines to protect the substrate and your health.
Painting over damp or contaminated surfaces
When you paint over damp or contaminated cement, the finish won’t stick and moisture can cause blistering, peeling, or mold growth—so always confirm the wall’s fully dry and clean before you roll on paint.
Test for moisture with a hygrometer or plastic sheet.
Remove efflorescence, dirt, oil, and mildew thoroughly.
Painting too soon wastes paint and invites failure—wait and prep properly.
Skipping primer or inadequate surface repairs
After you’ve confirmed the wall’s dry and contaminant-free, don’t skimp on primer or rush repairs—both determine whether paint bonds and lasts.
You should patch cracks, fill voids, and remove loose material before priming. Use a masonry primer suited to cement, apply it evenly, and let it cure.
Skipping these steps leads to peeling, uneven coverage, and costly rework.
Maintenance After Painting
Once the paint’s dry, you should schedule routine inspections and gentle cleanings to keep the finish looking fresh.
For minor stains or mildew, you can usually remove them with a soft brush and a mild detergent solution or diluted bleach without repainting.
Address spots promptly to prevent deterioration and reduce the need for touch-ups.
Routine inspections and cleaning to prolong finish
Because painted cement faces the elements constantly, you should set a simple inspection schedule to catch problems early.
Walk the perimeter monthly, looking for peeling, cracks, efflorescence, or dirt buildup. Gently wash with a soft brush and mild detergent as needed, rinse thoroughly, and allow to dry.
Touch up small damaged spots promptly to prevent wider failure and extend the finish’s life.
How to address minor stains or mildew without repainting
To tackle minor stains or mildew without repainting, start by identifying the problem area and its cause—dirt, organic growth, or water intrusion—so you can choose the right cleaner and fix any moisture source.
Use a mild detergent or diluted bleach solution (1:10 bleach to water) for mildew, scrub with a soft brush, rinse thoroughly, dry, and monitor.
Seal if stains recur.
FAQ
You’ll find answers here to common questions like whether you can skip pressure washing, how long a cleaned wall needs to dry, and whether muriatic acid is required for efflorescence.
You’ll also learn which primers work best for exterior versus interior cement and whether paint can stop efflorescence or moisture issues.
If you have a specific situation, ask and I’ll give tailored guidance.
Can I paint cement walls without pressure washing?
Wondering if you can skip pressure washing? You can paint without it if the wall is relatively clean, free of loose paint, mildew, efflorescence, and heavy dirt.
Use a stiff brush, trisodium phosphate (TSP) solution, and rinse thoroughly.
For stubborn grime or porous surfaces, pressure washing is safer to guarantee paint adhesion and longevity—don’t skip it when in doubt.
How long must a cleaned cement wall dry before painting?
How long should a cleaned cement wall dry before you paint it? Aim for 24–48 hours of dry conditions; thicker pores or cooler, humid weather can extend that to 72 hours.
Touch the surface — it should feel completely dry and not cool from evaporation.
Also confirm no visible moisture, damp spots, or efflorescence before priming and painting.
Is muriatic acid necessary to remove efflorescence?
Do you need muriatic acid to remove efflorescence? Not always.
You can often scrub white salt deposits with a stiff brush and water or a mild vinegar solution.
Use muriatic acid only for stubborn, widespread deposits and dilute it carefully, wear protection, and rinse thoroughly.
Test a small area first; consider safer alternatives before choosing strong acid.
What primer types work best for exterior vs. interior cement?
Because exterior and interior cement face different moisture and wear issues, you’ll pick primers designed for those conditions: use alkali-resistant, breathable masonry primers or acrylic-latex primers with water-repellent additives for exterior walls, and standard acrylic-latex or bonding primers for interior cement where moisture is lower.
Choose solvent- or water-based bonding primers for slick or previously painted surfaces, and always follow manufacturer surface prep recommendations.
Can painting prevent efflorescence or moisture problems?
Painting can help reduce visible efflorescence and slow moisture intrusion, but it won’t fix underlying sources like leaks or poor drainage.
You should repair cracks, seal joints, and improve grading or gutters first.
Use breathable masonry paints or silane/siloxane water repellents so trapped moisture can escape.
Monitor for recurring salts; persistent efflorescence means you need to address the moisture source, not just repaint.