How to Finish Chalk Paint for a Durable, Beautiful Result
You can turn chalk paint’s soft, matte look into a durable, everyday finish by prepping, sealing, and protecting correctly. Clean and sand the surface, prime slick or porous areas if needed, then apply thin chalk paint coats, sanding lightly between layers. For low sheen use paste wax; for heavy use choose a water‑based polyurethane or polycrylic applied in thin, even coats with light sanding between. Match finish to use and cure fully, and keep going to learn tips for each option.
Quick Answer How to Finish Chalk Paint for a Durable, Beautiful Result
For a durable, beautiful finish, seal chalk paint with a clear wax or water-based topcoat and lightly buff for smoothness.
You’ll need paint, fine-grit sandpaper, tack cloth, your chosen sealer (paste wax or polycrylic), brushes/cloths, and a foam applicator.
Follow proper curing times and work in thin, even layers to avoid brush marks.
One-sentence summary of best finishing approach
If you want a durable, beautiful finish, sand lightly, seal with a thin coat of water-based clear wax or polyurethane, and add a second protective topcoat after the first cures.
For a quick one-sentence summary of how to finish chalk paint: prep smooth, apply thin, even sealer, let cure fully, then protect with a second compatible topcoat for lasting wear and easy maintenance.
Fast checklist of required materials and tools
1 simple checklist shows what you’ll need to finish chalk paint for a durable, beautiful result: gather quality supplies and proper tools before you start.
- Fine-grit sandpaper, tack cloth, foam brush, and good synthetic brush.
- Clear topcoat (wax or water-based poly) and applicator pad or high-density foam roller.
- Clean rags, mild cleaner, painter’s tape, and gloves for prep and protection.
Basic Understanding What Chalk Paint Is and Why Finishing Matters
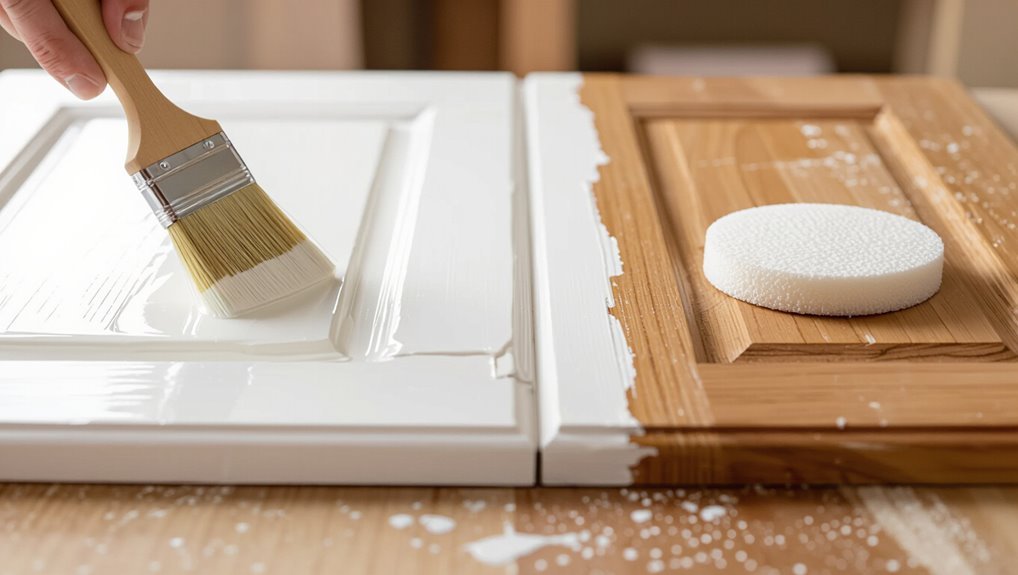
Chalk paint is a matte, water-based paint you’ll often use on furniture and décor for a smooth, vintage look with minimal prep.
What you choose to finish with — wax, lacquer, polyurethane, or varnish — changes how durable, glossy, and easy to clean the surface will be.
Knowing the pros and cons of each finish helps you match appearance and maintenance needs to the piece.
What chalk paint is and its typical uses
A matte, velvety paint that adheres well to many surfaces, chalk paint lets you transform furniture and decor quickly without extensive prep work.
You’ll use it on wood, metal, plaster, and even laminate for cabinets, tables, and frames. It’s ideal for shabby-chic, vintage, and modern matte looks, easy distressing, and quick color updates when you want a low-effort makeover.
How finish affects durability, appearance, and maintenance
You’ve seen how chalk paint sticks to lots of surfaces and creates that soft, velvety look, but what you put on top of it will largely determine how the piece wears over time.
The finish controls scratch resistance, water protection, sheen, and color depth. It also changes cleaning needs and repairability, so choose a finish that balances durability, look, and maintenance for the item’s use.
Differences between wax, lacquer, polyurethane, and varnish finishes
Although they all protect and change the look of your chalk-painted piece, wax, lacquer, polyurethane, and varnish perform very differently, so picking one depends on how the item will be used and how much sheen, toughness, and repairability you want.
| Finish | Sheen/Toughness | Repairability |
|---|---|---|
| Wax | Low/Soft | Easy touch-up |
| Lacquer | High/Hard | Harder to repair |
| Poly/Varnish | Variable/Very tough | Spot repairs possible |
Preparing the Surface Keys to Long-Lasting Results
Before you paint, identify the substrate—wood, laminate, or previously painted surfaces—because each needs different prep to stick and last.
Clean and degrease thoroughly, then repair, fill, and sand using appropriate grits (start coarse for gouges, finish with 120–220 grit for a smooth base).
Use a primer when surfaces are porous, stained, or slick (like laminate), choosing bonding or stain-blocking primers as needed.
Assessing the substrate: wood, laminate, previously painted surfaces
When you’re prepping a piece for chalk paint, the first step is to identify what you’re working with—solid wood, laminate, or an existing paint layer—because each substrate needs different prep to guarantee adhesion and durability.
Check for veneer, water damage, or loose paint; sand glossy finishes, scuff laminate, and prime or strip flaking paint.
Note stains or tannins that need sealing before painting.
Cleaning and degreasing steps
Start by giving the piece a thorough cleaning: remove dust and loose grime with a soft brush or vacuum, then wash with a degreasing solution (dish soap and warm water, trisodium phosphate substitute, or a commercial cleaner) to lift oils, waxes, and fingerprints that prevent chalk paint from bonding.
Rinse thoroughly, dry completely, and tack-cloth the surface before priming or painting to guarantee adhesion.
Repairing, filling, and sanding: grit recommendations and techniques
A smooth, stable surface makes chalk paint last, so repair dents, fill gouges, and sand high spots before you ever reach for a brush.
Use a lightweight wood filler for gaps, let it cure, then start with 120-grit to shape. Finish with 220-grit for paint adhesion.
For delicate trim, hand-sand with fine 320-grit. Remove dust completely before painting.
Priming: when to use a primer and recommended types
Once your repairs are smooth and dust-free, you’ll decide whether primer is needed to guarantee adhesion, hide stains, or create a uniform base for chalk paint.
Use shellac-based primer for water stains or tannin bleed; oil-based for raw wood or problematic surfaces; water-based bonding primer for slick finishes or laminates.
Apply thin, even coats and sand lightly between layers for best results.
Choosing the Right Finish Pros, Cons, and Best Uses
When you pick a finish for chalk paint, consider tradeoffs between soft options like paste wax—great for that matte, hand-rubbed look but needing periodic reapplication—and hard finishes such as polyurethane or water‑based polycrylic, which offer superior durability and various sheen choices.
You can also combine approaches (wax over a sealed coat or use furniture lacquer) to balance appearance and protection, though hybrids may add complexity or affect touch-up ease.
Match your choice to the project: decorative pieces can favor wax, high-traffic or tabletop surfaces should use hard finishes, and mixed-use furniture often benefits from a hybrid approach.
Soft finishes (paste wax) look, durability, reapplication needs
Consider paste wax if you want a soft, chalky look with a low sheen; it soaks into chalk paint, rounding edges and subduing brush marks while giving a tactile, slightly velvety finish.
Wax offers moderate protection against scuffs and moisture but won’t resist heavy wear. You’ll need to reapply annually or touch up high-use areas, and buff periodically to restore depth.
Hard finishes (polyurethane, water-based polycrylic) durability, sheen options
If you prefer tougher protection than wax can provide, hard finishes like oil-based polyurethane or water-based polycrylic give a much more durable surface that stands up to frequent use, spills, and cleaning.
You’ll choose oil-based for ambering warmth and extreme durability, or water-based polycrylic for low odor and clearer color.
Sheen ranges from matte to gloss—pick based on wear, light reflection, and style.
Hybrid options (wax + poly, furniture lacquer) pros and tradeoffs
Because you want both beauty and durability, hybrid finishes—like waxing over a poly topcoat or using furniture lacquer—offer a practical middle ground between soft wax and heavy-duty poly.
You get improved abrasion resistance, easier spot repairs, and a richer hand.
Tradeoffs: slightly more complex application, longer cure times, and less effortless re-touching than pure wax.
Choose based on use and desired sheen.
Finish selection guide by project type
Now that you’ve weighed hybrid options like wax over poly and lacquer, pick a finish that matches how each piece will be used. Choose poly for high-traffic surfaces, wax for decorative pieces, and lacquer for smooth factory-like looks. Match durability, sheen, and maintenance to function.
| Project | Best Finish |
|---|---|
| Tabletops | Poly |
| Cabinets | Lacquer |
Step-by-Step Finishing Process
Before you start, test a small area, pick the sheen and guarantee good ventilation so you know what to expect.
Next you’ll choose and apply a sealer if needed, then put on your topcoat using brush, foam, or spray and sand lightly between coats with the recommended grits and a tack cloth.
Finish with the final coat and allow proper drying and curing times, noting that curing can take much longer than surface dry.
Step 1 Test and plan: patch test, sheen choice, ventilation
Start with a small patch test, choose the sheen you want, and plan for good ventilation so the finish turns out as you expect.
Test paint and topcoat compatibility on an inconspicuous area, note drying time and color shift, and evaluate sheen in different light.
Ventilate for fumes and faster curing.
Decide sheen (matte, satin, semi-gloss) before proceeding.
Step 2 Applying a sealer (if using): product options and technique
If you plan to seal chalk paint, pick a compatible product—wax, water-based poly, or oil-based varnish—then work methodically so your finish stays durable and looks consistent.
Clean dust, apply thin even coats, and sand very lightly between poly or varnish coats with fine grit.
For wax, buff while slightly tacky for sheen control.
Always follow manufacturer dry times and temperature recommendations.
Step 3 Applying the topcoat: brush vs. foam vs. spray application methods
Now that your sealer’s cured, choose the topcoat application that matches the look and durability you want—brush, foam, or spray—because each gives different coverage, texture, and control.
Use a high-quality brush for smooth, controlled strokes and edges; a foam applicator for minimal brush marks on flat panels; or spray for fast, even coverage on intricate pieces.
Work in thin, even layers.
Step 4 Sanding between coats: recommended grits, tack cloth use
Once your topcoat has cured to the touch, lightly sand between coats to knock down dust nibs and help the next layer adhere.
Use 320–400 grit for lacquer or spray finishes, 220–320 for polycrylic or varnish.
Sand gently with a sanding block, then wipe with a slightly damp microfiber or tack cloth to remove residue.
Repeat before each additional coat.
Step 5 Final coat and curing: drying times and curing vs. drying differences
Because this is the last layer that protects and levels your work, apply the final coat evenly and avoid overworking the surface so you get a smooth, uniform finish.
Let it dry to the touch per product directions (usually 1–6 hours), but remember curing takes longer—days to weeks—for full hardness.
Keep items light-duty, control humidity and temperature, and wait before heavy use.
Step 6 Optional distressing and protective touch-ups
Although optional, distressing and spot-touching can give your piece character and extend its life.
So take a moment to plan where you want natural wear to show and which areas need protective reinforcement.
Use fine sandpaper or steel wool to reveal underlying paint sparingly.
Seal exposed edges with clear wax or polycrylic, then touch up chips with matching paint for a seamless, durable finish.
Tools, Materials, and Products What to Buy and Why
Before you start finishing, gather the essential tools—quality brushes, a small roller or sprayer for smooth coverage, various grits of sandpaper, and a tack cloth for dust-free surfaces.
Choose products by finish type based on features (durability, sheen level, water- or oil-based compatibility) rather than brand names.
Don’t forget safety and workspace: guarantee good ventilation, use a respirator when needed, and protect floors with drop cloths.
Essential tools (brushes, rollers, sprayer, sandpaper, tack cloth)
Tools matter as much as technique when finishing chalk paint, so gather the right brushes, rollers, a sprayer option, sandpaper, and a tack cloth before you start.
Choose a synthetic-bristle brush for smooth strokes, a dense foam roller for flat panels, and a fine-grit sanding block plus 220–320 grit for prep.
Use tack cloth to remove dust.
- Brushes
- Rollers
- Sandpaper/tack cloth
Recommended products by finish type (brand-agnostic features to look for)
Now that you’ve picked brushes, rollers, and sanding supplies, match the rest of your kit to the finish you want.
For matte, choose water-based wax or flat furniture varnish with low sheen and fine-mist sprayer compatibility.
For satin/semi-gloss, pick durable waterborne poly or oil-modified topcoat with good leveling.
For high-gloss, use high-build lacquer or polyurethane formulated for smooth leveling and sanding between coats.
Safety gear and workspace setup (ventilation, respirator, drop cloths)
Because finishing releases fumes and creates dust, set up a well-ventilated workspace and kit yourself with proper PPE: an NIOSH-rated respirator with organic-vapor cartridges for solvent-based topcoats (or a P100 for heavy dust), chemical-resistant gloves, safety goggles, and a disposable coverall or apron to protect skin and clothing.
Lay heavy-duty drop cloths, seal off vents, use a fan to exhaust air, and keep a fire extinguisher nearby.
Common Problems and How to Fix Them
You’ll run into a few common finish issues like brush marks, streaks, or an orange-peel texture and you’ll want to know how to correct the application or sand and recoat.
If you get bubbling, lifting, or adhesion failure, you’ll need to diagnose contamination or moisture and strip or re-prime the area.
To prevent yellowing, or to fix soft or tacky spots after curing, follow specific cleanup, sealer, and cure-time steps so the finish hardens properly.
Brush marks, streaks, and orange peel causes and remedies
When your chalk paint shows brush marks, streaks, or an orange-peel texture, it usually means the paint, tools, or technique need adjusting. Identifying which one is at fault lets you fix the problem quickly.
Thin paint slightly, use a high-quality synthetic brush or foam pad, keep a wet edge, sand light between coats with fine grit, and apply even, controlled strokes for a smooth, uniform finish.
Bubbling, lifting, or adhesion failure diagnosis and repair
If your chalk paint develops bubbles, peels, or just won’t stick, it’s usually a sign of surface contamination, incompatible products, or improper prep and application—so start by identifying which of those is at fault.
Clean and sand to bare, remove wax/oil, test adhesion with tape.
Strip failed areas, re-prime with a bonding primer, repaint with compatible finishes, and cure fully before topcoating.
Yellowing or discoloration over time prevention and correction
Though chalk paint is prized for its matte, vintage look, it can yellow or discolor over time from sunlight, heat, chemical reactions, or incompatible topcoats.
To prevent this, use UV-resistant clear coats, avoid oil-based sealers, and keep pieces out of direct sun.
To correct mild yellowing, lightly sand and recoat with a non-yellowing water-based topcoat; for severe cases, strip and repaint.
Soft spots or tacky finishes after curing troubleshooting steps
Because finishes can feel dry while still being soft underneath, you’ll want to diagnose the cause before recoating or stripping.
Check cure time, humidity, and temperature; tackiness often means incomplete curing.
Test small areas, sand only if fully cured, and wipe away dust.
If contamination (wax, oil) caused it, clean, degrease, then recoat with compatible topcoat.
Best Practices, Tips, and Time-Saving Strategies
To get a professional, smooth finish with minimal effort, start by sanding between coats and using a quality brush or foam roller.
You’ll preserve that finish by cleaning spills promptly, avoiding abrasive cleaners, and re-waxing or re-sealing high-wear areas as needed.
Also factor humidity and season into drying times, and choose economical methods—bulk supplies and brush-on sealers for large projects, small jars and touch-up kits for tiny pieces.
How to get a professional smooth finish with minimal effort
Getting a professional, smooth chalk paint finish doesn’t require perfect technique or hours of sanding—you just need the right sequence of simple steps and a few time-saving tools.
Clean and degrease, apply thin even coats with a high-density foam roller, lightly sand between coats with fine grit, remove dust, then seal with a hard-wearing topcoat.
Work steadily; skip rushing.
Maintenance tips to preserve finish longevity
While regular care won’t make your piece indestructible, a few simple maintenance habits will keep a chalk-painted surface looking fresh for years:
Wipe spills promptly with a damp cloth, avoid harsh cleaners, use coasters and felt pads, dust gently, reapply wax or topcoat annually where traffic is high, touch up chips with matching paint, and inspect seams to prevent dirt buildup.
Seasonal and humidity considerations when finishing
Because humidity and temperature directly affect drying and adhesion, you should plan your chalk-paint finishing around seasonal conditions to avoid tacky, cracked, or cloudy results.
Work when humidity is 40–60% and temperatures are 60–75°F (15–24°C).
Use dehumidifiers or fans for damp days, heaters for cold ones, and allow extra cure time in winter.
Monitor conditions for best adhesion.
Economical approaches for large projects vs. small pieces
Once you’ve planned around temperature and humidity, scale and scope become your next consideration: large projects demand different materials, techniques, and time management than small pieces.
For big jobs, buy larger containers, use rollers, sectional sanding, and thin multiple coats to save time and money.
For small pieces, work with sample sizes, detail brushes, and pot-safe finishes to reduce waste and speed up completion.
Comparison Cheat Sheet Finish Choices at a Glance
You’ll find a quick comparison table that lines up durability, sheen, ease of application, and recoat time for common finishes.
Use it to match the finish to your project needs at a glance.
Refer to the table when you need a fast decision without reading long descriptions.
Quick comparison table: durability, sheen, ease of application, recoat time
Here’s a compact cheat sheet that helps you pick a finish fast: it compares durability, sheen, ease of application, and recoat time so you can match the look you want with the performance you need. Use this quick guide to choose wisely and speed your project.
| Finish | Key notes |
|---|---|
| Wax | Moderate durability, low sheen, easy, quick recoat |
| Polycrylic | High durability, bright sheen, moderate, fast |
| Lacquer | Very high, glossy, harder, fast |
| Oil-based Poly | Very high, satin/gloss, harder, longer |
FAQs Quick Answers to Common Finishing Questions
You’ll find quick answers here to common finishing questions like whether a water-based poly will adhere over wax, how long to wait before using a finished piece, and if sanding between coats is always needed.
You’ll also learn about mixing finishes for custom sheen or durability and the fastest fixes for scratches or chips.
Use these tips to choose the right topcoat and handle repairs confidently.
Can I use a water-based poly over waxed chalk paint?
Wondering whether you can apply a water-based polyurethane over waxed chalk paint? You generally shouldn’t.
Wax creates a barrier that prevents proper adhesion, causing peeling or blotchy finish.
If you need poly, strip or de-wax the surface thoroughly, clean and lightly sand, then prime before applying water-based poly.
Otherwise stick with paste or soft wax sealer designed to top chalk paint.
How long should I wait before using a finished piece?
If you’ve sealed your chalk-painted piece with wax, wait longer before regular use than you’d after a poly finish: wax needs up to 30 days to fully cure and harden under normal indoor conditions, while water-based poly typically allows light use in 24–48 hours and reaches full cure in about 7 days.
For heavy use, wait full cure times; be gentle until then.
Is sanding between coats always necessary?
Sometimes yes, sometimes no — sanding between coats depends on the finish you’re using and the result you want.
If you need smoothness or are using multiple paint or topcoat layers, light sanding with fine grit (220–320) removes dust nibs and improves adhesion.
Skip sanding if coats level perfectly and the product instructions allow.
Always clean dust before recoating for best adhesion.
Can I mix finishes to get custom sheen or durability?
Curious about blending finishes? You can mix topcoats—wax, lacquer, poly—only when products are compatible.
Test first on scrap to confirm adhesion, sheen, and drying. Thin coats blend more predictably.
For custom sheen, dilute a satin with a matte sheen product per manufacturer guidelines.
For durability, favor poly or lacquer over wax. Always follow cure times before heavy use.
How do I repair scratches or chips in a finished chalk-painted piece?
Repairing scratches or chips in chalk paint is straightforward if you take a few careful steps: clean the area, sand lightly, and apply matching chalk paint with a small brush or toothpick.
Feather edges, let dry, then lightly sand for smoothness. Seal with your chosen topcoat (wax or water-based poly).
For deep chips, fill with wood filler before painting.
Final Checklist Before You Start
Before you begin, check your supplies, set aside a small test area, and make sure the room temperature and humidity are right for painting.
Know the post-project steps too — how long the finish needs to cure, your maintenance routine, and when a recoat may be required.
That way you’ll start with confidence and finish without surprises.
Pre-project checklist (materials, test area, environment)
Checklist time: gather your materials, mark a small test area, and set up the right workspace so you don’t run into surprises once you start.
Confirm paint, sealer, brushes, sandpaper, tack cloth, and protective gear.
Test adhesion and color on the marked spot.
Guarantee good ventilation, steady temperature, and clean, dust-free surfaces.
Have drop cloths and proper lighting ready.
Post-project checklist (curing, maintenance plan, recoat schedule)
Once your final coat’s dry, take a moment to confirm the cure time, recoat window, and maintenance plan so you won’t be caught off guard later.
Note full cure (days), light-use vs heavy-use timelines, and recommended cleaners.
Schedule touch-up checks at 1 month, 6 months, and yearly.
Keep product labels and recipes handy in case you need to match finishes or recoat.