How to Get Dried Blood Off Painted Walls Safely and Effectively
You can safely and effectively remove dried blood from painted walls by first protecting yourself with gloves and testing a hidden spot. Gently scrape loose flakes, then blot with a soft cloth dampened in warm soapy water, working inward from the edges. For stubborn marks try 3% hydrogen peroxide or an enzymatic cleaner, then rinse and dry. Be cautious with solvents on glossy finishes and touch up paint if needed — keep going for step‑by‑step techniques and tips.
Quick Answer How to Remove Dried Blood from Painted Walls Safely
If you need to remove dried blood from painted walls quickly, start by gently scraping away loose flakes with a plastic putty knife.
Mix a mild detergent with warm water, test a hidden spot, then blot the stain with a soft cloth until it lifts.
Rinse the area, pat dry, and touch up with matching paint if needed.
Short, direct steps for quick action
Act quickly and gently: soften the dried blood with a damp cloth soaked in cold water, then blot—don’t rub—to lift residue without spreading it.
For how to get dried blood off painted walls, follow these short steps:
- Dampen cloth, press gently.
- Blot upward strokes to lift stains.
- Use mild soap solution if needed.
- Rinse, pat dry, inspect for touch-up.
Basic Understanding What Dried Blood Is and Why It Stains Paint
Blood is mostly water with proteins and iron-rich hemoglobin that bond to paint as it dries, so you’ll often get a stubborn, colored residue.
Different paints — latex, enamel, oil, matte, and satin — react differently: some absorb stains, others form a smooth film that can trap dried blood on the surface.
If you clean aggressively or use the wrong solvent you can strip or discolor the finish, and you should also treat the stain as a potential biohazard and use gloves and proper disinfectants.
Composition of blood and how it bonds to painted surfaces
When you look closely, dried blood is a complex mix of proteins, cells, and minerals that chemically bind to paint rather than just sitting on the surface.
You’ll find hemoglobin, fibrin, and cellular debris create a protein matrix that adheres tightly. As it dries, oxidation and crosslinking increase adhesion, making mechanical and enzymatic actions necessary to loosen and remove the stain.
Differences between paint types (latex, enamel, oil, matte, satin) and stain behavior
Although dried blood behaves similarly as a protein-rich, oxidized film, how it interacts with painted walls depends a lot on the paint’s chemistry and finish.
You’ll find latex (water-based) often absorbs stains into pigments, satin resists slightly, and matte soaks and shows marks.
Oil and enamel form harder films that can trap protein on the surface, making lift-off easier with appropriate cleaners.
Risks of improper cleaning (paint damage, discoloration, biohazard concerns)
Because dried blood’s proteins and pigments bond with paint differently, cleaning it the wrong way can easily strip finish, spread stains, or push residue deeper into porous surfaces.
You’ll risk discoloration, haloing, or peeling if you scrub abrasively or use harsh solvents.
You can also create biohazard exposure by aerosolizing pathogens or leaving infectious residue—so use proper PPE, containment, and disposal.
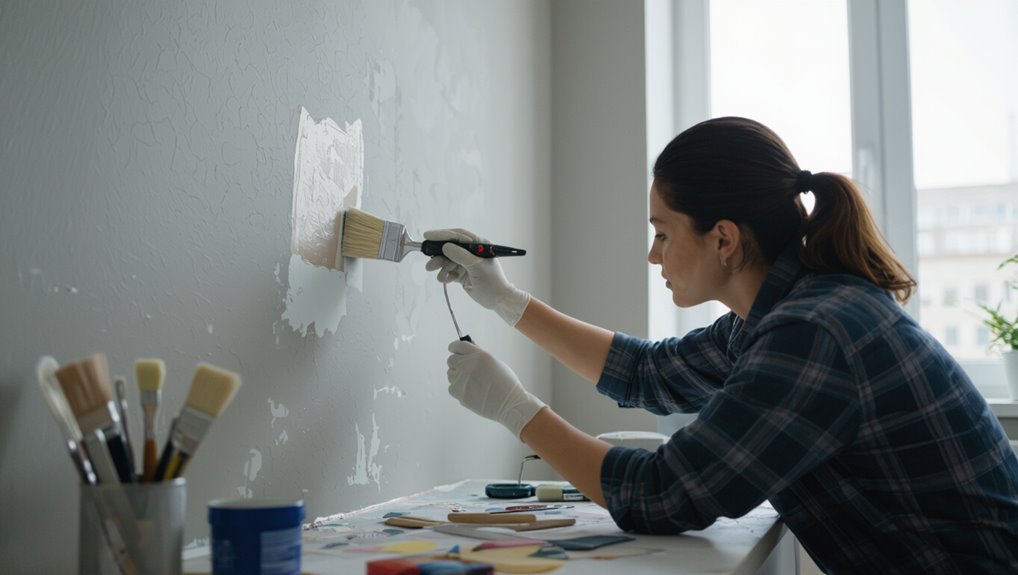
Safety Precautions Before You Start
Before you start, put on gloves, a mask, and eye protection and wash your hands afterward to limit exposure.
Treat visible blood as a potential biohazard—if the stain is large, from an unknown source, or you’re unsure how to proceed, call a professional.
Do a small spot test on an inconspicuous area and cover nearby floors or furniture to protect surrounding surfaces.
Personal protective equipment and hygiene (gloves, mask, eye protection)
When you’re dealing with dried blood on walls, protect yourself with proper personal protective equipment: disposable nitrile gloves, a fluid-resistant mask (N95 or surgical), and safety goggles or a face shield to keep splashes out of your eyes.
Change gloves if torn or contaminated, avoid touching your face, and dispose of PPE in a sealed bag.
Wash hands thoroughly with soap and water afterward.
Biohazard considerations and when to call professionals
If the blood stain is large, near body fluids other than blood, or you’re unsure how old or infectious the material is, treat it as a potential biohazard and don’t try to clean it yourself.
Contact trained biohazard remediation or emergency services. They’ll assess risk, secure the area, and use proper containment, PPE, and disposal.
Call professionals if you lack equipment, training, or confidence.
Spot testing and protecting surrounding areas
Since cleaning solutions and techniques can damage paint, wallpaper, or finishes, test a small, hidden area first to confirm compatibility.
Wear gloves, open windows, and lay down plastic or drop cloths to protect floors and furniture.
Tape edges and remove switch plates. If the test shows discoloration, stop and try a milder method or consult a professional.
- Gloves
- Ventilation
- Drop cloths
- Tape
Tools and Supplies You’ll Need
You’ll want a few basic household supplies—warm water, mild detergent, hydrogen peroxide, baking soda, and dish soap—ready before you start.
Grab soft cloths or microfiber, a sponge, a soft-bristle brush, and a plastic scraper for gentle scraping and blotting.
For stubborn stains, consider enzymatic cleaners, diluted ammonia, or commercial stain removers and only use them when milder methods don’t work.
Household supplies (warm water, mild detergent, hydrogen peroxide, baking soda, dish soap)
Gathering the right household supplies before you start makes removing dried blood from walls faster and less stressful.
You’ll need warm water and mild detergent for gentle cleaning, hydrogen peroxide for spot-treating stains, and baking soda to create a paste for stubborn areas.
A bit of dish soap helps break oils. Use small amounts, test a hidden spot first, and rinse thoroughly.
Cleaning tools (soft cloths, microfiber, sponge, soft-bristle brush, plastic scraper)
Pick a few gentle tools before you start: soft cloths and microfiber for wiping, a nonabrasive sponge for rinsing, a soft-bristle brush for textured surfaces, and a plastic scraper for lifting crusted residue.
Have several cloths for clean-rinse cycles, a bucket of warm water, and gloves.
Work gently, testing an inconspicuous spot to avoid paint damage before proceeding.
Optional stronger products and when to use them (enzymatic cleaners, ammonia, commercial stain removers)
If gentle tools and warm water don’t lift the stain, it’s reasonable to reach for stronger, targeted cleaners: enzymatic products that break down proteins, diluted ammonia for tough dried blood on durable painted surfaces, or commercial stain removers formulated for blood. Test first, ventilate, wear gloves, and avoid bleach on colored paint.
| Product type | When to use |
|---|---|
| Enzymatic cleaner | Fresh or protein-rich stains |
| Diluted ammonia | Durable, nonporous paint |
| Commercial remover | Persistent stains after testing |
| Gloves/ventilation | Always use with strong agents |
Step-by-Step Removal Methods
Start by preparing the area and doing a small spot test so you don’t damage the paint.
Begin with warm water and mild dish soap, then move on to hydrogen peroxide for light-colored paints (use a low concentration, let it sit briefly, and rinse).
If the stain remains, try an enzymatic cleaner, and for stubborn spots use a baking soda paste with gentle abrasion.
Step 1 Prepare the area and do a spot test
Before you touch the stain, clear the surrounding area, lay down drop cloths or old towels, and open windows for ventilation so you won’t spread dried blood or fumes while you work.
Put on gloves, gather gentle cleaners and soft cloths, and locate an inconspicuous spot.
Test your chosen cleaner there, wait for full drying, and check for paint discoloration before proceeding.
Step 2 Start with the gentlest method: warm water and mild dish soap (method, timing, technique)

Now that you’ve confirmed your cleaner won’t harm the paint, move on to the gentlest removal method: warm water and mild dish soap.
Mix a few drops of dish soap in warm water, dampen a soft cloth, and blot the stain—don’t scrub.
Work from edges inward, rinsing the cloth frequently.
Pat dry with a clean towel and inspect; repeat once if necessary.
Step 3 If stain persists: hydrogen peroxide application for light-colored paints (concentration, dwell time, rinse)
If the soap-and-water method didn’t lift the stain, try 3% hydrogen peroxide on light-colored, nonporous painted walls; it’s strong enough to break down dried blood but gentle enough for most latex finishes.
Apply a small amount with a clean cloth, let it sit 5–10 minutes, blot gently, then rinse with a damp cloth.
Test first in an inconspicuous spot.
Step 4 Enzymatic cleaners for protein-based stains (usage guidelines)
When soap, water, or hydrogen peroxide won’t fully remove a protein-based stain like dried blood, reach for an enzymatic cleaner—these products contain protease enzymes that break down the proteins so you can lift the residue without scrubbing harshly.
Test on an inconspicuous area, apply per label, allow recommended dwell time, blot (don’t rub), then rinse and air-dry.
Repeat if needed.
Step 5 Baking soda paste and gentle abrasion for stubborn spots
Mix a thick paste of baking soda and water, then apply it to stubborn dried blood spots and let it sit so the mild abrasive and alkaline action loosen the residue.
After a few minutes, gently rub with a soft cloth or sponge in circular motions.
Rinse with clean water, pat dry, and repeat once if necessary—avoid scrubbing hard to protect paint.
Step 6 When to use diluted ammonia or commercial paint-safe stain removers (precautions)
Because dried blood can be stubborn, you’ll sometimes need a stronger solution like diluted ammonia or a paint-safe commercial stain remover—used sparingly and with care.
Test an inconspicuous spot first, wear gloves and ventilate, mix ammonia very diluted (about 1 part to 10 parts water), apply briefly with a cloth, blot don’t rub, and stop immediately if paint softens or discolors.
Step 7 Rinsing, neutralizing, and drying to prevent haloing or water stains
After you’ve finished spot-treating, rinse the area and neutralize any cleaning residues to stop stains from bleeding back into the paint or leaving pale halos.
Use a damp microfiber and plain water, then blot with a clean cloth.
Apply a mild vinegar solution if alkaline cleaner was used, rinse again, and dry thoroughly with a fan or soft towel to prevent water spots and streaks.
Step 8 Touch-up painting if cleaning removes paint or leaves permanent discoloration
If cleaning has stripped paint or left a stubborn discoloration, you’ll want to touch it up promptly to restore a uniform finish and protect the wall surface.
Match paint sheen and color—use a small sample or hidden area to verify.
Sand lightly, prime bare spots, then feather on paint with a brush or small roller.
Blend edges and allow full drying before evaluating.
Alternative Methods for Specific Situations
When you’re tackling dried blood, the surface and stain age change what’ll work best—textured or popcorn walls need different tools and a gentler scrubbing technique than high-gloss or enamel finishes, which can’t be abraded.
For large or old stains you’ll use more intensive, patch-focused strategies, while small recent spots respond to quick, targeted treatments.
If you’re considering a steam cleaner, know the benefits for loosening stains and the risks of damaging paint or spreading moisture before you proceed.
Dried blood on textured or popcorn walls (tools and technique)
Textured and popcorn walls demand a gentler, more precise approach than smooth surfaces because their crevices trap dried blood and cleaning can damage the finish.
You’ll need the right tools and a careful technique to lift stains without harming the texture. Use soft-bristled brushes, microfibre cloths, mild enzymatic cleaner diluted per instructions, and blot gently.
Work in small sections, rinse minimal, and pat dry.
Blood on high-gloss or enamel paint (do’s and don’ts)
Switching from textured walls to high-gloss or enamel paint means you can be more aggressive with cleaning, but you still need to protect the finish.
Use mild detergent or hydrogen peroxide sparingly, test an inconspicuous spot first, and wipe gently with a soft cloth.
Don’t scrub hard, use abrasive pads, or let strong chemicals sit—these can dull or strip the sheen.
Large or old stains vs. small, recent stains (strategy differences)
Although large or old stains demand a different approach than small, recent ones, you’ll still follow the same basic goals: stop further damage, soften the dried blood, and lift it without harming the finish.
For small fresh spots, act quickly with mild soap and blotting.
For large or aged stains, pre-soak with enzymatic cleaner, work in sections, use gentle agitation, and rinse thoroughly.
Using steam cleaners safely benefits and risks
If you’re considering a steam cleaner, weigh the benefits—quick softening and sanitizing of dried blood without chemicals—against the risks to paint, wallpaper, and porous surfaces; use low pressure, a diffusing attachment, and brief passes to avoid peeling finishes or driving moisture into the wall.
Test a hidden area, keep sessions short, ventilate, and blot moisture. Don’t scrub softened paint.
Comparison of Cleaning Agents and Their Effects on Paint
You’ll want to weigh mild soap, hydrogen peroxide, enzymatic cleaners, and ammonia by how abrasive they’re and how your paint holds up.
For fresh stains on washable latex you can usually start with soap, while older or protein-rich stains may need peroxide or enzymatic formulas; ammonia is stronger and can harm some finishes.
Match the agent to your paint type and test a hidden spot first to avoid discoloration or sheen loss.
Mild soap vs. hydrogen peroxide vs. enzymatic cleaners vs. ammonia
Often the easiest and safest way to start is with mild soap and water, but stronger options like hydrogen peroxide, enzymatic cleaners, and ammonia each interact with paint differently and deserve consideration before you apply them. You’ll test mild first, then escalate only if needed; blot, don’t scrub, and rinse promptly.
| Agent | Effect on paint | Best use |
|---|---|---|
| Mild soap | Low risk | Surface dirt |
| H2O2 | May bleach | Protein stains |
| Enzymatic | Gentle on paint | Organic residues |
| Ammonia | Can dull/strip | Stubborn spots only |
Recommended agent by paint type and stain age
Paint type and stain age determine which cleaner will work best and how aggressively you should act. You’ll choose gentle soap for fresh stains on flat or matte paint, hydrogen peroxide sparingly on semi-gloss, and enzymatic cleaners for older set stains on durable finishes. Test first to avoid damage.
| Paint type | Recommended agent |
|---|---|
| Flat/matte | Mild soap |
| Semi-gloss/Gloss | Hydrogen peroxide |
Common Mistakes and How to Avoid Them
Don’t scrub so hard that you strip the paint—gentle, repeated treatments are safer.
Avoid bleach and harsh solvents that can ruin the finish, and always spot-test a cleaner to prevent discoloration.
Also don’t ignore biohazard protocols; use gloves and proper disposal to protect yourself and others.
Over-scrubbing and paint removal
Scrub gently and stop as soon as you see paint coming off — aggressive scrubbing is the fastest way to damage the wall finish and create a bigger mess than the dried blood itself.
Work in small sections, use soft cloths or a sponge, and test a hidden spot first.
If stains persist, switch to gentler techniques or consult a pro before removing more paint.
Using bleach or harsh solvents that damage finish
If you reach for bleach or strong solvents to remove dried blood, be cautious—those chemicals can strip paint, dull finishes, and even eat through wallpaper backing.
Don’t use undiluted bleach, acetone, or paint thinners on finished surfaces. Opt for mild detergent, enzymatic cleaners, or isopropyl alcohol sparingly.
Rinse thoroughly and blot dry to prevent lingering damage and finish loss.
Skipping spot tests and causing discoloration
After choosing gentler cleaners, always test them in an inconspicuous spot before treating a visible stain—skipping this step is a common way people end up with faded paint, bleached patches, or wallpaper stains.
You should wait for the test patch to dry, inspect under different light, and only proceed if color and finish match.
Patch-test every product and avoid guessing.
Ignoring biohazard protocols
Because dried blood can carry pathogens and contaminate surfaces beyond the visible stain, ignoring biohazard protocols puts you and others at real risk—so don’t treat cleanup like an ordinary chore.
You should wear gloves, eye protection, and a mask, contain and bag contaminated materials, use EPA-registered disinfectants, and follow local disposal rules.
If unsure, call professionals to avoid exposure and liability.
Prevention and Best Practices
When a fresh stain happens, blot—don’t rub—to lift as much blood as you can without spreading it.
Keep painted walls in good shape with gentle routine cleaning and prompt spot treatment to reduce staining risks.
If stains keep recurring or the finish’s worn, consider sealing or repainting with a washable, stain-resistant paint.
Immediate actions to minimize staining (blotting, not rubbing)
Act quickly and blot the blood with a clean, damp cloth or paper towel—don’t rub—so you lift liquid without spreading or pushing it deeper into the paint or drywall.
Work from the outer edge inward, replacing soiled cloths as needed. Use gentle pressure, dab repeatedly, and avoid harsh scrubbing.
If residue remains, switch to a mild soap solution and continue blotting carefully.
Routine maintenance tips to protect painted walls
If you want painted walls to stay clean and stain-free, establish simple routines like wiping splatters immediately, rotating furniture bumpers, and using washable paints in high-traffic areas.
Dust weekly, spot-clean with mild detergent, test cleaners in inconspicuous spots, and use microfiber cloths to avoid abrasion.
Keep pets’ nails trimmed, teach careful behavior near walls, and store staining materials away from painted surfaces.
When to seal or repaint to prevent future staining
Because minor stains often signal deeper porosity or finish wear, you should plan to seal or repaint as soon as cleaning becomes ineffective or the finish looks chalky, cracked, or uneven.
Inspect for bleed-through, absorption, or lingering discoloration. Use a stain-blocking primer and appropriate topcoat.
Repaint high-traffic areas proactively to maintain protection and prevent future staining.
When to Call a Professional
If the stain is large, has soaked through drywall, or you spot lingering odor or mold, you should call a restoration pro.
They’ll assess structural damage, use specialized cleaning and disinfection, and tell you whether repairs or full replacement are needed.
Expect inspection fees plus cleaning and repair costs that vary by severity—get a written estimate before they start.
Signs you need restoration or professional cleaning
When should you call a professional?
Call one if blood stains cover large areas, soaked into porous surfaces, or you can’t remove stains without damaging paint.
Also hire pros if biological contamination, odors, or health risks are present, or if the scene involves trauma and legal chain-of-custody concerns.
If DIY attempts fail after safe methods, get professional restoration to guarantee thorough, hygienic results.
What to expect from professional services and estimated costs
Wondering what a pro will actually do and how much it will cost? You’ll get assessment, safe stain removal, paint touch-ups, and odor control; pros quote by severity and time.
Expect $150–$600 for standard jobs, more for restoration or hazardous cleanup.
Typical steps include:
- Inspect damage and test surfaces
- Contain and remove residues
- Clean and sanitize
- Repair and repaint as needed
FAQ Common Questions About Removing Dried Blood from Painted Walls
You’ll want clear answers to common concerns like whether bleach or hydrogen peroxide will harm paint, how long to wait before cleaning, and if enzymatic cleaners are safe for your walls.
You should also know what to do when stains soak into drywall or plaster. Below are concise FAQs to guide your next steps.
Can I use bleach to remove blood stains from walls?
Can bleach remove blood stains from painted walls?
You can use diluted bleach on nonporous, water-safe paints to disinfect and lighten stains, but it may strip or fade finish and isn’t safe for all surfaces.
Test a hidden spot first, ventilate, wear gloves, and rinse thoroughly.
For older or delicate paint, choose milder cleaners or consult a professional to avoid damage.
Will hydrogen peroxide remove paint color or finish?
How cautiously you treat hydrogen peroxide depends on your paint type and finish: it’s a mild bleaching agent that can lighten or dull some paints if left on too long.
Test a hidden spot first. Use 3% solution, apply briefly with a damp cloth, then blot and rinse.
Avoid prolonged soaking on flat or delicate finishes to prevent color loss or sheen changes.
How long should I wait before attempting to remove dried blood?
When should you tackle dried blood on a painted wall? You don’t need to wait long—address stains as soon as it’s safe and practical.
Fresh stains lift more easily; dried areas are harder and may need repeated gentle cleaning.
If the scene requires attention or medical safety protocols, follow those first, then proceed with caution and appropriate cleaners once it’s safe.
Are enzymatic cleaners safe for all painted surfaces?
Although enzymatic cleaners break down proteins like blood efficiently, they aren’t automatically safe for every painted surface.
You should spot-test in an inconspicuous area first and follow manufacturer instructions. Avoid using on delicate, flat, or poorly cured paint without testing, and don’t let cleaner sit too long.
Rinse thoroughly and dry to prevent haloing or paint softening.
What if the stain has soaked into drywall or plaster?
If the blood’s soaked into drywall or plaster, you’ll often find that surface cleaning won’t remove the stain completely because those porous materials absorb pigments and proteins.
You can try blotting with cold water then applying a diluted enzyme cleaner; let it sit, rinse, and repeat.
If discoloration remains, sand lightly, prime with a stain-blocking primer, and repaint for a permanent fix.
Appendix Quick Reference Cheat Sheet
You’ll find a compact flowchart that guides your immediate steps based on how fresh the stain is and the surface involved.
It also lists safe cleaning agents tailored to common paint types so you can pick the right product without guessing.
Use this cheat sheet to act quickly and protect your finish.
Step-by-step flowchart for immediate decision-making
1 quick-reference flowchart helps you make safe, effective decisions on cleaning dried blood from walls without fumbling through long instructions.
Follow: assess stain size and paint finish → test a hidden spot → choose gentle cleaner (see later section) → blot, don’t scrub → rinse and pat dry → inspect for residue → repeat test and treatment if needed.
Stop and consult pros for large or biohazardous cases.
Safe cleaning agent selection by paint type
Because different paints react differently to solvents and scrubbing, pick cleaners that match your wall’s finish before you start—test a hidden spot first. Use mild soap for flat, gentle degreaser for eggshell, and rubbing alcohol sparingly on semi-gloss; avoid bleach on delicate finishes. Refer to the quick table below.
| Paint Type | Safe Cleaner | Notes |
|---|---|---|
| Flat | Mild soap | Blot only |
| Eggshell | Degreaser | Low scrub |
| Semi-gloss | Isopropyl alcohol | Spot test |
| Gloss | Mild solvent | Gentle touch |