How to Get a Smooth Finish With Spray Paint Every Time
You can get a smooth spray-paint finish every time by prepping well, controlling your environment, and using thin, even coats. Clean and sand the surface, use primer when needed, and mask off surrounding areas. Shake and strain paint, keep a steady 8–12 inch distance, overlap strokes by about 50%, and allow proper flash and cure times between coats. Fix runs by sanding and recoating, use a clearcoat for durability, and keep going for tips on optimization and troubleshooting.
How to Get a Smooth Finish with Spray Paint Every Time
Want a quick, direct answer?
Use proper surface prep, thin even coats, and let each layer fully dry before the next.
Do that every time and you’ll get a smooth finish.
Quick Direct Answer The One’‘Sentence Solution
Spray in steady, overlapping strokes from about 8–12 inches away, keep the can moving to avoid drips, and apply several thin coats with light sanding between them so you’ll get a smooth, durable finish every time.
For a quick direct answer: practice consistent speed and distance, use light passes, let flash times elapse, and sand lightly between coats — that’s how to get smooth finish with spray paint.
Basic Understanding: What Produces a Smooth Spray Paint Finish
To get a smooth spray paint finish, you need to understand how the paint atomizes into tiny droplets and how those droplets evaporate and coalesce on the surface.
You’ll also want to control factors like the substrate prep, paint formula and viscosity, nozzle choice, and environmental conditions such as temperature and humidity.
With those basics in mind, you can start making adjustments that directly improve smoothness.
How Spray Paint Works (atomization, droplets, evaporation)
Atomization is what breaks paint into a fine mist of tiny droplets that land and fuse into a smooth film. You control droplet size by spray pressure and nozzle action; smaller droplets level easier.
As solvent evaporates, droplets coalesce and flatten, forming a continuous layer. Paint chemistry governs flow and drying speed, so let each coat flash appropriately before applying the next for best results.
Factors That Affect Smoothness (surface, paint type, nozzle, environment)
Although many things matter, a truly smooth finish comes down to how well your surface, paint, nozzle, and environment work together.
You’ll prep and sand surfaces, choose compatible paint and thinner for flow, pick the right nozzle and pressure for droplet size, and control temperature, humidity, and dust.
Balance these factors, spray test panels, and adjust settings until the finish lays down evenly.
Preparation: The Foundation for a Flawless Finish
Before you pull the trigger, you’ll pick the right paint and primer and gather essential tools like nozzles, a respirator, tack cloths, and stands.
Then you’ll clean and degrease the surface, sand and fill any imperfections, and mask off surrounding areas to protect them.
Proper prep like this is what makes a smooth, professional-looking finish possible.
Choosing the Right Spray Paint and Primer
Choosing the right spray paint and primer sets the stage for a smooth, durable finish, so pick products that match your project’s surface and conditions. Use primers for bare wood, metal, or plastic; choose paint type (acrylic, enamel) for durability and sheen. Test color and adhesion on a scrap before full coats.
| Surface | Recommended |
|---|---|
| Wood | Acrylic primer |
| Metal | Etch primer |
| Plastic | Plastic primer |
| General | Acrylic enamel |
Selecting Tools and Accessories (nozzles, respirator, tack cloth, stands)
When you gather the right tools and accessories—nozzle tips matched to your paint, a certified respirator, a tack cloth, and stable stands—you’ll make spraying faster and reduce common finish problems.
Pick nozzle sizes for material viscosity, test spray patterns, and keep spare tips.
Use a NIOSH-rated respirator, lint-free tack cloths to lift dust, and sturdy adjustable stands to maintain consistent distance and angle.
Surface Cleaning and Degreasing Step 1
1 essential step in prepping any project is thorough surface cleaning and degreasing — you’ll remove dust, oils, and residues that wreck adhesion and cause fisheyes or peeling.
Wipe surfaces with a tack cloth, then clean using a mild detergent or dedicated degreaser. Rinse, dry completely, and avoid touching cleaned areas.
Proper cleaning guarantees primer and paint bond evenly for a smooth, durable finish.
Sanding and Filling Imperfections Step 2
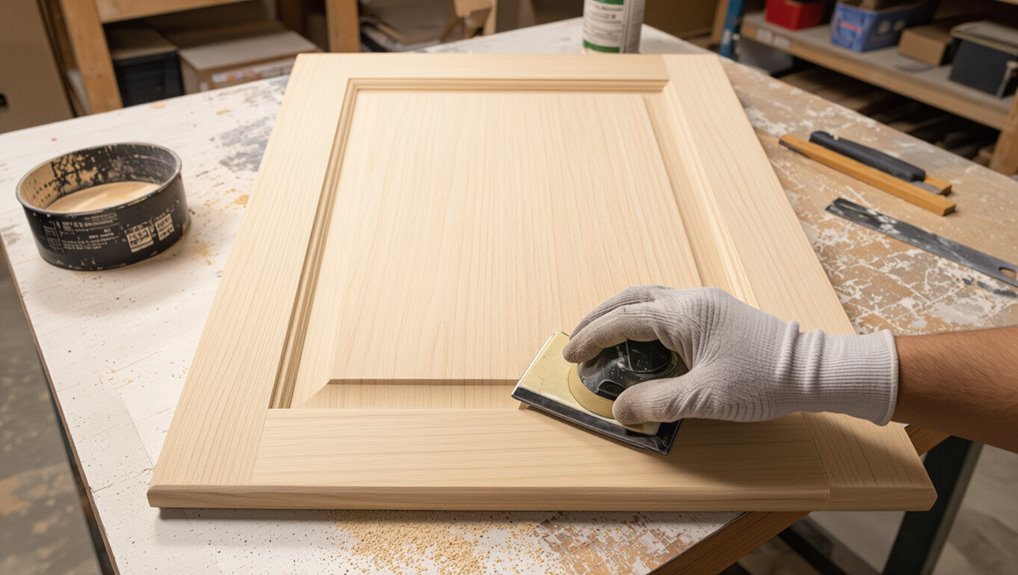
Before you spray, sand the surface smooth and fill any dents or pits so the primer and paint can lay down evenly.
Use progressively finer grits, finish with 220–320 grit for most projects, and remove dust.
Apply a suitable filler, sand it flush when cured, and spot-prime repaired areas.
That creates a uniform base, prevents show-through, and guarantees your topcoat sprays on flawlessly.
Masking and Protecting Surrounding Areas Step 3
Tape off and cover everything you don’t want paint on—windows, trim, hardware, and nearby floors—so overspray won’t ruin your work or create extra cleanup.
Use low-tack painter’s tape, plastic sheeting, and paper drop cloths. Mask seams tightly, press edges for crisp lines, and protect vents and handles.
Remove tape after tacky—not fully dry—to prevent peeling and guarantee sharp edges.
Step’‘by’‘Step Painting Process (Primary How’‘To)
Now you’ll walk through the step-by-step painting process so you can control every variable that affects finish quality.
Start by setting up a well-ventilated, temperature- and humidity-appropriate workspace, then shake, strain, and test the paint before you spray.
Keep a consistent distance, angle, and motion as you lay down even base coats, allow proper flash time, and build color with mid coats.
Step 1 Setting Up Your Workspace (ventilation, temperature, humidity)
1 clear, well-ventilated workspace will make the biggest difference in your spray-paint finish: set up near a window or outdoors, position fans to move fumes away from you, and keep the area sheltered from wind and dust so temperature and humidity stay steady.
Monitor temperature (65–75°F) and relative humidity (40–60%), and allow time for conditions to stabilize before you begin.
Step 2 Shake, Strain, and Test Spray (shake time, filter paint, test card)
Shake the can vigorously for at least one to two minutes (listen for the mixing ball), then strain the paint into a clean container and do a quick test spray on a scrap card to check color, atomization, and nozzle function.
You’ll catch blocked nozzles, uneven pigment, or separation; adjust by re-shaking, replacing the nozzle, or filtering again until the test spray’s pattern is smooth and consistent.
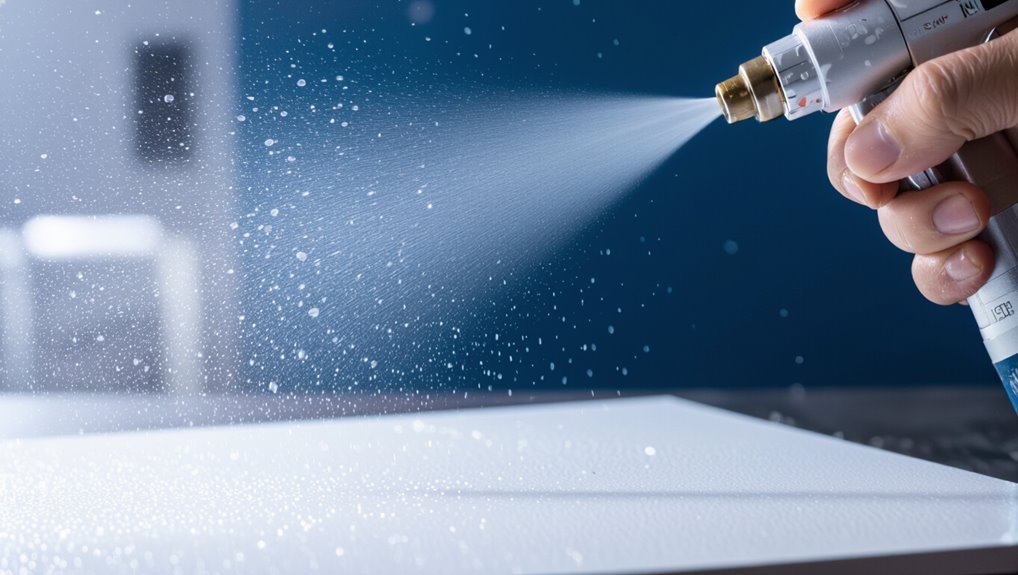
Step 3 Holding Distance, Angle, and Motion (overlap, speed, passes)

With your test spray showing a smooth pattern, it’s time to focus on how you hold and move the can—distance, angle, and motion dictate whether those fine droplets land evenly or build up into runs.
Hold about 8–12 inches away, keep the nozzle perpendicular for flat areas, tilt for edges, and move in steady, overlapping strokes.
Don’t linger; keep a consistent speed.
Step 4 Applying Even Base Coats (wet vs. dry coats, flash time)
Before you start full coverage, decide whether you need wet coats—where each pass blends into the next—or dry coats—where each layer dries before the next goes on—because that choice affects coverage, texture, and drying time.
For wet coats, keep light, overlapping passes and short flash times.
For dry coats, wait longer between passes to avoid runs and build a uniform, tack-free base before proceeding.
Step 5 Building Color and Coverage with Mid Coats
Once you’ve laid a uniform base, start building color and coverage with mid coats by applying slightly heavier, controlled passes that deepen the hue without flooding the surface.
Keep movements steady, overlap each pass about 50%, and allow flash time between coats. Inspect for thin spots and feather edges as you go.
Stop when color looks even and opacity is achieved.
Step 6 Applying Final Finish and Clearcoat (when and how)
Now finish the job by applying the final color passes and a clearcoat to lock in durability and gloss.
Spray two to three light, even final color coats, holding the can 8–12 inches away and overlapping 50%. Let flash time between coats per label.
Then apply two light clearcoat layers, using smooth passes to avoid runs.
Check coverage; add a thin tack coat if needed.
Step 7 Drying, Curing, and Handling Timeframes
After the final clearcoat, give the paint time to dry to the touch and then to cure fully so you don’t mar the finish; drying times tell you when you can handle the piece, while curing times tell you when it’s safe for regular use.
Follow manufacturer intervals, wait longer in cool or humid conditions, and avoid stacking or heavy use until the full cure time elapses.
Optimization Strategies and Advanced Techniques
To get truly consistent results, you’ll control temperature and humidity and adjust your spray speed accordingly.
You’ll also use progressive sanding between coats, then wet sand and buff for an ultra-smooth gloss.
For metallics, pearls, and other specialty finishes, you’ll layer base, mid, and highlight coats with tailored techniques to avoid mottling.
Temperature and Humidity Control for Consistent Results
1 key to a smooth, even spray-paint finish is controlling temperature and humidity so the paint dries at the ideal rate; you’ll get fewer runs, less orange peel, and stronger adhesion when conditions are right.
Work between 50–80°F (10–27°C) and 40–60% humidity when possible. Use heaters, fans, or dehumidifiers to stabilize the environment and allow proper flash/curing times between coats.
Using Speed’‘Sanding Between Coats (grit progression)
Once your coats have flashed and the environment’s stable, speed-sanding between coats lets you level the surface quickly and prepare it for the next layer without cutting through the paint.
Use fine open-coat sanding pads: 320–400 grit for leveling, 600 for smoothing before final coats.
Sand lightly with even pressure, clean dust thoroughly, and recoat promptly to maintain adhesion and uniform finish.
Wet Sanding and Buffing for Ultra’‘Smooth Gloss
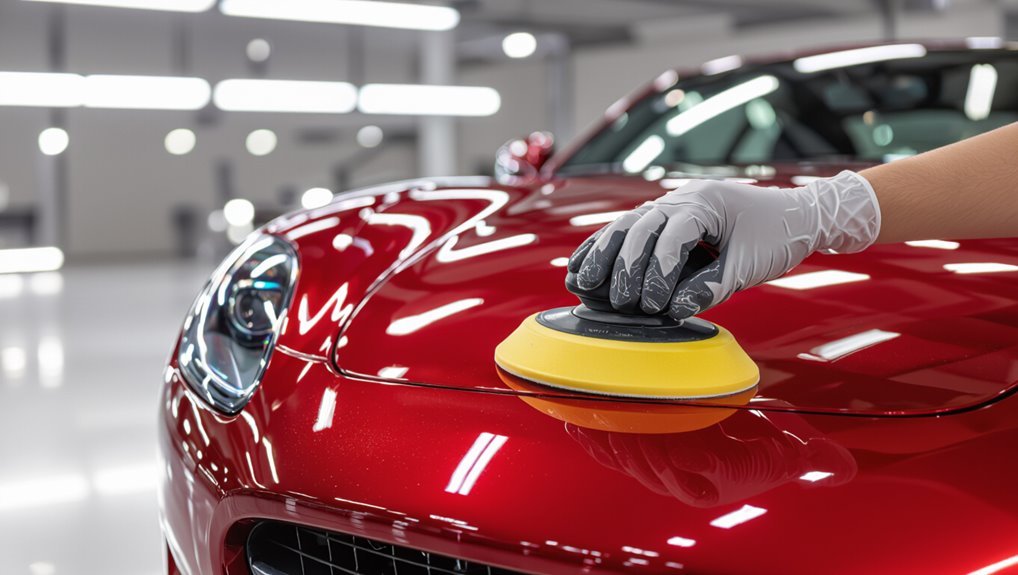
When you’re aiming for a mirror-like gloss, wet sanding followed by careful buffing removes tiny orange peel, dust nibs, and primer imperfections that speed-sanding can’t fully eliminate.
Use progressively finer wet sandpaper (800→2000+), rinse often, and keep surfaces flat.
After drying, apply a fine-cut compound, polish with a foam pad, then finish with a glaze or ultra-fine polish for deep, reflective clarity.
Layering Techniques for Metallics, Pearls, and Specialty Finishes
A thin, controlled layering approach makes metallics, pearls, and other specialty finishes sing—so start by planning your basecoat, midcoat effects, and clear in relation to how each layer will interact under light.
You’ll apply thin, even passes, stagger metallic flake orientation, feather pearl coats for depth, allow full flash times, and finish with a polished clear to protect and enhance shift and reflectivity.
Common Problems, Causes, and Fixes
You’ll run into a few predictable problems—runs and sags, orange peel texture, fish eyes from contamination, blushing, bubbling or cracking, and uneven coverage or color mismatch—and each has specific causes and fixes.
I’ll show how to prevent and repair runs and sags, eliminate orange peel, identify and treat fish eyes, address blushing, bubbling and cracking, and troubleshoot coverage or color issues.
Follow the quick checks and remedies so you can correct issues fast and get a smooth finish.
Runs and Sags Prevention and Repair
Catch runs and sags early by watching for shiny streaks or drooping paint as you spray; they’re usually caused by holding the can too long in one spot, spraying too close, or applying overly heavy coats.
Stop spraying, let excess thin and level, then sand lightly with fine grit.
Recoat with lighter, even passes from a proper distance, keeping the can moving.
Orange Peel Texture Causes and How to Eliminate
One common problem you’ll run into is orange peel—the bumpy, dimpled texture that makes spray-painted surfaces look like the skin of an orange.
It’s usually caused by incorrect spray distance, low solvent flow, high paint viscosity, or fast drying.
Fix it by adjusting your distance and speed, thinning paint per instructions, warming or slowing curing, and applying light, overlapping passes.
Fish Eyes and Contamination Identification and Remedies
If contaminants like oil, silicone, or grease get on your surface or in the paint, they’ll cause “fish eyes”—small, crater-like defects that repel the finish and ruin smoothness.
Identify them by their round, punched-out appearance and the way the paint beads around the spot.
Clean thoroughly with a wax/grease remover, scuff and recoat, use contamination-free tools, and avoid touching primed surfaces.
Blushing, Bubbling, and Cracking When They Occur and What to Do
When your spray finish shows blushing, bubbling, or cracking, you’ll want to diagnose the specific symptom quickly because each indicates a different underlying problem and repair method.
Blushing: caused by moisture—let it dry, sand, and recoat in drier conditions.
Bubbling: trapped solvents or heat—strip, sand, thin coats, and allow longer flash times.
Cracking: old finish or overthinning—remove and refinish with proper mix.
Uneven Coverage and Color Mismatch Troubleshooting Tips
After you’ve handled blushing, bubbling, and cracking, uneven coverage and color mismatch present a different set of puzzles that need a focused approach.
Check surface prep, primer, and spray distance first. Thin or old paint, wrong nozzle, or inconsistent strokes cause patchiness.
For color shifts, confirm batch numbers and test panels; blend with light mist coats.
Sand and recoat if needed.
Best Practices and Pro Tips for Professional Results
You’ll get the cleanest, most consistent results when you keep your gear in top shape, work safely in the right conditions, and use smart shortcuts that save time without cutting quality.
Take a few minutes after each job to clean and store nozzles, masks, and cans properly so they’re ready next time.
I’ll share practical safety tips, storage rules, and time‑saving techniques that pros use.
- Clean and cap spray tips immediately to prevent clogs.
- Store cans upright in a cool, dry place away from heat.
- Work when humidity and temperature are within the paint’s recommended range.
- Use respirators, gloves, and proper ventilation every time.
- Learn a few fast masking and layering tricks to speed jobs while keeping a flawless finish.
Maintenance of Equipment and Proper Storage
Because neglected gear quickly undermines a clean spray finish, keep your gun, tips, hoses, and compressor in top shape with a short, regular maintenance routine you can actually stick to.
Clean tips after each use, flush lines, check seals, and replace worn parts promptly.
Store equipment dry, dust-free, and temperature-stable in labeled containers or racks to prevent damage and contamination.
Environmental and Safety Best Practices
Good upkeep keeps your gear reliable, but safe, consistent results also depend on the environment you paint in and the precautions you take.
Work in well-ventilated, dust-free spaces, control humidity and temperature, and avoid windy conditions.
Wear a respirator, eye protection, and gloves.
Dispose of solvents and cans per local regulations, keep fire sources away, and store materials securely to prevent spills or degradation.
Time’‘saving Hacks Without Sacrificing Quality
Save time and still get pro-level results by planning each spray session and using a few reliable shortcuts: prep parts in batches, keep a wet tack cloth handy, and use consistent spray distances with a simple spacer like a folded card.
Mask wisely, work in controlled temperature, and use quick-dry primers and paints.
Test on scrap, overlap strokes evenly, and let proper flash times prevent runs.
Tools and Product Recommendations (What to Buy and Why)
You’ll want the right balance of budget-friendly and pro-grade gear to get a smooth finish without wasting time or money. Below is a quick comparison of primers, paint lines, and clearcoats to help you pick what fits your project. Use the table to guide choices and I’ll explain why each option matters next.
| Category | Budget Option | Professional Option |
|---|---|---|
| Primers | Rust-Oleum Universal | Zinsser Bulls Eye 1-2-3 |
| Paint Lines | Krylon Fusion | PPG / Rustoleum Automotive |
Budget vs. Professional Options
When weighing budget vs. professional spray-painting options, think about the project’s scope and how long you want the finish to last: hobby projects and quick fixes can do fine with affordable aerosol cans and a basic respirator, while furniture, automotive, or high-traffic pieces deserve pro-grade primers, coatings, and tools that deliver smoother atomization and greater durability.
Choose based on expected wear, desired finish, and long-term value.
Recommended Primers, Paint Lines, and Clearcoats
If you’ve decided to step up from bargain cans for longer-lasting results, picking the right primers, paint lines, and clearcoats will make the biggest difference in finish quality and durability.
Use adhesion primers for plastics/metal, sanding primers for filling imperfections, mid-range enamel or acrylic lacquer lines for smooth coverage, and a durable polyurethane or acrylic clearcoat.
Test compatibility and cure times first.
Quick Checklists
Before you spray, use a pre-painting checklist to confirm surface prep, masking, and ventilation are all set.
While you work, keep a during-painting checklist handy for consistent distance, motion, and dry times between coats.
After finishing, follow a post-painting checklist for curing, cleanup, and storage so the finish stays smooth.
Pre’‘Painting Checklist
Although you’ve chosen your paint and drop cloths, take a moment to run through a quick pre-painting checklist to catch small problems that cost time later.
Inspect the surface, clear dust, test spray pattern, guarantee ventilation, and gather tools so you start confident and uninterrupted.
- Sand and wipe surface
- Remove hardware
- Shake and test spray can
- Mask surrounding areas
- Set up ventilation
During Painting Checklist
Once you start spraying, stay methodical: keep the can moving in smooth, even passes, maintain the recommended distance (usually 8–12 inches), and overlap each stroke about 50% to avoid streaks and heavy spots.
- Keep a steady pace, don’t linger
- Watch for drips and catch them early
- Shake cans periodically between coats
- Rotate parts for even coverage
- Feather edges to blend coats seamlessly
Post’‘Painting Checklist
Finish strong with a quick post-paint checklist to catch runs, tacky spots, and dust before they become permanent—inspect under good light, feel for uneven texture, and note areas that need touch-ups or extra drying time.
- Check for runs or drips and mark them
- Feel for tacky or uneven spots
- Lightly dust or blow away debris
- Confirm full cure time per paint
- Prep small touch-up blends as needed
FAQ Common Reader Questions
You probably have questions about coats, weather, and wait times, so let’s answer the essentials.
I’ll cover how many coats you need, whether you can spray in cool or humid conditions, and how long to wait between coats and before handling.
We’ll also explain when primer’s necessary and how to fix small blemishes after the paint has cured.
How many coats of spray paint do I need for a smooth finish?
Curious how many coats you’ll need for a smooth spray-painted surface?
Usually two to three thin coats give the best results: one primer or base coat (if needed), then one or two color coats.
Wait recommended dry times, sand lightly between coats if imperfections appear, and apply final light passes.
Too many heavy coats causes drips and orange peel—avoid overloading the surface.
Can I spray paint in cool or humid weather?
How cold or humid can it be before spray paint stops behaving? You should avoid spraying below the manufacturer’s minimum—often around 50°F (10°C)—and above high humidity (over ~85%).
Cool air slows curing; moisture causes blushing and poor adhesion. If conditions aren’t ideal, warm the workspace, use fast-drying formulations, or wait for a drier day to guarantee even atomization and a smooth finish.
How long should I wait between coats and before handling?
Because drying times vary by paint type and conditions, wait between coats only as long as the paint needs to set to a tack-free state — typically 5–15 minutes for quick-build spray primers and 10–30 minutes for most enamel or acrylic spray paints.
Allow full cure before handling, which can range from a few hours to several days depending on temperature, humidity, and the product’s instructions.
Dry lightly between coats; handle only after cure.
Is primer always necessary for a smooth finish?
Do you need primer for every spray-paint job? Not always.
You should prime when surfaces are porous, uneven, bare metal, or changing colors dramatically. Primer improves adhesion, hides flaws, and prevents bleed-through, giving a smoother topcoat.
For already painted, nonporous surfaces, light scuffing plus a quality spray paint may suffice.
Choose primer based on material and desired durability.
How do I fix a small blemish after the paint has cured?
Even with proper priming and careful spraying, tiny runs, dust nibs, or chips can show up after the paint cures; you can usually correct them without stripping the whole finish.
Lightly sand the blemish with fine grit, clean the area, then apply thin touch-up coats or spot-spray feathering outward.
Let each layer cure, sand between coats if needed, and finish with a clear coat for protection.