How to Paint Canvas Shoes Without Cracking the Finish
You can repaint canvas shoes that stay flexible and crack-free by cleaning and degreasing them, removing laces, and taping off areas you don’t want painted. Use flexible fabric paints or acrylic mixed with textile medium, apply thin even coats, let each layer fully dry, and keep humidity low. Finish with a flexible clear sealer and cure gently with warm air if needed. Keep going to learn step-by-step prep, layering, and troubleshooting tips.
How to Paint Canvas Shoes Without Cracking the Finish
Yes—you can paint canvas shoes without the finish cracking if you use flexible fabric paints and proper preparation.
Prep, thin even coats, and heat-set or seal as recommended to keep the paint flexible.
In short: use fabric-specific products, apply light layers, and cure them properly.
Quick Answer Can You Paint Canvas Shoes Without Cracking?
Wondering if you can paint canvas shoes without the finish cracking? Yes—you can.
Follow proper prep, flexible fabric paints or acrylics mixed with textile medium, thin even layers, and full curing between coats.
Let shoes dry flat, avoid heavy buildup, and finish with a compatible flexible sealer.
These steps explain how to paint canvas shoes without cracking and keep designs durable.
One-Sentence Summary of Best Practice
If you prep the shoes, use flexible fabric paint (or acrylic plus textile medium), apply thin even coats with full curing time between layers, and seal with a compatible flexible finish, your painted canvas will resist cracking.
You should sand lightly, clean thoroughly, mask areas, work in controlled humidity, cure each coat fully, and avoid overworking the paint so movement won’t stress the finish.
Understanding the Basics
Before you start painting, you’ll want to know what makes paint crack on canvas shoes so you can prevent it.
Choose the right paints and mediums—acrylics, fabric paints, and flexible additives work best—to keep your designs flexible and long-lasting.
Also pay attention to how the shoe is built (canvas thickness, seams, and glued areas) because construction affects adhesion and wear.
What Causes Paint to Crack on Canvas Shoes?
When paint on your canvas shoes flakes or forms fine lines, it’s usually because the coating couldn’t flex with the fabric—either the paint was too rigid, the shoe wasn’t prepped, or the layers were applied incorrectly.
Other causes include inadequate drying between coats, heavy buildup that cracks with movement, dirt or oils preventing adhesion, and repeated bending or flexing without a flexible topcoat.
Types of Paint and Mediums Suitable for Canvas Shoes
There are three main paint types you should consider for canvas shoes: acrylic fabric paints, textile-specific acrylics, and water-based leather or multi-surface paints that offer flexibility; each balances durability, colorfastness, and stretch differently.
You’ll also use flexible mediums and fabric additives to increase adhesion and elasticity, and primers or clear flexible sealers to protect color without stiffening the fabric.
How Canvas Shoe Construction Affects Painting Results
Because the way a shoe is built determines how paint behaves on it, you should start by inspecting the canvas, stitching, soles, and any glued or coated areas.
You’ll note fabric weight, weave tightness, and seams that flex—these affect adhesion and cracking. Rubber or coated sections resist paint; glued overlaps need sealing.
Pick flexible paints and prep accordingly to guarantee durability.
Materials and Tools You’ll Need
You’ll want the right paints—acrylics or fabric-specific formulas work best, and there are leather/canvas options if your shoes need them.
Pick up primers, sealers, and additives to keep paint flexible and prevent cracking, plus brushes, applicators, painter’s tape, and cleaning supplies for prep and touch-ups.
For longer-lasting results consider optional tools like a heat gun, reinforced stitching, or supportive insoles.
Recommended Paints (Acrylic, Fabric Paints, Leather/Canvas-Specific)
Pick paints that match your shoe material and the finish you want: acrylics work great on canvas and are easy to mix, fabric paints stay flexible and resist cracking, and leather- or canvas-specific formulas give better adhesion and durability for those surfaces.
| Type | Best For | Benefit |
|---|---|---|
| Acrylic | Canvas | Vibrant, mixable |
| Fabric | Flexible textiles | Resists cracking |
| Leather/Canvas-specific | Shoes | Strong adhesion |
Primers, Sealers, and Mediums to Prevent Cracking
Before you start painting, prep the shoes with the right primers, sealers, and mediums to keep your design from cracking and peeling.
Use a flexible fabric primer or textile medium mixed into acrylics to improve adhesion and elasticity.
Finish with a clear flexible sealer—matte or satin—for protection.
Apply thin, even coats and let each layer fully cure to prevent stiffness and flaking.
Brushes, Applicators, Tape, and Cleaning Supplies
Tools matter as much as paint when you’re customizing canvas shoes: choose a range of brushes (small rounds for details, flats for blocks of color), a few foam or sponge applicators for smooth coverage, and fine-tip markers or paint pens for lines and lettering.
Clean, tape, and store tools properly so your finish stays crisp.
- Painter’s tape (narrow)
- Soft-bristle brush set
- Foam applicators
- Mild soap and cloth
Optional Tools for Durability (Heat Gun, Sewing Reinforcement, Insoles)
If you want your painted canvas shoes to last through wear and washing, consider adding a few optional durability tools: a heat gun or hairdryer to set paint and sealants, a sewing awl or sturdy thread for reinforcing stress points, and cushioned insoles to reduce internal abrasion.
Use low heat, stitch loose seams, and swap insoles for comfort; these steps cut cracking and extend life.
Preparation Steps (Step 1 Prep)
Start by giving your shoes a thorough clean and degrease so paint will stick.
Take out the laces, insoles, and any removable hardware, and mask off areas you don’t want painted.
If parts are slick, lightly sand or roughen them safely before you begin.
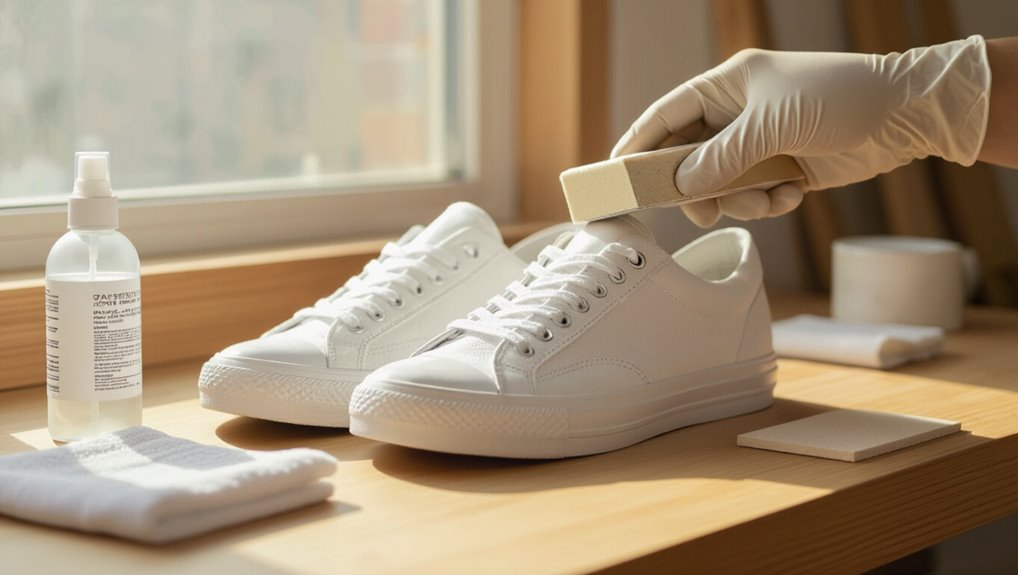
Cleaning and Degreasing the Shoes
Before you pick up paint, give the shoes a thorough cleaning and degreasing so the primer and paint will adhere evenly.
Use a soft brush to remove dirt, then wash with mild detergent or a 50/50 water and isopropyl alcohol mix for grease.
Rinse, blot excess moisture, and let them dry fully in a well-ventilated area before priming.
Removing Laces, Insoles, and Hardware
Remove the laces, insoles, and any removable hardware to give yourself a clean, unobstructed surface for painting—pull out laces, pop insoles, and unscrew or pry off eyelets, buckles, or clips, keeping small parts in a labeled container so nothing gets lost.
Check tongue tabs and heel liners, note placement for reassembly, and let parts air dry before proceeding.
Masking Areas You Don’t Want Painted
1. Use painter’s tape to cover rubber soles, eyelets, and logos you don’t want painted. Press tape edges firmly so paint won’t seep underneath.
For curved areas, use small tape pieces or a flexible masking film. Remove any adhesive residue with rubbing alcohol before painting.
Keep extra tape on hand for touch-ups and peel it off slowly after the paint dries to preserve clean lines.
Sanding or Roughening Slick Surfaces Safely
If your canvas shoes have glossy or coated sections, lightly sanding or scuffing them will help paint adhere better; use a fine-grit (220–400) sandpaper or a scuff pad and work gently until the surface loses its shine.
Keep pressure even, sand with the grain or in small circles, wipe away dust with a damp cloth, and test a small area before painting.
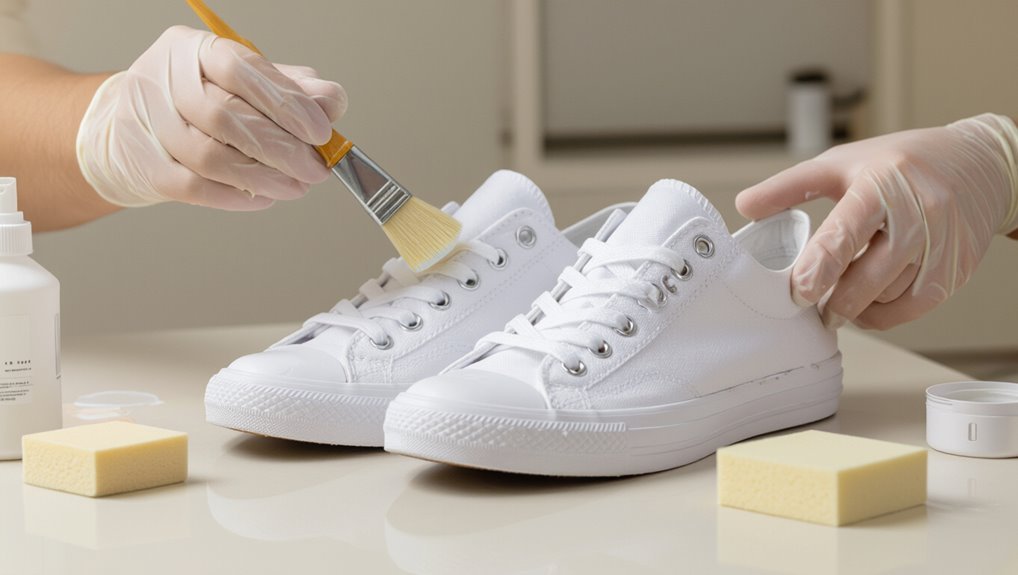
Painting Process (Step 2 Paint)
Now that your shoes are prepped, you’ll want to mix your acrylics to the right consistency with fabric medium and plan thin, even layers rather than thick globs.
Use brushes, sponges, or a spray for smooth coverage, allowing adequate drying time between coats in a warm, low-humidity space.
For flexible, long-lasting designs, pick stencils or freehand techniques and build gradients with multiple thin passes so the paint stays pliable.
Choosing Paint Consistency and Mixing with Fabric Medium
Getting the paint right means balancing opacity, flexibility, and adhesion so your design looks vibrant without cracking.
Thin acrylics with fabric medium until they flow smoothly but don’t run; aim for a creamy, spreadable consistency.
Test on scrap canvas, adjust ratio for flexibility. Use small amounts of medium—too much weakens pigment—stir thoroughly and paint promptly for best bonding.
Layering Strategy: Thin Coats vs. Thick Coats
When you build color on canvas shoes, work in thin, controlled layers rather than laying down thick paint all at once.
Thin coats dry faster, flex with the fabric, and reduce cracking risk. Let each layer dry fully before adding the next, and add more layers for opacity and depth.
Reserve thicker applications only for tiny accents after base layers are stable.
Brush, Sponge, and Spray Techniques for Even Coverage
After you’ve built your layers with thin coats, choose the right application tool to get smooth, even coverage across the canvas.
Use a soft synthetic brush for detail, a dense foam sponge for blending and stippling larger areas, or a fine aerosol for uniform base coats.
Work in controlled strokes, maintain wet edges, and avoid overloading to prevent drips and texture buildup.
Drying Time Between Coats and Ideal Environmental Conditions
Because thin, fully cured layers prevent tackiness and color shift, let each coat dry to the touch and then wait the manufacturer’s recommended cure time—typically 15–30 minutes for water-based paints and up to an hour for heavier acrylics—before applying the next one.
Work in 50–70°F (10–21°C) with low humidity, good airflow, and indirect light; avoid heat sources and damp air that weaken adhesion.
Creating Flexible Designs: Stencils, Freehand, and Gradient Techniques
Now that your base layers are dry and stable, you can start building flexible designs that move with the shoe—stencils for crisp repeating shapes, freehand for organic lines, and gradients for smooth color shifts.
Use thin, flexible paint, stretch fabric gently while painting, and seal with a flexible finisher when dry.
- Use low-viscosity acrylics
- Tape and anchor stencils
- Blend with sponge or brush
- Test flexibility on scrap
Sealing and Curing (Step 3 Protect)
Now that your paint’s dry, you’ll want to protect it with the right sealer to prevent cracking and fading—acrylic spray, flexible fabric medium, or brush-on varnish each have pros and application tricks.
Learn how to seal without stiffening the canvas, decide whether heat-setting or air-curing suits your paint and shoe type, and follow simple steps to condition and break in the shoes afterward.
I’ll walk you through product choices, application techniques, and finishing touches so your design lasts and stays comfortable.
Best Sealers to Prevent Cracking (Types and Application Methods)
Start with a flexible, breathable sealer—it’s the single most important step to prevent painted canvas shoes from cracking as they flex. Choose acrylic textile sealers, matte spray fixatives, or fabric mediums diluted into paint. Apply thin, even coats, letting each cure. Test bend and wash.
| Type | Finish | Use |
|---|---|---|
| Acrylic textile | Flexible | Topcoat |
| Matte spray | Low sheen | Quick seal |
| Fabric medium | Mix-in | Increases pliability |
How to Apply Sealant Without Stiffening the Fabric
If you want your painted canvas shoes to stay flexible, choose a sealer and apply it in ways that minimize stiffness: thin, even layers, light misting passes with a spray sealer, or diluted fabric-medium coats applied with a soft brush.
Let each coat dry fully between applications, test flexibility on a hidden area, and avoid heavy buildup near seams or bends to preserve comfort and movement.
Heat-Setting vs. Air-Curing: When to Use Each
While both heat-setting and air-curing will fix your paint, choosing between them depends on the type of paint, the shoe’s materials, and how much flexibility you need;
use heat-setting (iron or dryer) for fabric paints labeled heat-activated to boost durability, but avoid high heat on glued or synthetic parts.
Air-cure for delicate materials or mixed-media designs—allow longer drying for maximum flexibility.
Final Conditioning and Breaking-In Painted Shoes
Give your painted shoes at least 24–48 hours of undisturbed curing before you handle them heavily; during this time the sealant fully bonds and the paint gains flexibility.
After curing, flex soles gently, wear socks indoors, and avoid wet conditions for a week.
If stiffness or tiny cracks appear, reapply a thin flexible sealant, let it cure, then resume normal wear gradually to finish breaking them in.
Troubleshooting Common Problems
If your paint cracks, peels, shows brush marks, or the fabric feels stiff or discolored after sealing, you can fix most issues without starting over.
I’ll explain common causes and step-by-step repairs for cracking and flaking, how to even out color and remove brush marks, and tips to soften or restore sealed fabric.
Follow these troubleshooting steps to get your shoes looking right again.
Paint Cracking After Drying Causes and Fixes
When your paint cracks after drying, it usually means the coating couldn’t flex with the canvas or was applied in a way that stressed it. You can fix most cases without redoing the whole shoe.
Check for thick layers, incompatible paint or sealant, or drying too fast. Lightly sand, apply a flexible textile medium or thinner layers, and cure slowly to prevent recurrence.
Paint Peeling or Flaking Repair Steps
Start by evaluating how much paint is lifting and where—small flakes along seams need a different fix than wide sheets peeling off a toe box.
Light lifts: sand gently, clean, apply flexible fabric medium-mixed paint in thin layers, heat-set.
Extensive peeling: remove loose paint, reseal with fabric primer, repaint in thin coats.
Always finish with a flexible sealer and cure fully before wearing.
Uneven Color or Brush Marks How to Correct
Although uneven color or visible brush marks can be frustrating, you can fix them with a few targeted steps that restore a smooth, even finish.
Lightly sand dried areas with fine-grit paper, wipe dust, then apply thin, even coats of thinned acrylic or textile medium using a soft brush or sponge.
Let each coat dry fully before adding another for consistent coverage.
Stiff or Discolored Fabric After Sealing Reversal Tips
Fixing uneven paint often requires sealing, but that sealant can sometimes leave your canvas feeling stiff or looking discolored — and you’ll want to address that without stripping your work.
Gently soften fibers by lightly scrubbing with a soft brush and diluted fabric conditioner, then air-dry flat.
For slight haze, buff with a microfiber cloth or apply a thin layer of matte acrylic medium to even sheen.
Preventive Tips and Best Practices
Keep your painted shoes flexible and crack-free by wiping them clean, conditioning the fabric gently, and avoiding excessive bending when they’re wet.
Reapply a clear sealer every few months or sooner if you notice wear, and touch up high-friction spots as needed.
Test sealers, paints, and techniques on a hidden area or scrap canvas first, and choose designs that avoid heavy paint build-up on bend points.
Daily Care to Maintain Flexibility and Prevent Cracking
When you treat your painted canvas shoes with gentle, consistent care, they’ll stay flexible and resist cracking much longer.
- Clean with a soft brush and mild soap; avoid soaking.
- Air-dry away from direct heat or sunlight.
- Move your feet naturally; avoid forcing bends.
- Store with shoe trees or rolled tissue to maintain shape and reduce stress on painted areas.
How Often to Reapply Sealer and When to Touch Up
Because wear varies with use and exposure, check your sealer every few weeks during heavy wear and every couple of months for occasional use.
Reapply a thin protective coat when water beads poorly or scuffs appear. Touch up chips promptly with matching paint, let it cure fully, then seal that spot.
Regular light maintenance prevents larger repairs and keeps flexibility intact.
Design Choices That Minimize Stress on Painted Areas
If you plan your design with durability in mind, you’ll cut down on cracking, peeling, and frequent touch-ups.
Choose simple shapes away from seams and flex points, use larger solid areas instead of fine lines that can split, and place accents where the shoe bends least.
Limit heavy layers, opt for flexible paints, and seal edges to prevent stress concentration and lift.
Testing Techniques on a Hidden Area or Scrap Canvas
Before you commit to painting your whole shoe, test your materials on a hidden spot or a scrap of canvas so you can check adhesion, color, flexibility, and drying time.
Try your proposed primer, paint layers, and sealer. Bend and rub the sample after full cure to spot cracking or flaking.
Adjust formulas, thinning, or curing times until the sample holds up to normal wear.
Comparison: Paint Systems and Longevity
You’ll want to weigh acrylic mixed with fabric medium against ready-made fabric paints—mixes give custom texture and flexibility while premade options save time and guarantee consistent durability.
For sealing, spray sealers offer even coverage and quick application, whereas brush-on sealers let you control thickness and spot-protect high-wear areas.
Consider your painting style, desired finish, and how much abrasion the shoes will face to pick the best combo for longevity.
Acrylic with Fabric Medium vs. Pre-Made Fabric Paints
When choosing between mixing acrylic paint with fabric medium and buying pre-made fabric paints, think about flexibility versus convenience: mixing gives you full control over pigment, viscosity, and color matching, while ready-made formulas save time and promise consistent textile adhesion out of the bottle. You’ll balance customization, durability, cost, and ease to suit your style.
| Feeling | Choice | Result |
|---|---|---|
| Excited | Mix | Personalized hues |
| Relieved | Pre-made | Reliable finish |
| Proud | Mix | Tailored texture |
| Calm | Pre-made | Quick wearability |
Spray Sealers vs. Brush-On Sealers: Pros and Cons
Sealers lock in your design and determine how your painted canvas shoes will wear, so choosing between spray and brush-on formulas matters.
You’ll prefer spray for even, quick coverage and minimal brush marks; it’s thinner and resists yellowing.
Brush-on gives thicker, targeted protection for high-wear areas but can stiffen fabric and show strokes.
Test first for flexibility and appearance.
Case Examples and Scenarios
You’ll want different techniques for high-flex areas like the toe box and heel to keep paint from cracking, such as thinner layers and flexible medium.
Prep and coverage also change depending on whether you’re starting with white or colored canvas—whites may need less primer, while darker fabrics often take more coats or a blocking base.
Finally, treat athletic shoes differently from casual canvas shoes: athletic fabrics and construction need more flexible paint and reinforcement at seams.
High-Flex Areas (Toe Box, Heel) Recommended Approach
Because the toe box and heel flex constantly, you’ll need different prep and paint techniques there than on flat panels to prevent cracking and peeling.
Lightly sand and wipe, then apply a flexible fabric medium mixed into your acrylics. Use thinner, multiple coats, letting each dry fully.
Reinforce stress points with a clear flexible topcoat and avoid heavy, stiff layers at seams and bend lines.
White Canvas vs. Colored Canvas Prep and Coverage Differences
After handling high-flex areas so paint won’t crack at the toe or heel, you’ll need a different plan depending on whether your canvas started out white or already has color.
If white, prime lightly and one or two thin opaque coats usually suffice.
If colored, sand gloss, apply a proper primer or base coat, then build thin layers to achieve opacity without stiffness.
Painting Athletic Shoes vs. Casual Canvas Shoes
While both athletic and casual canvas shoes take paint well, you’ll want different approaches for durability, flexibility, and appearance: athletic shoes need thin, flexible layers and reinforced high-flex zones to handle toe-off and lateral movement, while casual canvas can tolerate slightly stiffer coverage and more opaque, decorative finishes.
For athletes, focus on stretchable fabric medium, light coats, and sealing only high-wear areas.
Common Mistakes to Avoid
Don’t slap on thick coats or rush layers—you’ll get cracking and long dry times.
Make sure you don’t skip primer or a fabric medium, and pick a sealer meant for flexible canvas.
Also avoid painting in too-hot, too-cold, or humid conditions that wreck adhesion and finish.
Applying Thick Coats Too Quickly
If you pile paint on too fast, you’ll end up with drips, uneven texture, and long drying times that invite smudges and cracking.
Let each thin layer dry fully, sanding lightly between coats for smooth adhesion.
Work in controlled strokes, use less paint on your brush or sponge, and rotate shoes so gravity doesn’t pull wet paint into ridges or creases.
Skipping Primer or Fabric Medium
Because canvas soaks up paint unevenly, you’ll get faded colors, stiffness, and poor adhesion when you skip primer or a fabric medium.
You’ll also risk the paint cracking as fibers move. Use a thin primer or mix acrylic with fabric medium to maintain flexibility, improve coverage, and prevent stiffness.
Prep saves time and keeps your design durable and comfortable to wear.
Using the Wrong Sealer
Once you’ve prepped the canvas with primer or fabric medium, sealing comes next—and choosing the wrong sealer can undo all that careful work.
Pick a flexible, breathable sealer made for fabric or textile paint; avoid rigid, glossy varnishes that crack with movement.
Test on a scrap, apply thin even coats, and let each layer cure fully to preserve adhesion and flexibility.
Painting in Poor Environmental Conditions
While you’re excited to start, painting in the wrong conditions will ruin your work before it dries. Avoid high humidity, extreme heat, direct sun, and dusty or windy spaces.
They’ll cause bleeding, slow curing, cracking, or dust inclusions. Work in a clean, ventilated area at moderate temperature, use a fan or dehumidifier if needed, and wait for recommended drying times between coats.
FAQ Frequently Asked Questions
You probably have a few quick questions about painted canvas shoes, so let’s answer the essentials.
We’ll cover curing time, machine-washing, warranty concerns, restoring flexibility if paint feels stiff, and eco-friendly paint options.
Read on for clear, practical answers you can use right away.
How long does painted canvas take to fully cure?
How long your painted canvas takes to fully cure depends on the type of paint, the number of layers, and the drying conditions; generally, acrylics set to the touch in hours but reach full hardness in 48–72 hours per thin layer.
Heavier coats, sealers, humidity, and temperature can extend curing to a week.
Be patient, avoid flexing, and let shoes rest for best durability.
Can I machine-wash painted canvas shoes?
Wondering if you can toss painted canvas shoes in the washing machine?
You technically can if you wait until paint fully cures (usually 72 hours), use a gentle cold cycle, place shoes in a mesh bag, and avoid harsh detergents or bleach.
Air-dry only.
Still, hand-washing is safer to preserve paint and sealant longevity and reduce cracking risk.
Will painting shoes void any manufacturer warranty?
If you’ve been careful about washing and sealing your painted canvas shoes, there’s one more practical question to contemplate: will customizing them affect the manufacturer’s warranty?
It depends. Many warranties exclude user alterations or cosmetic changes, so painting can void coverage for appearance-related claims.
For structural defects, manufacturers may still honor warranty, but expect scrutiny.
Check the specific warranty terms and contact the manufacturer before customizing.
How do I restore flexibility if paint feels stiff?
When painted canvas feels stiff, you can usually restore flexibility without stripping the design: gently flex the shoe, apply a small amount of fabric-safe conditioner or diluted acrylic medium, and work it into the painted areas while the shoe is warm (wear them around the house or use a hair dryer on low to loosen the paint).
Repeat as needed, let fully dry, and avoid over-saturating seams.
Are there eco-friendly paint options for canvas shoes?
Fixing stiffness often involves additives or heat, but you might also want paints that have a lighter environmental footprint from the start.
Look for water-based acrylics labeled low-VOC or non-toxic, and plant-derived fabric paints. They’re flexible, adhere well, and wash with less harsh solvent.
Test compatibility and durability on a scrap first, and seal with an eco-friendly fabric medium to extend wear.