How to Fix Chipped Paint on a Window Sill the Right Way
You can restore a chipped window sill quickly by removing loose paint, sanding smooth, filling gaps, priming, and repainting with thin coats for a seamless, durable finish. Start by scraping and cleaning, then use the right filler for wood, MDF, metal, or vinyl, sand progressively, apply an appropriate primer, and finish with matching paint and caulk at joints. Allow proper drying between steps and use safety gear—keep going to learn detailed steps, tips, and material-specific fixes.
How to Fix Chipped Paint on a Window Sill Quick Answer and What to Expect
You can usually repair a chipped window sill in an hour or two with basic tools—sandpaper, filler, primer, and paint—and expect a neat, durable finish if you follow the steps.
If the damage is extensive, involves rot, or the sill is hard to access, you’ll want to hire a pro for a safer, longer-lasting result.
We’ll cover estimated times, required tools, and clear signs that mean calling a contractor.
Quick Answer: Repair Time, Tools, and Outcome
Although the job’s small, expect to spend about 30–90 minutes per sill depending on damage, and you’ll need a few basic tools: a scraper or putty knife, sandpaper (80–120 and 220 grit), wood filler or epoxy, primer, paint, brushes or a small roller, and rags.
You’ll remove loose paint, sand, fill, prime, and repaint.
Outcome: a durable, seamless finish if you follow steps for how to fix chipped paint on window sill.
When to DIY vs. Hire a Pro
Wondering whether to tackle a chipped window sill yourself or call a pro?
If damage’s minor—small chips, loose paint, no rot—you can sand, fill, prime, and repaint in an afternoon with basic tools.
Hire a pro for extensive rot, humidity damage, lead-paint concerns, complex trim, or if you want guaranteed color matching and a flawless finish.
Consider time, skill, and safety.
Basic Understanding Why Paint Chips on Window Sills
You’ll usually see paint fail on window sills because of moisture, sun exposure, regular wear, or poor surface preparation.
The material of the sill—wood, MDF, metal, or vinyl—changes how the paint behaves and what fixes will hold up.
Knowing both the common causes and the substrate helps you choose the right repair steps.
Common Causes (Moisture, Sunlight, Wear, Poor Prep)
When paint starts flaking on your window sill, it’s usually due to a few predictable causes: moisture that swells and separates the paint, prolonged sun exposure that breaks down binders and fades finish, everyday wear from opening windows or setting objects down, and poor surface preparation that prevents proper adhesion.
- Check for water intrusion.
- Note sun‑facing damage.
- Address wear and prep issues.
Types of Window Sill Materials and How They Affect Repair (Wood, MDF, Metal, Vinyl)
Materials matter: the type of sill—whether it’s solid wood, MDF, metal, or vinyl—changes why paint chips and what you need to do to fix it. You’ll sand and prime wood, seal MDF, degrease and use metal primer, and clean vinyl with adhesion primer. Match prep and paint to material for lasting repairs.
| Material | Repair focus |
|---|---|
| Wood | Fill, sand |
| MDF | Seal edges |
| Metal | Remove rust |
| Vinyl | Use adhesion primer |
Tools, Materials, and Safety Checklist
Before you start, gather the essential tools—scrapers, sandpaper, a putty knife, and brushes—so you don’t interrupt the job to hunt for supplies.
Choose the right materials: primer, filler, and the correct interior or exterior paint plus caulk for gaps.
Prep for safety by ensuring good ventilation, laying drop cloths, and wearing PPE like gloves and a mask.
Essential Tools (Scrapers, Sandpaper, Putty Knife, Brushes)
You’ll want a small set of reliable tools to get the job done quickly and cleanly: a flat scraper and a putty knife for removing loose paint and applying filler, medium- and fine-grit sandpaper for feathering edges and smoothing repair areas, and a few angled brushes for cutting in and finishing.
- Scraper, putty knife
- Medium/fine sandpaper
- Angled brushes and a sanding block
Use them steadily; keep edges crisp and surfaces smooth.
Materials and Paint Types (Primer, Filler, Exterior vs. Interior Paint, Caulk)
While choosing the right primer, filler, paint, and caulk might seem straightforward, picking products matched to your window’s location and condition makes the repair last.
Use compatible materials and follow manufacturer directions.
- Primer: oil- or latex-based adhesion primer for bare wood or metal.
- Filler: exterior-grade wood filler for rot-free sills.
- Paint/caulk: exterior paint for outside; interior for inside; paintable, mildew-resistant caulk.
Safety Gear and Work Area Prep (Ventilation, Drop Cloths, PPE)
Since you’re about to sand, scrape, and paint, set up ventilation, protective gear, and drop cloths so dust and fumes stay out of your home and off your skin.
Use a respirator, gloves, and goggles; tape edges and spread a drop cloth.
Follow this checklist:
- Respirator and eye protection
- Gloves and long sleeves
- Window open and fan blowing outward
Step-by-Step Repair Process (Detailed How-To)
Start by inspecting the sill to see how far the damage goes and whether you’re dealing with paint failure, rot, or just isolated chips.
Then you’ll remove loose paint, clean the surface, and sand progressively—feathering edges with finer grits—before filling gaps with the appropriate filler, putty, or epoxy for your material.
Finish by choosing the right primer and applying it correctly to guarantee adhesion and a smooth topcoat.
Step 1 Inspect Damage and Assess Scope
Before you pick up any tools, take a close look at the sill to determine how bad the chips are and where they’re concentrated.
Check for rot, moisture stains, or bare wood exposure. Note chip size, depth, and paint layers.
Photograph areas for reference, measure affected length, and decide if repairs are spot fixes or require full strip-and-repaint preparation.
Step 2 Remove Loose Paint and Clean Surface
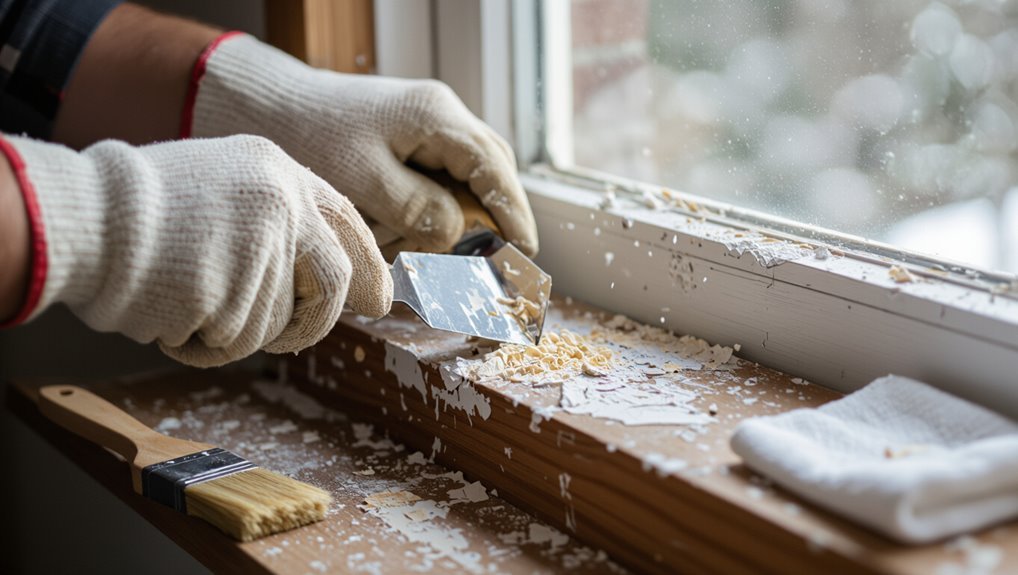
Scrape away any loose or flaking paint with a putty knife or paint scraper, working gently to avoid gouging the wood; then sand the edges smooth with medium-grit sandpaper to feather the remaining paint into the bare surface.
Wipe dust with a damp cloth, vacuum crevices, and let dry. Remove grease or mildew with a mild detergent solution, rinse, and dry thoroughly before priming.
Step 3 Sanding: Grit Progression and Feathering Techniques
Once you’ve removed loose paint and cleaned the sill, you’ll move on to sanding with a planned grit progression to blend old paint into bare wood and create a smooth surface for primer.
Start with 80–100 grit to remove edges, follow with 120–150 grit to feather, finish with 220 grit for a fine surface.
Sand with the grain, keep consistent pressure.
Step 4 Repairing Surface: Filler, Wood Putty, or Epoxy (Choose by Material)
Choose the right repair material for the job—wood filler for small dents and shallow gouges, exterior-grade wood putty for minor surface imperfections on painted trim, and two-part epoxy for deep rot or structural loss.
Apply filler in thin layers, let each cure, then sand flush. For putty, press firmly and tool smooth.
For epoxy, follow mix ratios and clamp if needed before sanding.
Step 5 Prime: Types of Primer and Application Tips
1. Choose primer by material: oil-based for bare wood, stain-blocking for tannins, or acrylic for repainting.
Sand smooth, remove dust, and mask surrounding areas.
Apply thin, even coats with a brush or small roller, letting each cure per label.
Feather edges to blend with old paint.
Lightly sand between coats if needed for a smooth finish before painting.
Step 6 Caulking Joints and Seams for Weatherproofing
Now it’s time to seal gaps: caulking joints and seams prevents water and drafts from getting behind the paint and causing future chips or rot.
Run a bead of paintable exterior-grade caulk into seams, smooth with a wet finger or tool, and wipe excess. Let it cure per manufacturer’s instructions.
Check corners and exterior joints for full coverage before moving to the next step.
Step 7 Painting: Technique, Number of Coats, and Drying Times
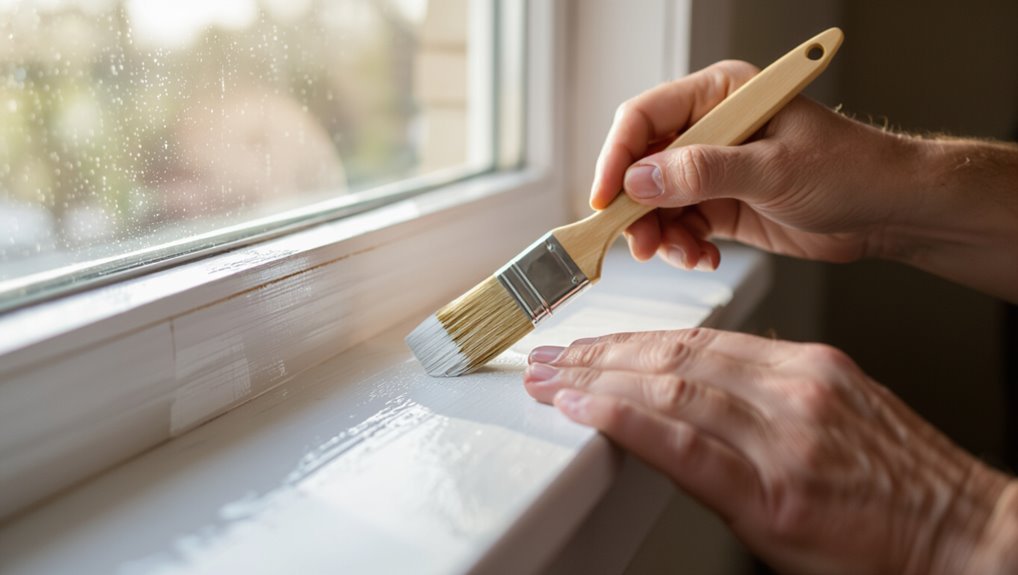
With seams sealed and caulk cured, it’s time to paint so the finish protects and looks right.
Use a high-quality brush for edges and a small foam roller for flats. Apply thin, even coats; two coats are usually sufficient.
Allow manufacturer-recommended drying between coats (typically 2–4 hours for latex, longer for oil). Lightly sand tacky spots before the final coat.
Step 8 Final Inspection and Touch-Ups
Step 8 is your last chance to catch imperfections and make the repair look seamless, so inspect the sill closely under good light and from several angles.
Run your fingers gently to feel for ridges or rough spots, note any thin or missed paint, and sand or fill tiny flaws.
Spot-prime and apply a final thin coat, then recheck once dry.
Time, Cost, and Difficulty Estimates
Expect a small chip to take 30–60 minutes, moderate damage a few hours, and a full repaint a day or weekend depending on drying times.
Materials like sandpaper, primer, and paint usually cost $10–$50, while hiring labor can raise the total to $100–$300 or more.
If you’re comfortable with basic sanding and painting, you can handle most repairs; call a pro for rot, large-area damage, or if you want a perfect finish.
Typical Time by Scope (Small Chip, Moderate Damage, Full Repaint)
When you’re planning a repair, the time, cost, and difficulty will vary a lot depending on the scope: a small chip, moderate damage, or a full repaint each demand different prep, materials, and skill levels. You can expect: quick touch-ups (15–45 min), moderate repairs (1–3 hrs), and full repaints (half to full day). Compare at-a-glance:
| Scope | Typical Time |
|---|---|
| Small chip | 15–45 min |
| Moderate damage | 1–3 hrs |
| Full repaint | 4–8 hrs |
| Notes | Skill and drying times vary |
Cost Breakdown: Materials vs. Labor
Budgeting a repair comes down to two main pieces: materials and labor, and you’ll want to weigh both when estimating time, cost, and difficulty.
Materials (sandpaper, filler, primer, paint, brushes) typically run $10–$50 for small jobs.
Labor drives costs—DIY saves money but costs time; hiring help adds $50–$150+ per hour depending on skill and location.
Skill Level Required and When to Call a Professional
If you’re comfortable with basic hand tools and can follow step-by-step instructions, fixing a small chipped window sill is a straightforward DIY task that usually takes 1–3 hours.
More extensive damage or rot pushes the job into intermediate territory and can take several hours to a full day.
You can expect low material costs; hire a pro if rot, structural issues, lead paint, or poor ventilation complicate the job.
Common Mistakes and How to Avoid Them
Don’t skip proper prep — failing to remove loose paint or clean the surface leads to peeling and extra work later, so sand, scrape, and prime as needed.
Make sure you use the right primer and paint for wood and match exterior vs. interior formulas, and avoid overfilling gaps or under-sanding which creates visible lumps or poor adhesion.
Also check weather: don’t paint in high humidity or extreme temperatures, or your finish won’t cure correctly.
Skipping Proper Prep (Consequences and Fixes)
When you skip proper prep, paint won’t adhere correctly and chips will reappear soon after you finish, turning a quick fix into repeated touch-ups.
You need to remove loose paint, sand edges smooth, clean dust and grime, and dry thoroughly.
Use filler for deep gouges and feather edges into sound paint.
Proper prep guarantees a durable, professional-looking repair and saves you time.
Using Wrong Paint or Primer
Proper prep gives paint something to grip, but choosing the wrong paint or primer will still make your repair fail fast.
Use a primer suited for bare wood, stains, or metal, and pick paint labeled for trim or high-wear surfaces.
Don’t mix oil and latex; match types.
Test adhesion on a small area, and follow manufacturer cure times for lasting results.
Overfilling or Under-sanding
If you overfill chips with wood filler or skim coat and then under-sand, the repair will stand proud of the surrounding sill or show visible ridges once painted.
You should fill just enough to level the void, let it fully cure, and sand it smooth with progressively finer grit until the patch blends seamlessly into the profile of the sill.
Check edges, feather the filler, and finish evenly.
Poor Weather Conditions for Exterior Work
Because exterior repairs depend on temperature and humidity, you should never paint or fill a sill during extreme heat, freezing cold, or damp conditions; the materials won’t cure properly, adhesion will suffer, and the finish can blister or flake.
Wait for dry, mild weather, check forecasts, and choose days with stable temperatures. Use products rated for the expected range and keep work shaded and dust-free.
Prevention and Maintenance Best Practices
Keep a simple seasonal inspection routine so you spot chips, cracks, or moisture issues early.
Make sure you control ventilation and humidity, choose the right exterior- or interior-grade paint, and plan regular refinishing intervals.
Learn quick touch-up techniques so small flaws never turn into big repairs.
Seasonal Inspection Routine
As seasons change, inspect your window sills at least four times a year to catch chips, moisture, and wear before they worsen; a quick, consistent routine lets you spot early paint damage, worn caulking, and rot so you can make small repairs instead of costly restorations.
- Check paint edges and flaking.
- Test wood firmness and small soft spots.
- Note gaps and schedule minor touchups.
Proper Ventilation and Moisture Control
When you control humidity and airflow around your windows, you drastically cut the risk of paint failure and wood rot; aim to keep indoor relative humidity between 30–50% and guarantee air can circulate across sills to dry any condensation quickly.
Use exhaust fans in kitchens and baths, open windows briefly after showers, position vents to promote cross‑flow, and repair leaks promptly to prevent prolonged dampness.
Paint Selection and Refinish Intervals
Choosing the right paint and scheduling timely refinishes will keep sills looking good and resist chipping; pick a durable exterior‑grade or high‑quality interior enamel with good adhesion and follow manufacturer cure times before closing the window.
Check finishes annually, touch up wear promptly, and plan full refinishes every 3–7 years depending on exposure.
Keep surfaces clean and inspect seals to extend paint life.
Quick Touch-Up Techniques to Prevent Large Repairs
Catch small chips early to stop them from turning into bigger, costlier repairs.
Keep a small touch-up kit: matching paint, fine brush, sandpaper, and filler.
Clean and sand the chip, apply a thin filler if needed, then paint in light layers. Feather edges to blend.
Inspect sills monthly and address any new nicks immediately to avoid moisture damage and peeling.
Comparison: Repair Options by Material and Damage Level
When you choose a repair approach, think about the sill material—wood, MDF, metal, and vinyl each need different fillers, primers, and paint.
For small chips, patching usually works; for rot, heavy corrosion, or seriously swollen MDF, you’ll want to replace the piece.
Below we’ll compare the best fix for each material and explain when replacement is the smarter choice.
Wood vs. MDF vs. Metal vs. Vinyl Best Repair Methods
Different materials call for different fixes, so you’ll want to match your repair to whether the sill’s wood, MDF, metal, or vinyl—and how badly it’s damaged. You’ll sand and fill wood, use wood filler or epoxy for MDF, treat metal for rust and prime, and use flexible fillers for vinyl. Choose methods that restore strength and beauty.
| Material | Fix | Emotional Result |
|---|---|---|
| Wood | Sand, fill, prime | Reassuring |
| MDF | Epoxy, seal | Confident |
| Metal | Rust-treat, prime | Secure |
Patch vs. Replace: When Replacement Is Better
If the damage is shallow and the material’s structure is sound, you can usually patch the sill and save time and money; but if rot, deep water damage, severe warping, or extensive rust has compromised load-bearing parts or seals, replacement is the safer choice.
You should replace when repairs won’t restore integrity, when hidden decay risks spread, or when replacement yields better long-term value and weatherproofing.
Tools and Materials Quick-Reference Checklist (Printable)
Grab a printable checklist that separates one-time repair items (like patching compound, sandpaper, primer, and touch-up paint) from regular maintenance supplies (cleaner, small brush, and spare caulk).
Use the one-time list when you’re fixing chips and the maintenance list to prevent future problems.
Keep the checklist near your supplies so you can grab what you need quickly.
One-time Repair Checklist
Before you start, gather everything on this one-time repair checklist so you won’t stop mid-job:
- Sandpaper (120/220), putty knife, tack cloth.
- Wood filler, primer, matching paint, small brush.
- Painter’s tape, drop cloth, gloves, disposable mixing cup.
Have these laid out nearby. You’ll work faster, cleaner, and finish with a smooth, durable repair on the sill.
Regular Maintenance Supplies
Keep a small kit of everyday supplies on hand so you can tackle minor chips and wear before they worsen: a fine-grit sanding block (220), touch-up paint in a small bottle, a thin artist’s brush, spare primer, a squeeze tube of wood filler, painter’s tape, lint-free cloths, and a compact plastic palette or disposable cup for mixing.
- Touch-up essentials
- Repair and prep tools
- Cleaning and masking items
FAQ
You probably have questions about whether the sill needs full replacement or just a repair, what filler to use for rotted wood, and how to match old paint.
You’ll also want to know if interior paint is OK outside and how long to wait between primer and topcoat.
Below are clear answers to those common FAQs.
How do I tell if I need to replace the entire sill instead of repairing it?
How can you tell whether the damage is fixable or the whole sill needs replacing?
Inspect for rot, soft spots, spreading cracks, or structural sagging. Probe with a screwdriver; decay feels spongy and crumbles.
If water has warped the sill, molding or gaps exceed cosmetic repair, or fasteners pull out, replace it.
Small chips, surface rot, or paint failure you can repair.
Can I use interior paint on an exterior window sill?
Wondering if interior paint will hold up on an exterior window sill? You shouldn’t rely on it.
Interior paint lacks UV, moisture, and temperature resistance, so it’ll peel, crack, or fade sooner.
Use exterior-grade paint or a marine/trim formula designed for exposure.
If the sill gets wet, prime with an exterior primer first, then topcoat for durability and proper protection.
How long should I wait between primer and topcoat?
Before you topcoat, let the primer dry to the touch and follow the manufacturer’s recommended recoat window—typically between 1 and 24 hours for fast-drying acrylic primers and 24 to 48 hours for oil-based or high-build primers.
If you miss the window, lightly scuff glossy primer, clean dust, then apply topcoat.
Longer cures may need sanding for proper adhesion.
What filler is best for rotted wood on a sill?
For small to medium rot patches, use a two-part epoxy wood filler; it bonds well, resists moisture, and can be sanded, shaped, and painted to match the sill.
For larger or structural decay, install a wood or epoxy patch piece and secure with exterior-grade adhesive or screws.
Always remove all soft wood, dry the area, and follow manufacturer cure times before sanding and priming.
How do I match old paint color on a window sill?
How can you get a new coat to blend seamlessly with aged paint? Match sheen first, then color.
Clean and primer any bare spots.
Take a chip or photo to a paint store for color-matching; test small swatches at home, viewing in different light.
If exact match fails, blend by feathering edges or repainting the entire sash for uniformity.