Do You Paint or Stain First? The Right Order Explained
You’ll usually stain bare wood first to highlight grain and seal pores, then paint non-porous or fully primed surfaces for opaque coverage; stain penetrates and tints while paint forms a surface film, so match solvents and use stain‑blocking primer on tannin‑rich woods. Inspect and prep surfaces, sand with the grain, wipe excess stain, let it cure, then prime before painting. Follow compatibility and dry times for adhesion, and keep reading to get step‑by‑step guidance and tips.
Do You Paint or Stain First? Quick Answer
For most projects, you’ll stain bare wood first to seal and highlight grain, then paint areas that need opaque coverage.
If you’re working with non-porous materials like metal or plastic, paint first after proper priming.
Rule of thumb: stain wood, paint everything else.
Direct short recommendation for common scenarios
If you’re covering wood for color and protection, stain first; if you need an opaque, uniform finish or are painting over bare wood, paint first—except when sealing pre-stained or previously painted pieces, in which case match the existing finish (stain over stain, paint over paint).
When deciding do you paint or stain first, consider exposure, desired look, adhesion, and manufacturer’s guidance to pick the right order.
One-sentence rule of thumb for wood vs. other materials
When you’re working with wood, stain first to show grain and protect it; for nonporous materials like metal, plastic, or previously painted surfaces, paint or prime first so coatings adhere and hide imperfections.
Think: stain reveals and soaks into porous surfaces, while paint seals and covers nonporous ones.
Follow that simple rule, adjust for finish type, and prep surfaces properly before applying.
Basic Understanding What Are Paint and Stain?
You’ll want to know that paint forms an opaque film on the surface while stain soaks in to tint the material without hiding its texture.
Different formulations—like latex and oil paints or penetrating and film-forming stains—offer varied durability and appearance.
Also check compatibility, because wood, metal, masonry, and composite surfaces each need specific prep and products to get the best result.
How paint and stain work differently on surfaces
Although both change a surface’s look and protect it, paint and stain work in fundamentally different ways: paint creates an opaque layer that sits on top of the material, while stain soaks in and alters the substrate itself.
You’ll find paint hides grain and surface defects, forming a barrier, whereas stain highlights texture, penetrates fibers, and relies on the material’s condition for adhesion and longevity.
Types of paint and types of stain
Paints and stains come in several distinct types, each formulated for different surfaces and results, so you’ll want to match the product to your project.
You’ll encounter:
- Latex paint — water-based, flexible, easy cleanup.
- Oil paint — durable, glossy, longer cure.
- Transparent stain — highlights grain, minimal film.
- Solid stain — opaque protection like paint but with stain properties.
Surface compatibility: wood, metal, masonry, composite
When choosing between paint and stain, consider the surface material first, since wood, metal, masonry, and composites each demand different formulations and prep work.
You’ll stain porous wood to enhance grain and penetrate fibers.
Paint suits metal and masonry after proper priming and rust or efflorescence treatment.
For composites, follow manufacturer guidance—some accept stain, others need specialty paint or primers for adhesion.
Key Factors That Determine Order
To decide whether to paint or stain first, you’ll want to weigh a few practical factors that affect appearance and longevity.
Consider your desired finish, how porous the surface is, exposure to weather, how well coatings will bond, and any existing treatments.
These points will guide the prep and product choices so your finish lasts and looks right.
Desired finish and aesthetic goals
Appearance matters most when you’re deciding whether to paint or stain first, because the finish you want dictates technique, materials, and the order of operations.
If you want transparent, wood-grain emphasis, stain-first preserves texture and lets you seal or topcoat over it.
For opaque, uniform color, paint-first (or prime then paint) guarantees coverage.
Match sheen and durability to use and style.
Surface porosity and absorption
Surface porosity determines how paint or stain soaks into wood and other materials, and it should guide your order of operations.
If grain or porous surfaces absorb stain deeply, apply stain first so color penetrates.
Smooth, sealed surfaces repel stain and work better with paint first.
Test a hidden area to gauge absorption, then choose the sequence that preserves adhesion and appearance.
Durability and weather exposure
Because long-term protection matters, consider how exposure and wear affect whether you should paint or stain first:
If the surface faces harsh sun, wind, or moisture, you’ll want a finish that prioritizes weather resistance.
Paint often offers a thicker barrier; stain soaks in and highlights grain.
Match product longevity to expected abrasion and environmental stress to reduce maintenance and failure.
Adhesion and bonding concerns
When deciding whether to paint or stain first, think about how well each product will bond to the substrate and to any preceding coats. Adhesives, sealers, and existing finishes can all affect adhesion and change the proper order.
You’ll prioritize compatibility: choose primers that promote paint adhesion, allow stain to penetrate bare wood, and guarantee each layer cures fully before applying the next to prevent peeling.
Existing coatings and previous treatments
Adhesives and primers only matter if you’re starting with a clean baseline, so next look at what coats are already on the material and how they were applied.
You’ll check for paint, stain, sealers, varnish, or oil treatments, how old or intact they are, and whether they’re film-forming. That determines whether you strip, scuff, or prime before staining or painting.
General Rules: When to Stain First vs. Paint First
You’ll usually stain first when working with exterior wood or when you want a clear finish that soaks into the grain.
You’ll paint first on primed surfaces or when you need an opaque color that hides the substrate.
There are exceptions and hybrids—like solid stains or painting over stained wood—so you’ll sometimes combine approaches depending on durability and appearance goals.
Stain-first scenarios (exterior wood, clear finishes)
Why stain first on exterior wood or when applying clear finishes? You’ll preserve grain, improve penetration, and guarantee even UV protection.
Apply stain before any clear topcoat so wood soaks it in.
Steps:
- Clean and dry wood thoroughly.
- Test stain on scrap.
- Wipe excess for uniform tone.
- Let cure fully before clear finishing.
Paint-first scenarios (primed surfaces, opaque color)
When you’re covering wood with an opaque color or working on factory-primed surfaces, paint-first is usually the right call because paint blocks the grain and creates a consistent base that stain can’t reliably achieve.
You should:
- Prime or use factory-primed boards.
- Apply paint to seal and uniform the surface.
- Let paint cure fully before any topcoat.
- Choose paint for lasting opacity and protection.
Exceptions and hybrid approaches (solid stain, paint over stain)
Although paint-first covers most opaque projects, there are clear exceptions and hybrid approaches where staining first—or combining stain and paint—makes more sense.
You’ll choose solid stain when you want paint-like coverage but wood protection.
For vintage or distressed looks, stain then paint, sanding between coats, gives depth.
When repainting stained wood, use a bonding primer so paint adheres and lasts.
Step-by-Step Process If You Choose to Stain First
If you’re staining first, start by evaluating the surface for damage and removing old finishes so the stain can penetrate evenly.
Clean and sand thoroughly to promote absorption, then apply the stain with the recommended technique and allow proper drying time between coats.
Finally, decide on a compatible sealant or topcoat to protect the finish and prepare the piece for any subsequent painting.
Step 1: Assess and prepare the surface
Before you pick up a brush or rag, inspect the wood closely so you know what you’re working with and what prep it needs.
Check for damage, rot, or loose boards. Note previous finishes and stains. Decide whether to strip or spot-treat. Plan for necessary repairs.
- Look for cracks and rot
- Test finish adhesion
- Mark repairs
- Gather tools and materials
Step 2: Clean and sand for stain absorption
Start by thoroughly cleaning the wood so the stain can penetrate evenly: remove dirt, grease, and mildew with a wood cleaner or TSP solution, rinse well, and let the surface dry completely before sanding.
You’ll then sand to open pores and remove old finish. Follow these steps:
- Inspect for damage.
- Use 120–150 grit sandpaper.
- Sand with the grain.
- Vacuum and tack.
Step 3: Apply stain: techniques and drying times
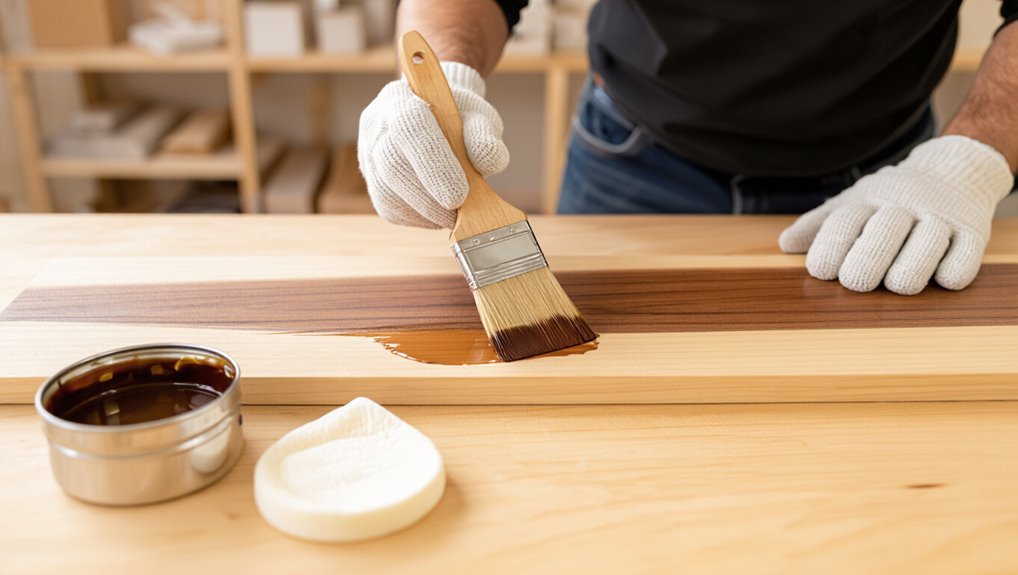
Apply the stain evenly using a natural-bristle brush, foam applicator, or clean cloth, working small sections and following the grain so you don’t get lap marks.
Let each coat penetrate, wipe excess, and monitor drying times.
Recommended steps:
- Test stain on scrap wood.
- Apply thin coat with grain.
- Wipe after 5–15 minutes.
- Wait 8–24 hours before next coat.
Step 4: Sealant or topcoat considerations before painting
A clear finish—whether a wipe-on polyurethane, water-based sealer, or oil-based topcoat—locks in your stain and determines how well paint will adhere, so choose a product that’s compatible with both the stain and your chosen paint.
- Test adhesion on scrap.
- Sand gloss lightly.
- Use compatible primer.
- Allow full cure before painting.
Step-by-Step Process If You Choose to Paint First
If you decide to paint first, start by stripping old finishes, sanding smooth, and cleaning the surface thoroughly so paint and primer will adhere.
Apply a primer that’s compatible with your material, then follow manufacturer directions for drying before you paint.
After the paint cures, you can add stain accents or overlays in targeted areas using techniques that won’t disturb the base coat.
Step 1: Surface prep: strip, sand, clean
Start by stripping old finishes, sanding smooth, and thoroughly cleaning the surface so the paint bonds properly.
- Remove flaking finish with a chemical stripper or scraper.
- Sand progressively, ending with fine grit for an even profile.
- Vacuum and tack cloth to remove dust completely.
- Degrease and rinse, then let the surface dry fully before proceeding.
Step 2: Apply primer suitable for material
Now that the surface is stripped, sanded, and cleaned, pick a primer that matches your material and the topcoat you plan to use.
Apply it evenly, follow manufacturer instructions, and guarantee good adhesion.
Use these steps:
- Choose oil- or water-based primer for substrate.
- Stir thoroughly; avoid shaking.
- Thin only if instructed.
- Apply thin, even coats; sand light between coats.
Step 3: Paint application and curing times
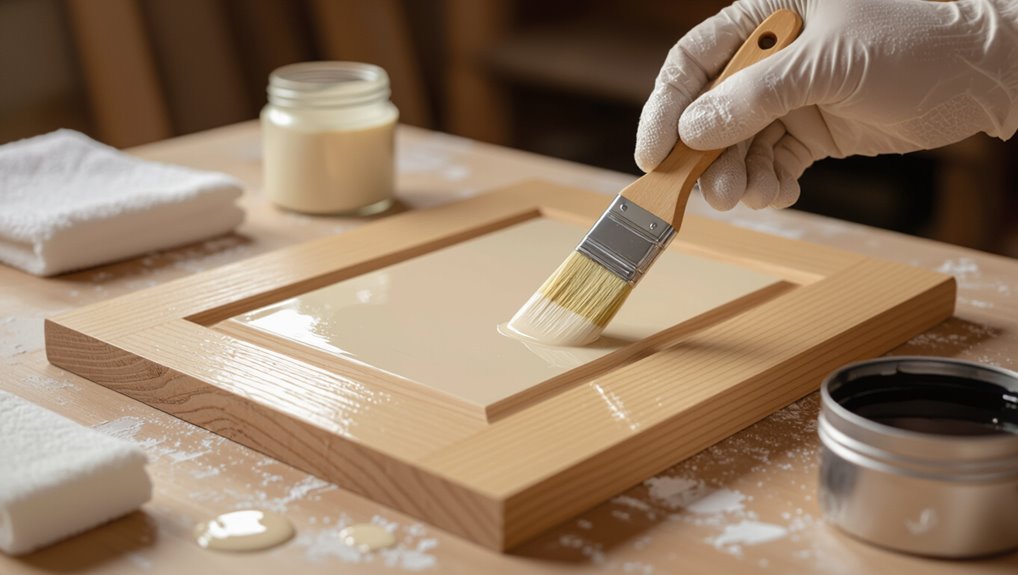
When you’ve primed and sanded the surface, apply your paint in thin, even coats to avoid runs and guarantee smooth curing; use a high-quality brush or sprayer and follow the manufacturer’s recommended drying times between coats.
- Wait suggested flash time before recoating.
- Lightly sand between coats for adhesion.
- Monitor temperature and humidity for proper cure.
- Allow full cure before handling or topcoating.
Step 4: When and how to add stain accents or overlays
Although you’ve already laid down paint and let it cure, you’ll want to add stain accents or overlays only after the paint has fully cured to the manufacturer’s specified time so the stain won’t lift or react unpredictably; test a small, inconspicuous area first to confirm adhesion and color.
Use a brush or rag for controlled application, wipe excess quickly, and seal edges with clear topcoat to protect contrasts.
Comparison Table Paint vs. Stain Outcomes
To help you choose, here’s a clear visual comparison of how paint and stain perform and what maintenance each requires.
You’ll see differences in durability, color retention, and how often touch-ups are needed.
Use this table to match the outcome you want with the effort you’re willing to put in.
Visual comparison of performance and maintenance
Because you’ll want a quick, side-by-side sense of how each finish performs over time, this comparison table highlights key outcomes—durability, color retention, maintenance frequency, and repairability—so you can decide at a glance whether paint or stain better matches your priorities. Use the table to weigh trade-offs and pick what fits your project needs.
| Finish | Durability | Maintenance |
|---|---|---|
| Paint | High | Moderate |
| Stain | Moderate | Low |
Common Problems When Combining Paint and Stain
When you mix paint and stain on the same surface, you can run into peeling, flaking, or other adhesion failures if the substrates or finishes aren’t compatible.
You might also see uneven color or stain bleed-through where the stain migrates under or shows through the paint.
Trapped moisture can cause blistering or bubbling, so you’ll want to address compatibility and moisture before you finish.
Peeling, flaking, and adhesion failure causes
If paint or stain starts peeling or flaking, it’s usually because the surface couldn’t hold the new finish—poor adhesion happens when the substrate is dirty, oily, glossy, or previously coated with an incompatible product.
You should remove loose material, clean thoroughly, sand glossy areas, and guarantee surfaces are dry.
Use compatible primers and follow manufacturer instructions to prevent adhesion failure and prolong the finish.
Uneven color or bleed-through issues
Although stain and paint can look great together, uneven color and bleed-through can quickly ruin the effect, especially on porous or tannin-rich woods.
You’ll see dark streaks or brownish seepage under paint if tannins leach or water-based stain wasn’t sealed.
Prevent this by using a tannin-blocking primer, testing on scrap wood, and allowing full dry time before painting to guarantee even, stable finish.
Trapped moisture and blistering
Beyond color bleed and tannin stains, trapped moisture poses another big risk when you layer paint over stain.
If the stain hasn’t fully dried or the wood holds moisture, paint can’t adhere properly. You’ll see blistering, peeling, and bubbles as moisture tries to escape.
Always dry and test moisture content before painting; otherwise you’ll waste time and materials fixing failed finishes.
How to Fix and Prevent Those Problems
Start with a clear surface-prep checklist so you don’t trap dirt or old finishes under new coatings.
Pick compatible stains, paints, and primers, follow recommended application methods and drying times, and address problem spots before you finish.
Finally, set a simple maintenance routine to protect your work and catch issues early.
Proper surface preparation checklist
Prep work makes the difference between a lasting finish and a paint or stain that peels, bubbles, or looks uneven — so you’ll want a clear, prioritized checklist before you touch a brush.
- Clean surfaces: remove dirt, grease, and mildew.
- Repair damage: fill cracks, sand rough spots.
- Sand and smooth: guarantee adhesion-ready texture.
- Dry and tack-free: confirm moisture-free before coating.
Choosing compatible products and primers
When you pick paint, stain, and primers that work together, you’ll prevent peeling, blotching, and adhesion failures before they start.
You should:
- Match solvent systems (water vs. oil) for primer and finish.
- Use stain-blocking primer over tannin-rich woods.
- Confirm manufacturer’s compatibility charts.
- Test a small area to verify adhesion and color acceptance.
Best application practices and drying times
Once you’ve confirmed product compatibility and tested a patch, focus on application technique and respecting dry times to prevent runs, bleeding, and adhesion failures.
- Work in thin, even coats; avoid overloading brush or roller.
- Follow manufacturer’s recoat and cure times; track temperature/humidity.
- Sand between coats lightly for bonding; remove dust.
- Allow full cure before heavy use to prevent scuffs and trapped moisture.
Maintenance and long-term care tips
If you want your finish to last, schedule simple inspections and touch-ups every few months to catch issues like chipping, mildew, or wear before they spread.
Clean surfaces with mild soap, rinse, and let dry. Sand and recoat damaged spots promptly.
Reapply protective sealant annually for stains or every few years for paint. Keep drainage clear and trim vegetation to prevent moisture buildup.
Real-World Scenarios and Recommended Orders
When you’re tackling projects like exterior decking, fences, or indoor trim, the order you choose—stain, paint, or sealer—changes the outcome and longevity.
For doors, windows, and furniture you’ll need to balance finish type with airflow and whether you’re working in a renovation or a new build.
I’ll walk you through recommended orders for each scenario so you can pick the best workflow.
Exterior decking and fences: stains, paints, and sealers
Curious how to sequence stains, paints, and sealers on exterior decks and fences for lasting protection?
Start by cleaning and drying wood, then apply a penetrating stain or paint suited to your look—stain first if you want grain visible, paint for opaque coverage.
Once fully cured, add a compatible sealer for UV and moisture resistance.
Recoat per product instructions to maintain protection.
Interior furniture and trim: when to paint vs. stain
Wondering whether to paint or stain that dining table or baseboard?
You’ll choose stain for visible grain—tables, chair rails, hardwood trim—then seal with clear topcoat.
Paint suits painted trim, bookcases, or pieces needing color; prime bare wood, then paint.
For mixed jobs, prep and mask: stain first, let cure, then paint adjacent surfaces to avoid bleed and guarantee crisp edges.
Doors and windows: combination finishes and airflow concerns
How do you handle mixed finishes on doors and windows without creating drips, bleed, or poor airflow during curing?
Mask wood sections, apply stain first to bare wood, and seal carefully.
Paint adjacent trim afterward, keeping wet edges separate.
Ascertain cross-ventilation and use gentle fans to speed curing without forcing dust.
Check hardware and gaps to prevent trapped moisture and finish failure.
Renovation vs. new build: different workflows
When you’re deciding whether to paint or stain first, the job’s context matters: renovations force you to work around existing finishes, hardware, and occupants, while new builds let you stage surfaces, masking, and ventilation for ideal sequencing.
In renovations, protect and stain exposed wood first, then paint surrounding walls and trim.
In new builds, stain cabinets and trim before final wall paint to avoid overspray and touchups.
Materials and Product Recommendations
When choosing products, you’ll pick different stains for pine, oak, and mahogany to get the right color and penetration.
If you’re painting over a stained surface, use a compatible primer (stain-blocking or bonding) and a paint formulated for wood or exterior use as needed.
Finish with a clear sealer or topcoat—waterbased or oil-based polyurethane or spar urethane—matched to the stain and designed for wear.
Recommended stains for different woods
A small sample board can save you time and money: different woods absorb stain very differently, so pick products matched to the species you’re finishing.
You’ll want oil-based, water-based, or gel options depending on porosity and grain. Test and adjust coats for color.
- Pine — gel stain
- Oak — oil-based penetrating stain
- Maple — water-based with preconditioner
- Walnut — thin oil stain
Primer and paint types for painting over stained surfaces
After testing stains on sample boards and settling on the right finish, you’ll need primers and paints that block tannins and guarantee adhesion over stained wood.
Choose a high-adhesion, oil-based or shellac primer, then a compatible topcoat.
Consider these options:
- Oil-based stain-blocking primer
- Shellac-based primer for severe tannin bleed
- Bonding acrylic primer
- 100% acrylic latex enamel paint
Sealers and topcoats to use after staining
Because your stain sets the color and tone, you’ll want a sealer and topcoat that both preserves that look and withstands wear; choose between penetrating oils, wiping sealers, and film-forming finishes based on the surface and use.
Pick products by exposure and desired sheen:
- Tung or linseed oil for depth and water resistance.
- Oil-based wiping sealer for easy application.
- Water-based polyurethane for quick drying.
- Spar varnish for exterior flexibility.
Mistakes to Avoid
Don’t skip the primer or sealer—you’ll weaken adhesion and shorten the finish’s life.
Make sure surfaces are clean and dry, test compatibility on a scrap piece, and don’t mix products without confirming they work together.
Be patient with drying and curing times or you’ll ruin the result.
Skipping primer or sealer
If you skip primer or sealer, you’ll likely save time upfront but invite problems like uneven absorption, poor adhesion, and blotchy finish.
You’ll also risk faster wear, stain bleed-through, and difficulty achieving uniform color.
Use a compatible primer for paint or a clear sealer for stain to promote adhesion, block tannins, and extend durability—don’t assume paint or stain alone will protect or perform effectively.
Applying paint or stain on damp or dirty surfaces
When you slap paint or stain onto a damp or dirty surface, the finish won’t bond properly and the result will look patchy, peel sooner, and trap moisture that promotes rot or mildew.
You should always clean, dry, and sand surfaces before coating. Use a moisture meter for wood, remove grease and dust, and wait until conditions meet manufacturer specs to guarantee adhesion and longevity.
Using incompatible products without testing
Once you’ve cleaned, dried, and sanded a surface, the next mistake is assuming any product will work together—using incompatible primers, paints, and stains can cause adhesion failure, blotching, or chemical reactions that ruin the finish.
Always test a small, inconspicuous area with your chosen combinations, follow manufacturer compatibility charts, and let test patches cure fully before committing to the whole project.
Rushing drying and curing times
Although you’re enthusiastic to see the finished result, rushing dry and cure times is one of the quickest ways to wreck a finish.
If you skip full drying or handle surfaces too soon, paint or stain can smudge, peel, or trap solvents that later cause bubbles or tackiness.
Follow manufacturer wait times, allow extra in humid or cold conditions, and test before stacking or sealing.
Best Practices Checklist Before You Start
Before you pick up a brush or rag, run through a quick checklist so you don’t waste time or materials: inspect the wood for damage, clean and sand surfaces, test the stain or paint on a scrap piece, gather the right tools and PPE, and confirm weather and drying conditions are suitable.
- Verify surface prep
- Match product to wood
- Arrange ventilation/PPE
- Plan timing and coats
FAQ
You’re probably wondering about common concerns like painting over stained wood without sanding, whether to seal stain before painting, and which lasts longer outdoors—stain or paint.
You’ll also want to know how long stain must dry before you paint or seal it, and if one product can serve as both stain and paint.
I’ll answer each of these clearly so you can pick the right approach for your project.
Can you paint over stained wood without sanding?
Yes—you can paint over stained wood without sanding in many cases, but success depends on the stain type, surface condition, and prep.
Clean the surface, remove gloss with a deglosser or etcher, and use a high-adhesion primer suitable for stained wood.
Test a small area first. If stain bleeds, smells, or is oil-based, light sanding or a shellac primer may be needed for lasting results.
Should you seal stain before painting?
If you’ve cleaned and primed stained wood as described earlier, the next question is whether to seal the stain before you paint.
You usually don’t need a separate sealer if you’ve applied a quality primer that bonds to stain. Use a stain-blocking primer for tannin bleed or uneven absorption.
If the stain’s oil-based, pick a compatible oil- or shellac-based primer first.
Is it better to stain or paint exterior wood for longevity?
Wondering which lasts longer—paint or stain—depends on the wood, exposure, and maintenance you’ll commit to.
Generally, paint offers longer color protection and seals against moisture on well-prepared surfaces, but it can peel and trap decay if neglected.
Stain soaks in, resists UV fading, and’s easier to refresh.
Choose paint for durability with vigilant upkeep; pick stain for low-maintenance longevity.
How long should stain dry before painting or sealing?
Dry time varies by product and conditions, but you should generally wait 24–72 hours before painting or topcoating over a stain.
Check the stain label for specific cure times and guarantee the surface feels dry and not tacky.
Cooler, humid weather extends drying; thin coats dry faster than heavy ones.
Test a small area before committing to full painting or sealing.
Can you use the same product as both stain and paint?
Sometimes a single product can serve as both a stain and a paint alternative, but it depends on the formulation and your goals.
You can use translucent stains or pigment-infused waterborne products to tint and protect while keeping wood grain visible.
For full opacity or heavy protection, choose true paint or solid stain.
Always check manufacturer specs and test a small area first.