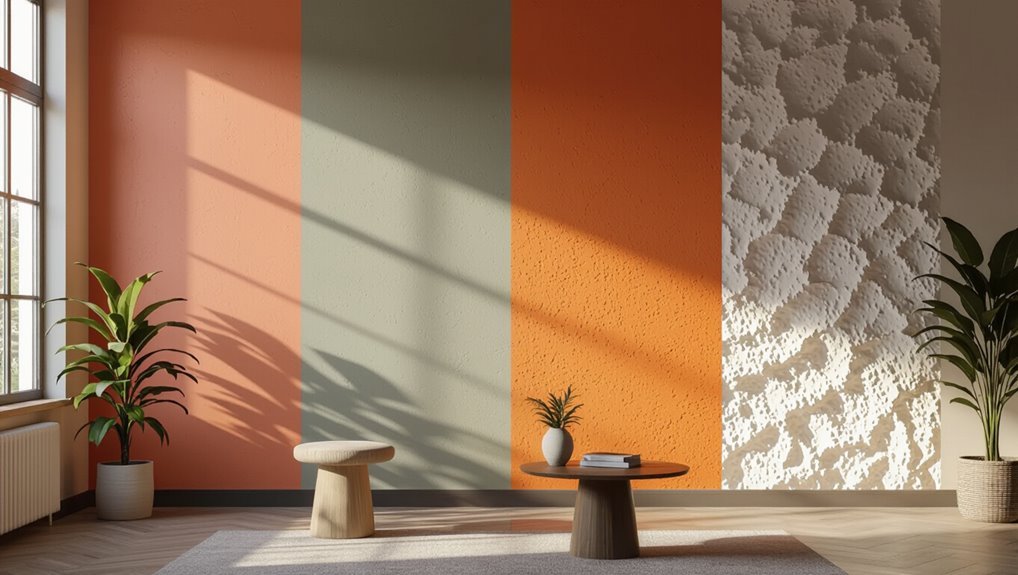
What Actually Sticks to Textured Walls Without Falling Off
You can hang things on textured walls if you match the method to the surface and prep it first. Use heavy-duty Command strips or removable poster putty for light items, high‑bond double‑sided tape or velcro for slightly heavier decor, and construction adhesive or mechanical anchors (screws, masonry anchors) for permanent, heavy pieces. Clean and press firmly, allow cure time, and combine adhesive with fasteners when needed — keep going to learn specific picks and step‑by‑step installs.
What Actually Sticks to Textured Walls Without Falling Off Quick Answer
You can rely on a few strong adhesive options for textured walls: heavy-duty command strips for medium loads, construction adhesive for permanent fixtures, and high-bond double-sided tape for lightweight decor.
Test a small area first to make sure the texture and paint handle the adhesive.
Pick the option that matches the weight and permanence you need.
Direct summary of reliable adhesive options
When you need something to stick to textured walls and stay put, choose adhesives made for rough surfaces: heavy-duty command strips (the velcro-style or large picture-hanging types), construction adhesive (like Liquid Nails or Loctite Power Grab) for permanent bonds, heavy-duty mounting tape rated for textured surfaces, and removable poster putty or museum gel for lightweight items.
- Command strips
- Construction adhesive
- Mounting tape
- Poster putty/museum gel
These options answer what sticks to textured walls and help you pick based on permanence and weight.
Basic Understanding Why Texture Affects Adhesion
Texture changes how much of an object actually touches the wall, so the adhesive and weight get distributed over peaks and valleys instead of a flat plane.
You’ll notice knockdown, orange peel, popcorn, and heavy stucco each present different contact patterns and load-bearing points that affect what’ll stay put.
Knowing the specific texture helps you choose anchors, adhesives, or mounting methods that match the surface.
How wall texture changes surface contact and weight distribution
Because a textured wall isn’t uniformly flat, adhesives and fasteners only touch parts of the surface, which concentrates loads on those contact points and changes how weight is carried.
You must account for fewer contact areas, uneven shear and peel stresses, and potential torque from protrusions. That means choosing anchors or adhesives that bridge gaps, distribute load, or engage deeper substrate for reliable hold.
Types of textured walls (knockdown, orange peel, popcorn, heavy stucco)
You’ve seen how uneven surfaces change where adhesives and fasteners bear load; now look at the common wall textures you’ll meet and how each shapes contact points.
Knockdown flattens peaks, giving broader spots for hooks.
Orange peel offers fine bumps that reduce adhesive area.
Popcorn is very irregular, limiting contact and favoring mechanical anchors.
Heavy stucco is coarse and prize for anchors, not tape.
Best Adhesive Methods That Work on Textured Walls
You’ll want to match the method to the wall and the load: Command strips and removable hooks work great for light items within their weight limits, while construction adhesives and heavy-duty mounting tapes give permanent hold for heavier pieces.
For the most secure installs on rough or masonry surfaces, use mechanical fasteners like screws, anchors, or masonry nails, and reserve adhesive putty for small, temporary decorations since it has limited strength.
Velcro and hook-and-loop systems can bridge uneven surfaces if you press firmly and use the right-rated adhesive or backing.
Command Strips and Removable Hooks when they work and weight limits
Command Strips and similar removable hooks can work on lightly textured walls, but their success depends on the texture depth, surface cleanliness, and the strip’s design and weight rating.
You should clean and dry the area, press firmly, and follow wait times. Use multiple strips for heavier items within rated limits (usually 0.5–7.5 pounds each).
Avoid edges, deep texture, and humid locations.
Construction Adhesives and Heavy-Duty Mounting Tapes permanent options
If temporary hooks won’t hold your heavier pieces or the texture’s too deep, you’ll need a more permanent approach.
Use construction adhesives (polyurethane or heavy-duty construction adhesive) where surfaces mate well; roughen and clean first.
For lighter permanent needs, heavy-duty mounting tapes (VHB) can work on textured paint if pressed into crevices and cured per instructions.
Always follow cure times and weight ratings.
Mechanical Fasteners (screws, anchors, masonry nails) for different substrates
Three reliable options—screws, anchors, and masonry nails—give you solid, long-term support on textured walls when adhesives won’t do.
Choose anchors for drywall to prevent pullout; toggle or molly anchors handle heavy loads.
Use masonry screws or hardened nails for brick, concrete, or stucco.
Pre-drill appropriately, match fastener length to thickness, and avoid over-tightening to protect both wall and fixture.
Adhesive Putty and Tack best uses and limitations
Adhesive putty and tack offer a quick, low-damage way to hang lightweight items on textured walls, but they work best on small, flat-backed objects and smoother textures.
You’ll find they’re excellent for posters, lightweight frames, and temporary decorations, yet they’ll struggle with deep grooves, heavy pieces, or prolonged loads.
Press firmly, clean the surface, test weight, and replace hardened putty regularly.
Velcro and Hook-and-Loop Systems application tips
Many Velcro and hook-and-loop systems give you a secure, removable option for textured walls when you pick the right strips and prep the surface properly. Clean with isopropyl alcohol, choose heavy-duty adhesive or screw-on anchors for porous textures, press firmly for 30 seconds, and wait 24 hours before loading.
| Tip | Best Use | Hold Time |
|---|---|---|
| Clean | Removes oils | 30s press |
| Choose | Heavy-duty strips | 24h cure |
| Anchor | Screws for heavy | Immediate |
| Test | Small weight first | N/A |
How to Choose the Right Method (Step-by-Step Decision Guide)
First, you’ll identify the wall texture and substrate. Then, note the item’s weight and fragility.
Next, consider how permanent the fix should be and any rental rules. Match the adhesive method to the conditions and load.
Finally, test a small area before committing to the full installation.
Step 1 Identify wall texture and substrate
Before you pick a hanging method, confirm exactly what kind of texture and substrate you’re dealing with—smooth drywall, heavy orange peel, popcorn, plaster, brick, or concrete all behave differently and need different approaches.
Inspect closely, tap to detect hollow versus solid, and note paint type and surface hardness.
Photograph the area, measure texture depth, and mark potential fastener locations before choosing adhesives or anchors.
Step 2 Determine item weight and fragility
Step 2 is about matching the hanging method to your item’s weight and fragility: weigh the piece, note its dimensions, and assess whether it’s delicate, brittle, or likely to shift.
Use weight to pick adhesive strength or anchor type, account for center of gravity, and decide if vibration, wind, or handling could stress attachments.
Record measurements before choosing hardware.
Step 3 Consider permanence and rental restrictions
Because your rental agreement, landlord preferences, and how long you want the item up all affect which fasteners you can use, weigh permanence and restrictions carefully before choosing a method.
Check lease clauses, ask your landlord, and note required repairs upon move-out.
Prefer removable options for temporary displays; choose non-damaging anchors only if you’re allowed to patch holes or get prior approval for permanent fixtures.
Step 4 Match adhesive method to conditions and weight
1 clear rule will guide your choice: pick an adhesive or fastener rated for the surface conditions and the load it must bear.
Assess texture, humidity, and temperature. Use heavy-duty anchors or screws for weighty items; choose foam tape or mounting strips for light decor.
Match adhesive specs to porous or painted textures, and factor in vibration or outdoor exposure before committing.
Step 5 Test a small area before full installation
Now that you’ve matched the adhesive or fastener to the surface and load, try the method on a small, inconspicuous spot before committing to the whole job.
Test for adhesion, surface damage, and appearance over 24–48 hours. If it holds and leaves no mark, proceed.
If it fails or harms the texture, choose an alternative adhesive, fastener, or protective layer.
Installation Steps for Top Methods
Before you mount anything, you’ll want to prep textured walls by cleaning, degreasing, and fully drying the surface.
Then follow specific steps for each method—place and press Command strips properly and allow curing time, use backing shims with heavy-duty mounting tape on uneven areas, and drill pilot holes with the right anchors for drywall or plaster.
For very heavy items, pair construction adhesive with mechanical backup like screws or anchors to guarantee a secure hold.
Preparing textured walls for better adhesion (cleaning, degreasing, drying)
Good surface prep makes the difference between a bond that lasts and one that fails, so start by thoroughly cleaning, degreasing, and drying textured walls before you apply any adhesive or mounting hardware.
Remove dust with a soft brush or vacuum, wash with mild detergent, rinse, and wipe with isopropyl alcohol to remove oils.
Let surfaces air-dry completely before proceeding.
Applying Command strips and hooks correctly (placement, pressure, curing time)
Start by choosing a flat, well-supported spot on the textured wall that’s within the strip’s weight rating and free of dust or oils.
Peel adhesive backing, press the base firmly for 30 seconds, then attach the hook.
Wait the manufacturer’s recommended curing time—usually an hour to 24 hours—before loading.
Apply even pressure when mounting items and check weight limits regularly.
Using heavy-duty mounting tape on uneven surfaces (surface prep, backing shims)
If Command strips won’t hold because of the texture, heavy-duty mounting tape can work—if you prepare the surface and use shims to fill gaps.
Clean with isopropyl alcohol, let dry, and test adhesion on a small patch.
Cut tape to size, press firmly, and place thin plastic or cardboard shims behind the item to eliminate voids.
Wait recommended cure time before loading.
Installing anchors and screws in drywall and plaster (pilot holes, anchor types)
Drill a pilot hole and choose the right anchor so your screws actually hold in drywall or plaster: select anchors rated for the load (plastic expansion anchors for light loads, self-drilling metal or threaded drywall anchors for medium loads, and toggle or molly bolts for heavy items).
Mark stud locations, drill appropriate pilot diameter, insert anchor flush, then drive the screw without over-torquing.
Test the fit before hanging.
Using construction adhesive and mechanical backup for heavy items
1 key principle for securing heavy items to textured walls is to combine a high-strength construction adhesive with mechanical fasteners so the load is shared rather than relied on a single method.
Clean surfaces, apply adhesive to the mounting plate, press and brace per cure time, then install screws into studs or heavy-duty anchors.
Test load gradually and follow adhesive cure specifications.
Comparison: Best Options by Item Type and Weight
For lightweight decor under 2 lbs, you’ll usually get away with strong adhesives like command strips or construction adhesive.
For medium-weight items (2–20 lbs), you’ll want heavier-duty picture hangers or anchors paired with adhesive for extra hold.
For heavy pieces over 20 lbs, you should combine wall anchors or screws into studs with adhesive and mounting hardware to be safe.
Lightweight decor (under 2 lbs) recommended adhesives
When you’re hanging lightweight decor (under 2 lbs) on textured walls, pick adhesives that balance grip with easy removal so you don’t damage the finish.
Options like removable picture-hanging strips, small command hooks, and certain mounting putties work best depending on item type and shape.
Use strips for flat frames, hooks for looped hangers, and putty for irregular backs—clean surfaces first.
Medium-weight items (2’“20 lbs) recommended adhesives and fasteners
Lightweight solutions work well for small frames and trinkets, but medium-weight items—those between 2 and 20 lbs—need stronger, more reliable hardware that still respects textured surfaces.
Use hollow-wall anchors or toggle bolts for drywall textures, picture-hanging hooks rated 10–20 lbs, and adhesive-backed metal plates with construction adhesive for flat-backed items.
Match anchor type to wall density and item weight for secure mounting.
Heavy items (over 20 lbs) recommended combination methods
1 clear rule applies to heavy items: you should combine mechanical anchors with adhesive methods to spread load and prevent pull-through on textured walls. Use toggle bolts plus construction adhesive for shelves, masonry anchors plus epoxy for stone, and studs plus heavy-duty adhesive for cabinets. Choose anchors sized to weight and texture; test small loads before full installation.
| Item | Anchor | Adhesive |
|---|---|---|
| Shelf | Toggle | Construction |
| Stone | Masonry | Epoxy |
| Cabinet | Stud | Heavy-duty |
Common Mistakes That Cause Things to Fall Off
You’ll often see things fall because you treat every textured wall the same instead of accounting for substrate and surface profile.
You’ll also overload adhesives past their rated weight, skip proper cleaning or ignore humidity and temperature, and expect removable hooks to hold up like permanent mounts.
Fixing those mistakes cuts most failures before you even pick a product.
Ignoring wall substrate vs. texture differences
Although textured surfaces might look similar, the underlying wall substrate — drywall, plaster, cement board, or masonry — changes what’ll actually stick; ignoring that difference is a common reason hooks, adhesive strips, and tapes fail.
You should match fasteners and adhesives to substrate porosity, rigidity, and surface prep: use anchors for masonry, special adhesives for plaster, and test a small area before committing.
Overloading adhesives beyond rated weight
When you ignore an adhesive’s weight rating and hang something heavier, the bond will eventually give — usually at the worst possible moment.
You’ll overload tapes, hooks, and glues, causing slow creep or sudden failure. Match adhesive ratings to the object’s true weight, include dynamic forces, and distribute load across multiple anchors.
Don’t gamble on safety; follow manufacturer limits.
Poor surface preparation and environmental factors
If you skip cleaning, degreasing, or drying a textured wall before applying an adhesive, the bond won’t hold no matter how strong the product claims to be.
Oils, dust, and paint flakes create weak contact points. Temperature swings, humidity, and direct sun degrade adhesives or cause detachment.
Prep meticulously, control room conditions, and let adhesives cure fully to avoid premature failure.
Misuse of removable products as permanent solutions
After you’ve prepped the wall and controlled the room, don’t make the common mistake of treating removable hooks, tapes, or putty like permanent anchors — they’re designed for temporary, low-load use and will fail over time on textured surfaces.
You should choose anchors rated for the wall type and load, follow manufacturer instructions, and inspect attachments periodically to avoid sudden falls and damage.
Prevention and Best Practices
To keep things stuck, start by prepping the surface and choosing adhesives rated for textured finishes so adhesion lasts longer.
Use mechanical fasteners when weight or safety demands it, and pick removable, low-damage options if you’re renting.
Also plan around humidity and seasonal temperature swings, which can weaken bonds over time.
Steps to maximize adhesion longevity
When you want adhesive to last on textured walls, start with a clean, dry surface and choose materials matched to the texture and weight of your item; this prevents early failure and reduces rework.
Press firmly, follow manufacturer cure times, and avoid stress or movement during bonding.
Control temperature and humidity, inspect periodically, and replace adhesives showing brittleness or loss of tack to maintain hold.
When to combine adhesives with mechanical fasteners
If a bond must bear heavy loads, tolerate vibration, or handle safety-critical stress, combine adhesives with mechanical fasteners to prevent catastrophic failure; you’ll get the adhesive’s sealing and dampening benefits while the fasteners carry peak loads and guarantee immediate holding power.
Use appropriate anchors, match fastener type to wall material, apply adhesive per instructions, and test load capacity before finalizing installation.
Rental-friendly alternatives that minimize wall damage
Because you’ll likely need to leave the place in good shape, choose mounting methods that avoid permanent holes and stubborn residue: command strips and damage-free hooks, tension rods, adhesive Velcro, and removable picture-hanging kits let you hang lightweight to medium items without anchors.
Meanwhile, lightweight shelving can be achieved with freestanding units or leaning shelves that don’t touch the wall.
Test adhesion on a hidden spot, clean surfaces, and follow weight limits.
Seasonal and humidity considerations
As seasons shift and humidity levels rise or fall, you’ll need to account for how moisture and temperature changes affect adhesives, tapes, and fasteners on textured walls.
Store adhesives in stable conditions, test a small area before committing, and choose humidity-tolerant products like outdoor-rated tapes or silicone-based adhesives.
Remove items slowly during dry or cold spells to avoid surface damage and adhesive residue.
Troubleshooting If Something Falls Off
If an item falls, first inspect the failure point to figure out why it gave way.
Carefully remove any leftover adhesive or hardware and patch the wall so you don’t make the problem worse.
Then reinstall using a stronger method suited to your wall texture.
Inspecting failure points and diagnosing causes
Start by examining the fallen item and the wall where it was attached to spot obvious clues—loose adhesive residue, crumbled texture peaks, or bent fasteners.
Note where adhesive stayed or pulled off, check weight versus fastener rating, and inspect surface cleanliness and moisture.
Photograph damage, test texture depth, and recreate mounting position to identify whether load, surface, or installation caused the failure.
Safe removal and wall repair tips
Having identified why the item failed, you can move on to removing residues and repairing the surface without causing more damage.
Gently lift edges, use a plastic scraper, and soften adhesive with warm soapy water or a damp cloth. For stubborn glue, try rubbing alcohol sparingly.
Patch gouges with spackling, sand smooth when dry, and prime before repainting to restore texture.
Reinstalling with a better method
When something falls off textured walls, you’ll want to rethink the attachment method before reinstalling to prevent a repeat—choose an option matched to the texture, weight, and surface prep you’ve just completed.
Test a small area: try heavier-duty adhesive, mechanical anchors, or picture-hanging hooks.
Clean and prime first, allow full cure time, and redistribute weight or use multiple contact points for secure, lasting hold.
Materials and Tools Checklist for Working with Textured Walls
You’ll want a compact kit before you start: strong adhesives (like construction adhesive and heavy-duty mounting tape), appropriate fasteners (masonry or toggle bolts for thicker texture), and cleaning supplies (mild degreaser, rubbing alcohol, and lint-free cloths).
Test adhesives on a small hidden patch to confirm bond and finish compatibility.
Keep tools handy — a utility knife, caulk gun, level, and drill — so you can prepare and secure items properly.
Recommended adhesives, fasteners, and cleaning supplies
Because textured surfaces change how things stick, you need the right adhesives, fasteners, and cleaners to get secure, tidy results.
Choose products rated for uneven surfaces, and prep properly.
- Construction adhesive (gap-filling, exterior-grade)
- Heavy-duty wall anchors and toggle bolts
- High-bond double-sided mounting tape (foam-backed)
- Mild degreaser, sponge, and lint-free cloth for surface prep
Frequently Asked Questions
You’ll find answers here to practical questions like whether Command strips work on orange peel or knockdown texture and how to hang heavy mirrors without anchors.
We’ll cover if mounting tape will hurt paint, rental-safe adhesives that hold medium weight, and the best ways to remove stubborn adhesive residue.
Read on so you can pick the right method for your textured walls with confidence.
Can Command strips stick to orange peel or knockdown texture?
Can Command strips hold on to orange peel or knockdown walls? Yes, but adhesion drops on rough textures.
You’ll get best results on smoother, lightly textured areas; thoroughly clean and dry the surface, press firmly, and follow the strip’s temperature and weight limits.
For very bumpy sections, consider alternative hanging methods because strips may peel prematurely and won’t guarantee long-term hold.
How do I hang heavy mirrors on textured walls without anchors?
Hanging a heavy mirror on textured walls without anchors is possible, but it takes the right hardware, careful prep, and realistic expectations about weight limits.
Use heavy-duty picture hangers rated for the mirror’s weight, mount them into studs whenever you can, and shim or flatten textured bumps to seat the hanger flush.
Test support gently before full reliance and don’t exceed rated loads.
Will mounting tape damage paint on textured surfaces?
If you stick mounting tape to textured paint, it can pull off loose or poorly adhered paint when you remove it, especially on rough or popcorn finishes.
Test a small, hidden spot first. Use low-tack tape for delicate finishes and peel slowly at a sharp angle.
Expect some texture bits to lift on older or flaking paint; repair may be needed.
Are there adhesives safe for rental walls that still hold medium weight?
After testing tape on a hidden spot, you’ll probably want adhesives that won’t wreck the paint but can still support medium-weight items like framed prints, mirrors, or shelves.
Look for removable picture-hanging strips rated 10–16 pounds per set, low-tack heavy-duty hooks, or adhesive mounting squares labeled for textured surfaces.
Always follow weight guidelines and test a small area before committing.
How do I remove adhesive residue from textured walls?
Though textured surfaces trap glue in crevices, you can usually remove residue without damaging paint by working gently and using the right solvents and tools.
Start with warm soapy water and a soft brush, then try rubbing alcohol or adhesive remover on a cloth.
Test first in an inconspicuous spot, work small areas, dab—don’t scrub—then rinse and pat dry to avoid streaks or damage.