Should You Paint a Ceiling in Two Directions? The Technique Explained
Yes—you should usually paint a ceiling in two directions. Start with long, continuous strokes to lay a wet edge and establish coverage, then cross-roll or back-brush perpendicular to blend and eliminate lap marks for an even sheen. This method helps with low-sheen paints, textured surfaces, and bright lighting that reveals streaks. Use the right roller nap, keep a wet edge, and avoid overworking the paint. Keep going to learn the step‑by‑step technique and pro tips.
Quick Answer Should You Paint a Ceiling in Two Directions?
Yes — you can paint a ceiling in two directions, and it often gives a smoother, more even finish.
Use the two-direction technique when you’re covering large areas, correcting lap marks, or working with low-sheen paints that show streaks.
If your ceiling’s small or you’re short on time, a single consistent direction may be fine.
Short, direct recommendation
If you want the smoothest, most even finish, paint the ceiling in two directions: cut in and then roll across the room in a consistent pattern so you avoid lap marks and uneven sheen.
For a quick recommendation, yes—should you paint a ceiling in two directions? Do it.
Work steadily, keep a wet edge, and finish each section before it starts to dry for uniform coverage.
When two-direction technique is beneficial
When you’re aiming for a flawless ceiling, the two-direction method really shines—especially on textured surfaces, newly drywalls, or rooms with strong light that would show lap marks; cutting in first and then rolling perpendicular helps hide seams, blend touch-ups, and produce a uniform sheen.
Use it when ceilings have texture, uneven porosity, or directional lighting, or when you need seamless coverage after repairs.
Basic Understanding What Painting “In Two Directions” Means
When you hear “painting in two directions,” it usually means applying paint with strokes both lengthwise and crosswise to avoid lap marks and blend coats.
You’ll notice how brush or roller direction, paint viscosity, and light angle change how the finish reads.
Also consider the ceiling texture and paint type—smooth, popcorn, flat or satin finishes all respond differently to bidirectional painting.
Definition and common interpretations
Although it might sound technical, painting a ceiling “in two directions” simply means applying your paint strokes along two axes—typically lengthwise and then crosswise—to confirm even coverage and blend feathered edges.
You’ll hear variations: some call it cross-rolling, back-brushing, or two-pass technique. Each aims to eliminate lap marks, guarantee uniform sheen, and make touch-ups easier without overworking the surface.
How paint flow, brush strokes, and light affect appearance
Because paint flows and dries differently depending on how you move the roller or brush, the direction you work directly changes the ceiling’s final look.
You’ll see strokes, lap marks, and sheen variations based on flow and brush angle. Working consistently reduces visible seams; changing directions can hide imperfections but may reveal texture under directional light, so plan movements with lighting in mind.
Types of ceiling surfaces and paints that influence direction
You’ve seen how brush and roller direction changes the look of a ceiling; now consider how the surface and paint type change what “painting in two directions” actually means.
Smooth drywall needs thin, consistent passes; textured plaster or popcorn hides strokes but benefits from cross-hatching to fill crevices.
Eggshell or flat paints forgive overlap; high-gloss reveals every direction, so plan a single, careful pattern.
Why Direction Matters Visual and Technical Factors
When you paint a ceiling, the direction you roll affects how light reflects and whether lap marks show up.
Texture, the roller’s nap, and any surface irregularities will change how the paint lays and reads from below.
You’ll also influence drying behavior and paint thickness, which can make edges more or less visible.
Light reflection and lap marks
Light reflects off ceilings in predictable ways, so the direction you paint directly affects how obvious lap marks and brush or roller strokes will appear.
You should control light and overlap to minimize contrast:
- Paint toward the light to blend edges.
- Stagger passes to avoid wet edges meeting.
- Keep consistent pressure and speed to maintain uniform sheen.
These choices reduce visible laps.
Texture, nap of roller, and surface irregularities
Texture, nap, and surface irregularities all change how paint lays down, so the roller direction matters more than you might think.
You’ll choose a nap length to match texture: short for smooth, longer for popcorn or heavy knocks.
Rolling across bumps flattens pile differently than rolling with them, so change direction to fill recesses evenly and reduce missed spots and uneven sheen.
Drying behavior and paint thickness
Although you might focus on appearance, drying behavior and paint thickness play a big role in whether your ceiling looks uniform, so you should consider how your rolling pattern affects both.
You’ll control sheen and lap marks by managing coat thickness and drying direction. Consider:
- Thin, even passes — faster, uniform drying.
- Heavy overlap — slower, visible differences.
- Cross-rolling — evens thickness.
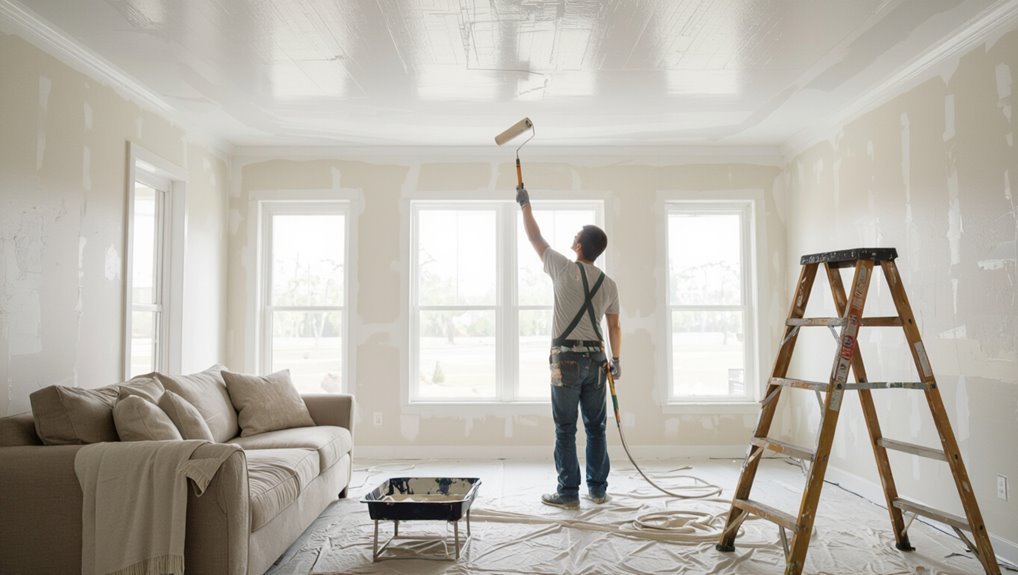
How to Paint a Ceiling Correctly Step-by-Step Guide
Before you start, gather your tools, mask off trim, and prime any stains so the surface’s ready.
Cut in the edges first, then make a long, continuous first pass across the ceiling followed by a second cross-rolling or blending pass.
Finish by feathering and back-rolling to blend edges and avoid lap marks.
Preparation: tools, masking, and priming
Gather the right tools and set up a clean work area so you’ll move quickly and avoid mistakes: you’ll need a sturdy ladder or scaffolding, an extension pole with a roller frame, angled and trim brushes, drop cloths, painter’s tape, a paint tray, and a quality ceiling primer.
Mask fixtures and trim carefully, repair imperfections, then apply primer for even coverage.
- Safety
- Cleanliness
- Adhesion
Step 1: Cutting in the edges
When you’re ready to start, cut in the edges first so you create a clean boundary between the ceiling and walls, fixtures, and trim; this makes rolling faster and prevents lap marks.
Use a steady-angle angled brush, load it without dripping, and work in manageable sections. Keep a wet edge, feather the paint toward the center, and tidy corners with light, controlled strokes.
Step 2: First pass long, continuous strokes or rolls
Start your first full pass with long, continuous strokes or rolls that run the length of the room so you establish an even, wet edge and minimize lap marks.
You should:
- Maintain steady pressure to avoid streaks.
- Overlap each stroke slightly to blend edges.
- Work quickly enough to keep the edge wet for consistent coverage.
Step 3: Second pass cross-rolling or blending technique
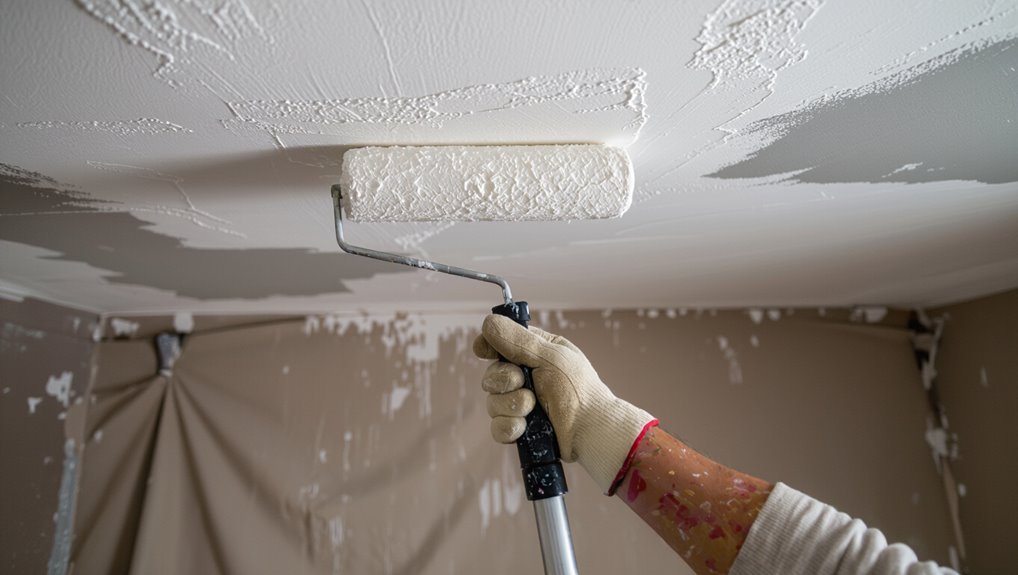
Roll crosswise on your second pass to blend the initial wet edge into the rest of the ceiling, using short, overlapping strokes perpendicular to your first direction so the paint levels out and hides roller lines.
Keep a consistent pressure, maintain a wet edge, and work in small sections. Move steadily to avoid texture variation and guarantee even coverage without reloading excessively.
Step 4: Feathering, back-rolling, and avoiding lap marks
Feather the edges by easing pressure at the ends of each stroke so the paint thins out and blends into adjacent wet areas; then back-roll gently—light, parallel passes over freshly applied paint—to even out texture and eliminate roller ridges.
You’ll avoid lap marks by working wet-to-wet and matching overlap timing.
- Maintain even pressure
- Work wet edges only
- Check lighting often
Drying time and when to apply additional coats
Because ceiling paint dries to the touch before it’s ready for another coat, you should wait the manufacturer’s recommended recoat time—usually 2 to 4 hours for latex and longer for oil-based—while checking that the surface feels cool and not tacky.
If humidity is high or ventilation is poor, add extra drying time and use a fan or dehumidifier to speed things up.
Wait fully before recoating, test a small area, then apply the next coat evenly to avoid lap marks and texture differences.
Two-Direction Techniques Compared
You’ll compare vertical-then-horizontal versus side-to-side then back-rolling, decide whether to wet-on-wet or let the first pass dry, and match roller nap and stroke patterns to your chosen method. Below is a quick matrix to help you weigh trade-offs and outcomes. Use it to pick the sequence and tools that suit your ceiling and paint.
| Technique | When to use | Key benefit |
|---|---|---|
| Vertical then horizontal | Large rooms, high ceilings | Smooth coverage across joints |
| Side-to-side + back-roll | Textured surfaces | Better texture filling and uniformity |
| Wet-on-wet | Fast work, same-batch paint | Seamless blending across passes |
| Let first pass dry | Complex lighting or color shifts | Easier correction of lap marks |
Vertical then horizontal vs. side-to-side then back-rolling
Wondering which two-direction method will give you the most even coverage and fewest lap marks? You’ll choose based on texture, speed, and control.
Vertical then horizontal gives consistent layering; side-to-side then back-rolling smooths roller lines.
Consider these priorities:
- Texture control — pick the method that masks imperfections.
- Speed — side-to-side is faster.
- Finish smoothness — back-rolling refines surface.
Wet-on-wet blending vs. letting first pass dry
When you’re deciding between wet-on-wet blending and letting the first pass dry, weigh control against convenience: wet-on-wet lets you feather seams and maintain a uniform sheen, while waiting for drying reduces lap marks from uneven touch-ups but adds time and break complexity.
Choose wet-on-wet for continuous coverage and fast work; choose drying between passes when you need precise correction and minimal overlap visibility.
Roller nap and stroke patterns matched to technique
A roller’s nap and your stroke pattern should match the technique you pick: short naps with tight, controlled strokes suit back-and-forth wet-on-wet work, while longer naps and broader, overlapping passes help blend when you’re letting coats dry between sessions.
Choose deliberately:
- Short nap + tight strokes = smooth, fast wet blending.
- Medium nap + steady overlap = forgiving, even coverage.
- Long nap + broad passes = texture blending over dry coats.
When Not to Paint in Two Directions
You shouldn’t use two-direction painting when your surface or paint is prone to lap marks, because crossing wet and tacky edges makes flaws more visible.
In small rooms or under tricky lighting, consistent strokes can reduce the risk of uneven sheen or noticeable seams.
Stick to single-direction or uniform strokes when you need maximum control and a seamless finish.
Surfaces and paints prone to lap marks
Certain ceilings and paints are more likely to show lap marks, so you’ll want to avoid crossing directions on them.
Rough or textured plaster: absorbs unevenly and highlights overlaps.
High-gloss or semi-gloss: reveals sheen differences instantly.
Deep or saturated colors: require careful feathering to hide edges.
- Rough/textured
- Glossy sheens
- Bold/dark colors
Small rooms or tricky lighting conditions
When a room’s small footprint or awkward lighting makes every brushstroke obvious, avoid painting the ceiling in two directions because cross-lapping will stand out more and be harder to blend.
You’ll notice overlaps under low-angle or directional light, so stick to a controlled approach: work steadily, maintain a wet edge, and use consistent pressure and roller loading to minimize visible seams and uneven sheen.
Situations where single-direction or consistent strokes are preferable
If lighting, texture, or room size will highlight every overlap, stick to single-direction or consistently oriented strokes to keep the finish uniform.
You’ll avoid lap marks, uneven sheen, and visible directional texture.
Consider these cases:
- Glossy or satin ceilings that show brush strokes.
- Strong side lighting or narrow rooms.
- Textured plaster where direction emphasizes flaws.
Common Mistakes and How to Avoid Them
Don’t overwork the paint or you’ll get visible overlaps and texture problems, so keep your passes light and consistent.
Use the correct roller nap, maintain even pressure, and take care when cutting in to blend edges smoothly.
Also respect drying times and room conditions to avoid lap marks and uneven sheen.
Overworking paint and visible overlaps
One common mistake is overworking paint: you’ll create streaks, lap marks, and a tacky finish by repeatedly brushing or rolling the same area as the paint starts to set.
Stop reworking; work wet edges and maintain a steady pace.
Tips:
- Lay off once the coat evens.
- Blend only during initial open time.
- Keep sections small to avoid overlaps.
Using wrong roller nap or inconsistent pressure
After you stop overworking areas, the next thing that’ll sabotage a smooth ceiling is using the wrong roller nap or applying uneven pressure.
Pick a nap suited to your texture—short for smooth, medium for slight texture, long for popcorn.
Maintain consistent pressure and rhythm; change rollers when nap wears.
Test on a scrap area to confirm even coverage and uniform sheen before proceeding.
Insufficient cutting-in or poor edge blending
If you skimp on cutting-in or don’t blend the edges well, you’ll end up with visible lines and mismatched sheen where the ceiling meets walls and fixtures.
You can avoid that by sharpening technique and planning:
- Use a steady, angled brush for crisp lines.
- Feather the edges with a damp brush or roller.
- Work in small sections to match wet edges and finish uniformly.
Ignoring drying times and environmental conditions
Because paint needs the right conditions to cure, ignoring drying times and room environment will cost you finish quality and time, so plan accordingly.
You should monitor temperature, humidity, and ventilation; they’ll affect drying pace and adhesion.
Don’t rush coats—allow recommended dry times. Use fans or dehumidifiers if needed, and avoid painting in extreme cold or dampness to prevent blistering, sagging, or uneven sheen.
Tips and Best Practices for Flawless Ceilings
Pick the right roller nap, extension pole, and sheen for your ceiling, and set up directional lighting so you can spot imperfections as you work.
Work in manageable sections, keep a wet edge to avoid lap marks, and save touch-ups for after the paint has dried.
Finish by cleaning tools promptly, evaluating the surface under good light, and making precise touch-ups where needed.
Choosing the right roller, extension pole, and paint sheen
When you choose the right roller, extension pole, and paint sheen, you’ll cut work time and get a more even, professional-looking ceiling; pick tools that suit texture and reach, and sheen that masks flaws without glare.
- Roller: 3/8″–1/2″ nap for smooth to light texture
- Pole: sturdy, telescoping, comfortable grip
- Sheen: flat or matte for concealment
Lighting setup to reveal imperfections while painting
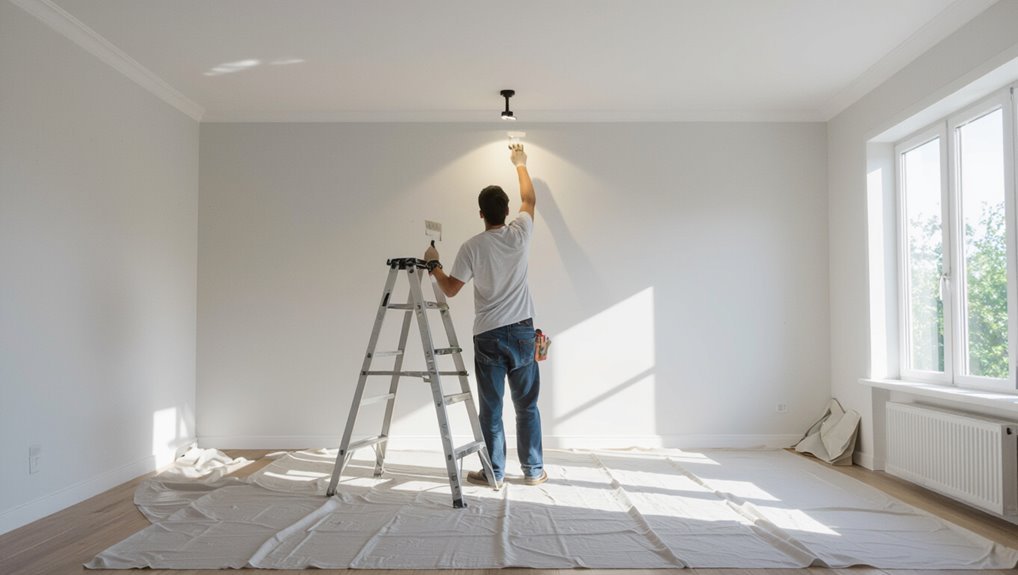
1 simple tweak can save you hours of touch-ups: set up lighting so it skims the ceiling at a low angle.
Use portable work lights or a strong lamp on a tripod, positioned to cast long shadows.
Walk the room while painting to spot drips, roller marks, and thin spots.
Adjust angle or brightness as you go to catch flaws before they dry.
Working in manageable sections and maintaining a wet edge
Although ceilings can look simple, you’ll get the smoothest, most consistent finish by working in manageable sections and keeping a wet edge.
Divide the ceiling into reachable zones, paint each fully before moving on, and overlap slightly to blend.
Follow this checklist:
- Start near the light source.
- Work in 3–4 foot strips.
- Maintain a 10–15 minute wet edge.
Clean-up, touch-ups, and assessing final finish
Since the final look matters as much as the painting itself, wrap up with a systematic clean-up, targeted touch-ups, and a careful assessment of the finish.
Remove tape, clean drips, and wash tools promptly.
Scan under varied lighting for thin spots or roller marks, feather in paint where needed, and let the coat fully cure before reinstalling fixtures.
Note imperfections for future touch-ups.
Cost, Time, and Effort Comparison
Painting one direction can save you time—often cutting the job by 20–30% compared with a two-direction approach that requires more careful overlap.
You’ll spend more effort and attention with the two-direction method, and that extra time can add up if you’re doing the whole ceiling yourself.
Consider hiring a pro when you value speed, flawless finish, or when labor costs justify avoiding the extra hassle.
Typical time estimates for single-direction vs two-direction methods
A quick rule of thumb: rolling a ceiling in one direction usually takes less time because you keep a steady rhythm and make fewer passes, while working in two directions adds 15–40% more labor as you cross-roll and touch up overlaps.
You’ll typically expect:
- Single-direction: 1–2 hours per room.
- Two-direction: 1.5–3 hours per room.
- Complex ceilings: add 25–50%.
When hiring a pro is worth it
Wondering if you should hire a pro? You’ll pay more upfront, but pros finish faster, avoid mistakes, and deliver uniform coverage—especially with two-direction technique.
If you’re short on time, lack equipment, or want flawless results for textured or high ceilings, hire one.
DIY saves money if you’ve patience and skill; otherwise, consider the cost versus guaranteed quality.
FAQs
You’ve probably got questions like whether painting in two directions will leave streaks or brush marks and if it’s okay to switch directions between coats.
You’ll also want to know if back-rolling is necessary after your first pass, which roller nap works best for textured ceilings, and how to fix lap marks once the paint has dried.
I’ll answer each of these clearly so you can choose the best technique for a smooth finish.
Will painting in two directions cause streaks or brush marks?
If you paint a ceiling in two directions—typically up-and-down then crosswise—you won’t automatically get streaks or brush marks, provided you use the right technique and tools.
Use consistent pressure, maintain a wet edge, and pick proper rollers.
- Prep: clean, prime, smooth surface.
- Tool choice: nap length, quality roller/brush.
- Technique: overlap, feather edges, work quickly.
Can I switch directions between coats?
Yes—you can switch directions between coats, and doing so often improves coverage and hides roller texture.
Rotate your roller pattern 90 degrees or alternate long and short passes on the second coat to fill gaps and blend overlaps.
Keep edges wet, maintain consistent pressure, and let the first coat dry fully.
Switching directions helps achieve an even, professional-looking finish without obvious lap lines.
Is back-rolling necessary after the first pass?
Switching roller directions between coats helps hide texture and improve coverage, but you might still wonder whether to back-roll after that first pass.
You don’t always need to, but back-rolling can level high spots and guarantee even sheen.
Consider these quick checks:
- Coverage look — patchy? back-roll.
- Texture depth — deep? back-roll.
- Dry time — rushing? skip.
What roller nap is best for textured ceilings?
For most textured ceilings you’ll want a nap that holds plenty of paint without flattening the texture—typically a 3/4-inch to 1-inch roller nap for medium to heavy textures, and a 1/2-inch nap for lighter stipple or popcorn surfaces.
Choose a high-quality synthetic or blended cover for even pickup and release.
Test a small area to verify coverage without clogging the texture.
How do I fix lap marks after the paint has dried?
Don’t panic if lap marks appear after the paint’s dried—you can usually blend them out without stripping the whole ceiling.
Lightly scuff the edges with fine sandpaper, clean dust, then feather new paint into the area with a damp roller.
Follow these steps:
- Sand and wipe.
- Thin the paint slightly.
- Roll quickly, blending edges.