How to Texture Garage Walls Like a Professional
You can texture your garage walls like a pro by prepping surfaces, choosing the right compound and sprayer or knockdown tools, and working in consistent 4×4 sections. Inspect and repair drywall or block, prime appropriately, mix joint compound to the right consistency, then spray or trowel on orange peel or knockdown texture and flatten at the proper time. Sand, prime, and paint for durability. Keep tools and touch-up mix handy, and continue for full step-by-step guidance.
How to Texture Garage Walls Like a Professional Quick Answer
For a quick, professional look you’ll usually get the best results with a thin knockdown or orange peel texture applied over primed drywall.
Texture when you want a finished, durable surface that hides imperfections; leave drywall exposed in unfinished or utility-only garages where cost and access matter more.
If you’re unsure, test a small area to compare appearance and maintenance before committing.
Short direct answer: best method overview
Start by prepping the space: clean and repair drywall, tape seams, and apply a thin coat of drywall compound so the surface’s uniform before you texture.
For best results, choose a knockdown or orange-peel finish, mix compound to recommended consistency, use a hopper gun or trowel technique, spray or float evenly, then lightly knock down peaks.
Sand, touch up, prime, and paint.
When to texture garage walls vs. leave drywall exposed
When should you texture garage walls and when can you leave the drywall exposed?
Texture when the garage is visible from living areas, you want durability, or you’ll use it as a workshop—texture hides imperfections and resists scuffs.
Leave drywall exposed in unfinished, low-visibility utility spaces or if you plan to frame and insulate later.
Consider budget, maintenance, and future finishes.
Understanding Garage Wall Texture Basics
Before you start, know that wall texture is the finish you apply to drywall—common garage options include orange peel, knockdown, and heavy stomp.
Texturing boosts durability, hides imperfections, and gives your space a cleaner look.
You’ll need joint compound or texture mix plus a few basic tools like a hopper gun, trowel, and texture brush.
What wall texture is and common types for garages
Texture gives garage walls more than looks — it changes how they handle light, hide imperfections, and stand up to wear.
Texture is the surface finish applied to drywall or concrete. Common garage types include smooth skim coat, orange peel, knockdown, slap brush, and heavy popcorn.
You’ll choose by ease of application, visual preference, and how the surface tolerates scuffs and cleaning.
Benefits of texturing garage walls (durability, concealment, aesthetics)
Durability matters in a garage, and adding a textured finish helps protect walls from dings, stains, and everyday wear.
You’ll hide imperfections like patches, nail holes, and uneven drywall while creating an easy-to-clean surface.
Texture also boosts visual appeal, tying storage, tools, and flooring together for a cohesive look.
Materials and tools overview
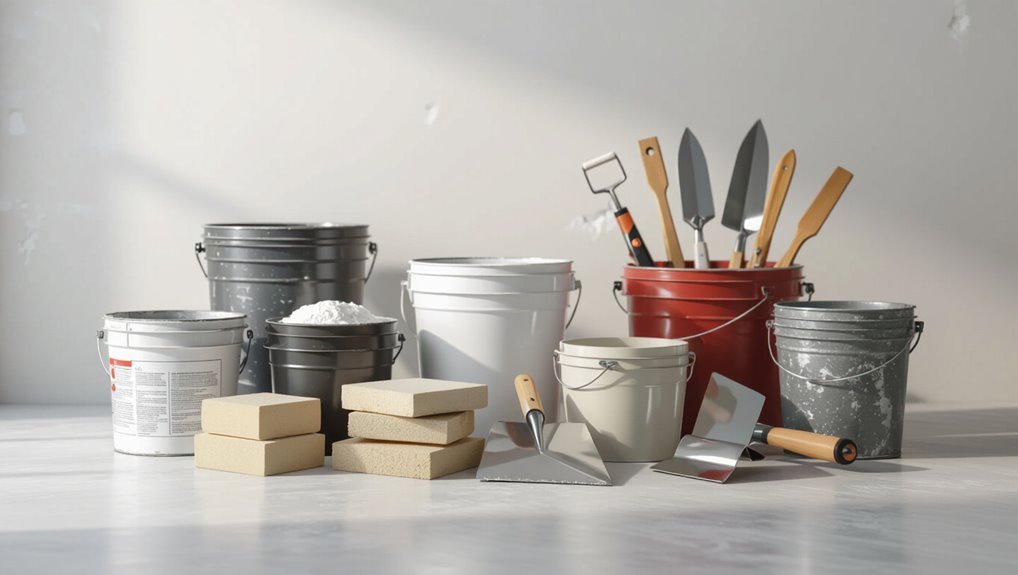
Now that you know why a textured finish pays off, you’ll want the right supplies to get the job done cleanly and efficiently.
Gather quality joint compound, texture additives, and primers. Choose tools that match your texture style and workspace size.
- Hopper or texture gun
- Trowels and knives
- Sanding block and respirator
Assessing Your Garage Before You Start
Before you start, walk the garage and note what your walls are made of—drywall, concrete block, or plywood—so you know what prep and texture methods will work.
Measure the surface area to calculate how much joint compound, primer, and paint you’ll need.
Check for hazards like moisture, missing or exposed insulation, wiring, or signs of pests and address those before you begin.
Inspecting wall condition: drywall, concrete block, plywood
When you’re planning textures, start by closely inspecting the existing wall surface—drywall, concrete block, or plywood—because each material needs different prep and products.
Check drywall for nail pops, loose tape, and moisture stains.
On concrete block, look for efflorescence, cracks, and spalling.
For plywood, verify fastening, warping, and rot.
Note substrate type and defects before choosing primers and repair methods.
Measuring surface area and calculating materials
Start by measuring the length and height of each wall and any ceiling areas you plan to texture so you can calculate the exact square footage you’ll be covering. Multiply wall areas, subtract openings, then determine compound amounts for primer, mud, and texture. Estimate 10% overage for waste.
| Item | Unit Coverage | Quantity Needed |
|---|---|---|
| Primer | 350 sq ft/gal | |
| Mud | 50 sq ft/bag | |
| Texture | 100 sq ft/gal |
Identifying hazards: moisture, insulation, wiring, pests
Although it might seem like a simple surface job, you should inspect for moisture, damaged or missing insulation, exposed wiring, and signs of pests before you touch any texture tools—these hazards can ruin finishes and create safety risks if left unaddressed.
Check for damp spots, mold, and rot; probe insulation gaps; turn off power and verify wiring; look for droppings or chewed wood, then fix issues.
Prep Work: Surface Preparation and Safety
Before you texture, you’ll clean and repair the walls—patch cracks, replace any damaged panels, and make sure surfaces are smooth.
Prime and seal appropriately for the substrate (drywall needs a different primer than concrete block), and cover floors, doors, and fixtures to protect them.
Wear proper safety gear and keep the area well ventilated while you work.
Cleaning and repairing walls: patching cracks, replacing damaged sheets
Clear away dirt, dust, and flaking paint, then inspect the surface for cracks, gouges, and water-damaged sheets so you know exactly what needs fixing.
Remove loose material, sand edges, and widen hairline cracks for proper filling. Use appropriate patching compound, mesh tape over joints, and replace any structurally compromised sheet.
Sand smooth, clean residue, and verify surfaces are stable before texturing.
Priming and sealing different substrates (drywall vs. block)
When you’re ready to prime, match your sealer to the substrate—drywall needs a drywall primer/latex PVA to seal porous paper, while masonry block benefits from a masonry primer or acrylic-based masonry sealer that fills pores and resists moisture.
Apply evenly, use a nap roller for drywall, a masonry brush or roller for block, allow full dry time, and spot-check adhesion before texturing.
Protecting floors, doors, fixtures and ventilation
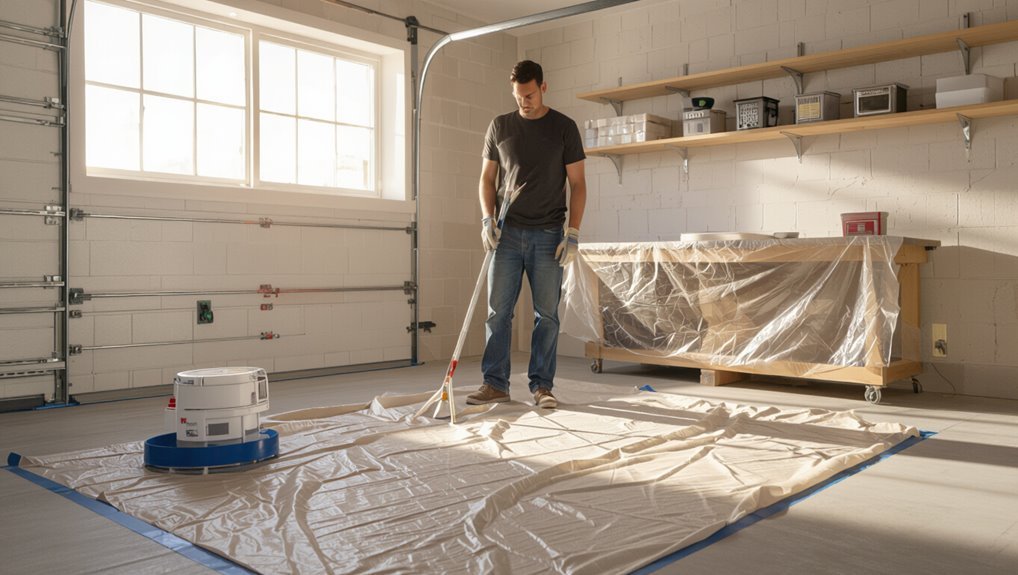
Having sealed the walls, you’ll want to protect everything below and around your work area so dust, texture, and primer don’t create a bigger cleanup job.
Cover floors with rosin paper or plastic, tape doors and trim, and isolate vents.
Use:
- Heavy-duty floor protection rolled out and taped
- Contractor plastic over doors and fixtures
- Foam gasket or taped vent covers
Safety gear and ventilation best practices
Because sanding, spraying, and mixing compounds kick up dust and fumes, you’ll want the right PPE and a ventilation plan before you start.
Wear N95 or P100 respirators, eye protection, gloves, and disposable coveralls.
Use exhaust fans, open doors and windows, and direct airflow outwards.
Run a HEPA air scrubber for prolonged work and seal off other rooms to prevent contamination.
Step-by-Step: Texturing Garage Walls
You’ll start by picking a texture style that suits garage use—knockdown, orange peel, skip trowel, or knockdown comb.
Then mix your compound, choose an applicator (sprayer, hopper, trowel, or roller), and set your tools for the chosen technique.
Apply the texture with the right settings and motions, perform knockdown and smoothing at the correct timing, and let it dry before sanding and finishing.
Step 1 Choose the right texture style for garage use (knockdown, orange peel, skip trowel, knockdown comb)
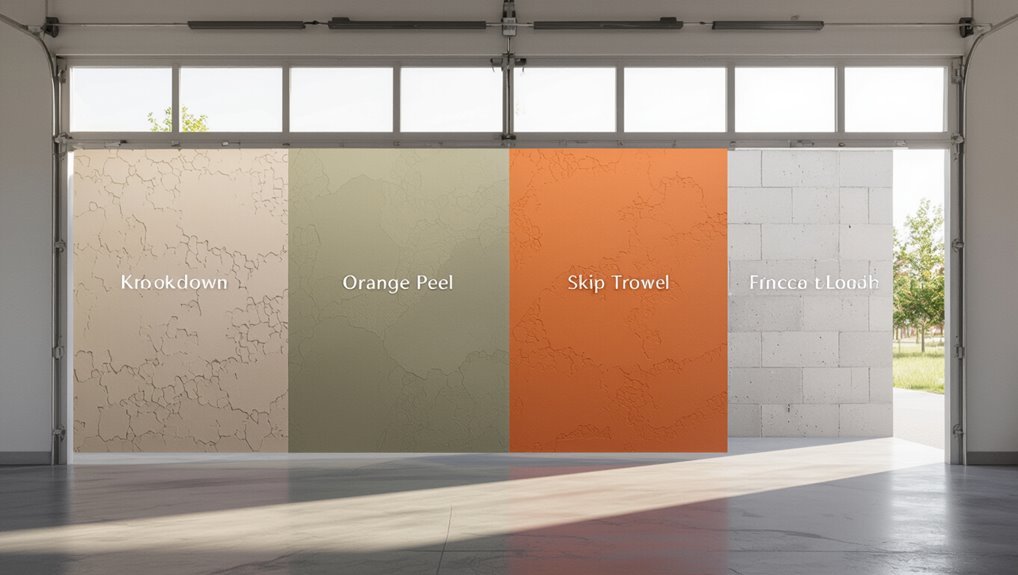
When choosing a texture for your garage walls, think about durability, repairability, and the look you want—knockdown, orange peel, skip trowel, and knockdown comb each bring different trade-offs. You’ll pick based on visibility, ease of patching, and cleaning. Compare options quickly:
| Style | Durability | Repairability |
|---|---|---|
| Knockdown | High | Moderate |
| Orange peel | Moderate | Easy |
Step 2 Mix compound and select applicator (sprayer vs. hopper, trowel, roller)
Now that you’ve picked a texture style, mix the right compound and pick an applicator that matches both the finish and your skill level.
Use premixed or powdered joint compound thinned per label. For large areas choose a hopper or texture sprayer; for small or controlled patterns use a trowel or roller.
Match viscosity to tool and practice on scrap board first.
Step 3 Apply texture: technique for each style (sprayer settings, trowel motions, timing)
Start by setting a clear rhythm for the application: work in manageable sections (about 4×4 feet) and finish each section before the compound skins over.
For sprayers, hold nozzle 18–24 inches, use low pressure for popcorn, medium for orange peel.
For trowels, use consistent overlapping strokes and vary angle for depth.
Keep compound workable; rewet or remix if it skins.
Step 4 Knockdown and smoothing techniques (timing, tools, troubleshooting)
Step 4 brings the knockdown and smoothing phase, where timing and the right tools turn rough texture into a finished surface you can paint; wait until peaks slightly set (finger-safe), then glide a wide knockdown knife at a shallow angle to flatten peaks.
Work in consistent passes, clean blade often, touch up low spots with light trowel pressure, and address ridges before they over-harden.
Step 5 Drying time and sanding/finishing tips
After you’ve knocked down and smoothed the texture, give the compound time to cure before any sanding or finishing—this prevents tearing and gouging.
Wait at least 24 hours for thin coats, longer for humid or cold conditions.
Use a fine 120–150 grit sandpaper, light pressure, and a sanding pole.
Clean dust, inspect for low spots, and touch up sparingly before final sealing.
Step 6 Primer and paint recommendations for garages (moisture-resistant, washable finishes)
Once the texture’s fully cured, you’ll want a primer that seals the compound and blocks moisture before painting.
Choose a high-adhesion, stain-blocking latex primer formulated for drywall or masonry depending on your wall substrate.
After priming, use a semi-gloss or satin acrylic latex paint rated for high humidity and washable durability.
Apply two coats, allow proper dry times, and ventilate well.
Tools and Products Comparison
Now let’s compare DIY versus professional gear so you can weigh cost, speed, and the finish you want.
You’ll also want a quick rundown of recommended joint compounds, primers, paints, and sprayers that suit each approach. This will help you pick the right products and tools for your budget and timeline.
DIY vs. professional equipment (cost, speed, finish)
While you can texture garage walls with basic DIY tools, choosing between consumer-grade and professional equipment comes down to cost, speed, and the finish you want. You’ll save money with hand tools but work slower; pros deliver uniform texture faster and cleaner. Pick based on budget, time, and desired result.
| Option | Cost | Speed |
|---|---|---|
| DIY | Low | Slow |
| Pro | High | Fast |
Recommended joint compounds, primers, paints, and sprayers
1 clear choice you’ll face is whether to match your materials to the job — light, all-purpose joint compound and a good bonding primer for smooth, small repairs; heavier, setting-type compounds for fast fill and durability; and paints and sprayers that suit your finish and budget.
You’ll pick tools for scope, speed, and texture control:
- Lightweight compound, small trowel
- Setting compound, hawk, larger knife
- HVLP or airless sprayer, quality latex paint
Common Problems and How to Fix Them
You’ll run into a few common issues when texturing garage walls, so you’ll want to know how to spot and fix them quickly.
Learn how to correct uneven texture and blotches, stop cracking, peeling, or flaking, and get texture to bond to concrete block or plywood.
Also cover smart cleanup and overspray control to keep the rest of your garage tidy.
Uneven texture and blotches causes and corrections
Uneven texture and blotches usually come from inconsistent material application, mismatched drying times, or surface contamination.
But you can fix them with targeted preparation and technique adjustments. Clean and prime surfaces, mix texture to uniform consistency, and work in consistent sections.
Feather edges, match roller or spray pressure, and reblend wet patches promptly.
Sand lightly and touch up after full cure.
Cracking, peeling, or flaking prevention and remedies
Prevent cracking, peeling, or flaking by addressing the root causes—poor adhesion, trapped moisture, and incompatible coatings—before you apply texture.
Fix delamination: scrape loose material, sand edges, and clean thoroughly.
Dry and ventilate the space; repair leaks and use a moisture barrier when needed.
Prime with a compatible bonding primer, allow full cure, and apply texture per manufacturer instructions to guarantee lasting adhesion.
Texture not adhering to concrete block or plywood fixes
Often the same fixes solve adhesion problems on both concrete block and plywood: clean the surface, remove loose material, and prep it so the texture can bond.
Prime porous or sealed areas with the right bonding primer, repair gaps or mortar voids, sand glossy spots, and guarantee surfaces are dry.
Use compatible texture products and follow manufacturer cure times for reliable adhesion.
Dealing with overspray and cleanup
Once you’ve fixed adhesion issues and everything’s bonded, you’ll still face the practical mess of applying texture—overspray, splatter, and dust can mar floors, fixtures, and nearby walls.
Protect surfaces with heavy-duty drop cloths and plastic sheeting, tape seams, and seal vents.
Work from clean to dirty, wipe fresh splatter with a damp sponge, and vacuum dust with a HEPA filter to finish.
Time, Cost, and When to Hire a Pro
For a single-car garage you can usually texture walls in a weekend, while larger two- or three-car spaces take a few days to a week depending on prep and drying times.
Expect costs for materials and tools to be modest, equipment rental to add a chunk, and hiring a pro to be the most expensive but fastest option.
If you’re short on time, uncomfortable with drywall repair, or want a flawless finish, you should hire a professional.
Estimated DIY timeline by garage size
A typical single-car garage takes a weekend to texture if you’re working steady.
For a two-car garage plan two to three weekends for prep, application, and drying.
A three-car or oversized space can stretch to a week with help.
Factor in patching, sanding, and multiple coats.
Hire a pro if timelines matter or you lack equipment or experience.
Cost breakdown: materials vs. equipment rental vs. professional hire
You’ll want to separate costs into three clear buckets—materials, equipment rental, and labor—so you can compare what you’ll buy, what you’ll borrow, and when hiring a pro makes sense. Estimate materials (joint compound, tape, primer), rental (sprayer, sander), and pro rates. Balance time vs. skill: rental saves time; pros add cost but reduce risk.
| Item | Typical Cost |
|---|---|
| Materials | $30–$150 |
| Rental | $40–$120/day |
| Pro labor | $200–$1,000+ |
| Misc/contingency | 10–20% |
Signs you should hire a professional
If the project will eat more than a weekend of your time, cost more to redo than to hire out, or requires skills you don’t have, call a pro—especially when tight timelines, uneven surfaces, or textured matches are on the line.
You’ll save headaches if you lack experience, tools, or patience.
Pros guarantee consistent texture, proper prep, and faster, cleaner completion for a predictable budget and finish.
Best Practices and Pro Tips
When you’re working on a large garage, use speed tricks like batching panels and keeping tools loaded to move faster without sacrificing quality.
To keep texture consistent across multiple walls, mark a wet-edge plan and match pressure, angle, and material mix as you go.
Finally, set up a simple maintenance and touch-up kit with leftover mix, matching tools, and clear notes on the finish so repairs blend in over time.
Speed tricks for large garages
Because large garages multiply every step, working smarter saves hours — and sometimes days — on texture work.
Plan sections, use a hawk and multiple poles, and rent a hopper gun for broad coverage. Prep with drop cloths and trays to reduce cleanup time.
Work with a partner: one mixes and feeds material while the other textures, keeping steady pace and uniform output.
Achieving consistent texture across multiple walls
Speed tricks helped you move fast, but keeping that momentum means matching texture from wall to wall so the garage reads as one finished surface.
Work in consistent sections, keep compound mix, nozzle pressure, and tool angle identical.
Feather overlaps, blend new passes into wet edges, and step back often to spot variations.
Label settings and mark start points to repeat patterns precisely.
Long-term maintenance and touch-up strategy
If you want your garage texture to stay seamless for years, plan a simple maintenance routine and keep a small touch-up kit on hand.
Inspect annually for cracks, chips, and dirt. Clean and spot-prime before repairs. Store matching texture mix, paint, and small tools.
- Keep a labeled sample patch
- Track touch-up dates
- Reblend edges carefully
FAQ
You’ll want clear answers to common questions before you start, like whether you can texture over existing paint and which finishes stand up to damp or cold.
Ask about longevity, suitability for wood or metal, and whether you need special paint after texturing.
I’ll cover each of these so you can choose the right method for your garage.
Can I texture garage walls over existing paint?
Wondering whether you can texture garage walls over existing paint? Yes — but prep matters.
You’ll clean, sand glossy finishes, and repair cracks or peeling. Apply a bonding primer if paint’s glossy or oil-based.
Test adhesion first on a small area. If paint’s loose or too many layers, strip it; otherwise proper prep lets your new texture stick and look professional.
What texture holds up best in damp or cold garages?
Because damp and cold conditions stress coatings, choose textures and materials that resist moisture, mold, and thermal movement.
Go with acrylic or elastomeric textured finishes over properly primed, vapor-resistant drywall or cement board.
Skip delicate popcorn or thin skim coats.
Use slightly open, coarse textures that shed water and hide imperfections, and seal with a breathable, mildewcide-containing topcoat for added protection.
How long does textured finish last in a garage?
How long a textured finish lasts in a garage depends on the material, prep, and conditions—expect anywhere from 5 to 25 years.
With proper surface preparation, quality products, and good ventilation you’ll hit the upper range.
Regular cleaning, prompt repairs of chips or moisture damage, and avoiding impact or heavy abrasion will extend life.
Refinish when wear or staining becomes noticeable.
Can I texture wood or metal surfaces in a garage?
Yes—you can texture both wood and metal surfaces in a garage, but each material needs different prep and products to stick and last.
For wood, sand, fill gaps, and use a primer/sealer designed for porous surfaces.
For metal, remove rust, clean thoroughly, and use etching primer before texture.
Choose flexible, adhesion-friendly compounds and follow manufacturer cure times for durability.
Is special paint required after texturing?
Do you need special paint after texturing? You don’t usually need specialty paint, but choose durable, moisture-resistant latex or acrylic rated for garages.
Use a high-quality primer to seal texture and guarantee adhesion, especially over joint compound or patched areas.
For high-traffic zones, pick a semi-gloss or satin for easier cleaning; flat finishes hide imperfections but stain more easily.
Visual Examples and Project Inspiration
You’ll see clear before-and-after scenarios that show how each texture transforms a garage from plain to polished.
Flip through a texture-style gallery that matches finishes to uses—durable knockdown for high-traffic areas, smooth skim coat for workshop walls, and rugged orange peel for utility spaces.
Use these visuals to pick the look and performance that fit your garage’s needs.
Before-and-after scenarios
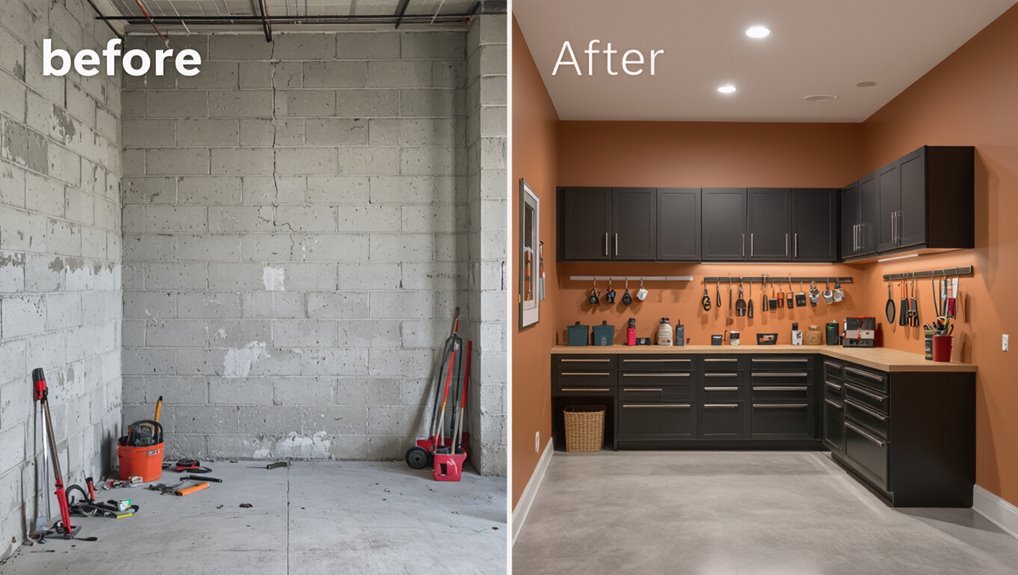
Before-and-after photos show what your garage can become, turning abstract plans into concrete proof that texture, paint, and layout changes really transform a space.
Use staged shots to compare lighting, storage, and wall finish impact.
Note prep steps, timelines, and tools used.
Identify small changes that deliver big visual gains so you can replicate results and avoid common mistakes.
Texture style gallery with recommended uses
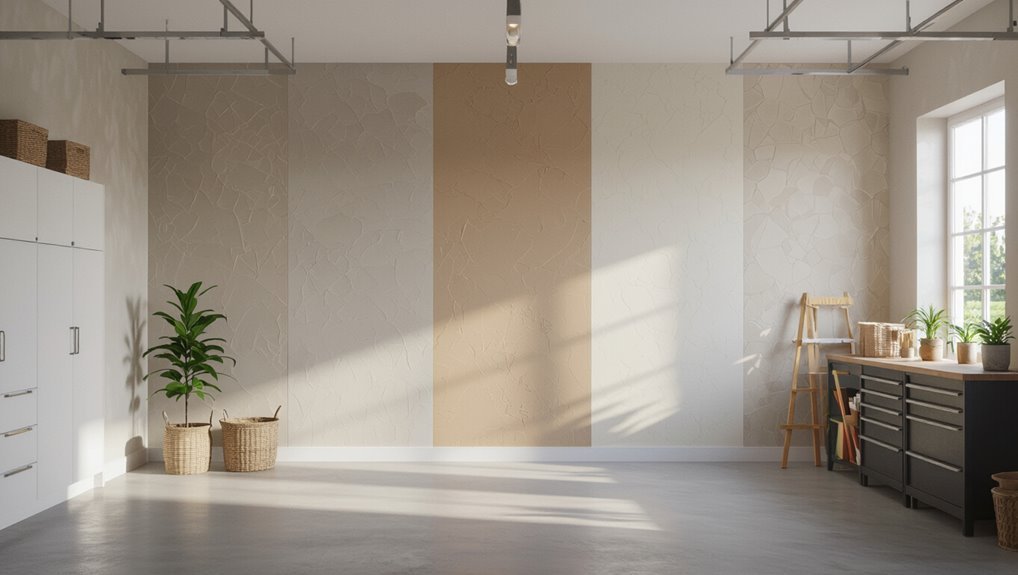
Pick textures that match how you use the garage—smooth painted drywall for clean workshop walls, durable epoxy for floors and lower walls in high-traffic or spill-prone areas, beadboard or shiplap for a decorative workbench backdrop, and textured plaster or stucco for a rugged, finished look in converted living spaces.
Create a gallery of samples, note maintenance, durability, and visual scale, then match styles to function.