How to Repair Plaster Walls With Texture and Make It Look Original
You can make a plaster patch disappear by matching substrate, compound, and texture, then feathering and blending to align with the existing light and shadow. Clean and undercut edges, secure lath, apply bonding agent, build layers for large voids, then replicate the finish (trowel, knockdown, or spray) on test boards first. Sand and prime gently, then match paint sheen. Follow these steps and tips below to get professional-looking results and learn troubleshooting details.
How to Repair Plaster Walls with Texture and Make It Look Original
You can often repair textured plaster so it blends with the original surface if you match the texture, paint, and feather the edges carefully.
Smaller chips and cracks are usually worth fixing, but if large sections are loose, sagging, or have underlying damage you’ll want to replace the whole section.
I’ll show how to judge repairability and techniques to make the patch look original.
Quick Answer Can you repair textured plaster so it matches?
Can textured plaster be repaired so the patch blends seamlessly with the original? Yes — if you follow proven steps for how to repair plaster walls with texture: match the base coat, recreate the texture using appropriate tools, feather edges, and prime before painting.
With patience, practice, and proper materials you’ll hide repairs effectively so they match surrounding surfaces and remain durable.
When to repair vs. when to replace entire section
When damage is small and isolated, repair the textured plaster; when large areas are loose, crumbling, or include multiple failed lath seams, replace the whole section.
You’ll save time and avoid repeated fixes by choosing replacement for pervasive failure, but repairs preserve character when small. Trust your inspection and don’t hesitate to cut out unsafe sections.
- Frustration relieved
- Pride restored
- Calm regained
- Home cherished
Understanding Plaster and Textures
Plaster is a mix of gypsum or lime and sand that you apply wet and shape before it sets, and textured finishes are made by tooling or spraying that material to create patterns.
Common textures you’ll encounter are skip trowel, knockdown, orange peel, stipple, and popcorn, each requiring different tools and techniques.
Matching the original texture matters because a close match hides the repair and keeps the wall looking seamless.
What is plaster and how textured finishes are created
Think of plaster as a durable, spreadable skin for your walls—made from lime, gypsum, or cement mixed with sand and water—that hardens into a solid surface you can shape or finish.
You apply it in layers, trowel or float the surface, then add texture by manipulating wet plaster with tools, brushes, or additives to control grip, drying and final appearance.
Common types of wall texture (skip trowel, knockdown, orange peel, stipple, popcorn)
After you’ve built a smooth base and learned how tools and additives shape wet material, you’ll want to pick a surface look that fits the room.
You’ll recognize styles quickly: skip trowel’s soft swirls, knockdown’s flattened peaks, orange peel’s fine dimpled spray, stipple’s deliberate brushwork, and popcorn’s coarse, retro clusters.
- cozy
- modern
- subtle
- nostalgic
Why matching texture matters for a seamless repair
Matching the existing wall texture keeps repairs from sticking out like a sore thumb, because your eye immediately notices differences in light, shadow, and pattern across a surface.
You need to match scale, rhythm, and finish so repaired areas blend under normal viewing. Proper texture matching hides edges, preserves room character, and avoids repeated touch-ups that draw attention and waste time and materials.
Tools, Materials, and Safety Preparations
Before you start, gather a compact toolkit—joint compound, plaster patch, putty knives, hawk, sanding block, screws, a stud finder, and a trash sheet—so you won’t stop mid-job.
Put on safety gear (respirator, goggles, gloves) and prep the workspace for dust control and ventilation by sealing off the room and using a fan or HEPA vacuum.
As you work, inspect the wall for hairline cracks, loose lath, or signs of moisture so you can choose the right repair method.
Essential tools and materials checklist
You’ll need a compact set of tools, reliable materials, and basic safety gear to get plaster repairs done cleanly and safely.
Gather only what matters: a hawk and trowel for smooth application, joint compound and patching plaster for strength, assorted knives and sanding blocks for shaping, and a texture sponge or brush to match the original finish.
- Trowel & hawk
- Joint compound
- Sanding kit
- Texture tools
Safety gear and workspace prep (dust control, ventilation)
Although plaster repair isn’t wildly hazardous, you should still gear up and control the space to keep dust and debris from spreading.
Wear a respirator rated for fine dust, safety glasses, gloves, and knee pads.
Seal doorways with plastic sheeting, use drop cloths, and run a HEPA air scrubber or window fan exhausting outward.
Clean up with a HEPA vacuum and damp wiping.
How to identify underlying damage (hairline cracks, loose lath, moisture)
How can you tell whether a shallow hairline crack is cosmetic or a sign of deeper trouble?
Tap around: a hollow sound suggests loose lath.
Probe cracks with a knife—if plaster flakes or gaps widen, it’s structural.
Check for staining, peeling paint, or musty odor—those indicate moisture.
Inspect both sides of exterior walls and near plumbing.
Document findings before repairs.
Quick Assessment and Planning
Start by closely inspecting the damaged area and documenting the texture pattern and scale so you know what to match.
Then decide whether a true plaster compound or a lighter joint compound will give the best structural and finish match.
Finally, make small test patches to confirm texture and color before doing the full repair.
Step 1: Inspect and document texture pattern and scale
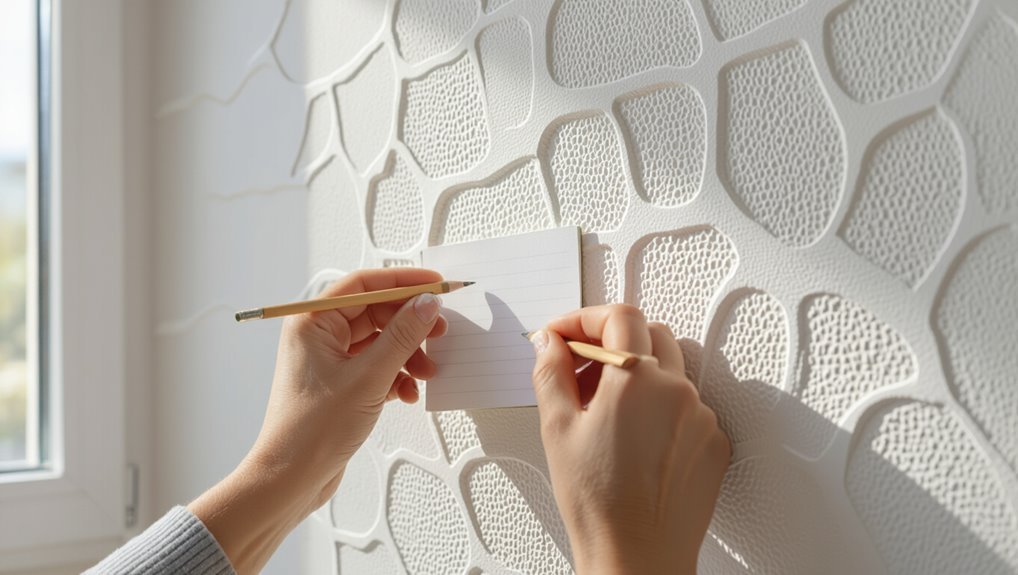
Before you touch plaster or mix a compound, take a close look at the wall and record the texture pattern and scale so your repair will blend in seamlessly.
Photograph sections, note repeat patterns, measure texture height with a ruler, and sketch grain direction.
Mark areas needing repair, include lighting conditions, and save samples for reference so you can replicate the original finish accurately.
Step 2: Choose matching base material (plaster compound vs. joint compound)
Now that you’ve documented the texture and scale, pick a base material that will match both the substrate and the finish so your repair disappears.
If the wall is true plaster, use a setting or skim plaster for strength and adhesion.
For drywall or thin feathering, use lightweight or topping joint compound.
Consider drying time, sanding properties, and shrinkage before you proceed.
Step 3: Test patches and color matching
Do a few small test patches to confirm your chosen compound, texture approach, and paint match will blend with the existing wall.
Mark each patch and note drying time.
Compare texture under varied light and at different distances.
Sand or adjust technique if seams show.
Mix paint with small tint adjustments until color and sheen match, then document ratios for the final repair.
Step-by-Step Repair Process
Start by preparing the damaged area: clean it, remove loose plaster, and undercut the edges so new material will bond.
Then stabilize the substrate with a bonding agent and repair or secure the lath or backing before you fill voids—use a layered approach for large holes and a different technique for hairline cracks.
Finish by recreating the original texture and carefully feathering and blending the edges so the repair disappears.
Step 1 Prepare the damaged area (clean, remove loose plaster, undercut edges)
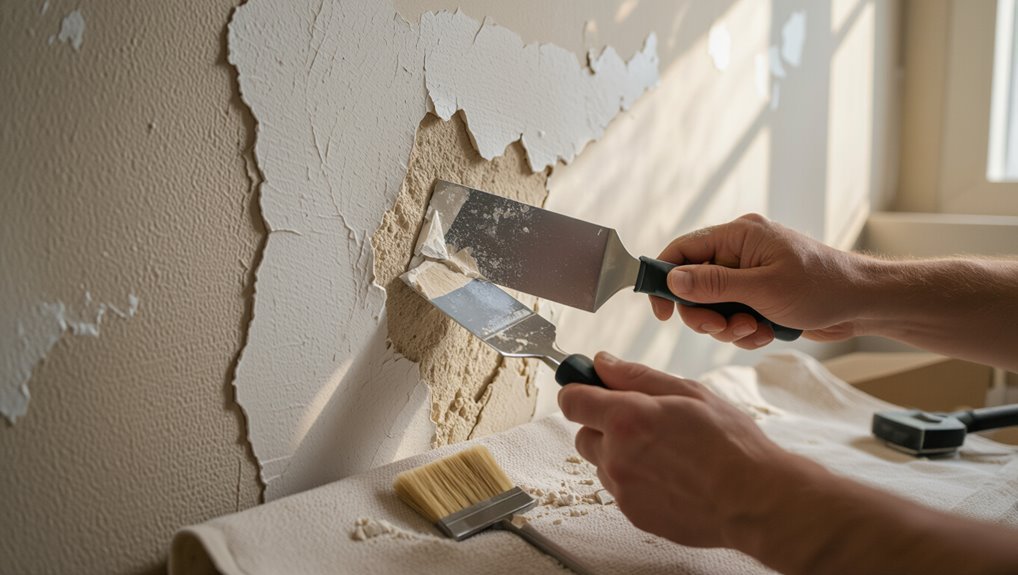
Clear the area and get a good look at the damage before you touch the wall.
Wear dust protection, then remove loose plaster with a putty knife or chisel.
Clean dust and debris, vacuum crevices, and wipe with a damp cloth.
Undercut edges slightly to create a firm bevel for new plaster to key into, ensuring a sound, clean repair perimeter.
Step 2 Stabilize substrate (apply bonding agent, fix lath or backing)
Stabilize the substrate so your new plaster has something solid to bond to: apply a compatible bonding agent to the exposed surface, and repair or replace any damaged lath or backing before you proceed.
Check for loose nails, split wood, or rusted metal; secure or replace fasteners. Verify backing is flush and rigid, then let the bonding agent cure to the manufacturer’s time before moving on.
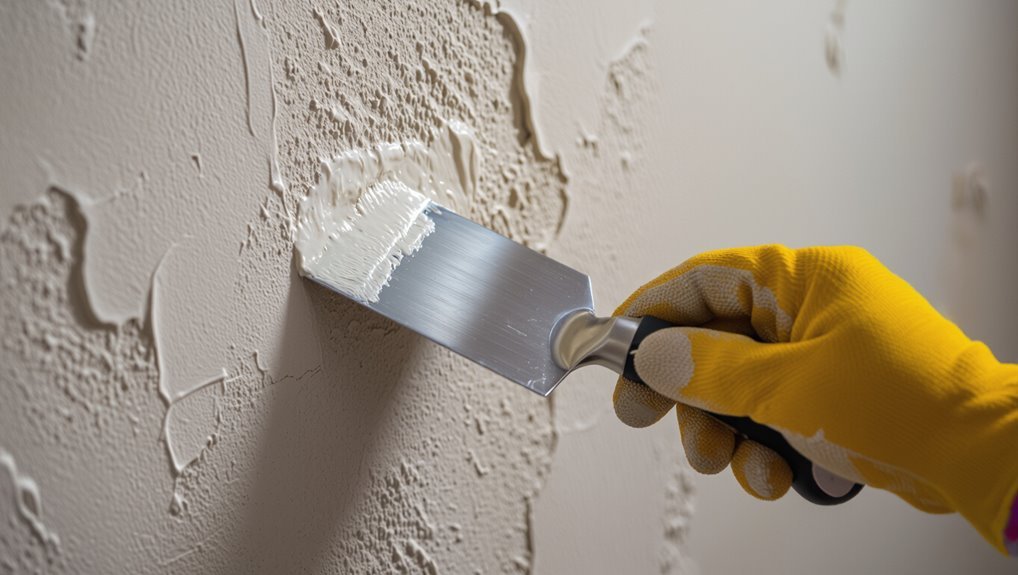
Step 3 Fill large voids vs. hairline cracks (layered approach)
Once the substrate’s secure, decide whether you’re dealing with a large void or a hairline crack, because each needs a different layered approach: fill deep holes with backing or coarse patch in layers to prevent sagging, while hairline cracks get a single thin skim with bonding agent and joint compound.
For voids, build successive thin lifts, letting each cure; sand between coats and finish flush.
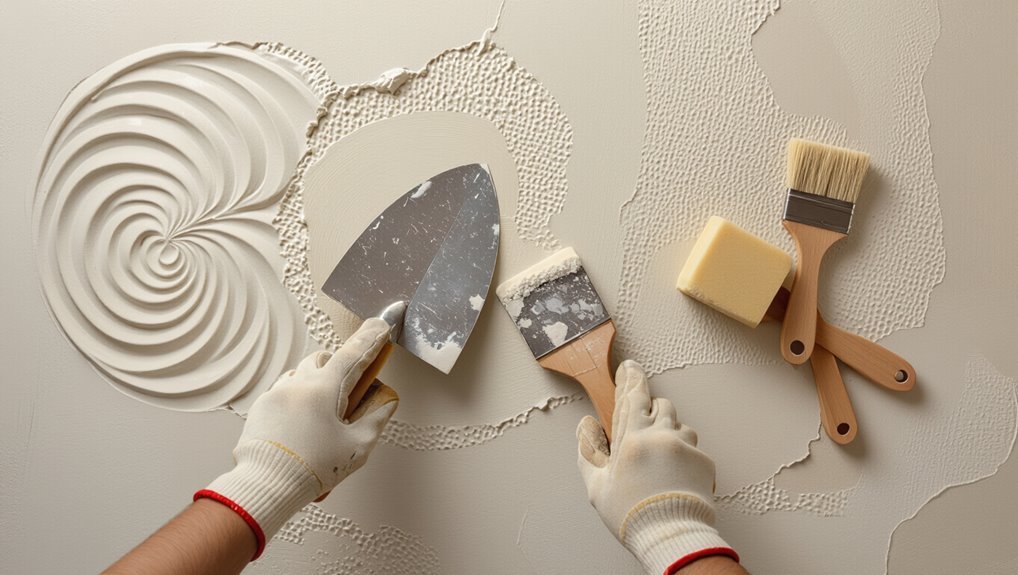
Step 4 Recreate texture: techniques per texture type
Now you’ll match the wall’s original finish by using the right texture technique for each area.
For smooth or Venetian-style surfaces you’ll trowel and burnish; for knockdown textures you’ll apply and flatten peaks with a knife; and for orange peel or spray textures you’ll use a hopper gun or sprayer while stipple/stomp textures are recreated with brush or stomp tools.
Practice on a scrap board first so you can adjust material, pressure, and timing before working on the wall.
Technique: Smooth trowel / Venetian-style textures
Although Venetian-style and smooth trowel finishes look effortless, you’ll need steady pressure, the right joint compound (or thin-set for true Venetian plaster), and a clean stainless steel trowel to recreate them.
Apply thin coats, burnish between layers, feather edges to blend with surrounding surface, and sand lightly only if needed.
Finish with a final polish or sealant for sheen and durability.
Technique: Knockdown texture replication
If you mastered smooth trowel or Venetian techniques, you’ll find knockdown texture is a different rhythm but the same attention to timing and tools.
Mix joint compound to pancake batter thickness, apply with a hawk and trowel or wide knife, let set 10–15 minutes, then gently drag a clean knife at a shallow angle to flatten peaks.
Feather edges to blend.
Technique: Orange peel / spray textures (sprayers, hopper guns)
Grab a hopper gun or texture sprayer and match the spray pattern before you touch the repaired area.
Thin joint compound to the correct viscosity, test on scrap drywall, then adjust air pressure and nozzle size until droplets match.
Lightly mist the patch, feathering edges to blend.
Let dry, then lightly sand high spots and prime before painting for an invisible repair.
Technique: Stipple and stomp textures
Match the original pattern by using a stomp brush or stiff-bristled roller and practice your motion until the texture aligns with the surrounding wall.
Mix joint compound to a peanut-butter thickness, apply with a trowel, then stipple by dabbing or twisting the brush.
Work small areas, feather edges into existing texture, let dry, then sand lightly and touch up paint for a seamless finish.
Step 5 Feathering and blending edges for invisibility
Once the patch is set and sanded smooth, you’ll feather the compound so the repair disappears into the surrounding plaster.
Use a wide drywall knife, thin the edge of compound outward, and work in overlapping strokes.
Blend texture carefully to match pattern, avoid hard ridges, and clean the knife frequently.
Check edges from different angles to guarantee a seamless change before finishing.
Step 6 Drying times, sanding, and finish touches
After you’ve feathered and checked the edges, let the compound cure fully before the final sanding and finish work; drying times vary by product, coat thickness, humidity, and temperature, so plan accordingly.
Once dry, sand gently with fine-grit paper, wipe dust with a tack cloth, inspect for low spots, and apply thin touch-ups.
Smooth shifts and clean surfaces guarantee texture blends before priming.
Step 7 Priming and paint matching for final concealment
1. You’ll prime patched areas with a stain-blocking, bonding primer to seal texture and guarantee even absorption.
Let it dry fully, then test paint samples in natural light. Match sheen and tint, feathering edges with thin coats until invisible.
Blend carefully, clean brushes, and inspect from different angles—tiny adjustments make the repair disappear.
Tools and Technique Comparison Table
Now you’ll compare hand tools and spray equipment so you can pick the right approach for each repair.
Use hand tools for small patches, tight corners, and precise feathering where control matters.
Choose spray gear for large areas or textured finishes when speed and even coverage are your priority.
When to use hand tools vs. spray equipment
When deciding between hand tools and spray equipment, think about the size and detail of the repair: hand tools give you control for small patches, edges, and textured finishes, while spray systems speed up large, flat areas and thin skim coats. You’ll choose care or speed based on patch size, texture match, and your patience.
| Hand Tools | Spray Equipment |
|---|---|
| Precise | Fast |
| Personal | Efficient |
Common Problems and How to Fix Them
You’ll run into a few common issues when repairing plaster: texture mismatches that give away repairs, visible seams after painting, shrinkage or new cracks, and moisture-related deterioration.
Learn how to diagnose each cause and apply the right remedies so your patch blends and holds.
I’ll walk you through prevention and step-by-step fixes for each problem.
Problem: Texture doesn’t match diagnosis and remedies
If the patched area looks different from the surrounding plaster, it usually means your texture, compound thickness, or finishing technique didn’t match the original — and that contrast draws the eye.
You can blend edges, feather compound thinly, match grit and tool marks, then sand and prime. Be patient; repeat thin layers until seamless.
- Frustration melting away
- Pride in subtle success
- Relief when it disappears
- Satisfaction of a perfect match
Problem: Visible seams after painting causes and fixes
Because paint can reveal differences in sheen, thickness, or underlying joint compound, seams often reappear once you coat a repaired area.
You’ll want to address the root causes—insufficient feathering, mismatched primer, or uneven compound application—before repainting.
Sand feathered edges smooth, apply a high-quality primer-sealer, and re-skim with thin coats.
Match texture, let each layer dry fully, then paint.
Problem: Cracking or shrinkage after repair prevention and repair
When repaired plaster cracks or shrinks after drying, it usually means the patching compound wasn’t compatible with the wall, was applied too thickly, or dried too quickly; to prevent this, use the right materials, apply thin feathered coats, and control drying conditions.
If cracks appear, remove loose material, recoat with a compatible filler in thin layers, sand lightly, and retexture to match.
Problem: Moisture-related deterioration remediation steps
Address moisture issues promptly to stop plaster deterioration from getting worse: locate and fix the leak or humidity source, dry the area thoroughly, and remove any softened or moldy plaster so repairs bond to sound material.
After remediation, apply a mold inhibitor, repair with compatible plaster or patching compound, texture to match, and prime with a moisture-resistant primer to prevent recurrence.
Best Practices, Tips, and Time-Saving Hacks
You’ll learn quick tips for matching texture pattern and scale so repairs don’t stand out.
I’ll share pro tricks for feathering and blending fixes across large walls to keep the finish seamless.
You’ll also get clear guidance on when a job’s worth doing yourself and when to call a pro.
Tips for achieving consistent texture pattern and scale
Although matching an existing plaster texture can feel tricky, you can get a consistent pattern and scale by planning ahead and using the right tools.
Study nearby texture, replicate stroke length and tool angle, and test on scrap board. Keep compound consistency, work from one edge outward, and match drying times.
Use the same trowel or sponge to maintain scale and rhythm.
Pro tips for blending repair into large areas
When blending repairs into large plastered areas, plan your sequence so you work from the least visible section toward focal walls and seams.
Tackle one manageable zone at a time to keep texture and drying consistent. Match compound mix, feather edges wider than the patch, use the same tools and strokes, and blend wet into wet when possible.
Sand minimally and check under varied light.
When to call a pro vs. DIY
Wondering whether to tackle the plaster repair yourself or call a pro? You can DIY small cracks and texture-matching if you’re patient and have basic tools.
Call a pro for structural damage, widespread crumbling, electrical/plumbing behind walls, or when time’s tight—pros save stress and guarantee seamless results.
- Frustration eased
- Pride in handiwork
- Relief from risk
- Confidence restored
Cost, Time Estimates, and Materials Calculator
You’ll get a clear sense of typical cost and time ranges for small, medium, and large plaster repairs so you can plan the job.
I’ll show a quick method to estimate material quantities — plaster, mesh, and joint compound — based on hole size and surface area.
Use these simple guidelines to create a basic materials calculator and avoid last-minute trips to the store.
Typical cost and time for small, medium, and large repairs
Small, medium, and large plaster repairs vary widely in cost and time, so it helps to group jobs by size before you estimate materials and labor. You’ll plan labor hours, materials, and drying time: small jobs (1–3 hours), medium (1–2 days), large (several days to a week). Use the table below for quick reference.
| Size | Time / Cost |
|---|---|
| Small | 1–3 hrs / $20–$150 |
| Medium | 1–2 days / $150–$600 |
| Large | Several days–1 week / $600–$2,500 |
How to estimate material quantities quickly
Now that you’ve grouped jobs by size and timing, estimate materials quickly by measuring the damaged area and matching it to product coverage rates.
Calculate patching compound, base coat, and texture mix by area (sq ft) and depth (inches), then convert to volume.
Add 10–15% waste, factor drying coats, and list primer/paint.
Use simple spreadsheet or calculator for fast totals.
Preventive Maintenance to Avoid Future Damage
You should inspect plaster regularly and control moisture by fixing leaks and using dehumidifiers where needed.
Catching and repairing minor cracks early prevents bigger failures later.
Repaint with a quality primer and paint suited for plaster to seal surfaces and protect your repairs.
Routine inspections and moisture control
Although you mightn’t notice them at first, regular inspections and tight moisture control are the best ways to keep plaster walls sound and dry.
Check for damp spots, efflorescence, peeling paint, or musty odors monthly. Fix roof and plumbing leaks promptly, run exhaust fans, and maintain humidity near 40–50%.
Document findings and address moisture sources before mold or structural damage starts.
Repairing minor cracks early and repainting strategies
When you catch hairline cracks early and repair them properly, you’ll stop moisture and movement from widening them into costly problems.
Fill cracks with flexible patching compound, sand smooth, and prime to seal.
Match texture before repainting—feather edges and blend with a small roller or brush.
Use quality paint and seasonal touch-ups to prevent recurrence and keep finishes consistent.
FAQ
You’ll find quick answers here to common worries: how long textured plaster takes to cure, whether you can spray texture over paint, and if repainting hides patches better than blending.
You’ll also learn when joint compound is acceptable for plaster repairs and how to match antique or ornate textures on historic walls.
Use these FAQs to decide the right repair method for your situation.
How long does a textured plaster repair take to fully cure?
Wondering how long a textured plaster repair takes to fully cure?
Typically, surface skin dries within 24–48 hours, but full cure often requires 7–28 days depending on thickness, humidity, ventilation, and product.
Thin skim coats cure faster; thicker repairs need more time.
Keep humidity low, ventilate the room, and avoid sanding or painting until the plaster feels hard and dry throughout.
Can you spray texture over painted surfaces without patching?
Can you spray texture over painted surfaces without patching? You can spray texture onto painted drywall or plaster, but adhesion and appearance vary.
Clean, scuff, and prime glossy paint first. Thin coats work better than heavy ones.
Texture will mask minor flaws but won’t hide deep gouges or loose paint. For lasting results, fix major damage before texturing and follow manufacturer instructions.
Will repainting the entire wall hide a patch better than blending texture?
Is repainting the whole wall a better way to hide a patch than trying to blend texture? Sometimes.
Repainting unifies color and sheen, masking minor differences, but it won’t hide mismatched texture.
If your patch’s texture matches well, spot painting can work. If texture differs, you’ll need to blend or refinish the surface before repainting to achieve an invisible repair.
Is joint compound acceptable for plaster patching?
If you’ve determined that texture and paint won’t hide the repair, you’ll also want to pick the right patching material.
Yes—joint compound works for small to medium plaster repairs if you key the edges, apply in thin coats, and allow full drying between layers.
Use setting-type compound for deeper fills, finish with texture matching, and prime before painting to guarantee adhesion and durability.
How to match antique or ornate plaster textures on historic walls?
When you’re working on historic walls, matching antique or ornate plaster textures starts with careful observation: study the pattern, depth, and tool marks so you can replicate the rhythm and scale rather than guessing at the look.
Photograph and sketch sections, sample-match materials, and practice on scrap. Use period tools or custom templates, build thin layered coats, and blend edges feathered into original texture for seamless repair.