How to Remove Sand Texture Paint From Walls the Easy Way
You can remove sand texture paint the easy way by working in small sections: lightly mist a 5–10 minute area, hold a sharp 5–6″ putty knife at 30–45°, and gently scrape off the grit, keeping the surface damp but not soaked to avoid paper damage; brush or vacuum residue, patch gouges with thin skim coats of joint compound, sand smooth, then prime and repaint; follow safety precautions and PPE, and keep going for tips on tools, timing, and when to hire pro help.
Quick Answer The Easiest Way to Remove Sand Texture Paint from Walls
The fastest practical method is to sand or scrape the sand texture smooth, then skim-coat with joint compound and sand for a flat finish.
You can tackle small areas yourself with basic tools, but hire a pro if the texture covers large surfaces, has damage, or if you want a flawless result fast.
If you’re unsure about structural issues or matching finishes, getting an expert opinion will save time and money.
One-sentence summary of the fastest practical method
If you want the fastest practical result, scrape off the sandy texture with a wide putty knife or drywall taping knife.
Sand the surface smooth, patch any low spots with joint compound, then prime and repaint.
For how to remove sand texture paint from walls, you’ll work systematically across small sections, use medium grit sanding, wipe dust, and apply thin compound layers for a flat, paint-ready finish.
When to hire a pro vs. DIY
When should you hire a pro instead of tackling sand texture removal yourself?
You should DIY for small areas, simple textures, and if you’re confident with sanding and patching.
Hire a pro when walls are extensive, damaged, contain lead/asbestos, or you lack time or tools.
- Large surface area
- Structural or moisture damage
- Suspected hazardous materials
- No time or proper equipment
What Is Sand Texture Paint and Why It’s Used
Sand texture paint mixes paint with fine grit or aggregate to create a rough, tactile finish that hides imperfections and adds visual interest.
You might want it removed because it traps dirt, clashes with modern decor, or was applied unevenly.
Before you start stripping it off, consider the risk of damaging drywall, the effort involved, and whether you’ll need repairs or professional help.
Composition and appearance of sand texture paint
Texture paint with sand-like grit gives walls a tactile, matte finish by mixing fine silica or polymer beads into a latex or acrylic base.
You’ll notice subtle grain, light-diffusing texture, and increased hide over imperfections. Pigments provide color while binders guarantee adhesion and flexibility.
Applied with roller or trowel, it creates uniform roughness that’s durable yet paintable for future updates.
Common reasons homeowners want it removed
Although it was popular for hiding imperfections, many homeowners decide to remove sand texture paint because it traps dust, shows wear unevenly, and makes repainting or patching difficult.
You may also dislike its dated look, find it hard to clean, or want a smoother finish for modern décor.
Removing it can simplify maintenance and let you update wall color or style more easily.
Risks and considerations before removal
Because it contains gritty additives and a thicker binder, sand-texture paint behaves differently than regular paint when you try to remove it, and you should understand those differences before you start.
You’ll face dust, abrasive residue, and uneven substrate exposure.
Wear PPE, test a small area, expect longer sanding or multiple chemical applications, and plan for repair or skim-coating afterward to restore a smooth finish.
Tools, Materials, and Safety Gear You’ll Need
Before you start scraping, gather the right tools: scrapers, putty knives, sanding tools, and a power washer if the surface allows.
Bring materials for repairs and finishing, like joint compound, primer, and paint.
Protect yourself and the room with masks, goggles, drop cloths, and good ventilation.
Tools (scrapers, sanding tools, power washers, putty knives)
Gather the right tools before you start—scrapers, sanding implements, a power washer for exterior jobs, and sturdy putty knives will make removing sand texture far easier and cleaner.
You’ll also want different grit sanders, adhesive-safe scrapers, extension handles, and a shop vac to control dust.
- Flat scrapers
- Sanding blocks/power sanders
- Putty knives
- Power washer
Materials (joint compound, primer, paint)
You’ll need a few key materials to repair and refinish walls after removing sand texture: joint compound for filling and smoothing, a quality primer to seal and level the surface, and paint suited to the room and finish you want.
- Joint compound (lightweight or all-purpose)
- Primer (stain-blocking, high-adhesion)
- Paint (sheen based on room use)
- Sandpaper (various grits)
Safety equipment and room preparation (masks, goggles, drop cloths, ventilation)
Because sanding and scraping kick up dust and debris, wear a proper respirator or dust mask, safety goggles, and work gloves, and protect floors and furniture with sturdy drop cloths or plastic sheeting; also open windows and run fans to keep fresh air moving while you work.
- Respirator or N95 mask
- Safety goggles
- Durable drop cloths/plastic
- Fans for ventilation
Assessing Your Walls Before You Start
Before you start scraping, try a few small test patches to see how the sand texture comes off and whether any underlying paint or wall material is damaged.
Check what your walls are made of—drywall, plaster, or concrete—because each needs a different approach.
Also assess how thick the texture is and how well it’s adhered so you can choose the proper tools and technique.
Test areas and small patch removal
Start by picking a few inconspicuous spots—corners, behind furniture, or inside a closet—where you can test removal methods without risking visible damage.
Try a small area with your chosen technique—wet sponge, scraper, or chemical remover—timing results and noting effort, paint lift, and substrate response.
Record what works, adjust pressure and dwell time, and proceed only when you’re confident.
Identifying wall substrate (drywall, plaster, concrete)
When you’re getting ready to remove sand texture paint, the first practical step is identifying what your walls are made of—drywall, plaster, or concrete—since each needs a different approach and tools.
Tap the surface: drywall sounds hollow, plaster feels solid with layered knocks, concrete is dense and cold.
Check edges, outlets, and thickness to confirm substrate before choosing methods and repair materials.
Determining texture thickness and adhesion
Although you’ve identified the substrate, you still need to gauge how thick and how well the sand texture is stuck to the wall to pick the right removal method.
Press a fingernail or scraper into a small, inconspicuous area to test depth and adherence. Tap for hollow spots.
Thick, firmly bonded texture may require mechanical removal; flaky or powdery areas need gentler scraping and patching.
Step-by-Step Method A Wet Scraping (Best for Thick, Loosely Adhered Texture)
Start by clearing the room and covering floors, trim, and furniture so you won’t track mess everywhere.
Wet the textured surface lightly to soften the sand paint, then scrape with a wide putty knife or scraper held at a shallow angle to lift material.
After you’ve removed the bulk, wash away residue, let the wall dry, and fill any gouges with joint compound before sanding smooth.
Step 1: Prepare the room and protect surfaces
1. Clear the room: remove furniture, curtains, and décor. Turn off HVAC and cover vents.
Lay heavy-duty drop cloths and plastic sheeting over floors, trim, and fixtures, taping edges securely. Protect outlets and switches with painter’s tape and plastic.
Wear gloves, goggles, and a dust mask. Keep a trash bin and tools nearby so you won’t track debris around.
Step 2: Soften texture with controlled water application
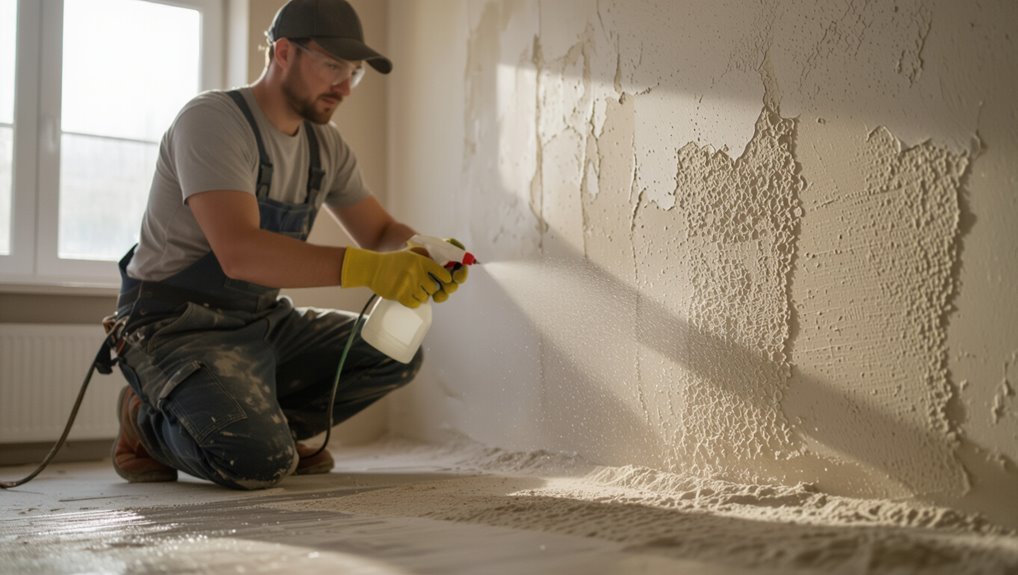
For wet scraping, you’ll soften the sand texture so it releases cleanly without gouging the drywall—this method works best when the texture is thick but not firmly bonded.
Lightly mist a small section with water using a spray bottle, wait 5–10 minutes, and reapply if needed.
Keep the surface damp, not soaked, to prevent paper delamination and minimize mess.
Step 3: Scrape using the right angle and tools
With the surface softened and consistently damp, you’re ready to scrape—doing it at the correct angle and with the right tools makes the difference between clean removal and damaged drywall.
Hold a 5–6-inch putty knife at about 30–45 degrees, push gently to lift texture, and use a wider scraper for large areas.
Keep blades sharp, work in overlapping passes, and discard clogged blades.
Step 4: Clean residue and allow to dry
Brush away loosened grit and rinse the wall so the surface is free of paste, dust, and tiny sand grains that can interfere with sanding or new finishes.
Use a damp sponge or microfiber cloth moving top-to-bottom, then rinse with clean water.
Blot excess moisture with clean towels and let the wall air-dry fully—usually several hours—before any sanding, priming, or painting.
Step 5: Repair gouges with joint compound and sand smooth
Once the wall is dry and free of loose grit, inspect for gouges, ridges, or thin spots left by scraping; you’ll repair these next using joint compound.
Mix lightweight joint compound to a creamy consistency, apply with a putty knife, and feather edges. Let it fully dry, then sand with fine-grit paper until smooth.
Wipe dust away and repeat thin coats for deep gouges.
Step-by-Step Method B Dry Sanding and Skimming (Best for Firmly Adhered or Thin Texture)
If the sand texture is firmly stuck or thin, you’ll want to contain dust and suit up with PPE before you start.
Use a pole or orbital sander to knock down high spots, then apply a thin skim coat of joint compound over the remaining texture and sand it smooth.
Finish by cleaning the surface, priming, and repainting.
Step 1: Set up dust containment and PPE
Start by sealing the work area and gearing up: hang plastic sheeting over doorways and vents, cover floors and furniture with drop cloths, and put on a respirator, safety goggles, and disposable coveralls to keep dust out of your lungs and off your clothes.
Tape seams, create a zipper entry, run a HEPA air scrubber or box fan with a furnace filter, and wear gloves.
Step 2: Sand high spots with pole sander or orbital sander
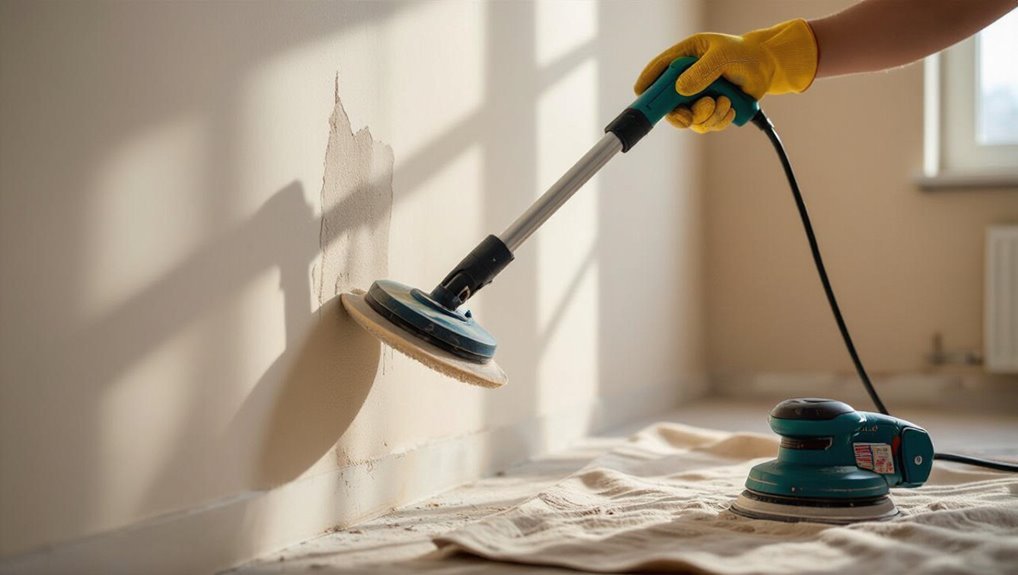
Grab your pole sander or orbital sander and focus on knocking down the highest sand texture peaks first so you can skim the wall smoothly afterward.
Work in even, light passes with 80–120 grit to avoid gouging. Keep the tool flat, check progress often, and vacuum debris regularly.
Stop when peaks are level and the surface feels consistently smooth to the touch.
Step 3: Apply skim coat (joint compound) over remaining texture
Apply a thin skim coat of premixed or freshly mixed joint compound over the remaining sand texture to fill low spots and create a smooth, uniform surface.
Use a 12–18-inch trowel or drywall knife, feathering edges to blend with surrounding wall. Work in manageable sections, keeping compound slightly wet to avoid ridges.
Let it set per product instructions before proceeding.
Step 4: Sand skim coat to a smooth finish
Begin by letting the skim coat fully cure. Then sand it smooth using a pole sander with 120–150 grit sandpaper, working in light, even passes to knock down high spots and blend edges without gouging the compound.
Check for ridges and feather the compound into surrounding wall. Switch to finer grit if needed, vacuum dust frequently, and inspect under raking light for a flawless, uniform surface.
Step 5: Clean, prime, and repaint
With the wall smooth and dust mostly removed, you’re ready to clean, prime, and repaint to seal the skim coat and restore a uniform finish.
Wipe surfaces with a damp cloth, let dry, then apply a quality bonding primer to prevent flashiness and guarantee adhesion.
After primer cures, paint with two thin coats, sanding lightly between coats for a flawless, consistent result.
Step-by-Step Method C Chemical Stripper or Power Tools (When Other Methods Fail)
If scraping and sanding haven’t worked or the texture is thick and stubborn, you’ll consider chemical strippers or power tools like oscillating blades and grinders.
You’ll follow strict safety steps for applying and neutralizing strippers, wear full PPE, and use guards and dust control with any power tool.
After removal you’ll repair gouges, skim where needed, and prep the surface for primer and paint.
When to consider chemical strippers or grinders
When nonabrasive methods and sanding haven’t removed the sand texture—or the coating is thick, oil-based, or bonded to drywall—you should consider chemical strippers or power tools.
Choose them when patching, time, or effort make manual removal impractical, or when textured layers resist scraping.
Prefer grinders only for robust surfaces; opt for strippers when substrate sensitivity or intricate contours make mechanical abrasion risky.
Safe application of chemical strippers and neutralization
Start by protecting yourself and the room: wear a respirator rated for organic vapors, chemical-resistant gloves, eye protection, and disposable coveralls.
Seal off vents, doors, and floors with plastic sheeting to contain fumes and runoff.
Apply stripper in thin, even coats per label, wait recommended dwell time, then scrape gently.
Neutralize residue exactly as product instructions dictate, rinse thoroughly, and ventilate until dry.
Using power tools (oscillating tools, grinders) safely
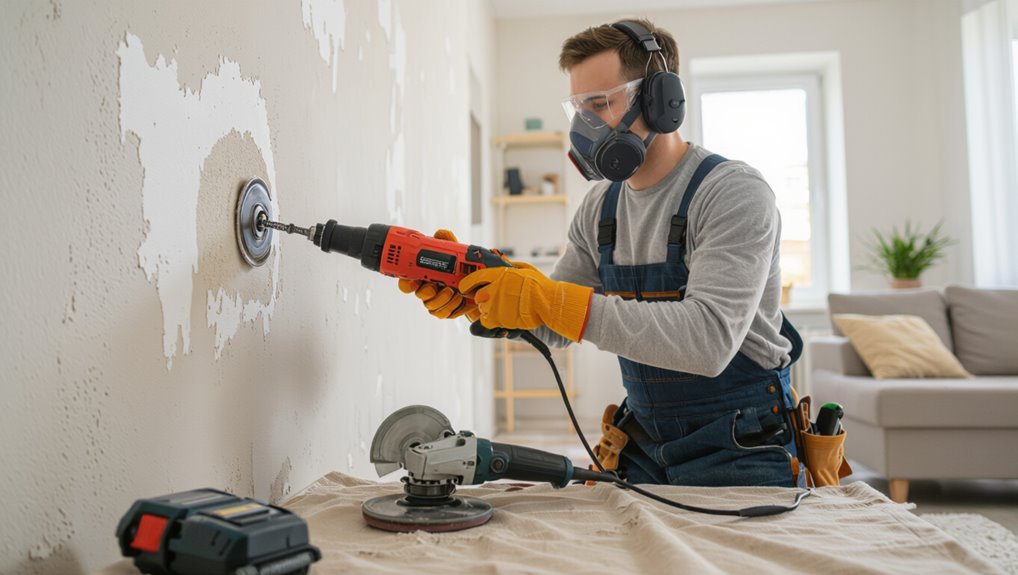
Although power tools can remove stubborn sand texture fast, they demand strict safety and control to avoid damage and injury.
Wear eye, ear, and respiratory protection, gloves, and cover nearby surfaces.
Use low-speed settings, firm two-handed grip, and selection of appropriate abrasive or blade.
Test a small area first, work in short passes, keep dust extraction running, and stop if wall shows distress.
Post-treatment repair and finishing
After you’ve removed the texture with a chemical stripper or power tools, you’ll need to repair the surface so paint and finishes adhere smoothly. This paragraph outlines the key post-treatment steps.
Clean residue, sand feathered edges, and fill gouges with spackle or joint compound.
Sand again, prime with stain-blocking primer, and inspect for imperfections.
Finish with two thin topcoats for durability.
Comparison of Methods Speed, Cost, Mess, and Wall Damage
Now let’s compare each removal method side-by-side for speed, cost, mess, and potential wall damage so you can pick what fits your project.
You’ll see which techniques work best on drywall, plaster, or masonry and which are budget-friendly versus more aggressive.
Use the table to match a method to your wall type, timeline, and tolerance for repair work.
Side-by-side comparison table of methods
Here’s a quick side-by-side look at the main removal methods—scraping, sanding, chemical strippers, and skim-coating—so you can compare speed, cost, mess, and potential wall damage at a glance. Use this to pick a method quickly.
| Method | Speed | Damage |
|---|---|---|
| Scraping | Medium | Low |
| Sanding | Slow | Medium |
| Strippers | Fast | High |
| Skim-coat | Slow | Low |
Which method suits different wall types and budgets
That quick comparison gives you the facts at a glance, but choosing a method comes down to the wall material, your budget, and how much mess and repair you’ll tolerate.
Pick gentle sanding for plaster (low cost, medium mess), chemical stripper for stubborn coatings (higher cost, messy), skim coat for damaged drywall (moderate cost, repair needed), and hire pros for large jobs (fast, costly).
- Gentle sanding
- Chemical stripper
- Skim coat
- Professional removal
Common Mistakes and How to Avoid Them
Don’t over-saturate the wall when softening sand texture, or you’ll weaken drywall and create more work.
If you strip texture without planning to patch and skim, you’ll end up with an uneven, patchy surface.
And don’t skip dust control and safety gear—silica dust and debris can harm you and ruin nearby surfaces.
Over-saturating walls and causing damage
If you soak textured walls while trying to remove sand paint, you’ll damage the finish and the drywall beneath it; the grit holds water and can trap moisture for days, softening joint compound and lifting texture.
Work in small sections, mist lightly, blot frequently, and use a damp—not dripping—sponge.
Dry thoroughly with fans and stop at the first sign of swelling or paint failure.
Removing texture without patching leading to uneven surface
When you scrape or sand off the sand texture without planning to patch, you’ll almost always end up with a mottled, uneven surface where low spots and feathered edges catch light and show through new paint.
To avoid that, inspect for hollows, apply skim coats to level changes, sand minimally between coats, and prime before repainting so finish coats hide variations and reflect evenly.
Skipping proper dust control and safety measures
Although you might be enthusiastic to get stripping, skipping dust control and safety lets fine silica and paint particles spread through your home and into your lungs; wear a proper respirator, eye protection, and disposable coveralls.
Seal off work areas with plastic, run a HEPA filter, and clean with a vacuum rated for fine dust.
Don’t risk long-term health for speed.
Preventing Texture Problems in the Future
To avoid repeating texture headaches, pick paints and finishes that mask flaws and suit the room’s wear.
You can also consider alternatives to full removal, like retexturing or applying a skim coat to renew the surface.
Finally, keep up simple maintenance—regular cleaning, timely touch-ups, and controlling humidity—to help walls stay smooth.
Choosing paint and finishes that hide imperfections
If you want to mask remaining imperfections and avoid repeating texture problems, pick paints and finishes designed to hide surface flaws: flat or matte sheens reduce light reflection and make bumps less noticeable, while high-build primers smooth minor irregularities before topcoat.
Use quality roller nap appropriate for slightly rough surfaces, apply two thin topcoats for even coverage, and choose neutral, mid-tones to minimize contrast.
Alternatives to full removal (retexturing, skim coat)
When you don’t want to strip every trace of sand texture, retexturing or applying a skim coat gives you faster, less disruptive options that still deliver a smooth, paint-ready surface.
You can level rough areas with joint compound, sand between thin layers, and match surrounding patterns or flatten completely.
These approaches save time, reduce dust, and let you repaint without full removal, if done carefully.
Maintenance tips to keep walls smooth
Retexturing or skim-coating gives you a smooth finish now, but you’ll want routines that keep it that way.
Wipe walls monthly with a microfiber cloth to remove dust, fix chips immediately with joint compound, use mild cleaners for stains, control humidity to prevent peeling, and avoid abrasive tools.
Repaint thinly every few years to protect the surface and inspect for damage regularly.
Prep for Repainting Priming, Paint Selection, and Finishing Touches
Once you’ve removed the sand texture and repaired the surface, pick a high-quality primer designed for porous or patched drywall—stain-blocking or bonding primers often work best.
Choose a smooth-looking paint (eggshell or satin for low-sheen, semi-gloss for high-traffic areas) and a paint formulation that levels well to hide minor imperfections.
Before and after painting, run a quick checklist: surface cleanliness, primer adhesion, even coverage, and tack-free finish with no missed spots.
Best primers after removal
Because removing sand texture can leave uneven porosity and residue, you’ll want a primer that seals, evens out the surface, and promotes adhesion—ideally a high-build, stain-blocking PVA or an oil-modified primer for stubborn residues, or a shellac primer where tannin bleed or heavy staining is present.
Choose a primer rated for drywall or previously painted surfaces, apply per manufacturer directions, and sand lightly between coats.
Paint types and sheens for a smooth look
Which paint will give you the smoothest, most durable finish? Choose a high-quality acrylic latex for walls; it levels well, resists yellowing, and cleans easily.
For high-traffic areas pick satin or eggshell—subtle sheen, washable. Use matte or flat only on low-traffic walls to hide imperfections.
For trim and doors, use semi-gloss for durability and easy cleaning; apply with proper tools for a flawless result.
Final inspection checklist before and after repainting
Before you call the job done, run a quick, methodical checklist to confirm prep, priming, paint choice, and finishing touches all meet your standards; this saves time and prevents costly touch-ups later.
- Inspect surface smoothness and repaired blemishes.
- Verify primer coverage and adhesion.
- Confirm correct paint sheen and uniform application.
- Check edges, hardware, and clean-up for a professional finish.
Estimated Time, Cost, and When to Hire a Professional
For a small room you can expect a few hours and a modest materials cost, while medium and large rooms may take a day or more and raise labor and paint expenses accordingly.
If the walls are badly damaged, the texture is extensive, or you don’t have the time and tools, it’s smart to hire a pro who can finish faster and guarantee the result.
Below I’ll break down typical time and cost ranges and list clear signs that mean you should call in a professional.
Typical time and cost breakdowns for small, medium, and large rooms
When planning the work, expect time and cost to scale with room size and surface complexity: you’ll spend more prep and smoothing in larger rooms; factor tools, materials, and cleanup. Typical estimates:
| Room Size | Time | Cost |
|---|---|---|
| Small (100 sq ft) | 4–6 hrs | $50–$150 |
| Medium (200–300 sq ft) | 1–2 days | $150–$400 |
| Large (400+ sq ft) | 2–4 days | $400–$1,000 |
Signs you should hire a pro
If you’re unsure about tackling textured-sand removal yourself, hire a pro—especially if the job involves extensive sanding, hidden damage, or tricky surfaces like high ceilings and crown molding.
Call a pro if you spot mold, structural cracks, lead paint, or uneven drywall.
Also hire help if you lack tools, need fast completion, or want guaranteed finishes and dust containment for safety and cleanup.
FAQ
You probably have a few quick questions before you start—like whether you can remove sand texture yourself without harming the drywall and how long it’ll take for an average room.
You’ll also want to know if removal affects your home’s value, whether you can just paint over the texture, and what to do if you find mold or asbestos.
I’ll answer each so you can choose the safest, most efficient option.
Can I remove sand texture paint myself without damaging drywall?
Can you remove sand texture paint yourself without harming the drywall? Yes—if you proceed carefully.
Use gentle methods: score loose areas, soften texture with a light mist or chemical stripper labeled safe for drywall, then scrape with a wide, flexible putty knife.
Sand lightly, repair gouges with joint compound, and prime before repainting.
Take your time to avoid tears or excessive abrasion.
How long does the removal process take for an average room?
Although time varies with room size and wall condition, expect a typical 10×12 room to take about one full day for removal and prep if you work steadily.
You’ll spend several hours scoring, wetting, and scraping, plus sanding and patching.
Allow extra time for drying compound and final sanding—plan a second short session the next day for touchups and cleanup.
Will removing texture reduce the value of my home?
How will removing sand texture affect your home’s value? It usually depends on buyer preferences and market norms.
If smooth walls match local trends and you finish professionally, value can improve or stay neutral.
Poor repairs or uneven surfaces can hurt appeal and appraisal.
Consider neighborhood standards and hire pros for consistent results that preserve or enhance resale value.
Can I paint over sand texture instead of removing it?
Wondering if you can skip removal and just paint over sand texture? Yes—if the texture is sound and clean, you can prime and paint to refresh walls.
Expect a bumpy finish that highlights light and shadows. Use high-build primer and quality paint to reduce visibility.
For uneven or peeling texture, repair or remove first to avoid poor adhesion and an unattractive result.
What if I discover mold or asbestos during removal?
If you spot mold or suspect asbestos while removing sand texture, stop work immediately and leave the area undisturbed; both hazards require professional testing and remediation.
Call certified testers and abatement professionals, seal the room, and avoid HVAC use that could spread contaminants.
Don’t attempt DIY removal.
Keep others away, document findings with photos, and follow professionals’ clearance before resuming work.