How to Glaze a Wall With Paint for a Rich, Custom Look
You can glaze a wall by first applying a cured basecoat, mixing a translucent glaze with tint or paint, then working in 3×3 to 4×4-foot sections with brushes, rags, sponges, or combs to build depth and texture. Keep a steady pace, overlap wet edges, feather seams, and avoid overworking to prevent lap marks. Allow adequate drying between layers and test techniques on a board—keep going to learn step-by-step methods, tool choices, and pro tips.
Quick Answer Can You Glaze a Wall with Paint for a Rich, Custom Look?
Yes—you can glaze a wall with paint to create soft depth, subtle texture, or dramatic color variation depending on technique and glaze choice.
It’s worth the effort when you want a tailored, high-impact finish that standard paint can’t achieve, especially in focal rooms or to hide minor imperfections.
If you’re after a quick refresh for a low-traffic space, stick with simpler paint finishes instead.
One-sentence summary of glazing outcomes
Glazing a wall with paint gives you a deep, layered finish that adds richness and subtle texture. You can tailor the look from soft antiqued warmth to dramatic depth by varying glaze color, application method, and topcoat sheen.
When you learn how to glaze a wall with paint, you’ll control translucency, pattern, and contrast to achieve anything from gentle aging to bold, painterly depth in one cohesive surface.
When glazing is worth the effort
If you want a rich, custom look that paint alone can’t deliver, glazing is worth the extra time and technique.
You’ll choose glazing when you want depth, subtle texture, or to soften imperfections. It’s ideal for focal walls, historic restorations, or when coordinating layered colors.
Expect longer prep and drying, but the nuanced, durable finish often justifies the effort.
What Is Paint Glazing and Why Use It?
Glazing is a translucent layer of paint you apply over a base coat to create depth, texture, and subtle color shifts that regular flat or eggshell finishes can’t achieve.
You’ll get benefits like richer visual interest, help masking minor wall imperfections, and the ability to tailor tone and sheen for specific rooms or surfaces.
It’s especially useful in living rooms, dining areas, entryways, and on feature walls, cabinets, or textured plaster where you want a custom, layered look.
Definition of glazing vs. regular paint finishes
While both involve paint, glazing differs from standard finishes in purpose and technique: you apply a translucent glaze over a base coat to modify color, add depth, or create textures rather than to provide opaque coverage or protection.
You’ll use thinner, translucent mixtures and tools like brushes, rags, or sponges to manipulate sheen and pattern, versus heavier, uniform coats from regular paint for coverage and durability.
Benefits: depth, texture, color modulation, concealment of imperfections
Now that you know how glazing differs from a standard finish, consider what it actually does for a wall: it adds richness and complexity you can’t get with flat, opaque paint alone.
Glazing builds depth, introduces subtle texture, and lets you modulate color—softening shifts or creating highlights. It also masks minor flaws, so surfaces look intentionally aged or refined instead of merely patched.
Best rooms and surfaces for glazing
Think about how light and function shape a room, and you’ll see where glazing works best: high-traffic spaces like living rooms and entryways benefit from its ability to hide wear while adding warmth.
Dining rooms gain a sophisticated, layered atmosphere, and bedrooms become more intimate with soft, diffused color.
Use glazing on textured walls, plaster, trim, and built-ins; avoid glossy, slick surfaces.
Materials, Tools, and Products You’ll Need
Before you start, you’ll want to choose the right glaze (water- or oil-based) and a compatible basecoat and glaze tint so colors layer correctly.
Gather brushes, rollers, lambswool applicators, rags, sponges, and trowels to achieve different textures and effects.
Don’t forget prep and safety items like drop cloths, painter’s tape, and a respirator for proper protection.
Types of glazes (water-based vs. oil-based)
When you choose a glaze, you’ll pick between water-based and oil-based formulations, each with distinct drying times, cleanup methods, and finish characteristics. You’ll prefer water-based for quick drying and easy soap cleanup; choose oil-based for longer open time and richer leveling, though mineral spirits are required.
| Type | Key trait |
|---|---|
| Water-based | Fast dry |
| Oil-based | Long open time |
| Cleanup | Soap vs. solvent |
Paint selection for glazing (basecoat vs. glaze color)
Although your glaze will add the effect, the basecoat and glaze color choices determine how that effect reads, so pick them with purpose: choose a basecoat with the finish and depth you want—matte hides flaws, satin adds subtle sheen.
Match glaze pigment to mood—tonal for depth, contrasting for drama. Test combos on a large sample before committing to the whole wall.
Tools: brushes, rollers, lambswool, rags, sponges, trowels
You’ll need a few key tools to get a smooth, controllable glaze: quality brushes for cutting and detail, a roller or lambswool cover for laying down base coats and even glaze, assorted rags and sponges for lifting and softening, and a trowel for plaster-style effects.
- Angled sash brush for edges and trim
- Lambswool roller or cover for even application
- Natural-fiber rags and various sponges
Safety and prep materials (drop cloths, tape, respirator)
Start by protecting the room and yourself: lay down sturdy drop cloths to catch drips, tape off trim and outlets with painter’s tape for clean lines, and wear a respirator whenever sanding or working with strong solvents.
Keep extra tape, rags, and a dust mask handy, secure loose furniture, and guarantee ventilation.
Inspect masks and replace filters as needed for safe, efficient glazing.
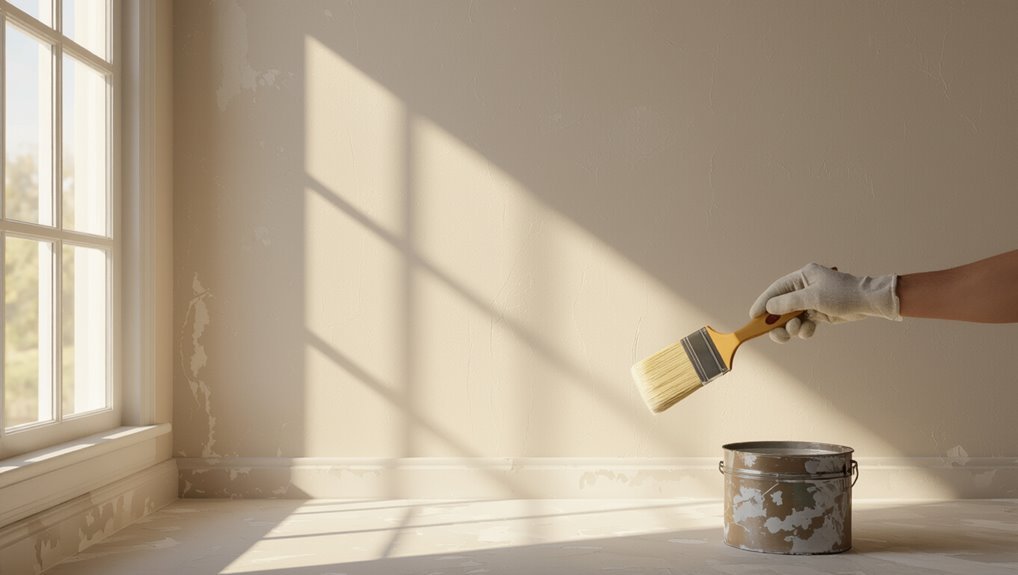
Preparation: Surface and Basecoat
Before you glaze, inspect the wall for cracks, holes, or loose paint and make any necessary repairs so the surface is smooth.
Clean, sand, and prime as needed, then pick a basecoat color and sheen that will support the glaze effect—apply it evenly and allow proper drying time.
Pay attention to temperature and humidity, since they affect drying and the final look.
Inspecting and repairing the wall
Walk the wall slowly, looking for cracks, nail pops, peeling paint, and damp spots so you can address problems before glazing.
Mark defects, remove loose material, and scrape flaking edges.
Fill holes and cracks with suitable filler, press seams, and let repairs cure fully.
Replace rotten drywall sections and treat mold or moisture sources to guarantee a stable, sound surface for glazing.
Cleaning, sanding, and priming
Clear the surface thoroughly so the glaze will adhere evenly: wipe down walls with a mild detergent solution to remove dust, grease, and sanding residue, then rinse with clean water and let them dry completely.
Sand repaired areas and glossy spots smooth, vacuum and tack cloth to remove dust, then apply primer to seal patches and guarantee uniform absorption before glazing.
Choosing and applying the best basecoat color and sheen
Pick a basecoat color and sheen that complements your glaze and the room’s light so the final effect reads as intentional: darker or higher-contrast basecoats make glazes pop, while softer, analogous tones and low sheens produce subtler depth.
Test swatches on the wall, view them at different times, and choose a durable, flat-to-eggshell finish for easy glaze blending and less visible brushstrokes.
Drying times and environmental considerations
Because glaze and basecoat curing depend on temperature, humidity, and airflow, you should plan your timing before you mix paints so you don’t trap moisture or rush the next step.
Work when temperatures are 50–85°F, humidity below 60%, and fans provide gentle airflow.
Allow basecoat 24–48 hours, glaze 4–24 hours between coats, and extend times in cooler, damper conditions.
Step-by-Step Glazing Techniques
Now you’ll choose the glazing method that fits your look and skill level, then mix glaze and paint to the right ratio for flow and transparency.
Prep your tools—brushes, rags, sponges, combs—and get the consistency right before you start.
Work in manageable sections, using techniques like brush-back, wipe-back, ragging, sponging, combing, or feathering while keeping wet edges to blend seamlessly.
Technique Overview choosing the right method
When you choose a glazing method, match the look you want with the surface, paint type, and your skill level so you get consistent results. Different techniques—brushing, ragging, sponging, or using a comb—produce distinct textures and require specific tools and glaze thicknesses.
Consider scale, pattern repeat, drying time, and cleanup. Pick a technique that complements room style and your comfort for predictable, attractive outcomes.
Step 1 Mixing glaze and paint (ratios and consistency)
After you’ve picked a technique, the next step is getting the glaze-to-paint ratio right so the effect lays down smoothly and mixes easily.
You’ll aim for translucency: more glaze for subtle depth, more paint for color. Test mixes on cardboard, adjust until you can still see underlying strokes, and keep consistency like heavy syrup for control.
- Start 1:4 glaze:paint for subtlety
- Test patches
- Stir gently
Step 2 Tools and tool preparation
Because a smooth finish depends as much on your tools as on your mix, take time to select and prep them before you touch the wall.
Choose quality brushes, foam rollers, soft rags, blending brushes, and a tray. Clean, dry, and remove loose bristles.
Tape edges, protect floors, and have stir sticks, a spray bottle, and a lint-free cloth ready for consistent glazing work.
Step 3 Application: brush-back, wipe-back, ragging, sponging, combing, feathering
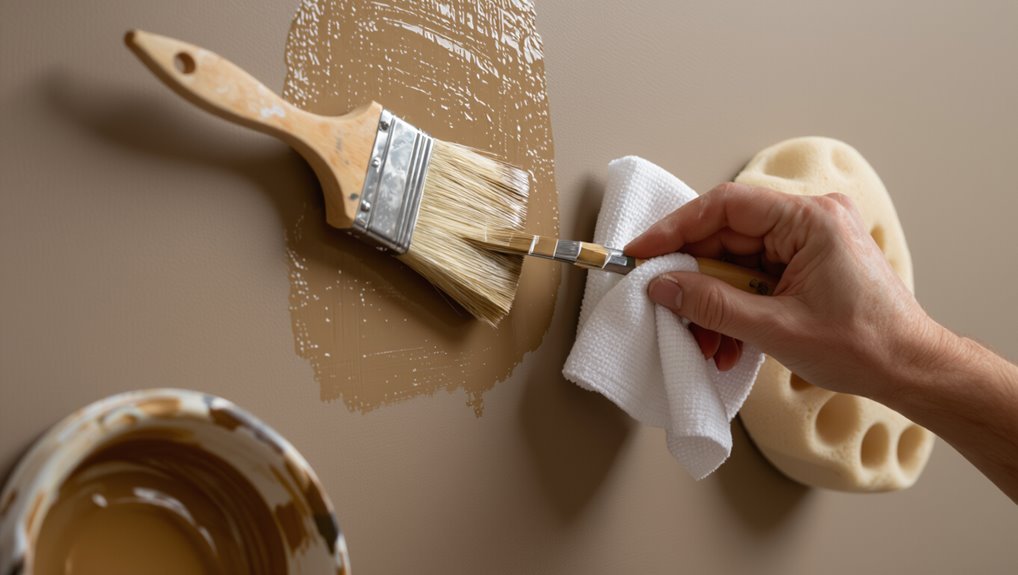
Start by choosing the glazing method that fits your desired texture and work at a steady, deliberate pace so the glaze stays wet while you manipulate it.
Use brush-back for soft strokes, wipe-back to remove excess, ragging or sponging for mottled depth, combing for linear patterns, and feathering to blend edges.
Practice on a board, adjust pressure and overlap for consistency.
Step 4 Working in sections and maintaining wet edges
When you work in manageable sections—usually a 3×3 to 4×4 foot area—you keep the glaze wet long enough to blend and avoid lap marks.
Move methodically from one section to the next, overlapping edges slightly so you can feather the seams while the glaze is still open.
Keep a consistent rhythm, monitor drying, re-wet edges if needed, and finish each section before moving on.
Step 5 Blending, layering, and creating transition zones
Although glazing feels forgiving, blending and layering take practice and a steady hand; you’ll build depth by working wet-over-wet for soft shifts and adding thin, dry layers for more defined bands.
Use a soft brush or suede cloth to feather edges, overlap slightly, and vary pressure.
Establish changeover zones by glazing gradually, stepping back frequently to judge balance and adjust before the glaze skins.
Step 6 Drying between layers and adding glaze layers for depth
Give each glaze layer time to dry fully before you add another, because patience prevents muddiness and lets each translucent coat read clearly; wait per manufacturer instructions and touch-test for tackiness.
Build depth with thin, controlled passes, varying hue and opacity. Step back often to assess cumulative effect.
If corrections are needed, sand lightly between coats and reapply a thin glaze until you achieve balanced translucency.
Design Options and Effects (Styles & Use Cases)
You can choose from subtle color washes and tone-on-tone glazing for a soft, unified look or go bold with faux finishes like suede, marble, linen, or a Venetian plaster effect.
Decide whether an accent wall will add punch or a whole-room glaze will create atmosphere, and consider combining glazing with stencils, metallics, or trim for extra texture and detail.
Think about the room’s light, furniture, and mood to pick the style and placement that’ll work best.
Subtle color wash and tone-on-tone glazing
When you want a refined, layered look without dramatic contrast, subtle color washes and tone-on-tone glazing let a single hue shift gently across the wall, adding depth and warmth while keeping the room calm and cohesive.
You’ll thin glaze for translucence, work in soft, overlapping strokes, and blend edges while wet.
The result is nuanced texture and understated sophistication.
Faux finishes: suede, marble, linen, venetian plaster look
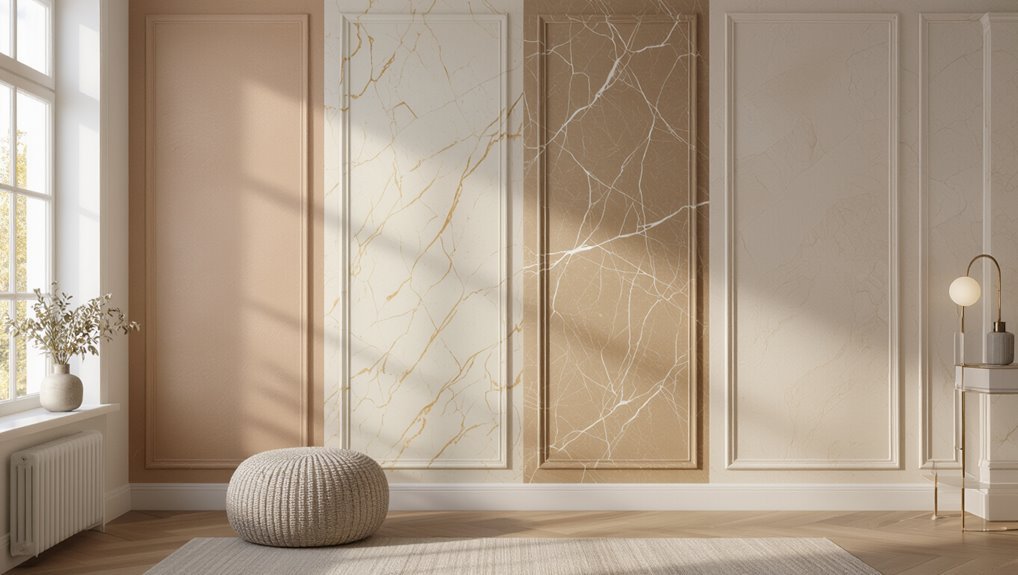
Pick from suede’s soft nap, marble’s veined elegance, linen’s subtle weave, or the luminous depth of Venetian plaster to transform a plain wall into a focal surface.
You’ll choose tools and glazing techniques to mimic textures: soft rags or sponges for suede, veining brushes for marble, crosshatch strokes for linen, and trowel layering plus burnishing for plaster.
Match glaze sheen to finish.
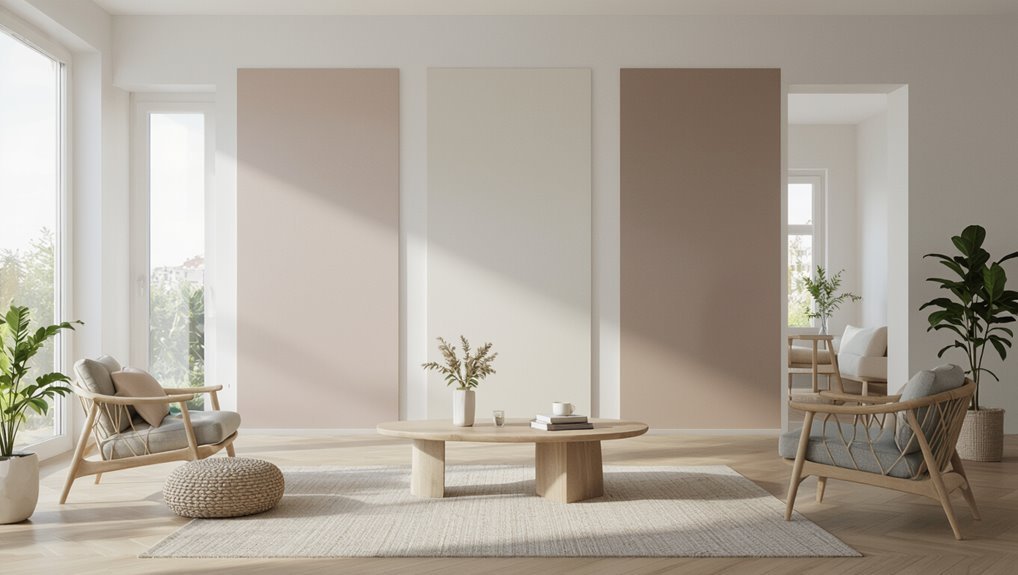
Accent walls vs. whole-room glazing
Although a single glazed accent wall can anchor a room and draw eyes to a fireplace, bed, or entry, glazing an entire room wraps the space in mood and texture, making the effect immersive.
You’ll choose an accent when you want focal impact without overwhelming, or full-room glazing to unify light, color, and atmosphere.
Consider scale, furniture, and lighting before deciding.
Combining glazing with stencils, metallics, and trims
If you want to add pattern, shimmer, or architectural detail, glazing plays nicely with stencils, metallics, and trims to create layered, custom looks.
You can glaze over stenciled motifs for depth, brush metallic glazes for subtle shine, or glaze molded trims to unify color and texture.
Test combinations on a sample board, adjust glaze transparency, and seal to protect the finish.
Common Mistakes and How to Avoid Them
Watch for a few common mistakes that can ruin a glaze: overworking the glaze or leaving visible lap marks, using the wrong glaze-to-paint ratio or failing to blend properly, and skipping surface prep which leads to adhesion issues.
You’ll also want to keep your texture consistent across sections to avoid patchy results. Fixing these early will save time and give you a smooth, professional finish.
Overworking the glaze or visible lap marks
When you drag the brush or rag over the same area too many times, the glaze starts to dry and leave visible lap marks that ruin the smooth, blended look you’re after.
To prevent this, work in manageable sections, keep a wet edge, use light, even strokes, and step back often.
If a mark appears, gently feather it immediately before it sets.
Wrong glaze-to-paint ratio and poor blending
Because glazing depends on the balance between glaze and paint, getting the ratio wrong will leave you with streaks, poor coverage, or a glaze that’s too thin to manipulate—so measure and mix deliberately.
Test small batches, note proportions, and adjust gradually.
Blend wet edges with a clean brush or rag, work in consistent sections, and step back frequently to guarantee even translucency and smooth shifts.
Inadequate surface prep and adhesion failures
Fixing your glaze ratio and blending won’t help much if the paint won’t stick to the wall.
You need to clean, sand glossy surfaces, repair cracks, and remove peeling paint before glazing.
Prime bare or stained areas with a compatible primer to guarantee adhesion.
Test a small patch first.
Skipping prep causes flaking, bubbling, and short-lived results—don’t rush this step.
Inconsistent texture across sections
Uneven texture usually shows up where you start and stop glazing or switch tools midwall, and it screams “amateur” if you don’t address it.
To avoid patchy sections, keep a wet edge, work in consistent strokes, and use the same applicator throughout a wall.
Blend seams immediately, feather edges, and check lighting angles as you go so texture reads uniform across the surface.
Troubleshooting and Fixes
If you notice streaks, ridges, or overlap lines, you’ll learn quick fixes like reworking with a dry brush or feathering the glaze while it’s still tacky.
If the glaze looks too strong, you can tone it down by lightly wiping with a damp sponge or diluting and reapplying a thin mist coat.
For localized damage or peeling, you’ll patch, sand, and blend the area so the repair disappears into the surrounding finish.
Fixing streaks, ridges, and overlap lines
Streaks, ridges, and overlap lines are the most common glaze problems, but you can usually correct them without stripping the whole wall: identify whether the issue comes from too much glaze, inconsistent thickness, or poor feathering.
Then smooth and reblend the area while the glaze is still tacky or sand and recoat if it’s cured. Use a soft brush or damp rag to blend; feather edges.
Removing or toning down an overly strong glaze
When your glaze reads too dark or dramatic, you can dial it back without stripping the whole finish: work while it’s still tacky to soften edges and lift pigment, or if it’s cured, sand and apply a translucent wash or light glaze to neutralize the effect.
Blend by feathering with a damp sponge or dry brush, thin fresh glaze with glaze medium, and test before committing.
Repairing localized damage or peeling glaze
Softening or neutralizing an overly strong glaze is one thing; fixing spots where the glaze has peeled or been damaged requires a different approach.
Scrape loose glaze, sand edges smooth, and clean the area. Prime bare drywall or repaired plaster, then reapply glaze matching technique and sheen.
Feather edges into surrounding finish so repairs blend seamlessly; allow proper drying between coats.
Best Practices and Pro Tips
Before you start glazing the whole room, test panels and mock-ups will save you time and let you tweak color and technique under the actual lighting and viewing distances you’ll use.
Keep lighting consistent while you check samples, care for brushes and tools immediately to guarantee repeatable results, and know that a pro’s help can be worth it for large, complex, or high-value finishes.
If you’re unsure about pattern control, scale, or clean lines, hire a pro instead of risking costly rework.
Test panels and mock-ups before committing
Make a small series of test panels and mock-ups so you can see how your glaze will look under real conditions and tweak technique, color, and sheen before committing to the whole wall.
Paint samples on plywood or foam core, try application methods, drying times, and varnish options.
Compare edges, layering, and cleanup.
Keep notes and photos to reproduce the best result.
Lighting considerations and viewing distance
Because glaze changes with light and distance, you should evaluate your wall under the same lighting and from the same viewing positions you’ll use every day.
Check finishes at different times—morning, midday, evening—and with artificial lights on.
Stand where people will normally view the wall, and from typical distances.
Note glare, depth, and color shift, then adjust glaze translucency or layering accordingly.
Tool care and cleanup for repeatable results
After you’ve checked lighting and viewing distances, turn attention to your tools—consistent glazing depends on them.
Clean brushes and rollers immediately with appropriate solvent, then rinse and reshape bristles.
Store glazes airtight; label mixes and dates.
Replace worn brushes and pads to avoid streaks.
Keep trays, rags, and sponges organized.
Proper care preserves finish quality and guarantees repeatable, professional results.
When to hire a pro vs. DIY
Wondering whether to tackle a glaze yourself or call in a pro?
If you’ve got steady hands, patience, and basic skill, DIY saves money and lets you customize.
Hire a pro if the finish must be flawless, walls have complex textures, or you lack time, tools, or confidence.
Get quotes, check portfolios, and weigh cost versus desired outcome before deciding.
Cost, Time, and Material Estimates
You’ll want a quick time breakdown—prep, glazing, drying, and touch-ups—for a single room so you can plan your weekend or hire help.
Estimate material costs by factoring in glaze, topcoat, brushes/rollers, and tape, and remember brand and surface condition will push the price up or down.
I’ll also share cost-saving tips that keep quality high, like buying concentrated glaze, using quality brushes that last, and prepping properly to avoid rework.
Typical time breakdown for a single room
A typical 12×12-foot room takes about a day and a half from prep to final touch-ups when glazing a single wall.
You’ll spend 2–3 hours cleaning, patching, and taping; 1–2 hours priming and drying; 2–4 hours applying basecoat and glaze layers (including short dry times between passes); and 1–2 hours on detailing and curing prep.
Plan breaks and ventilation.
Ballpark material costs and factors that affect price
Because glazing mixes simple supplies with specialty finishes, expect material costs to vary widely depending on your choices and room size. You’ll pay for base paint, glaze medium, brushes, rollers, and sealers; specialty pigments or metallics raise prices. Estimate $50–$300 for materials in a typical room and adjust for quality and square footage.
| Item | Typical cost |
|---|---|
| Base paint | $20–$100 |
| Glaze medium | $10–$50 |
| Tools | $10–$80 |
| Specialty finishes | $10–$70 |
Cost-saving tips without sacrificing quality
When you want to save money without cutting corners, prioritize smart choices that keep quality intact: buy mid-grade glaze and tint locally, mix only what you need, and reuse drop cloths and rollers when appropriate.
Rent specialty tools, compare paint samples, and do prep yourself. Plan stages to avoid rush corrections, and focus spending on primers and key tools for durable results.
FAQ
You’ll want answers to common concerns like longevity, upkeep, and whether you can glaze over wallpaper or textured surfaces.
Wondering about safety for kids and pets, choosing the right basecoat sheen, or future repainting?
I’ll cover each question so you can move forward with confidence.
How long does a glazed wall last and how do you maintain it?
How long a glazed wall lasts depends on the glaze type, surface preparation, and traffic in the room, but with proper care most glazed finishes remain attractive for 5–15 years; you’ll see longer life with quality products and good prep.
To maintain it, dust regularly, clean gently with mild soap and water, avoid abrasive cleaners, touch up scuffs promptly, and recoat high‑wear areas every few years.
Can you glaze over wallpaper or textured surfaces?
Although you can glaze over some wallpapers and textured surfaces, success depends on the paper type, adhesion, and surface profile.
Check that wallpaper is firmly stuck, unsealed with glossy coatings, and free of tears.
Light textures can accept glaze; heavy textures hide detail and may trap glaze.
Prime or skim coat problematic areas, test a small patch, then proceed with thin, controlled glaze applications.
Is glaze safe for homes with kids and pets?
If your wallpaper or texture testing went well, the next question is whether glaze is safe around kids and pets.
Yes — most water-based glazes are low-VOC and non-toxic when dry. Keep kids and animals away during application and allow full drying/ventilation.
Store products securely, follow label instructions, and consider non-toxic, certified glazes if you’re especially cautious.
How do I choose the right sheen for the basecoat?
When you pick a sheen for the basecoat, think about how much texture or imperfection you want to hide and how the glaze will reflect light.
Matte hides flaws and gives soft, subtle depth; eggshell offers slight sheen and easier cleaning; satin adds durability and highlights glaze effects more.
Choose based on surface condition, desired glow, and room traffic.
Can I repaint over a glazed wall in the future?
Wondering whether you can repaint over a glazed wall later? Yes—you can.
Clean the surface, sand any gloss or texture lightly, and use a good-quality primer to guarantee adhesion and even color.
If the glaze is sealed with varnish, choose a primer compatible with that finish.
Proper prep prevents show-through and helps your new paint layer last.
Visual Inspiration and Before/After Examples
Check out photo examples that show glazing from subtle sheens to bold, dramatic finishes so you can picture what works for your space.
You’ll see short case studies that walk through a small room, a feature wall, and a commercial space, highlighting materials, techniques, and outcomes.
Use these before-and-after shots to set expectations and spark ideas for your own project.
Photo examples of subtle to dramatic glazing
Whether you prefer barely-there texture or a bold, layered statement, photo examples make it easy to picture how glazing will change a room.
Study close-ups showing brush, rag, and dry-brush effects, then compare full-room shots to judge scale.
Use before/after pairs to see subtle shifts in warmth or dramatic depth, and save images that match your light and style for reference.
Short case studies: small room, feature wall, commercial space
When you want to see glazing’s real impact, short case studies give clear, usable examples: you’ll visualize techniques, scale, and mood quickly.
Use these concise before/after snapshots to guide choices, materials, and timing.
- Small room: soft glaze to enlarge and warm a cozy space.
- Feature wall: bold texture for drama without overwhelming.
- Commercial space: durable glaze for brand atmosphere and traffic.