How to Edge Paint a Wall Without Tape or Drips
You can cut clean, drip-free edges without tape by using a slim angled brush, loading only the lower third of the bristles, and anchoring short, controlled strokes along trim and ceilings. Hold the brush near the ferrule, keep light pressure, and feather each stroke outward into a small wet-edge section before reloading. Work in 2–3 foot sections, wipe drips immediately, and touch up with light sanding if needed—keep going to learn step-by-step techniques and fixes.
Quick Answer How to Edge Paint a Wall Without Tape or Drips
You can edge paint a wall without tape by using a steady hand, a slim angled brush, and feathering strokes to keep paint off adjacent surfaces.
Choose this method when you’re comfortable cutting in freehand, working on small areas, or want to save time on setup and cleanup.
If you need perfect lines or are painting around trim that can’t be touched, go with tape instead.
One-sentence summary of the technique
If you want crisp, drip-free edges without tape, run a steady, light-loaded angled brush along the corner with the bristles slightly fanned and a controlled, continuous stroke.
Wiping excess paint off the brush on a rag between passes will help prevent buildup.
You’ll learn how to edge paint a wall by maintaining consistent pressure, short overlapping strokes, and frequent brush cleaning for an even, sharp finish.
When to choose this method over taping
When working on small areas, quick touch-ups, or projects where speed and a seamless finish matter more than perfect straight lines, choose edging with a steady brush instead of tape; it saves setup time, avoids adhesive residue, and gives you finer control along trim and corners.
Use brush edging when surfaces are clean, trim is irregular, or you want minimal prep—reserve tape for long, critical straight runs.
Basic Understanding What Edge Painting Is and Why Avoid Tape or Drips
Edging means cutting a clean line where the wall meets trim, ceiling, or another color, and you’ll do it with a steady brush rather than broad strokes.
Drips and bleed usually come from too much paint on the brush, a shaky hand, or working too fast, so you want to control load and pressure.
Cutting in without tape speeds the job, gives a crisper finish, and cuts setup and cleanup time when you use the right technique.
What ‘œedging’ means in wall painting
Think of edging as the careful work of painting the narrow strips where wall meets trim, ceiling, or adjoining colors; it’s how you create clean, professional-looking lines without relying on tape.
You steady your hand, guide a loaded brush, and control paint flow to define boundaries. Edging balances speed and finesse so finishes look crisp and intentional, not sloppy or unfinished.
Common causes of drips and bleed when cutting in
One common reason you get drips or bleed while cutting in is loading the brush with too much paint—excess pools at the bristles’ tip and runs down the wall before it can level.
Other causes include forcing a worn or stiff brush, working too slowly so paint overbuilds, painting over damp or glossy surfaces, and pressing too hard—each lets paint migrate past the targeted edge.
Benefits of cutting in without tape (speed, cleaner finish, less setup)
If you stop loading the brush and fix the causes of drips, you’ll find cutting in by hand becomes faster and cleaner than relying on tape.
You’ll save setup time, skip sticky residue, and move room to room quickly. Your edges look crisper because you control paint flow directly, and touchups are minimal.
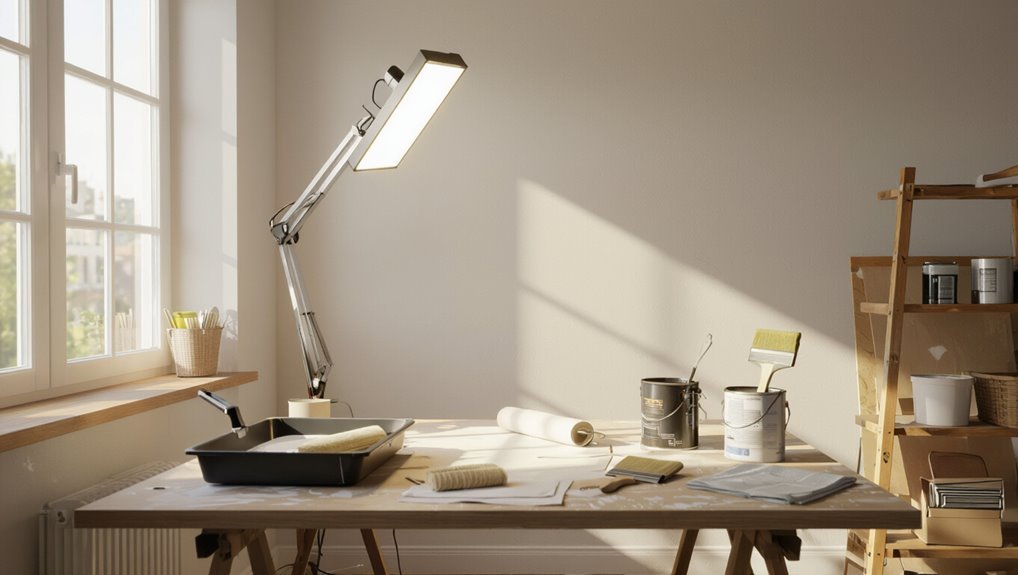
Essential Tools and Materials
Before you start edging, gather the right brushes, rollers, and trim tools so you can make crisp lines without dragging paint.
Pick paint with the proper viscosity for your brushes and rollers, and keep optional accessories—paint edgers, angled spatulas, damp cloths—on hand for touch-ups.
Don’t forget safety and prep: drop cloths, a stable ladder, and gloves will keep the job clean and safe.
Brush types and sizes for clean edges
Choose the right brush and you’ll cut crisp, professional-looking edges with far less touch-up.
You’ll pick based on paint type and edge detail: synthetic for latex, natural for oils. Match brush width to trim length and corner tightness so you control paint load and stroke.
- 1–1.5″ angled for tight corners
- 2–3″ sash for long runs
- Thin filbert for curves
- Quality synthetic for durability
Roller types and trim tools
After you’ve picked the right brushes for sharp edges, pick rollers and trim tools that keep those edges consistent and speed up the job.
You’ll want compact, precise gear:
- Mini roller (smooth surfaces)
- Foam roller (no texture)
- Angled trim pad (tight corners)
- Edging tool/sash brush guide (steady line)
Use each to maintain control and reduce touch-ups.
Paint types and viscosity considerations
If you want crisp edges and smooth coverage, pick the right paint type and mind its viscosity—latex and acrylic latex are forgiving for walls and dry fast, while oil-based paints level out better but need longer drying and stronger solvents.
You’ll adjust thickness for absorbent surfaces and edging techniques.
- Test flow on scrap
- Thin sparingly with manufacturer-recommended solvent
- Use slow-drying for blending
- Avoid over-thinning
Optional accessories: paint edgers, angled spatulas, damp cloths
Knowing your paint’s flow helps you decide which accessories will speed edging and reduce mistakes.
You’ll want tools that control application and cleanup without masking. Consider these options:
- Paint edger for consistent lines and minimal drips.
- Angled spatula to smooth and remove excess.
- Damp cloth for immediate wipes and feathering.
- Small brush for touchups and tight corners.
Safety and prep materials (drop cloths, ladder, gloves)
One clear rule: protect the room and yourself before you touch a brush.
You’ll set drop cloths, secure a steady ladder, and wear gloves to keep paint off skin. Keep tools organized and within reach.
Follow this quick checklist:
- Heavy-duty drop cloths
- Stable ladder or step stool
- Nitrile or latex gloves
- Small bucket for drips and cleanup
Preparation Steps Before Cutting In
Before you start cutting in, make sure the surface is clean, patched, and dry so the paint will stick evenly.
Check that the primer and paint are compatible, thin and mix the paint to the manufacturer’s specs, and test consistency on a scrap.
Finally, set up good lighting and clear your workspace so you can see edges and move without smudging.
Surface cleaning and patching
Start by thoroughly cleaning and patching the area you’ll be cutting in so the paint adheres and the lines stay crisp.
Wipe away dust, grease, and cobwebs with a mild detergent, then rinse and dry.
Fill holes and cracks with lightweight spackle, smooth with a putty knife, sand once dry, and remove residue so edges lay flat and paint flows evenly.
Priming and paint compatibility checks
Although a good clean and smooth patching job sets the stage, you’ll want to check compatibility and prime where needed so your cut-in lines stay true and the new paint bonds properly.
Test existing finish with a solvent, sand glossy areas, and use a stain-blocking or adhesion primer on repairs, bare drywall, or mixed surfaces.
Match primer type to your topcoat.
Proper paint thinning and mixing
Once your primer has dried and you’ve confirmed compatibility, get the paint ready for cutting in by mixing and thinning it correctly so your brush leaves a smooth, controllable edge.
Stir thoroughly to reincorporate pigments; use a mechanical stirrer or slow, steady motion.
Thin sparingly with manufacturer-recommended solvent—test on a sample board.
Aim for a creamy, brushable consistency that holds an edge without dripping.
Setting up lighting and workspace for visibility
Before you cut in, make sure your workspace lets you see the edge clearly: position a bright, shadow-free light source so it grazes the wall at a low angle, move furniture and drop cloths out of the way, and keep your tools within easy reach.
- Use a portable LED work light.
- Angle light low and along the wall.
- Clear floor and obstacles.
- Arrange brush, tray, and rag nearby.
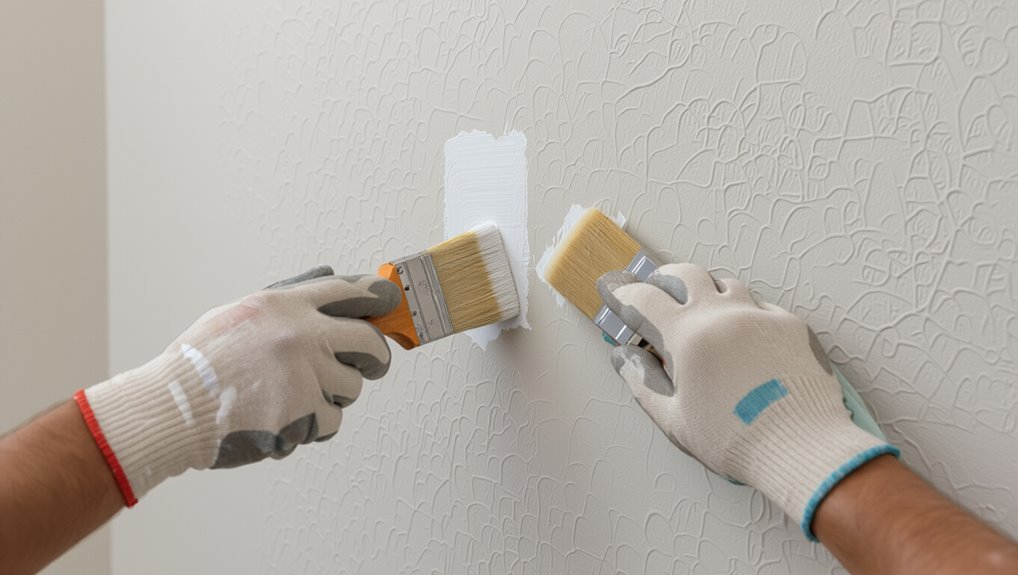
Step-by-Step Method to Edge Paint Without Tape
Start by loading just the tip of your brush so you’ve got control without drips. Anchor a steady stroke along the trim or ceiling, then use a single pull stroke to blend away from the corner and avoid overlaps.
Feather the edge, work in small sections, and keep a wet edge to hide brush marks.
Step 1 Load and control the brush: how much paint to pick up

Grab a modest amount of paint on your brush—dip only the lower third of the bristles—and tap the excess on the can’s rim so the brush isn’t dripping.
Hold the brush near the ferrule for control, wipe one side lightly against the rim to shape the tip, and keep a steady wrist.
Reload frequently; wet paint, not globs, guarantees clean, controllable strokes.
Step 2 The anchor stroke: establishing a solid edge along trim or ceiling
1. You’ll anchor the brush tip against trim or ceiling, resting bristles lightly so paint forms a crisp line.
Work in short, controlled strokes, moving the ferrule parallel to the edge. Keep wrist steady and reload sparingly to avoid blobs.
If you drag, lift and reset; if gaps appear, touch up with tiny, deliberate dabs until the edge reads clean and continuous.
Step 3 The pull stroke: blending away from the corner without overlapping
With the anchor stroke set, pull strokes will blend the paint away from the corner so the edge reads seamless without overlapping the trim.
Load a small amount on the brush, angle bristles slightly away from trim, then draw one confident stroke outward.
Don’t rock or rework; stop at a uniform distance.
Repeat consistent, short pulls until the area’s covered and smooth.
Step 4 Feathering technique to avoid visible brush marks
Start by loading a minimal amount of paint on the tip of your brush so you can lightly skim the surface instead of laying down a heavy coat.
Hold the brush at a low angle, drag outward with gentle, short strokes, then lift gradually to soften edges.
Repeat overlapping strokes while keeping pressure light so brush marks blend into a seamless, feathered finish.
Step 5 Working in small sections and maintaining a wet edge
Work in small, manageable sections—about 2–3 feet wide—so you can keep each area wet while you paint the adjacent trim; this prevents lap marks and helps your feathering blend seamlessly into the wall.
Move steadily, finish one section before the next, reload your brush appropriately, and overlap slightly into the wet edge to merge strokes.
Keep a consistent pace to avoid drying lines.
Step 6 Use of a shield/edger tool for straight lines (how to steady and move)
Grab a shield or edger tool and hold it flush against the trim as you paint, using your free hand or a helper to steady it so the edge stays tight and consistent.
Move the tool slowly along the line, keeping even pressure. Tilt slightly to control bead thickness, pause at corners, and overlap short strokes.
Clean excess paint from the shield as you go.
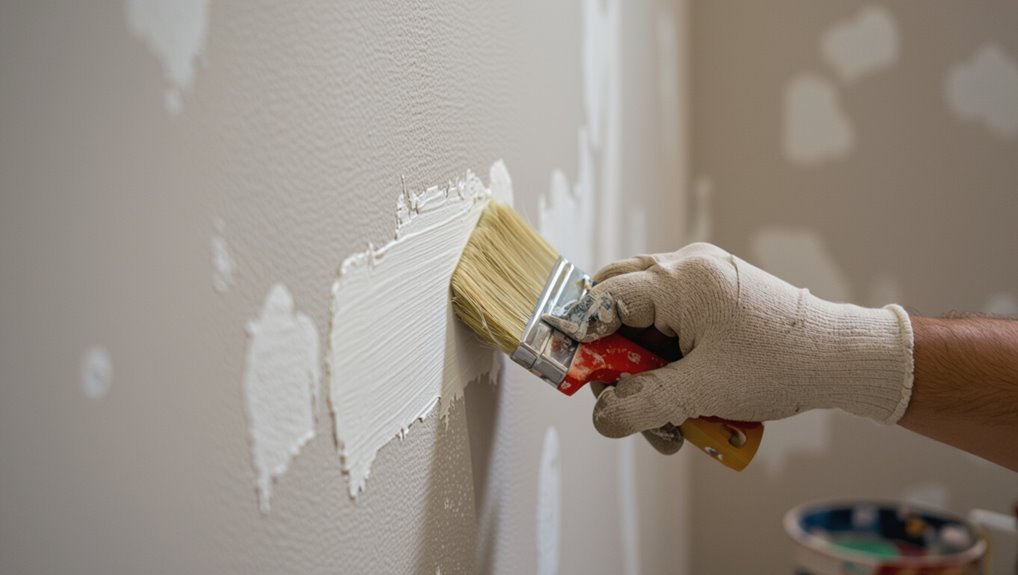
Step 7 Back-brushing or smoothing to remove lines and prevent drips
After you’ve edged a section, immediately back-brush the wet paint with a clean, angled brush to smooth the bead, blend it into the adjacent surface, and knock down any drips before they set.
Work with light, even strokes away from the edge, reloading the brush sparingly. Inspect for thin spots or ridges and feather until the line is seamless and level with the wall.
Step 8 How to handle inside corners, outside corners, and textured surfaces
3 common challenges you’ll meet at corners and on textured walls require slightly different techniques to keep your edge sharp without tape.
For inside corners, load a small brush and cut in vertically, feathering into the joint.
For outside corners, paint the flat face first, then roll the corner edge.
On textured surfaces, use a stippling brush or thin multiple coats to avoid buildup.
Alternative Methods and Tools Comparison
You’ll weigh paint edger tools against an angled sash brush to see which gives cleaner lines and faster coverage.
Decide whether a mini roller for final blending beats a pure brush technique for a seamless finish.
And you’ll learn when a paint shield or a homemade cardboard guard is the smarter, quicker option for tricky corners.
Paint edger tools vs. angled sash brush
When you’re deciding between paint edger tools and an angled sash brush, think about speed versus control: edgers let you cover long straight runs quickly and keep a consistent line with less skill, while an angled sash brush gives you finer precision around trim, corners, and tricky spots if you’re willing to work more carefully.
| Tool | Best use |
|---|---|
| Paint edger | Straight runs, speed |
| Angled sash brush | Precision, corners |
| Combination | Balance speed + control |
Using a mini roller for final blending vs. pure brush technique
One simple way to get a seamless edge is to follow your brushwork with a mini roller for a quick blend, while sticking to a pure brush technique gives you maximum control at the cut line but can leave subtle texture differences. You’ll choose based on speed, texture, and control.
| Method | Speed | Texture |
|---|---|---|
| Mini roller | Fast | Smooth |
| Brush only | Slow | Detailed |
| Hybrid | Moderate | Balanced |
When to use a paint shield or homemade cardboard guard
If you need crisp, consistent lines quickly, reach for a paint shield or a homemade cardboard guard to block stray strokes and protect adjacent surfaces.
You’ll use them when edges are narrow, trim is delicate, time is limited, or you’re skipping tape.
Choose a shield for speed and durability, cardboard for cheap custom fits, and steady your hand while painting.
- Narrow gaps
- Delicate trim
- Time crunch
- No-tape jobs
Common Problems, Why They Happen, and How to Fix Them
You’ll run into a few common problems when edging—drips and runs, paint bleeding or feathering, uneven or wavy lines, and visible brush marks or texture differences.
I’ll show how to stop drips while the paint’s wet, how to fix bleeds both before and after the paint cures, how to adjust your technique to straighten lines, and when to smooth or sand to remove texture.
Follow these tips and you’ll get cleaner, sharper edges with less rework.
Drips and runs prevention and cleanup while wet
When paint starts to bead or sag along the edge, act quickly to stop drips and runs before they dry; catching them while wet makes cleanup far easier and prevents noticeable blemishes once the job’s finished.
Wipe excess with a clean, damp cloth or foam brush, working downward. Smooth the area with light back-brushing, remove pooled paint, and reblend gently to restore the edge.
Paint bleed/feathering issues how to correct edges after paint cures
Although you’ve already let the paint cure, you can still fix bleed and feathered edges without repainting the whole wall; understanding why the paint migrated or feathered will guide a targeted repair.
Sand feathered ridges smooth, vacuum, then wipe with a damp cloth.
Prime glossy or stained spots.
Recut a crisp edge with a small angled brush and light coat, feathering outward for seamless blend.
Uneven lines or wavy edges troubleshooting technique adjustments
Fixing bleed and feathering is one thing; getting straight, even lines takes a different set of tweaks.
If your edges wobble, check your stance, brush angle, and steadying hand—support your wrist on the wall. Use shorter, controlled strokes, re-load less paint, and pull rather than push.
Slow your pace, keep a consistent pressure, and practice on scrap before committing to the wall.
Brush marks and texture differences smoothing and sanding fixes
Sand and feather any rough spots before you repaint so brush strokes don’t become permanent.
If texture differs, sand high areas with fine-grit, wipe dust, then apply a thin skim coat of joint compound or primer to level.
Use light, even brush or roller strokes with matching nap and thinned paint to blend.
Let dry, sand lightly, and recoating will hide marks.
Best Practices, Tips, and Shortcuts
Keep your brushes conditioned during long jobs and follow ideal drying times between coats so your edges stay crisp.
Plan an efficient workflow—cut in before rolling in sections—and use small pro hacks like magnetic tape or wet-edge glazes to save time.
Know when a tricky area or large job is better handled by a pro instead of pushing a DIY beyond your skill.
Maintaining brush condition during long jobs
1 simple routine will save you hours of frustration when you’re edge painting: treat your brush like a precision tool.
Rinse it briefly between sections, shake out excess, and wrap bristles in a damp cloth to prevent drying.
Rest the brush flat or hanging by the handle to avoid misshaping.
Clean thoroughly at job’s end and store bristles protected for consistent performance.
Ideal drying times between coats and how that affects edging
Once your brush-care routine is set, pay close attention to drying times between coats because they directly affect how clean your edges will be.
Let the first coat dry fully to touch—usually one to four hours depending on paint and humidity—before edging. Rushing causes smudges and lifting; waiting guarantees crisp lines and proper adhesion.
Test a small area if unsure.
Efficient workflow: sequence for cutting in and rolling
Start by cutting in the perimeter before you roll the main field: paint a two- to three-inch band along ceilings, corners, and trim so you can blend the roller into wet edges and avoid lap marks.
Work one wall at a time, cut in, then immediately roll from top to bottom with a loaded roller.
Keep a wet edge and maintain steady, overlapping passes.
Small time-saving hacks professionals use
After you’ve cut in and rolled each wall while keeping a wet edge, you can shave minutes off the job with a few pro shortcuts.
Use these quick tricks to work smarter, not harder:
- Keep a damp rag to wipe drips immediately.
- Use a trimmed brush for faster, cleaner edges.
- Load roller evenly on a grid.
- Work top-to-bottom per wall to avoid overlap.
When to call a pro vs. DIY
Wondering whether you should tackle edge painting yourself or call a pro?
If you’re comfortable with steady hands, minor repairs, and patience, DIY saves money and offers control.
Call a pro for large rooms, complex trim, textured surfaces, or tight deadlines.
Hire one if you lack tools, mobility, or confidence—professionals deliver speed, flawless edges, and cleanup.
Materials and Tool Care After Painting
Once you finish edging, clean brushes and edgers promptly to keep their edge sharp and prevent dried paint buildup.
If you’ve got more coats coming, seal partly used paint and wrap tools to stay ready between sessions.
Keep a small stash of mixed paint and a fine brush for quick touch-ups so you can fix minor nicks later without redoing the whole edge.
How to clean brushes and edgers to preserve edge performance
Keep your brushes and edgers sharp by cleaning them promptly and correctly after each job.
Rinse water-based paint with warm water and mild soap, working bristles and edges until water runs clear.
For oil-based finishes, use mineral spirits then wash with soap and water.
Comb bristles, reshape heads, blot dry, and let tools air-dry fully before reuse to preserve edge performance.
Storing partly used paint and tools between coats
If you’re pausing between coats, seal and stash your paint and tools properly to save time and prevent waste.
Pour leftover paint back into its can, stir, wipe the rim, and press plastic wrap over the opening before screwing the lid tight.
Wrap brushes and edgers in damp cloths or place them in airtight bags to keep bristles pliable until you resume.
Minor touch-up strategies for later fixes
When small scuffs or chips appear after the paint’s dried, tackle them quickly to blend repairs with the surrounding finish: clean the spot, sand feathered edges, dab primer if bare, then use a fine brush or small roller with matched paint.
Layer thinly, let each coat dry, then gently sand and wipe.
Store a tiny sample for future fast fixes.
FAQ Quick Answers to Common Questions
You’ll find quick, practical answers here to common edge-painting questions like using assistive tools if you don’t have a steady hand and whether the method works on high- or semi-gloss trims.
You’ll also learn how long to wait before removing a paint shield or wiping drips, whether to cut in ceiling or trim first, and if the same technique applies to doors and cabinets.
Read on for short, actionable tips that save time and reduce mistakes.
Can I edge paint without a steady hand? (assistive tools and techniques)
How can you edge paint neatly without a steady hand? Use simple assistive tools: an angled sash brush for control, a paint shield or flexible trim guard to catch excess, and a slim roller to load less paint.
Brace your elbow against the wall, work in short strokes, and keep paint thin.
Practice on cardboard, clean edges with a damp brush, and go slow.
Will this method work on high gloss or semi-gloss trims?
Those same assistive tools and steady techniques work on high-gloss and semi-gloss trim, but you’ll need to be more careful about finish flaws and lap marks.
Work in thin, even passes, keep a wet edge, and use a high-quality angled brush.
Lightly sand between coats if needed and clean edges immediately with a damp cloth to preserve the sheen.
How long should I wait before removing a paint shield or wiping drips?
After about 15–30 minutes, check the paint shield and any drips—if the paint still feels tacky, wait longer; if it’s just set but not fully cured, you can gently remove the shield and wipe stray marks with a damp cloth.
Use light pressure to avoid smearing, blotted motions for excess, and recheck after another 15 minutes before doing more cleanup or applying a second coat.
Is it better to cut in ceiling or trim first?
Want the cleanest edges with the least fuss? Start by cutting in the ceiling first—edges there show most if imperfect—then paint trim.
That way any tiny ceiling touch-ups won’t smear fresh trim. Work in small sections, keep a steady brush angle, and let ceiling paint dry briefly before doing trim to avoid dragging wet paint.
You’ll get crisper lines and fewer touch-ups.
Can I use the same technique for doors and cabinets?
Can you use the same cut‑in technique for doors and cabinets? Yes, with adjustments.
Use a small angled brush, steady wrist, and thinner paint to avoid drips. Work in manageable sections, keep edges light, and wipe excess on the tray.
For cabinet doors, remove hardware and paint flat or hang on sawhorses for even coverage and easier access to edges.