
Can You Use TSP on Painted Walls Safely? What You Should Know
You can usually use TSP on painted walls safely if you test a small hidden patch, dilute it per the label, rinse thoroughly, and avoid prolonged scrubbing. Don’t use it on chalky, peeling, or water‑sensitive finishes, and assume older homes may have lead paint so take precautions. Wear gloves, goggles, and ventilate the area. Rinse and neutralize fully, let surfaces dry before repainting, and keep going to learn practical steps, alternatives, and safety tips.
Quick Answer Can You Use TSP on Painted Walls?
Yes—you can use TSP on most painted walls to remove grease and prepare them for repainting, but test a small area first.
Don’t use TSP on delicate, water-sensitive, or poorly adhered paint, and avoid it on humidity-damaged surfaces until they’re repaired.
If you’re unsure, try a patch test or consult the paint manufacturer before proceeding.
Direct conclusion for typical painted surfaces
When you’re dealing with typical finished interior paint, TSP is usually safe to use sparingly and correctly; dilute it per the label, rinse thoroughly, and spot-test first on a hidden area to check for softening or sheen loss.
If you’re wondering can you use tsp on painted walls, follow instructions, avoid over-scrubbing, and rinse well to protect finish and color.
When to avoid TSP immediately
Although TSP can be effective, you should skip it right away on fresh, unsealed, or delicate painted surfaces because it can strip or dull the finish; also avoid using it on wallpapers, glossy or oil-based paints that haven’t fully cured, and any surface showing chipping, blistering, or soft spots.
Instead, test a small hidden area, use milder cleaners for sensitive finishes, and wait for full cure before heavy cleaning.
What Is TSP and Why It’s Used
You’ll often find TSP labeled as trisodium phosphate or a phosphate-based cleanser, sometimes mixed with builders and detergents in common formulations.
It’s a strong alkaline cleaner that strips grease, grime, and old residues from surfaces.
You’ll use it mainly to degrease, clean thoroughly, and prep painted walls for repainting or repairs.
Chemical composition and common formulations
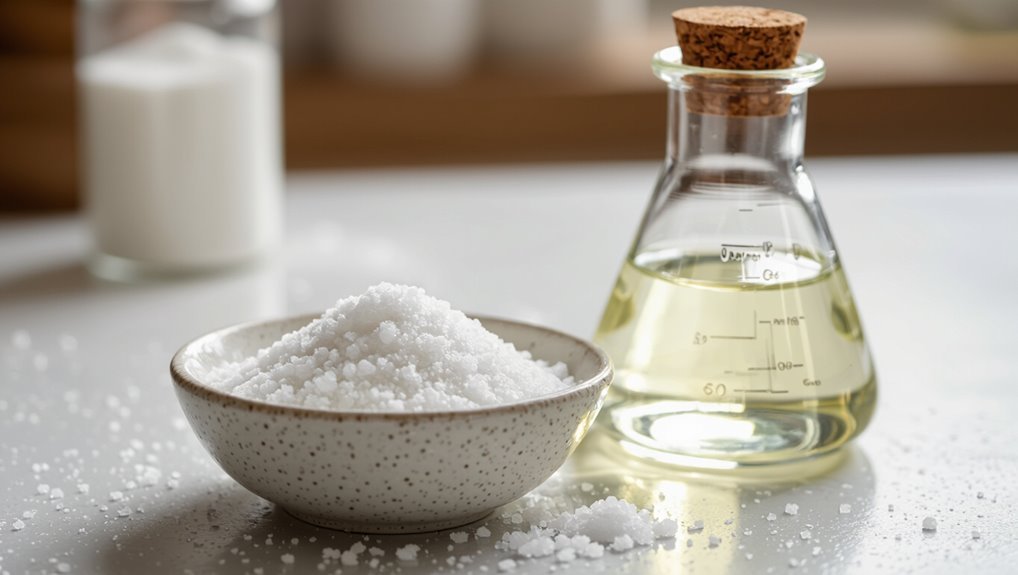
TSP, or trisodium phosphate, is a highly alkaline cleaning compound made from sodium carbonate and phosphoric acid that you’ll commonly find in powdered or granular formulations mixed with fillers and stabilizers.
You’ll encounter straight TSP, phosphate-reduced blends, and phosphate-free alternatives marketed for similar tasks; concentrations and additive corrosion inhibitors vary, so check labels for strength and designated surfaces before use.
Primary purposes: degreasing, cleaning, and surface prep
Reach for trisodium phosphate when you need strong degreasing, deep cleaning, or reliable surface prep before painting or refinishing.
You’ll remove grease, nicotine, and grime that prevent paint adhesion, and etch glossy finishes to improve bonding.
Use diluted TSP, work in ventilated areas, rinse thoroughly, and test a small patch first to avoid damaging sensitive or lead-painted surfaces.
How TSP Interacts with Different Types of Paint
When you use TSP on latex (water-based) paint, it usually cleans grime without harming the finish if you rinse well.
On oil-based paint it can remove heavy grease but may dull or slightly strip weaker varnishes, so test a small area first.
Be cautious on chalky, peeling, or poorly adhered paint because TSP can lift loose material and worsen adhesion, requiring scraping and spot-priming afterward.
Latex (water-based) paint expected effects
If you’re cleaning latex (water-based) paint with trisodium phosphate (TSP), expect effective removal of grease and surface dirt but minimal impact on the paint film itself when used properly.
You should rinse thoroughly, test a small hidden area first, avoid prolonged scrubbing to prevent dulling, and use diluted solution per instructions.
TSP won’t strip intact latex but can affect aged or poorly adhered paint.
Oil-based paint expected effects
Moving from latex to oil-based paints, you’ll find TSP behaves differently because oil-based films are less porous and chemically distinct.
You’ll usually see effective surface cleaning without swelling, but strong solutions can dull gloss or strip waxy finishes.
Test a hidden spot first, use milder mixes, rinse thoroughly, and avoid prolonged scrubbing to preserve sheen and underlying binder integrity.
Chalky, peeling, or poorly adhered paint risks
Because chalky, peeling, or poorly adhered paint lacks a stable film, TSP can lift loose pigment, worsen delamination, and leave a powdery residue that prevents new coatings from bonding properly.
You should avoid heavy TSP use on compromised surfaces; instead, scrape, sand to sound substrate, spot-prime with a bonding primer, or replace damaged sections.
Test a small area before full treatment.
Step-by-Step Guide: Safely Using TSP on Painted Walls
Before you start, you’ll assess the painted surface with an adhesion test and gather protective gear and materials.
Mix TSP to the proper dilution, perform a timed test patch, then note how long it needs to sit.
Finally, apply using the recommended technique and dwell time to avoid damage.
Step 1 Assess the painted surface (adhesion test)
If the paint’s loose or chalky, TSP will strip it off — so you should always do a quick adhesion test first.
Pick an inconspicuous spot, press a piece of clear tape firmly, then pull sharply. If paint comes away or a powdery residue appears, you’ll need to repair or remove loose paint before using TSP.
Note and mark failing areas for prep.
Step 2 Gather protective gear and materials
Safety gear and the right supplies make TSP cleaning effective and safe, so gather gloves, eye protection, and a respirator or mask rated for fine particulates and chemical fumes.
You’ll also want buckets, non‑abrasive sponges, and drop cloths to protect floors. Follow label warnings and keep windows open.
- Nitrile gloves and goggles
- Mask/respirator and ventilation fans
- Buckets, sponges, drop cloths
Step 3 Proper dilution ratios and mixing instructions
Now that you’ve gathered your protective gear and supplies, it’s time to mix TSP correctly so it cleans without damaging paint.
Use manufacturer ratios: standard is 1 tablespoon of powdered TSP per gallon of warm water for light cleaning, up to 1/4 cup per gallon for heavy grease.
Stir until dissolved, avoid excess concentration, and label the solution clearly.
Step 4 Test patch procedure and timing
Before you tackle the whole wall, pick a small, inconspicuous area and apply the diluted TSP for 5–10 minutes to check for colorfastness and finish damage.
Rinse that spot, let it dry, and inspect under good light. Wait 24 hours to confirm no fading, softening, or tackiness.
If all’s well, proceed; if not, stop and consult paint manufacturer guidance.
Step 5 Application technique and dwell time
Start by working in small sections so you can control application and rinsing; mix the TSP to the manufacturer’s ratio, apply with a sponge or low-nap roller, let it sit (dwell) just long enough to lift dirt—typically 2–5 minutes—and then rinse thoroughly.
Work top-to-bottom, overlapping strokes to avoid streaks, avoid scrubbing hard on fragile paint, and reapply only if the surface still looks soiled.
Step 6 Rinse and neutralize thoroughly
After rinsing each small section, neutralize and rinse again to remove all TSP residue so paint and finishes won’t be damaged.
Use a mild vinegar solution (1 part white vinegar to 4 parts water) or a commercial neutralizer per instructions.
Rinse thoroughly with clean water until no soapy film remains.
Wear gloves and discard rinse water responsibly to protect surfaces and drains.
Step 7 Drying time and readiness for repainting
Once the wall feels completely dry to the touch and no damp spots remain, you can assess whether it’s ready for repainting; most latex paints need about 24 hours of air-drying after rinsing, while oil-based surfaces may take 48 hours or more.
Check for tackiness, stains, or residue. If clean and dry, lightly sand glossy spots, wipe dust, then prime and repaint as directed.
Alternatives to TSP for Painted Walls
If you want to avoid TSP, you can try mild cleaners like citric solutions, vinegar, or dish soap for light grime.
For stronger cleaning, look for commercial TSP substitutes and non‑phosphate formulas labeled safe for painted surfaces.
When chemicals aren’t appropriate, you can use mechanical methods such as sanding or abrasive pads with care to avoid surface damage.
Mild cleaners and degreasers (citric, vinegar, dish soap)
1 simple, gentle cleaner you can use instead of TSP combines citric acid, plain white vinegar, and a drop of dish soap; together they break up grease and grime without stripping paint or leaving harmful residues.
Mix small batches, test a hidden spot, and gently wipe with a soft cloth. Rinse with clean water and let the wall air-dry to avoid streaks.
Commercial TSP substitutes and non-phosphate formulas
After trying a mild homemade cleaner, you may want a stronger product that still avoids phosphates; commercial TSP substitutes offer that balance. You can choose non-phosphate blends labeled “TSP-free” to cut grease without harsh residues. Test a small area, follow dilution instructions, wear gloves, and rinse thoroughly to protect paint.
| Product type | Benefit |
|---|---|
| Non‑phosphate TSP | Effective degreasing |
| All‑purpose cleaner | Gentle on finish |
| Citrus solvent | Removes sticky residue |
| Laundry booster | Stain lift |
Mechanical options: sanding and abrasive pads
Mechanical abrasion can be a reliable alternative to chemical cleaners when paint needs smoothing or stubborn residues must come off.
You can sand with fine-grit paper or use non-woven abrasive pads to scuff glossy finishes, remove flaking paint, and prep surfaces for repainting.
Work gently, keep dust controlled with a vacuum or mask, and test a small area to avoid over-sanding fragile layers.
Common Problems and Mistakes When Using TSP
When you use TSP on painted walls, watch out for common mistakes that can harm your finish or your health.
Don’t over-concentrate the solution, skip thorough rinsing, apply it to unstable or lead-painted surfaces, or ignore ventilation and PPE.
Addressing these issues early will save you time, prevent adhesion failures, and keep you safe.
Over-concentrating solution causing paint damage
If you mix TSP too strong, you’ll strip or soften the paint instead of just cleaning the surface.
You should follow label dilution rates and test a hidden area first. Use milder mixes for older or softened finishes, work gently with a soft cloth or sponge, and stop immediately if paint dulls, wrinkles, or peels.
Rinse thoroughly and allow to dry before repainting.
Insufficient rinsing leading to adhesion failure
Because TSP leaves a residue that can interfere with paint adhesion, you need to rinse thoroughly after cleaning to avoid future peeling or flaking.
If you skip or under-rinse, soap and salts stay on the surface, preventing primer or new paint from bonding.
Rinse with clean water until suds and film are gone, and let the wall dry completely before repainting.
Using on unstable or lead-painted surfaces
Although TSP is a powerful cleaner, you shouldn’t use it on flaky, unstable paint or on surfaces that might contain lead without taking precautions, because it can disturb old coatings and create hazardous dust.
You should test surfaces first, avoid aggressive scrubbing, and consider encapsulation or professional abatement for leaded layers.
Don’t assume simple washing is safe—assess stability before cleaning.
Ignoring ventilation and PPE requirements
When you skip proper ventilation and personal protective equipment, you raise your risk of inhaling dust and chemical fumes and exposing skin and eyes to irritants from TSP.
Always open windows, run fans, and wear gloves, goggles, and a respirator rated for particulates and chemical vapors.
Don’t rely on towels or brief exposure—protective gear and airflow prevent acute irritation and long-term harm.
Best Practices and Safety Precautions
Before you start using TSP on walls, put on gloves, eye protection, and guarantee good ventilation to protect your skin and lungs.
Be mindful of disposal rules and avoid pouring leftover solution into storm drains or soil.
If your home was built before 1978, assume lead paint might be present and take extra precautions like using HEPA filters and following lead-safe disposal.
Personal protective equipment and ventilation
1 key to staying safe while removing TSP from painted walls is using the right personal protective equipment and ensuring good ventilation.
You should wear gloves, goggles, and a respirator if fumes are strong. Open windows and use fans to move air. Limit exposure time and take breaks.
- Nitrile gloves
- Safety goggles
- Respirator and fans
Environmental considerations and disposal guidance
The protective gear and airflow you use for removing TSP also affect how you handle waste and protect the environment, so plan disposal from the start.
Collect rinse water and residue in sealed containers, never pour them down storm drains. Follow local hazardous-waste rules, label containers, and use approved disposal sites.
Rinse tools minimally and capture wash water for proper disposal.
Special care for older homes (lead paint precautions)
Because older homes often have lead-based paint, you need to treat TSP cleaning as a potential lead-hazard activity and take extra precautions:
wear a NIOSH-approved respirator, disposable gloves, and coveralls;
wet-clean surfaces to minimize dust;
contain and bag debris;
avoid dry scraping;
test paint for lead first;
consider hiring a certified abatement professional for disturbed or peeling paint to prevent exposure and contamination.
When to Call a Professional
If you notice the cleaner has stripped or bubbled your paint, don’t keep going—call a pro to assess and stop further damage.
You should also hire a professional for large-scale prep or any suspected lead paint to guarantee safe containment and removal.
Finally, get expert help when the job needs specialized cleaners or techniques you don’t have access to.
Signs that cleaning has damaged the paint
When cleaning leaves streaks, flaking, or a dull, powdery film, you’ll know the paint’s been harmed and it’s time to contemplate professional help.
Look for widespread blistering, softened or tacky areas, color loss, or rapid re-soiling.
If touch causes chalky residue or flakes fall away, stop. A pro can assess repair options, prevent further damage, and recommend safe restoration.
Large-scale prep or lead paint concerns
You’ve already learned the signs that cleaning has harmed paint; now consider situations that should prompt you to call a professional—especially for large-scale prep or any chance of lead paint exposure.
If you’re tackling whole-room stripping, extensive flaking, or homes built before 1978, hire licensed contractors.
They’ll test for lead, contain dust, follow regulations, and protect occupants, avoiding health and legal risks.
Situations requiring specialized cleaners or techniques
Because some stains and surfaces react badly to ordinary cleaners, you should call a pro for anything beyond routine soap-and-water or diluted TSP.
Hire specialists if you face lead paint, extensive mildew, oil-based stains, delicate finishes, or porous masonry.
Pros use tested chemical strippers, antimicrobial treatments, low-pressure washing, or encapsulation methods, preventing damage and ensuring safety and code compliance.
Cost, Time, and Tools Checklist
You’ll typically spend a modest amount on TSP supplies and an hour or two per wall section, depending on size and grime.
Gather TSP powder, gloves, goggles, a bucket, scrub brushes or a sponge, and clean water before you start.
Knowing realistic time and tool needs will keep the job efficient and protect your paint.
Typical costs and time estimates for TSP cleaning
A typical TSP cleaning job for painted walls usually takes between 1 and 4 hours for a single room, depending on wall condition, surface area, and how many hands are helping.
Expect DIY costs of $5–$25 for TSP and supplies; hiring pros raises labor to $50–$150 per hour.
Plan extra time for drying and touch-ups, and budget accordingly.
Tools and materials checklist for a successful job
Checklist: gather the right tools and materials before you wet a sponge—this saves time, prevents mistakes, and keeps costs down.
- Gloves, goggles, respirator, drop cloths, and bucket; buy quality PPE to protect skin and lungs.
- TSP or TSP substitute, measured per instructions, plus a scrub brush and sponge.
- Towels, clean water for rinsing, and trash bags for disposal; plan about 1–2 hours per room.
FAQ
You’ll find answers here to common questions like whether TSP is safe on all painted surfaces and if it’s appropriate before repainting interiors.
You’ll also learn how long to wait after using TSP before painting, whether it removes stains or smoke residue, and what safer alternatives exist for homes with pets or children.
If you have a specific situation, ask and we’ll cover the right steps.
Is TSP safe for all painted surfaces?
Wondering whether TSP is safe for every painted surface? You should know it’s not universally safe.
TSP can dull or strip soft, flat, or aging paints and may harm delicate finishes like faux textures or specialty coatings.
Test a hidden spot first, use dilute solution per instructions, wear gloves, and rinse thoroughly.
When in doubt, consult paint manufacturer guidance.
Can I use TSP before repainting interior walls?
Can you use TSP before repainting interior walls? Yes—you can. TSP removes grease, dirt, and residue that prevent primer or paint from adhering properly.
Wear gloves, eye protection, and ventilate the room. Rinse thoroughly with clean water and let walls dry completely before priming.
Test a small area first, especially on older or delicate finishes, to avoid damage.
How long should I wait after TSP before painting?
After you’ve cleaned with TSP, wait until the walls are completely dry before painting—typically 24 to 72 hours depending on humidity, temperature, and how well you rinsed the surface.
Check by touching several spots; if any feel cool or tacky, wait longer.
Guarantee proper ventilation and warm, dry conditions to speed drying.
Proceed only when the surface is fully dry and residue-free.
Can TSP remove stains or smoke residue from walls?
How well TSP removes stains or smoke residue depends on the type and age of the contamination.
You’ll find TSP effective on fresh grease, nicotine, and many surface soot marks; dilute per instructions, scrub gently, and rinse thoroughly.
Aged, deep-set stains or porous surfaces may resist cleaning and need repeated treatments or priming and repainting rather than more TSP.
Is there a safe TSP alternative for households with pets or children?
Looking for a safer substitute for TSP when you’ve got kids or pets around?
Use a mild, phosphate-free cleaner or a DIY mix of warm water, a few drops of dish soap, and white vinegar for general cleaning.
For tougher grime, try baking soda paste.
Rinse well, ventilate, and keep children and pets away until surfaces are dry to avoid ingestion or skin contact.
