
Can You Paint Log Cabin Walls Inside and Out Without Damage?
Yes — you can paint log cabin walls inside and out without damage if you inspect, prep, and pick the right products. Start by checking for rot, mold, insect damage, and moisture; logs should be dry and sound. Clean, sand, replace rotten wood, recaulk gaps, and use primers and breathable, flexible paints or stains made for wood movement. Apply thin, even coats in suitable weather and maintain regular inspections, and keep going to learn practical product and application tips.
Quick Answer Can You Paint Log Cabin Walls Inside and Out Without Damage?
Yes — you can paint log cabin walls inside and out without damage if you use the right products and prep the wood properly.
It’ll be safe when the logs are dry, structurally sound, and you choose breathable stains or paints suited for exterior or interior log use.
You risk trapping moisture and causing rot or peeling if you paint damp, failing to seal cracks, or use non-breathable coatings.
Short Direct Answer
You can paint log cabin walls inside and out without damaging them if you prepare and choose products correctly: clean and dry the logs, remove loose finish, use a breathable stain or paint formulated for logs, and follow proper application and maintenance steps.
Yes, can you paint log cabin walls — but do it with compatible, breathable coatings, correct prep, and regular inspections to avoid trapped moisture.
When painting is safe vs. when it risks damage
When the logs are clean, dry, and structurally sound, painting is generally safe if you pick breathable, log-compatible products and apply them correctly.
However, painting risks trapping moisture and causing rot or peeling when logs are damp, have recent mortar or caulking repairs, or are coated with incompatible sealers.
You should test moisture, remove old nonbreathable coatings, wait after repairs, and choose stains or paints designed for logs.
Basic Understanding Why Painting Log Cabin Walls Requires Special Care
You’ll notice log cabins aren’t like framed homes because solid timbers bring different species, grain patterns, age-related wear, and surface conditions that affect paint adhesion.
You’ll also need to account for moisture, breathability, and natural wood movement, all of which can make coatings fail if they’re not compatible.
Understanding these differences first helps you choose the right preparation and finish for lasting results.
What makes log cabins different from framed homes
A log cabin’s walls behave very differently from framed-home drywall, so you’ll need to plan painting and maintenance around wood’s natural movement and finish.
You’ll face solid, load-bearing logs that expand, contract, check, and shed moisture. Joints, chinking, and exposed end grains need flexible coatings and regular inspection.
Paint choice, application technique, and maintenance cycles must accommodate timber dynamics to avoid peeling and trapped moisture.
Wood types, grain, age, and surface condition
Because different woods react to moisture and stains in unique ways, knowing your cabin’s species, grain direction, age, and surface condition is essential before you pick a paint system.
You’ll inspect for sapwood, knots, checks, rot, and previous coatings.
Hardwoods, softwoods, tight or open grain, and weathered versus freshly milled surfaces all influence adhesion, prep needs, and primer choice.
How moisture, breathability, and wood movement affect coatings
Knowing the wood’s species and condition tells you what to expect, but moisture, breathability, and seasonal movement determine how a coating will perform over time.
You need coatings that let vapor escape, flex with expansion and contraction, and resist trapped moisture. Choose breathable primers and flexible finishes, maintain sealants at joints, and monitor for peeling or blistering so you can address issues before they worsen.
Assessment Inspecting Your Cabin Before Painting
Before you start painting, you should walk both the exterior and interior with a clear checklist to spot peeling finishes, gaps, and areas that need sealing.
Look for signs of rot, insect damage, or trapped moisture that’ll affect adhesion and may require repair before any coating goes on.
Also identify the existing finish type so you can choose compatible primers and paints and avoid adhesion failures.
Exterior inspection checklist
Start by walking the entire exterior and noting every area that needs attention: peeling paint, rotted wood, loose trim, mold or mildew, and failing caulk or sealant.
Then check for:
- Structural damage (sills, corners, rot)
- Surface prep needs (old finish removal, sanding)
- Moisture sources (gutters, flashing, grading)
Address each before painting to guarantee lasting protection.
Interior inspection checklist
How will you know which interior surfaces need attention before painting? Inspect walls, ceilings, trim, and joints for loose finish, stains, or raised grain.
Test adhesion with a fingertip scrape, note areas needing sanding or cleaning, and check for gaps at corners.
- Cleanliness and adhesion
- Surface smoothness and prep
- Sealant and gap assessment
Signs of rot, insect damage, and trapped moisture
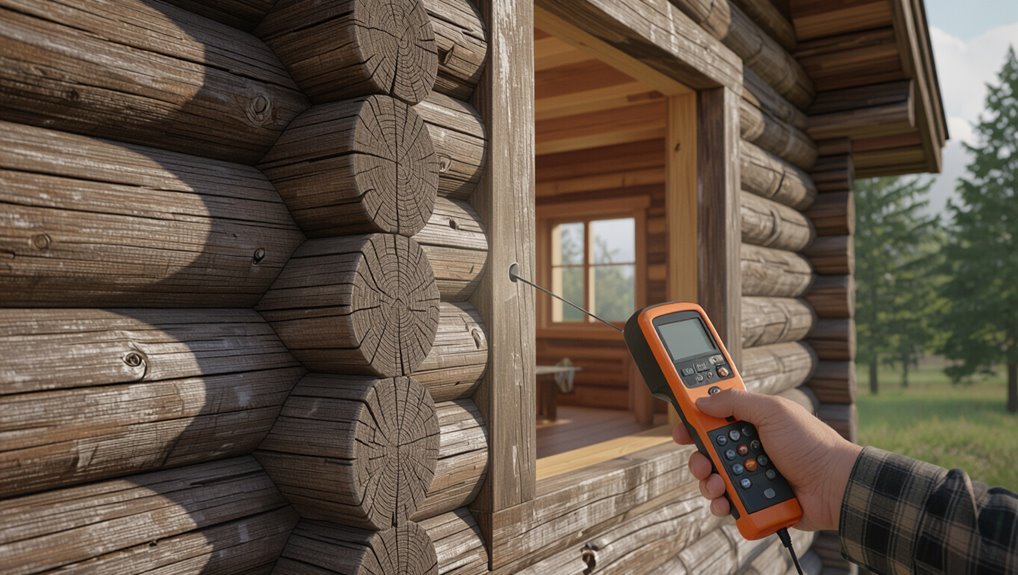
When you inspect cabin interiors for rot, insect damage, or trapped moisture, look for softened or spongy wood, dark stains or powdery frass, peeling or bubbling finish, and musty odors that linger behind walls and under trim.
Probe suspect areas with a screwdriver, check crawlspaces and rooflines, inspect window sills and corners, and note blistering paint or recurring damp patches for repair before painting.
Determining previous finishes and their compatibility
Before you touch a brush, identify what finish already coats your logs—stain, paint, varnish, or sealant—because compatibility will dictate prep, products, and longevity.
Test small areas: scrape, sand, or use solvent to see adhesion and finish type.
Match primers and coatings to that finish or remove it fully. Incompatible layers cause peeling, trapped moisture, and premature failure.
Preparation Essential Steps to Prevent Damage
Before you paint, gather the right tools and materials and clean the logs—use pressure washing only when safe, otherwise opt for gentler mildew treatments.
Make sure the wood is fully dry and check moisture with a wood meter, then replace rotten boards, recaulk, and repair chinking as needed.
Finish by sanding, stripping, or de-glossing glossy finishes so new paint will adhere properly.
Tools and materials you’ll need
You’ll need a compact set of reliable tools and quality materials to protect the log cabin while you paint:
- High-quality exterior/interior stain or paint, primer, and UV-resistant finish.
- Brushes, rollers, extension poles, caulk gun, sandpaper, and respirator.
- Drop cloths, painter’s tape, ladders, masking film, and rust-resistant fasteners.
Carry spare supplies and choose products rated for wood and climate.
Cleaning and mildew removal (pressure washing vs. gentle cleaning)
When mildew or dirt cling to your logs, cleaning them first prevents trapped moisture and paint failure later; decide whether a pressure washer or a gentler scrub will remove contaminants without harming the wood.
Test a small area: low-pressure washing and detergent work for tough grime, while soft-bristle brushes and oxygen bleach suit delicate or loose grain.
Rinse thoroughly and protect trim and vegetation.
Drying time and moisture testing (wood moisture meter use)
After cleaning, don’t rush to paint—wood has to dry thoroughly or trapped moisture will cause adhesion problems and rot.
Wait until exterior logs reach 12–15% moisture content and interior surfaces are below 12%.
Use a calibrated wood moisture meter, test multiple spots and depths, and only proceed when readings are consistently low and stable over several days to guarantee proper paint bonding.
Surface repair: replacing rotten boards, caulking, and log chinking
Inspect each surface closely and remove any rotten boards or failing caulk so you can stop moisture intrusion before you paint.
Replace decayed boards with matching, pressure-treated or seasoned wood, fasten securely, and seal joints.
Re-caulk gaps with exterior-grade, paintable silicone or polyurethane.
Re-chink logs where joints have failed, using compatible, flexible compounds to maintain weatherproofing and allow movement.
Sanding, stripping, and de-glossing: when and how
Start by determining whether you need to sand, strip, or de-gloss each surface—your choice depends on the existing finish, the wood’s condition, and how well the old coating is adhering.
Sand glossy or roughen weathered surfaces with 80–120 grit, strip failed coatings with a chemical remover or heat, then clean and degloss with a scuff pad.
Always vacuum and wipe before priming.
Choosing the Right Products Stains vs. Paints and Sealers
You’ll want to weigh paint versus stain for durability, appearance, and how each handles wood movement.
Consider breathable finishes for exterior logs to let moisture escape, and choose primers and formulations that promote adhesion on both interior and exterior surfaces.
I’ll outline the best paint and stain types for interior and exterior log walls and give primer selection tips next.
Paint vs. stain: pros, cons, and suitability
When you’re deciding between paint and stain for your log cabin, weigh durability, maintenance, and the look you want: You’ll choose paint for opaque, long-lasting coverage and easier color changes; pick stain for natural grain, easier touch-ups, and lower peeling risk.
| Option | Best for |
|---|---|
| Paint | Bold color, durability |
| Stain | Natural grain, low maintenance |
Breathable finishes vs. non-breathable finishes
Because log walls naturally release and absorb moisture, you should pick a finish that lets the wood “breathe” if you want to avoid trapped moisture, rot, and peeling.
Breathable stains and sealers allow vapor to pass through while protecting the surface, whereas non-breathable paints and sealers form a barrier that can lock moisture in and force it to escape through cracks or joints.
Choose breathable products for longevity.
Best paint/stain types for exterior log walls
Now that you’ve seen why breathability matters, pick products that match your goals for appearance, protection, and maintenance.
For exterior logs, choose breathable stains or thin-film translucent finishes to show grain and repel moisture.
Use oil-based or water-repellent preservatives for deep protection; consider microporous latex paints only if vents and caulking allow moisture escape.
Reapply sealers per exposure.
Best paint/stain types for interior log walls
Decide what look and level of upkeep you want before picking products for interior log walls, since stains, paints, and sealers each trade off appearance, breathability, and maintenance.
You’ll choose penetrating oil-based or water-based stains to highlight grain and allow moisture movement, or opaque paints for uniform color.
Use breathable sealers designed for interior logs to protect without trapping moisture; consider VOCs and durability.
Primer selection and adhesion considerations
When you’re preparing interior log walls, picking the right primer and understanding adhesion matters as much as choosing stain or paint; primers bridge the gap between raw log surfaces and your finish, promoting uniform coverage and helping prevent peeling, tannin bleed, or splotchy absorption.
Choose oil-based or shellac for tannin-rich species, or a high-quality acrylic bonding primer for cured, porous logs, and always sand and clean surfaces first.
Step-by-Step Application Process (Exterior)
Before you start, check timing and weather so coatings cure properly and moisture won’t ruin the finish.
Then walk through final prep and masking, confirm primers and sealers are sound, and choose the right tools and techniques for topcoats and number of coats.
Finish with a careful inspection and targeted touch-ups to guarantee long-lasting results.
Step 1 Timing and weather considerations
Pick a stretch of consistently mild, dry weather—typically temps between 50°F and 85°F with low humidity—so paint will adhere, cure, and drip less.
Plan exterior painting for calm days without rain in the forecast for at least 24–48 hours. Avoid strong winds, freezing nights, and intense sun that can flash-dry or cause lap marks.
Schedule early morning starts for stable conditions.
Step 2 Final surface prep and masking
Now that you’ve planned for the right weather window, it’s time to get the surface ready and mask off areas you won’t paint.
Scrape loose finish, sand rough spots, and wipe dust with a tack cloth. Replace rotten caulk and fill cracks with exterior-grade filler.
Apply painter’s tape to trim, windows, fixtures, and gutters, and cover plants and ground with drop cloths before you paint.
Step 3 Priming and sealing checks
Step 3 focuses on priming and sealing: you’ll apply the right primer to bare wood, previously painted areas, and any patched sections.
Then inspect seals and joints to prevent moisture intrusion. Use compatible exterior primer, feather edges at connections, and let recommended dry times pass.
Check caulking at log joints, window perimeters, and trim; replace failing sealant and touch primer where adhesion looks weak.
Step 4 Applying topcoats (technique, tools, coats)
Begin by choosing the right topcoat system and gathering the proper tools—brushes, rollers, sprayer, and quality exterior paint—so you can work efficiently and maintain consistent coverage.
Work with the grain, apply thin even coats, and back-brush to eliminate lap marks.
Allow recommended dry times, sand lightly between coats if specified, and apply two to three coats for durable, weatherproof protection.
Step 5 Post-application inspection and touch-ups
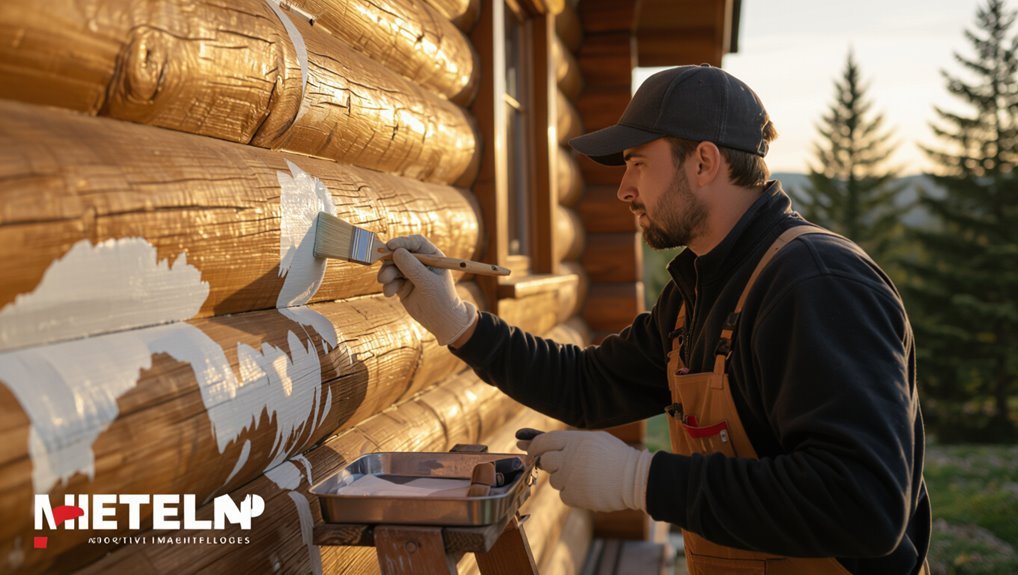
After the topcoats cure, walk the exterior in daylight and inspect each wall for missed spots, drips, thin coverage, or edges that didn’t blend.
Note imperfections, mark them lightly, and sand any raised drips.
Recoat small areas with the same batch and finish, feathering edges to match.
Clean tools, remove tape, and reassess after 24 hours for final touch-ups.
Step-by-Step Application Process (Interior)
Before you start painting inside, make certain ventilation and humidity are controlled so finishes cure properly and indoor air stays safe.
Prepare the logs by cleaning, sanding, and filling gaps, then apply the right primer or undercoat designed for interior logs.
Finish with a topcoat that preserves the wood’s texture and follow drying, curing, and air-quality tips to avoid odors and guarantee a durable result.
Step 1 Ventilation and humidity control
Because fresh paint releases fumes and humidity can ruin a finish, make ventilation and moisture control your first priority when painting a log cabin interior.
Open windows and doors, run exhaust fans, and use portable fans to keep air moving.
Maintain relative humidity around 40–50% with a dehumidifier or HVAC.
Monitor conditions and avoid painting during storms or high indoor moisture.
Step 2 Preparing interior log surfaces
Start by clearing the room and giving each log a quick inspection for loose chinking, cracks, old finishes, mold, or insect damage so you know exactly what repairs and prep each surface needs.
Remove dust and cobwebs with a soft brush, sand rough spots, strip flaking finishes, treat mold or pests, and fill gaps with compatible caulk or repair mortar.
Step 3 Priming and undercoats for interior logs
1. You’ll choose a breathable, oil- or alkyd-based primer formulated for log surfaces to seal tannins and even porosity.
Apply thin, even coats with a brush following grain; back-brush into cracks and checks. Allow full drying between coats, sanding lightly if needed.
Use a compatible undercoat to build uniform absorption and adhesion before finishing, preventing flaking and blotching.
Step 4 Topcoat application and maintaining natural texture
When you’re ready to apply the topcoat, choose a breathable oil- or alkyd-modified finish that matches your desired sheen and pigment load.
Work with a quality brush or short-nap roller, following the grain and keeping strokes feathered to avoid lap marks.
Apply thin, even coats, maintaining the log’s natural texture by avoiding heavy build-up in crevices and knots.
Step 5 Drying, curing, and indoor air quality tips
After your topcoat goes on, give the finish time and conditions to dry and cure properly so it reaches full hardness and off-gasses safely.
Keep temperatures steady (ideally 60–75°F/15–24°C) and humidity moderate (40–60%) while maintaining good cross-ventilation to remove fumes.
Monitor odor and tackiness; wait manufacturer cure times before closing rooms, rehanging textiles, or moving furniture.
Use air purifiers and low-VOC products to protect indoor air.
Common Problems and Mistakes That Cause Damage
When you pick the wrong products or skip prep, you’ll lock in moisture, hide rot or insects, and weaken joints.
Painting over damp or unprepared wood, using non-breathable coatings, or making incorrect caulking and flexible-joint choices accelerates damage.
Don’t over-sand or strip protective layers unless necessary, because that removes defenses and shortens the finish’s life.
Using non-breathable coatings that trap moisture
If you seal log walls with non-breathable coatings, trapped moisture will rot the wood from the inside out and undermine any paint or finish you apply.
You should choose breathable stains or paints designed for logs, allow vapor transmission, and maintain proper ventilation.
Inspect seals regularly, replace impermeable products, and use flexible, microporous finishes so moisture escapes without peeling, blistering, or fostering decay.
Painting over damp or unprepared wood
Although you might be keen to get paint on the logs, painting over damp or unprepared wood almost always leads to adhesion failure, bubbling, and accelerated decay.
You should dry, clean, and sand surfaces first; remove mill glaze, contaminants, and loose fibers.
Test moisture with a meter, allow proper drying time, and only then apply primers and breathable paints to guarantee a lasting, stable finish.
Ignoring insect or rot before coating
You can’t seal over insect damage or rot and expect the coating to hold up.
If you ignore soft wood, tunnels, or fungal decay, paint or stain will blister, flake, and trap moisture.
Inspect, remove compromised material, treat infestations, and replace or reinforce affected logs.
Only coat sound, dry wood so finishes adhere and protect long term.
Incorrect caulking or flexible joint mistakes
Incorrect caulking and poorly executed flexible joints let water and air sneak into seams, undermining paint and causing wood to swell, crack, and rot.
You must use compatible, paintable sealants and gun a smooth, continuous bead. Allow proper cure time, tool joints to compress without gap, and avoid rigid fillers.
Regularly inspect and replace failed caulk before repainting.
Over-sanding or removing protective layers unnecessarily
Fixing failed caulk won’t help if you then strip away the wood’s protective layers by over-sanding or removing finishes you don’t need to.
Don’t sand aggressively just to “refresh” wood; you risk thinning weatherproofing, exposing raw fibers, and creating uneven absorption.
Instead, assess finishes, spot-sand minimally, and use compatible primers or stains.
Preserve existing protection unless it’s visibly compromised.
Prevention and Maintenance to Avoid Future Damage
To keep your paint and logs lasting, set a regular inspection schedule and know what to look for—peeling, checking, water stains, and soft spots.
Track recoat intervals by monitoring finish wear and testing adhesion so you’ll know when to refresh before problems start.
Use protective measures like flashings, gutters, proper grading and seasonal checklists to prevent moisture and rot.
Regular inspection schedule and what to look for
When you set a routine inspection schedule—ideally every spring and fall, plus after any severe storm—you’ll catch small issues before they become big repairs.
You should:
- Check for peeling paint, cracked caulking, and water stains.
- Inspect log joints, flashing, and roofline for gaps or rot.
- Note insect holes, mold, and areas with trapped moisture for prompt repair.
Recoat intervals and how to know when to refresh
Although paint and stain can protect your logs for years, you’ll want to plan recoats on a regular timetable and base refreshes on visible wear and performance, not just calendar dates.
Check every 3–7 years outside and 7–10 years inside; shorter for harsh climates or high-UV exposure.
Recoat when finish dulls, peels, checks, or water no longer beads. Touch up damaged spots promptly.
Protective measures: flashings, gutters, and landscaping
Keeping up with recoats and quick touch-ups helps prevent water and UV damage from getting a foothold, but you also need physical protections around the cabin that stop moisture before it reaches the logs.
Install metal flashings at rooflines and joints, make sure gutters and downspouts divert water well away, and grade soil plus use gravel or hardscaping to keep splashback and plantings from trapping moisture.
Seasonal maintenance checklist
Because seasonal problems show up fast on exposed logs, you should follow a concise maintenance checklist every spring and fall to catch small issues before they become costly.
Inspect for cracks, rot, and insect activity; check sealants, chinking, and paint for failures; clean gutters and overhangs; trim vegetation; touch up finishes; and document changes.
Schedule repairs promptly to prevent escalation.
Comparison Cost, Durability, and Aesthetics Options
Now you’ll compare costs, durability, and appearance between staining, painting, and clear sealers to pick what fits your budget and goals.
Consider how long each finish will last and what maintenance it will need over time.
Also think about whether you want to preserve the natural log character or change the cabin’s look entirely.
Cost comparison: staining vs. painting vs. clear sealers
Choosing between stain, paint, or a clear sealer comes down to how much you’ll spend upfront and over time, how long the finish will last, and the look you want to achieve. You’ll pay less upfront for clear sealers, mid for stain, more for paint; maintenance and color goals shift choice.
| Option | Upfront Cost | Visual Impact |
|---|---|---|
| Clear sealer | Low | Natural |
| Stain | Medium | Enhanced grain |
| Paint | High | Full coverage |
Durability and lifespan of each finish type
Upfront cost and look matter, but the real test is how long each finish will protect your cabin and what maintenance it demands.
Paint lasts 8–15 years outdoors with proper prep, resisting UV and moisture but hiding wood.
Stains last 3–7 years, penetrating and needing more frequent reapplication.
Clear sealers protect briefly, often 1–3 years, requiring the most upkeep.
Aesthetic outcomes and preserving natural log character
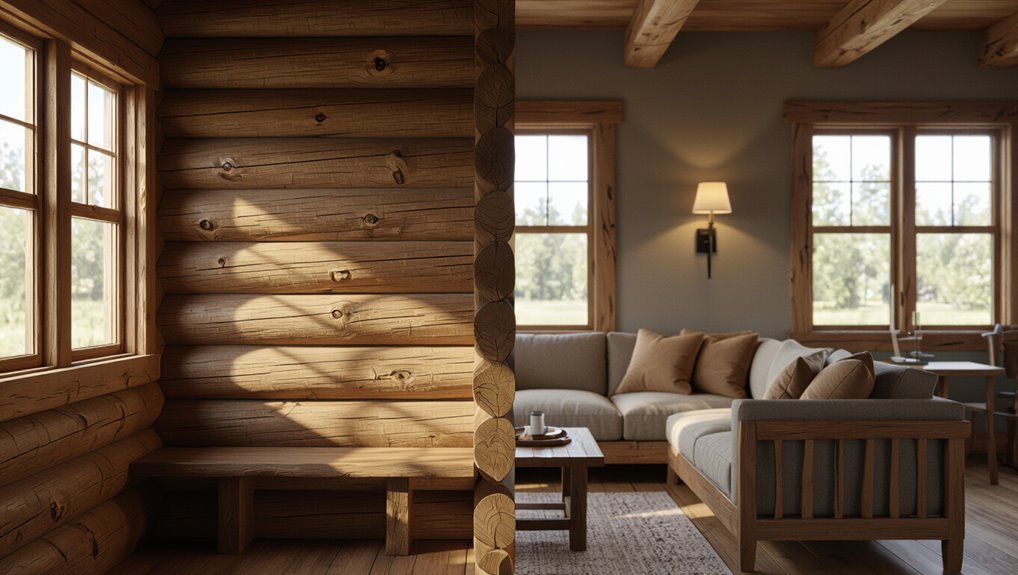
While cost and durability are important, how a finish affects your cabin’s natural log character often drives the decision—paints offer the widest color choices and long-term protection but completely hide grain and knots.
Stains let the wood show through in varying degrees while requiring more frequent reapplication.
Clear sealers preserve the raw look best but need the most upkeep and offer the shortest lifespan.
You’ll weigh appearance versus maintenance and longevity.
Practical Scenarios and Recommendations
For a new log cabin, you’ll usually get the best results by priming and using breathable exterior paint designed for fresh wood.
With older or historic logs, you’ll want to assess for rot, insect damage, and original finishes before choosing a preservative stain or paint that won’t trap moisture.
If the job involves significant repairs, high elevations, or historic preservation rules, hire a pro; for straightforward cleaning and repainting, you can often handle it yourself.
Best approach for new log cabins
Because new log cabins still settle and release resin, you should choose finishes and timing that accommodate movement and stickiness while protecting the wood; start with a moisture check, use flexible primers and stains designed for fresh logs, and delay final coats until seasonal shrinkage is minimal.
Clean, sand lightly, apply breathable stain, caulk flexible joints, and wait several months before full exterior sealing to prevent peeling.
Best approach for older or historic logs
When you’re working on older or historic log walls, start by evaluating their condition thoroughly so your painting plan preserves the building’s integrity and value.
Document rot, insect damage, and previous coatings. Clean gently, repair with compatible materials, and use breathable stains or paints that allow moisture exchange.
Test treatments on hidden areas, prioritize preservation over bright color changes, and keep records of work.
When to hire a professional vs. DIY
If your log walls show major structural decay, widespread rot, or complex previous treatments, you should hire a professional who can diagnose hidden issues and specify compatible repairs and finishes.
For small, sound areas you can DIY: test finishes, prep, and use breathable stains or paints.
Hire pros for large surfaces, high work, safety risks, or when preservation standards or warranties matter.
FAQs Common Questions About Painting Log Cabin Walls
You’ll find answers here to common concerns like whether you can paint over old stain without stripping, if paint will stop rot or insects, and how long to wait after construction before painting.
We’ll also cover whether you can change the color dramatically without harming the logs and what eco-friendly finish options exist.
Ask any specific question and I’ll help you decide the best approach for your cabin.
Can I paint over old stain without stripping?
Can you paint over old stain without stripping it first? Yes, often you can if the stain is oil- or latex-based, well-adhered, and clean.
Sand glossy areas, remove dirt and mildew, and apply a quality primer formulated for stained wood.
Test a small patch first; if the stain bleeds, you’ll need to strip or use a stain-blocking primer before painting.
Will paint prevent wood rot and insect damage?
While paint adds a protective barrier against moisture and pests, it won’t guarantee your logs never rot or attract insects.
Paint reduces surface water absorption and can deter some pests, but you still need proper sealing, flashings, and ventilation.
Inspect regularly for cracks, failed caulking, or peeling finish. Treat vulnerable areas with preservative or insecticide and address leaks promptly to prevent infestations.
How long should I wait after construction before painting?
If your cabin is newly built, wait until the wood has dried to its equilibrium moisture content for your climate—typically 3 to 12 months—before painting; this assures the finish bonds well and prevents peeling or trapped moisture.
Check moisture with a meter (below 12–15% for many finishes), confirm seasonal stability, prep surfaces, and only paint when humidity and temperature meet manufacturer specs to avoid adhesion issues.
Can I change the color dramatically without harming logs?
Thinking about a bold new hue? You can shift to a dramatic color, but prep matters.
Strip incompatible finishes, sand or de-gloss, and use a stain or paint formulated for logs to allow moisture movement. Test a small area, monitor adhesion and moisture readings, and guarantee proper sealing at joints.
Dramatic change won’t harm logs if breathability and proper products are maintained.
What are eco-friendly finish options?
Because you want a healthier home and a lower environmental impact, choose finishes labeled low-VOC or zero-VOC, natural oil finishes (like tung or linseed), water-based stains and paints formulated for exterior wood, or plant‑based sealers;
these let the logs breathe, cut chemical off-gassing, and still protect against moisture and UV when applied per manufacturer instructions.
Test on scrap, maintain regularly, and reapply as needed.
