
Can You Paint Formica Walls? What Works and What to Avoid
Yes — you can paint Formica walls if you prep them right. Start by cleaning with a degreaser, sanding lightly to scuff the slick surface, and repairing chips or seams. Use a high-adhesion bonding primer designed for laminates, then apply durable paint like acrylic, enamel, or an epoxy blend in thin, even coats. Finish with a compatible clear sealer for protection. Avoid painting warped or peeling laminate, and keep going to learn step-by-step tips and product picks.
Quick Answer Can You Paint Formica Walls?
Yes—you can paint Formica walls, and it’s worth it when the surface is in good condition and you want a budget-friendly refresh.
You’ll get the best results if you use proper cleaning, sanding, a bonding primer, and the right paint.
Skip painting if the laminate is badly warped, peeling, or if the finish is textured in a way that won’t hold paint.
Short verdict and when it’s worth it
If you want a quick, budget-friendly refresh, you can paint Formica walls and get good results when you prepare and prime properly.
Short verdict: yes, can you paint Formica walls — it’s worthwhile for dated finishes, rental updates, or low-traffic areas.
You’ll save money and avoid replacement when you clean, sand lightly, use bonding primer, and pick durable paint suited to smooth, nonporous surfaces.
Situations when painting is not recommended
You can often get great results painting Formica, but some situations make it a poor choice.
Don’t paint if the surface is heavily damaged, warped, or peeling—you’ll hide problems temporarily.
Avoid painting in high-heat or high-moisture areas where adhesion fails, and skip it when you plan frequent refinishing or need a durable, long-lasting finish.
In those cases, replace or refinish instead.
What Is Formica and Why It Matters for Painting
Formica is a hard, laminated surface made of resin-impregnated paper over particleboard, commonly used for countertops, cabinets, and wall panels.
That composition changes how paints stick. You’ll need to reckon with its smooth, nonporous finish and any wear or coatings that reduce adhesion before painting.
It’s not like drywall or wood—those absorb primer and bond differently—so your prep and product choices must reflect those differences.
What Formica is (composition and common uses)
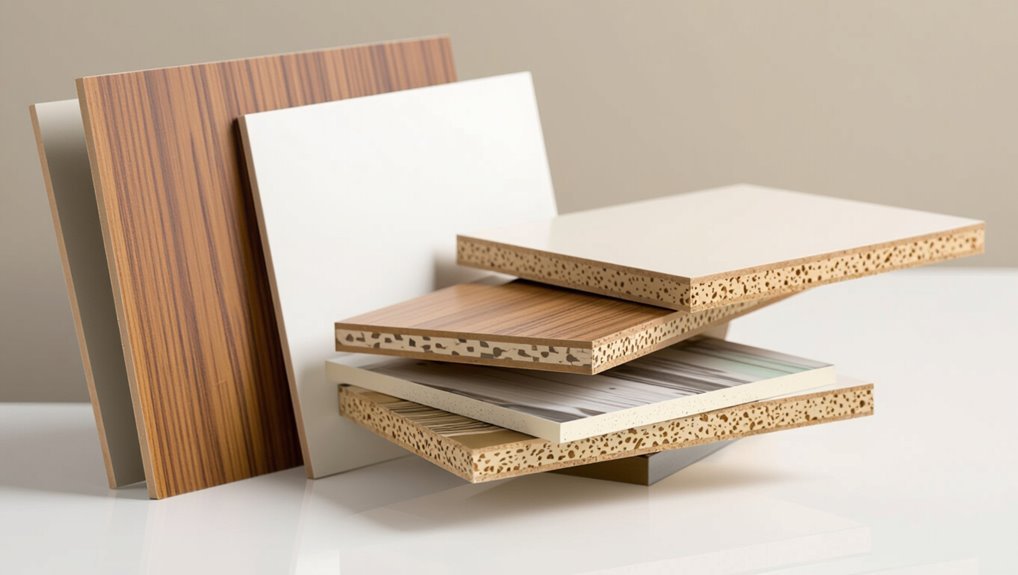
A durable laminate made from layers of paper or fabric saturated with resin and bonded under heat and pressure, Formica’s hard, nonporous surface shows up on countertops, cabinets, and wall panels in kitchens, bathrooms, and commercial spaces.
You’ll find it in high-traffic areas because it resists stains, scratches, and moisture. It’s affordable, lightweight, and available in many colors and patterns, so it’s popular for renovations.
Surface properties that affect paint adhesion
Because its surface is dense, smooth, and nonporous, Formica presents challenges for paint to stick—so understanding those properties is key before you start.
You’ll need to address low porosity, slick finish, and existing wear layers that resist bonding. Proper cleaning, deglossing, light abrasion, and a compatible primer improve adhesion.
Skipping prep risks peeling, chipping, and short-lived results.
Differences between Formica and painted drywall or wood
When you compare laminate surfaces to painted drywall or wood, you’ll notice they behave very differently under paint: laminate is a hard, nonporous sheet material with a slick factory finish, while drywall and wood absorb primer and allow mechanical keying.
You’ll need special adhesion primers, sanding, and sometimes chemical etchers for Formica, whereas drywall/wood usually need only standard primer and light sanding.
Tools, Materials, and Products That Work on Formica
Before you start, gather prep tools and safety gear—sandpaper, tack cloths, respirator, and gloves—to get a clean, safe surface.
You’ll want a good laminate primer (oil-based or a specialty bonding primer) before applying paints like acrylic, enamel, or epoxy that adhere well to Formica.
Finish with a compatible sealer or topcoat to protect the surface and extend the life of your work.
Prep tools and safety gear
Gather a handful of reliable tools and safety gear so you can prep Formica properly and stay safe: you’ll need fine-grit sandpaper or a sanding block, a degreasing cleaner, tack cloths, high-adhesion primer, quality brushes or foam rollers, painter’s tape, and nitrile gloves plus eye protection and a respirator rated for paint fumes.
- Sand, clean, wipe.
- Mask, glove, goggles.
- Tape edges, roll carefully.
Recommended primers for laminate surfaces (oil-based, bonding primers)
Pick a high-adhesion bonding primer formulated for slick, nonporous surfaces—these oil-based or specially labeled bonding primers create the key mechanical and chemical grip Formica needs.
Choose products labeled for laminate, melamine, or glossy surfaces.
Apply thin, even coats, sanding lightly between coats with fine-grit paper.
Allow full cure per manufacturer instructions before topcoating, and ventilate well when using oil-based primers.
Best paint types for Formica walls (acrylic, enamel, epoxy)
When you’re choosing paint for Formica walls, go with products designed to stick to slick, nonporous surfaces. You’ll typically pick acrylic latex for ease and flexibility, oil-based enamel for durability, or epoxy for heavy-wear areas. Match primer to paint. Test a small patch first.
| Paint type | Best use |
|---|---|
| Acrylic | Ease, quick dry |
| Enamel | Durable finish |
| Epoxy | High-traffic resilience |
| Test | Small patch first |
Sealers and topcoats to protect finished surface
After you’ve chosen paint and primed the Formica, protect that finish with a sealer or topcoat made for slick surfaces—these products lock in color, add wear resistance, and make cleaning easier.
Use water-based polyurethane, acrylic clear coats, or a two-part epoxy for high-traffic areas.
Apply thin, even coats, sand lightly between layers, and follow manufacturer cure times for durable, long-lasting protection.
Step-by-Step Guide to Painting Formica Walls
Before you start, assess the Formica for damage and pick a compatible paint system so you know what materials you’ll need.
Then clean with a strong degreaser, sand with the right grit, and repair chips or seams to create a smooth surface.
Finish by applying a quality primer following the manufacturer’s techniques and drying times.
Step 1 Assess the surface and choose the right paint system
Assessment starts with a close look at the Formica: check for scratches, peeling edges, grease, or old finish that might prevent adhesion.
Decide if repairs like filling chips or sanding glossy spots are needed.
Choose a primer made for laminate and a high-bonding acrylic or epoxy topcoat suited to walls.
Match finish (matte, satin) to traffic and cleaning needs.
Step 2 Clean thoroughly: degreasers and cleaners
Once you’ve repaired any chips and chosen the right primer and topcoat, you’ll need to remove every bit of grease, dirt, and residue so coatings will bond.
Use appropriate cleaners, rinse well, and dry fully before priming.
- TSP substitute for heavy grease
- Mild detergent and warm water for light soils
- Isopropyl alcohol wipe for fingerprints and wax
Step 3 Sanding: grit choices and technique
3 key sanding steps will give your primer something to grip: scuff the surface, smooth rough spots, and remove any remaining shine.
Use 220–320 grit for light scuffing; drop to 120–150 grit only on stubborn high spots, then finish with 220–320.
Sand lightly in even strokes, keep pressure consistent, clean dust with a tack cloth, and avoid cutting into the laminate.
Step 4 Repairing chips, seams, and imperfections
Repair small chips, seams, and imperfections before priming so your finish will look smooth and hold up over time.
Clean the area, then use a flexible, paintable filler or epoxy for gaps and chips. Feather edges with a putty knife, let cure, and sand lightly to blend.
Remove dust with a tack cloth. Check seams for lift; re-bond with adhesive if needed.
Step 5 Priming: application tips and drying times
After you’ve smoothed and cleaned the surface, it’s time to apply a high-adhesion primer formulated for slick surfaces like Formica. This step guarantees paint bonds and reduces the number of finish coats you’ll need.
Use a thin, even coat with a high-density foam roller or brush. Avoid pooling, and follow manufacturer drying times—typically 1–4 hours between coats and full cure in 24–48 hours.
Step 6 Painting: coats, tools (brush/roller/spray), and drying
Now you’ll apply the paint—choose your tool (brush, high-density foam roller, or HVLP/airless sprayer) based on surface area and finish preference.
Work in thin, even coats to avoid drips and texture build-up, and allow each coat to dry per the paint maker’s recommendations (usually 1–4 hours between coats with longer cure time before heavy use).
Start with light, overlapping passes; sand lightly between coats if needed.
Step 7 Sealing and curing for durability
Once your paint feels dry to the touch and any light sanding is done, seal the surface to lock in durability and resistance to chips, stains, and moisture.
Choose a compatible clear topcoat (water-based polyurethane or acrylic sealer), apply thin even coats, wait full cure times between layers, and allow final curing per manufacturer instructions before heavy use to guarantee lasting protection.
Alternatives to Painting Formica Walls
If painting doesn’t suit your timeline or skill level, you can try adhesive panels, wallpaper, or peel-and-stick options for a quick style change.
You might also consider replacing the laminate or hiring resurfacing services for a longer-lasting update.
For temporary or budget-friendly fixes, faux finishes and other removable solutions let you test looks without permanent commitment.
Adhesive panels, wallpaper, and peel-and-stick options
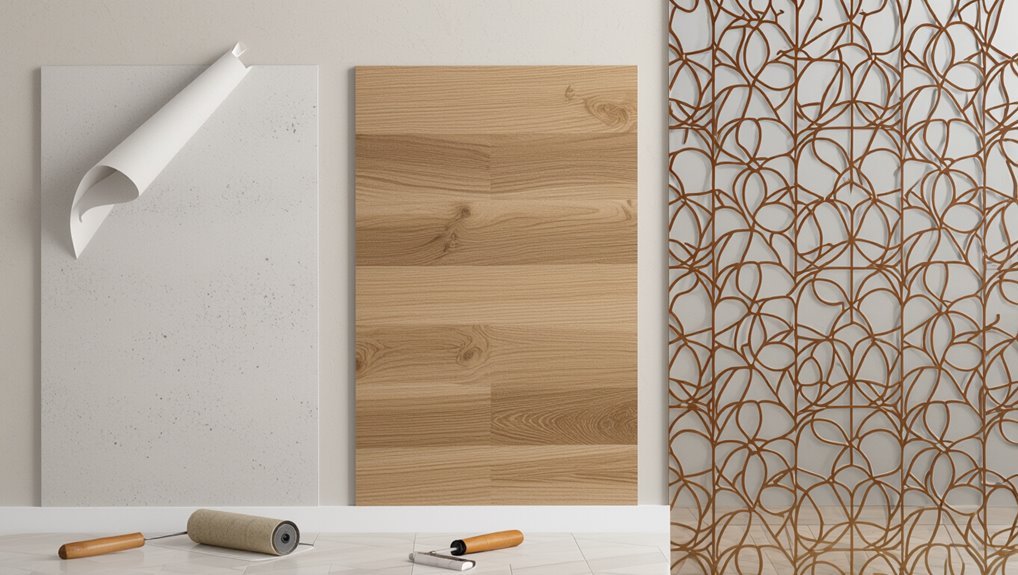
Adhesive panels, wallpaper, and peel-and-stick options give you fast, low-mess alternatives to painting Formica, letting you change texture and pattern without sanding or priming.
You can install them yourself, hide wear, and swap styles later. Consider options resistant to moisture and heat in kitchens.
- Faux tile peel-and-stick
- Textured vinyl wallpaper
- Magnetic-backed decorative panels
Laminate replacement and resurfacing services
If you’re looking for a longer-lasting solution than peel-and-stick coverings, consider professional laminate replacement or resurfacing services.
You’ll get durable new surfaces, color matching, and edge sealing that paint can’t always achieve on Formica. Pros remove damaged laminate or apply high-quality resurfacing materials, ensuring adhesion and moisture resistance.
Expect higher cost and downtime, but a more permanent, maintenance-friendly result.
Faux finishes and temporary solutions
While painting can work, faux finishes and temporary solutions give you more flexibility when you want a fresh look without permanently altering Formica walls.
Try removable wallpaper, peel-and-stick tiles, or contact paper for patterns. Use adhesive-ready planks for texture or stick-on panels for depth.
Faux veneer, metallic rubs, and stencils let you experiment—then remove or change designs without damage or long-term commitment.
Common Problems and Mistakes to Avoid
When painting Formica, you’ll want to watch for poor adhesion—usually caused by inadequate cleaning, wrong sanding, or skipping a bonding primer—and fix it by properly prepping and using a compatible primer.
You should also avoid visible brush marks, drips, and uneven texture by using the right tools and applying thin, even coats.
Finally, don’t pick the wrong primer or paint or rush the curing time, since improper products and insufficient cure will shorten the finish’s lifespan.
Poor adhesion reasons and how to fix them
Because Formica is nonporous and slick, paint can struggle to stick unless you address the underlying causes; poor adhesion usually comes from inadequate cleaning, lack of proper sanding or primer, using the wrong paint type, or painting over damaged laminate.
To fix it, degrease thoroughly, sand lightly to scuff, apply a high-bond primer, use a compatible enamel or acrylic paint, and repair or replace delaminated areas.
Visible brush marks, drips, and uneven texture
Watch your brushstrokes and the paint’s consistency—visible brush marks, drips, and uneven texture usually come from rushed application, overloaded brushes, or paint that’s too thick or thin.
Work in thin, even coats, keep a wet edge, and remove drips immediately.
Sand lightly between coats to smooth imperfections, use quality brushes or rollers, and take your time for a professional finish.
Choosing the wrong primer or paint
If you pick the wrong primer or paint, adhesion, durability, and the final look will suffer—Formica needs products formulated for slick, nonporous surfaces.
Don’t use standard drywall primers or cheap latex; they’ll peel or chip. Choose a bonding primer and a high-quality enamel or acrylic specifically labeled for laminates.
Test a small area first, follow manufacturer instructions, and expect better, longer-lasting results.
Not allowing adequate curing time
When you rush the curing process, paint may look dry but won’t have developed full hardness or adhesion, leaving it prone to scuffs, tackiness, and premature failure on Formica.
You should follow manufacturer cure times—often several days to weeks—avoid heavy use, and control temperature and humidity.
If you need faster turnaround, choose fast-cure products specifically rated for nonporous surfaces.
Best Practices and Maintenance After Painting
After painting your Formica, clean it with mild soap and a soft cloth to avoid stripping the finish.
Keep a small touch-up kit on hand for chips or scratches and gently sand before reapplying paint or sealer.
Monitor humidity, avoid direct heat, and limit heavy wear to help the finish last longer.
Cleaning and everyday care for painted Formica
Though painted Formica is durable, it still needs gentle, regular care to keep the finish looking fresh and prevent damage.
Wipe spills promptly with a soft cloth and mild dish soap, rinse, and dry. Avoid abrasive pads, strong solvents, and steam cleaners.
Use felt pads under objects to prevent scratches, and clean weekly to remove grime and maintain sheen without stripping the paint.
Touch-up tips and how to handle scratches
If you spot a chip or scratch, act quickly to prevent further peeling and keep the repair nearly invisible.
Clean area, scuff lightly with fine sandpaper, and remove dust.
Use matching touch-up paint or tinted primer with a small brush or toothpick for precision.
Feather edges, let cure, then lightly buff with a nonabrasive pad.
Repeat if needed for seamless blending.
How to extend lifespan: humidity, heat, and usage considerations
A quick touch-up keeps small blemishes from spreading, but you’ll extend your paint job’s life most by controlling humidity, heat, and how you use the painted Formica.
Keep rooms well-ventilated, use dehumidifiers in damp areas, and avoid direct heat sources or steam exposure.
Use gentle cleaners, soft cloths, and felt pads under objects. Limit heavy abrasion and repair chips promptly to prevent lifting.
Cost, Time, and ROI Is Painting Formica Worth It?
You can save a lot by doing the work yourself—expect DIY supplies and primer to run a fraction of a pro quote, but plan for more time and a learning curve.
Pros will cost more upfront but finish faster and may give a more durable result that needs less touch-up.
Consider how long you’ll keep the space and whether improved appearance and resale appeal justify the expense.
Estimated DIY vs. professional cost and time breakdown
When weighing whether to tackle Formica painting yourself or hire a pro, consider both upfront costs and the time each route demands—DIY saves money but eats your weekends, while pros charge more but finish faster and often deliver longer-lasting results.
| Option | Estimate |
|---|---|
| DIY cost | $50–$200 |
| DIY time | 1–3 weekends |
| Pro cost/time | $300–$1,200; 1–3 days |
Longevity expectations and resale considerations
If saving money and time mattered in your last decision, think about how long the painted finish will actually hold up and what buyers will notice down the line.
Paint can last years with proper prep, but chips and seams show on high-traffic Formica.
For resale, a neat, neutral repaint helps; poorly done work can lower perceived value and prompt buyer skepticism.
Quick Project Checklist (Materials, Tools, Time)
Before you start stripping or sanding, gather everything you’ll need so the job runs smoothly: a degreaser, fine-grit sandpaper or scuff pad, bonding primer formulated for laminate, 2–3 coats of a durable paint (acrylic latex or enamel), high-quality brushes and a foam roller, painter’s tape, tack cloths, drop cloths, and safety gear (gloves, mask).
Plan time: prep 1–2 hours, painting 2–4 hours, curing 24–48 hours.
- Small wall: half day
- Large wall: full day
- Touchups: 30–60 minutes
FAQ
You probably have a few quick questions before you start, like whether you can paint over laminate without sanding and if spray paint will work.
You’ll also want to know how long paint lasts, whether flexing or moisture makes it chip, and if you can change colors later without stripping.
I’ll answer each so you can pick the right prep, paint, and maintenance.
Can I paint over laminate without sanding?
Wondering whether you can paint over laminate without sanding? You can skip aggressive sanding if you thoroughly clean, degrease, and scuff with a light abrasive pad, then apply a bonding primer made for slick surfaces.
Use high-quality paint formulated for laminate or cabinets. Skipping proper prep risks poor adhesion and peeling, so follow manufacturer instructions and test a small area first.
How long does painted Formica last before needing touch-ups?
How long it lasts depends mainly on prep, paint quality, and how much wear the surface gets: with proper cleaning, scuffing, a bonding primer, and a durable cabinet or enamel paint, painted Formica can hold up well for 5–10 years before you’ll likely need touch-ups in high-use spots.
You can extend that by avoiding abrasions, cleaning gently, and touching up chips promptly with matching paint.
Will paint chip off if the wall flexes or gets wet?
If the wall flexes or gets wet, painted Formica can chip or peel where the bond is weakest, but proper prep and the right products greatly reduce that risk.
Use flexible primers and paint designed for laminate, fill gaps, and seal seams. Avoid heavy-bodied finishes that crack.
Promptly repair chips, control moisture, and reinforce problem areas to maintain adhesion and prevent water-related failure.
Can I change paint color later without stripping?
Although you can repaint Formica without completely stripping it, success depends on prep and product choice: clean and scuff the surface, prime with a bonding primer made for laminates, and use a durable topcoat designed for slick surfaces so the new color will adhere and wear well.
You can change color later if you prep and prime properly; skip either and peeling or poor coverage becomes likely.
Is spray paint a good option for Formica walls?
Since you can repaint Formica without stripping, you might wonder whether spray paint is a good choice for those walls.
It can work for small areas or textured finishes, but adhesion and durability are concerns. Sand, clean, and prime with a bonding primer first.
Spray gives fast, even coverage, yet expect more chipping than professional coatings; topcoat with clear polyurethane for protection.
