
Can I Use Wall Paint on a Concrete Floor? What You Need to Know
You can use wall paint on a clean, dry concrete floor for low‑traffic, indoor spots like closets or temporary projects, but expect limited durability and more upkeep than floor coatings. Prep is essential: clean, test for moisture, etch or abrade the surface, prime, and apply multiple coats or a clear sealer to improve adhesion. Wall paint will wear, chip, and become slippery faster than epoxy or polyurethane; keep that in mind if you want longer-lasting results and practical alternatives.
Can I Use Wall Paint on a Concrete Floor? Quick Answer
Yes—but with caveats: standard wall paint can work on a concrete floor for light-use, dry indoor areas if you properly prep and seal the surface.
You shouldn’t use it where the floor will get heavy traffic, moisture, or abrasion because wall paint lacks the durability and adhesion of floor-specific coatings.
Read on to see when it’s acceptable and when you need a specialty floor paint or sealer.
Direct short answer (yes/no and caveats)
You can use wall paint on a concrete floor in a pinch, but it’s not ideal unless you take precautions: choose a durable latex or acrylic formula, etch and clean the concrete, and apply a suitable primer and multiple coats or a concrete sealer on top for wear and adhesion.
When it might be acceptable and when it’s not
Having said that, there are situations where wall paint will do the job and others where it’ll fail quickly.
Use wall paint only for low-traffic, dry, clean indoor concrete like decorative basements or closets.
Don’t use it on garage floors, patios, or surfaces exposed to moisture, abrasion, or vehicles.
For those, choose floor-specific epoxy or concrete paint for durability and slip resistance.
Basic Understanding Wall Paint vs. Floor Paint
You’ll notice wall paints use different binders, pigments, and solids than floor paints, which are formulated for heavier wear.
Floor paints are tougher and more abrasion-resistant, often with textured or matte finishes to improve slip resistance.
Also pay attention to moisture and adhesion on concrete—floor products are designed to handle dampness and bond better to rough surfaces.
Composition differences: binders, pigments, and solids
Because wall and floor paints are formulated for different stresses, their basic compositions—binders, pigments, and solids—differ in ways that matter when you paint concrete.
You’ll find floor paints use tougher binders (epoxy/acrylic blends), higher solid content for film thickness, and pigments chosen for hide and wear.
Wall paints prioritize spreadability, lower solids, and softer binders for flexibility and ease of application.
Durability and abrasion resistance differences
While both wall and floor paints protect and color surfaces, they answer different durability demands: floor paints are built to resist constant foot traffic, scrapes, and occasional impacts, whereas wall paints are meant mainly to withstand light scuffs and cleaning.
You’ll find floor coatings use tougher binders, higher solids, and abrasion-resistant additives so the coating won’t wear through quickly under repeated use.
Slip resistance and finish differences
Along with wear resistance, slip resistance and finish are key ways floor coatings differ from wall paints.
You’ll notice floor paints include textured additives or matte formulations to improve traction when wet or oily.
Wall paints prioritize appearance and smoothness, often glossy.
Using wall paint leaves floors slick and unsafe; choose floor-specific products to guarantee the right grip and a durable, appropriate finish.
Moisture and adhesion considerations for concrete
If concrete can trap moisture beneath a coating, that trapped vapor will lift or blister paint.
So you need a product and prep routine that handle damp substrates. You should test for moisture, use breathable primers or epoxy primers designed for concrete, and patch cracks.
Choose coatings rated for concrete floors; they bond under slight moisture and flex with substrate movement to prevent peeling and failure.
Assessing Your Concrete Floor: Is Wall Paint Appropriate?
Before you decide, consider what kind of concrete floor you’ve got — garage, basement, patio, or an interior slab — since each has different traffic and exposure.
Check the surface for cracks, efflorescence, dust, and signs of moisture, and remember to test for moisture and pH before painting.
If the slab fails those checks you’ll need repairs or a specialized floor coating rather than standard wall paint.
Types of concrete floors and typical uses (garage, basement, patio, interior)
Concrete floors come in many forms—garage slabs, basement slabs, patios, and interior concrete—and each use exposes the surface to different stresses that affect whether wall paint will work.
Garages see vehicle weight, oils and abrasion; basements face occasional dampness; patios endure sun, rain, freeze-thaw; interior concrete gets foot traffic and light spills.
Match paint choice to these demands.
Surface condition checklist: cracks, efflorescence, dust, moisture
When you’re deciding whether wall paint will stick and last on a concrete floor, you need to inspect key surface conditions: cracks, efflorescence, dust, and moisture.
Check cracks for depth and movement; repair larger ones. Look for white powder or salts (efflorescence) and remove it.
Sweep and vacuum thoroughly. Feel for dampness; persistent moisture or flaking surface means don’t paint.
Testing for moisture and pH before painting
If you found damp spots, flaking, or salt deposits in your inspection, you’ll need to test for moisture and pH next to decide if wall paint will hold up.
Use a moisture meter and damp-cup for readings, and pH strips or a solution for alkalinity.
Interpret results: high moisture or pH over 10 means don’t paint until remedied.
- Damp patch with meter
- Cup condensation test
- pH strip color check
When Wall Paint Might Work Low-Traffic, Temporary, or Interior Uses
If your concrete floor sees little foot traffic or you need a short-term fix for an interior space, wall paint can be a workable, low-cost option with an expected lifespan of months to a couple years.
You’ll trade durability for savings and easier application—colors look fine but chips, scuffs, and staining are more likely.
Weigh the visual and budget benefits against the maintenance and touch-ups you’ll probably need.
Suitable scenarios and expected lifespan
1–3 coats of wall paint can work on a concrete floor in a few specific situations: very low-traffic rooms (like a guest closet or decorative display area), short-term projects (seasonal pop-ups or staged homes), or protected interior spots where the floor won’t face heavy abrasion or moisture.
Expect finishes to last months to a few years depending on use, prep, and topcoat protection; touch-ups may be needed.
Pros and cons of using wall paint on floors
When you only need a quick, low-cost fix for a protected interior area—like a guest closet, staged room, or temporary pop-up—wall paint can be a reasonable short-term option because it’s easy to apply and available in many colors.
You’ll benefit from low cost, fast drying, and simple touch-ups, but expect limited durability, poor abrasion resistance, and increased maintenance; avoid high-traffic or wet areas.
Visual and cost trade-offs
Think of wall paint as a bargain cosmetic fix rather than a long-term floor solution: it gives you fast color changes and a low upfront cost, but you’ll trade away durability and wear resistance.
Use it in low-traffic rooms, guest areas, or for staging. Expect frequent touch-ups, quick fading, and limited protection; budget for recoats or eventual replacement with proper floor paint or coatings.
Recommended Alternatives to Wall Paint for Floors
If you want a durable, long-lasting finish, choose products made for floors like epoxy, acrylic floor enamel, or concrete stains instead of wall paint.
You can also consider sealers and concrete dyes for a thinner, more natural look without the film of paint.
For garages, patios, or other high-traffic or exterior areas, use complete coating systems designed to withstand wear and weather.
Floor-specific paints (epoxy, acrylic floor enamel, concrete stains)
There are three common floor-specific options you should consider: epoxy, acrylic floor enamel, and concrete stains. Each suits different needs—durability, ease, or aesthetics—so pick based on traffic and finish.
| Type | Best for |
|---|---|
| Epoxy | High-traffic, chemical resistance |
| Acrylic Enamel | Quick application, moderate wear |
| Concrete Stain | Color depth, natural look |
Sealers and concrete dyes vs. paint
Those floor-specific paints are great, but you might prefer sealers or concrete dyes instead of coating a floor like you’d a wall.
Sealers penetrate and protect without hiding texture, reducing dust and staining while preserving slip resistance.
Dyes soak into concrete for translucent, long-lasting color that won’t peel like paint.
Both are thinner, easier to maintain, and better for porous slabs.
Coating systems for high-traffic or exterior floors
When you need a durable, long-lasting surface for high-traffic indoor areas or exposed exterior slabs, skip wall paint and choose purpose-built coating systems like epoxy, polyurea, or acrylic concrete coatings.
These systems bond to concrete, resist abrasion, UV, chemicals, and moisture, and offer slip-resistant textures.
You’ll select based on cure time, flexibility, longevity, and maintenance needs for your environment.
How to Use Wall Paint on a Concrete Floor Step-by-Step Guide (If You Choose To)
If you decide to use wall paint on a concrete floor, you’ll need to follow a careful, five-step process to get decent adhesion and durability.
Start by preparing the surface—clean, degrease, and patch—then etch or shot-blast for better grip.
Prime with a concrete-compatible primer, apply the wall paint correctly (thin if needed and use proper tools and multiple coats), and finish with a topcoat or sealer for protection.
I’ll walk you through each step with practical tips and product recommendations.
Step 1 Prepare the surface (cleaning, degreasing, patching)
Start by stripping the floor down to a clean, bare surface so paint can bond properly. You’ll sweep, degrease, and patch cracks and spalls; remove oil, wax, and loose particles.
Work methodically, letting patching compounds cure and rinsing thoroughly. Visualize the finished base:
- Scrubbed concrete with soapy water
- Grease spots lifted with degreaser
- Smooth, filled cracks ready to paint
Step 2 Etching or shot-blasting for adhesion
Prepare the concrete surface for paint adhesion by mechanically or chemically roughening it—etching with diluted muriatic acid or using a shot-blaster—to remove the smooth, glazed layer and open the pores so paint can bond.
Work in small sections, follow safety precautions (gloves, eye protection, ventilation), neutralize and rinse etched areas thoroughly, and allow full surface drying before proceeding to the next step.
Step 3 Priming: recommended primers and application tips
Once you’ve etched and cleaned the floor, apply a concrete-specific primer to guarantee the wall paint bonds and lasts; primers fill pores, block moisture, and create a uniform surface so your finish coat goes on smoothly.
Choose a high-adhesion, solvent- or acrylic-based concrete primer. Roll or brush evenly, work in small sections, follow manufacturer cure times, and ventilate; avoid puddling and recoat only when fully dry.
Step 4 Applying wall paint properly (thinning, tools, coats)
With the primer dry, you’re ready to apply the wall paint—but concrete floors demand a different approach than walls.
Thin water-based paint per manufacturer only if recommended; don’t over-thin.
Use a quality roller (¾” nap for smooth concrete) and a brush for edges.
Apply two thin, even coats, allowing full drying between coats for uniform coverage and adhesion.
Step 5 Adding topcoat or sealer to improve durability
Protect the painted surface by adding a topcoat or sealer that’s compatible with your wall paint—this step dramatically improves wear resistance, stain protection, and ease of cleaning on a concrete floor.
Choose a clear polyurethane, acrylic, or epoxy sealer recommended for concrete and your paint type.
Apply thin, even coats with a roller, follow recoat times, and inspect for missed spots.
Step 6 Curing time and first-use precautions
After you finish sealing, give the floor adequate time to cure before heavy use—most wall paints sealed for floors need at least 24–72 hours of light foot traffic and 7 days for full chemical and abrasion resistance.
During curing, avoid dragging furniture, spills, and cleaning with harsh chemicals. Use protective pads, ventilate the area, and wait the full cure period before placing rugs or heavy items to prevent damage.
Common Problems When Using Wall Paint on Floors and How to Fix Them
When you use wall paint on a concrete floor you may run into issues like poor adhesion, peeling, flaking, blistering, or white salt deposits (efflorescence).
You’ll also see rapid wear, scuffing, or tacky spots from incomplete curing.
Below I’ll explain common causes for each problem and give practical fixes you can try.
Poor adhesion and peeling causes and remedies
If your wall paint is flaking or peeling on a concrete floor, it’s usually because the surface wasn’t prepared or the paint isn’t designed for foot traffic and moisture; both issues keep paint from bonding.
Clean, etch, and dry the slab, remove loose paint, and sand glossy spots.
Use a concrete primer and switch to a floor-grade or epoxy paint.
Allow proper cure time.
Flaking, blistering, and efflorescence
Three common issues you’ll hit when using wall paint on a concrete floor are flaking, blistering, and efflorescence, and each has a distinct cause and fix.
Flaking indicates poor adhesion—clean, etch, and use a concrete primer.
Blisters form from trapped moisture or heat—allow moisture to dry, relieve heat sources, and sand before recoating.
Efflorescence needs dehumidifying and a salt remover; then seal.
Rapid wear and scuffing short-term fixes
Although wall paint can look fine at first, concrete floors take heavy foot traffic and you’ll see rapid wear and scuffing unless you protect the surface.
For short-term fixes, apply a clear, durable sealer or polyurethane coat, use area rugs in high-traffic spots, and add adhesive floor protector pads under furniture.
Clean regularly with a soft broom to minimize abrasive grit.
Tackiness or incomplete curing troubleshooting
When wall paint feels tacky or never seems to fully cure on a concrete floor, you’ll want to troubleshoot quickly to prevent dirt buildup and adhesion failures.
First, check humidity and temperature; raise heat or dehumidify. Confirm proper ventilation and extended drying time.
Test for moisture in the slab and remove contaminants. If problems persist, strip and reseal with a floor-rated primer and paint.
Best Practices and Professional Tips
When choosing paint for a concrete floor, pick a durable finish and color that hides wear and suits traffic.
You can improve slip resistance with approved aggregates or additives and follow simple maintenance to keep the surface lasting longer.
If the job needs extensive prep, moisture control, or a commercial-grade coating, call a pro instead of trying it yourself.
Choosing the right paint finish and color for floors
How do you pick a paint finish and color that’ll stand up to foot traffic, hide imperfections, and make the room feel right?
Choose durable floor or porch enamel with a satin or semi-gloss sheen for easy cleaning and scuff resistance.
Pick mid-tones or patterned stencils to mask flaws; light colors enlarge small spaces, while darker hues hide stains and add warmth.
Improving slip resistance safely (aggregates, additives)
Picking the right finish and color matters, but you also need to make sure the floor stays safe underfoot—especially in high-traffic or wet areas.
Add non-slip additives or broadcast fine silica or polymer grit into wet paint for texture. Test compatibility with your paint, follow manufacturer dosages, and seal with a clear topcoat.
Wear PPE and clean thoroughly before application.
Maintenance tips to extend longevity
Because regular care keeps painted concrete looking and performing its best, set up a simple maintenance routine and stick to it:
Sweep or dry-mop daily, spot-clean spills immediately with mild detergent, and wet-mop weekly with pH-neutral cleaner.
Reapply a compatible sealer every 1–3 years, touch up chips promptly, and use mats at entries to reduce grit.
Inspect periodically for wear and address issues quickly.
When to call a professional vs. DIY
Keeping up with routine maintenance will prevent many problems, but there are times when hiring a pro makes more sense than tackling a job yourself.
Call a professional if the floor has structural cracks, moisture issues, uneven substrate, or old coatings that need stripping.
DIY suits clean, dry, stable concrete and small areas.
Pros guarantee proper prep, moisture testing, and durable coatings for high-traffic spaces.
Cost and Time Comparison: Wall Paint vs. Floor Coatings
You’ll usually pay less upfront for wall paint in materials and labor, but floor-specific coatings cost more initially.
Consider expected lifespan—floor coatings often last several years longer and resist wear, meaning better long-term value.
We’ll compare quick cost estimates and projected durability so you can weigh immediate savings against future expense.
Upfront material and labor cost estimates
Comparing upfront material and labor costs is the quickest way to decide whether wall paint or a proper floor coating makes sense for your concrete floor. You’ll pay less for wall paint and simple rollers; coatings need primers, sealers, and often grinders plus pros. Estimate materials, prep time, and hourly labor before choosing.
| Item | Typical Cost |
|---|---|
| Wall paint materials | Low |
| Labor (DIY) | Low |
| Floor coating materials | Medium–High |
| Professional labor | High |
Expected lifespan and long-term value
While wall paint can get you a quick, low-cost finish, it usually won’t hold up like a purpose-made floor coating—expect painted concrete in moderate-traffic areas to show wear, chips, and staining within a year or two.
Whereas epoxy or polyurethane systems commonly last 5–15 years depending on prep and use.
You’ll pay less upfront with wall paint but replace or repair more often, raising lifetime cost.
Environmental, Safety, and Code Considerations
You’ll want to evaluate VOC levels and make sure there’s good ventilation when applying paint to a concrete floor to protect your health.
Follow safe application practices—gloves, respirator, and proper disposal—and keep children and pets away until the floor is fully cured.
Also check building codes and your insurance policy for garages or exterior surfaces, since some coatings can affect fire ratings or coverage.
VOCs, ventilation, and safe application practices
Because many wall paints weren’t formulated for floors, they often emit higher levels of volatile organic compounds (VOCs) that can accumulate in a garage or basement.
So you should plan ventilation and choose low-VOC or zero-VOC products when possible. Open windows, run fans, and use respirators rated for organic vapors.
Work in stages, allow full cure time, and keep people and pets away until odors dissipate.
Building code or insurance considerations for garages and exteriors
Good ventilation and low-VOC choices also help meet legal and insurance expectations when you’re painting a garage or exterior concrete.
Check local codes for fire, slip-resistance, and ventilation requirements; some jurisdictions restrict product types in garages.
Notify your insurer before major changes—painted floors can affect claims if they mask damage or alter fire ratings.
Keep records of products and application for compliance.
FAQs
You probably have quick questions like whether interior wall paint will hold up in a garage, stop concrete dusting, or how long it’ll last on a floor.
You might also wonder if you can mix in non-slip grit or if priming is always needed before painting concrete.
I’ll answer those points clearly so you can choose the right approach.
Can I use interior wall paint in a garage?
While you can technically use interior wall paint in a garage, it’s usually not the best choice because it lacks the durability and chemical resistance garage floors need.
Wall paint will chip, stain, and wear quickly under vehicles, foot traffic, and spills. If you must, expect frequent touch-ups and limited longevity.
Instead, choose floor-specific paints or epoxy coatings for better abrasion, oil resistance, and lasting protection.
Will wall paint prevent concrete dusting?
Because wall paint isn’t formulated to seal porous concrete, it won’t reliably stop dusting and will often fail after a short time.
If you apply interior paint, dusting will usually reappear as the paint flakes or absorbs moisture.
To control dusting, you need a concrete sealer or epoxy primer made for masonry; prepping the surface and addressing moisture issues is essential.
How long will wall paint last on a floor?
If you slap wall paint on a concrete floor without proper prep and protection, it’ll usually start showing wear within months rather than years.
Expect chipping, scuffing, and fading under foot traffic and moisture.
With excellent surface prep, primer, and protective topcoat, you might stretch life to a couple of years, but it won’t match floor-specific coatings for durability or long-term resistance.
Can I add non-slip grit to regular wall paint?
Curious whether you can mix non-slip grit into regular wall paint? You can, but check compatibility and container instructions first.
Mix fine grit or silica additive slowly to avoid clumping, and stir thoroughly. Test a small area for texture, adhesion, and appearance.
Expect reduced sheen and slightly different drying. For heavy-traffic or wet areas, use a floor-rated anti-slip additive or coating instead.
Is priming always necessary before using wall paint on concrete?
Adding non-slip grit to paint is a good start for traction, but you’ll also want to think about surface prep—especially priming—before using wall paint on concrete.
You usually should prime: concrete is porous and alkaline, and primer improves adhesion, seals stains, and prevents peeling.
Skip priming only for clean, previously sealed floors compatible with the paint; otherwise, always prime first.
Visual Guide and Resources
You’ll find a simple photo checklist that shows common surface problems and the prep steps to fix them.
Use the images to compare your floor and decide what repairs or cleaning you’ll need before painting.
Below the checklist are recommended products and links to technical data sheets so you can review specs and application instructions.
Photo checklist for surface problems and preparation
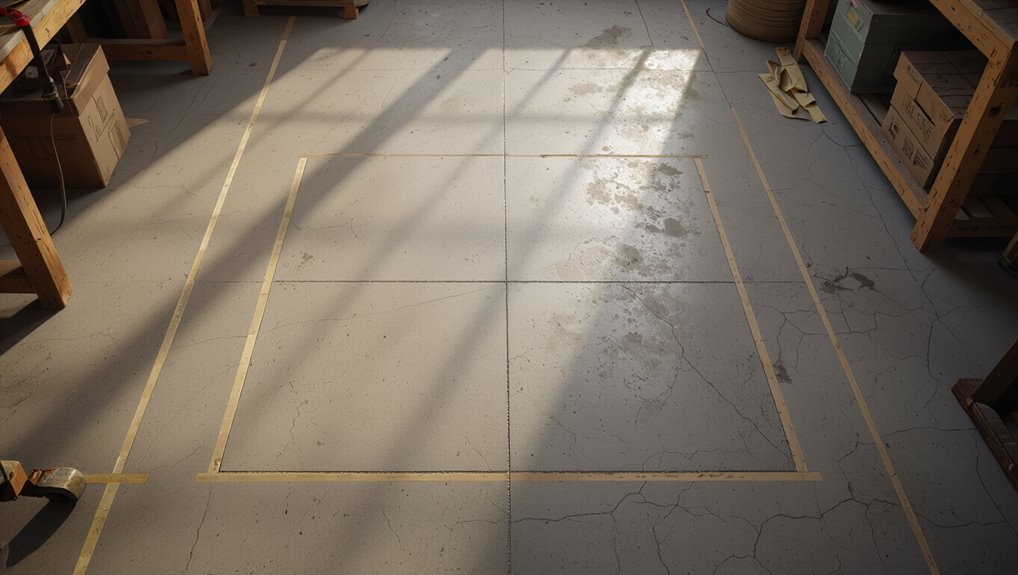
Before you start painting, walk the entire floor and take clear photos of every surface problem—cracks, spalling, efflorescence, oil stains, paint peel, and high spots—so you’ve got a visual record to guide repairs and product choices.
Label and timestamp each image, note location and size, capture close-ups and context shots, and keep a checklist of needed fixes to prioritize prep before painting.
Recommended products and links to technical data sheets
Start with a shortlist of proven products—concrete etcher/cleaner, crack repair compound, high-adhesion primer, and a floor-grade paint or epoxy—then match each to its technical data sheet (TDS) so you can confirm compatibility, coverage, cure times, and surface prep.
Download TDS PDFs from manufacturers; keep links handy.
Visualize product use:
- Etched, clean slab
- Filled, smooth joints
- Primed, uniform surface
