
Can I Use Wall Paint on Cardboard? When It Works and When It Doesn’t
Yes — you can use wall paint on cardboard for many indoor crafts and displays, but success depends on paint type, cardboard strength, and prep. Use water-based latex or acrylic, thin coats, and a sealer or primer to prevent soaking, warping, and flaking. Avoid heavy oil-based paints or thick layers on thin, unsealed cardboard. Work slowly, let each coat dry, and test a scrap first; keep going and you’ll find tips for tricky situations and best practices.
Can I Use Wall Paint on Cardboard? Quick Answer and Key Takeaways
Yes — you can use wall paint on cardboard, but results depend on the paint type and surface prep.
It works well for single-layer projects and sealed or primed cardboard, but it’s less suitable for thin, unsealed, or load-bearing pieces.
This guide’s for crafters, model-makers, and DIYers who want reliable tips for painting cardboard.
Direct short answer
You can use wall paint on cardboard for many projects, but choose water-based (latex or acrylic) paints and test a small area first to avoid warping or soak-through.
Thicker paints and a primer or sealant will give better coverage and durability.
In short, can I use wall paint on cardboard? Yes—prefer water-based, prime or seal when needed, and avoid heavy coats that saturate or deform the board.
One-line summary of when it works and when it doesn’t
When the cardboard is primed and you use water-based (latex or acrylic) paint in thin coats, it works well for crafts and temporary displays; don’t use heavy oil-based paints or saturating layers on thin corrugated board, or you’ll get warping, bleed-through, and weak surfaces.
Use primer, light coats, and sealed edges for small projects; avoid structural or long-term applications.
Who this guide is for
Those limits help set expectations, so now let’s clarify who this guide is for: hobbyists and DIYers working on small-scale craft projects, classroom displays, cosplay props, or temporary signage who want straightforward, low-cost paint options; homeowners tackling quick touch-ups on moving boxes or packing props; and beginners needing simple prep and painting steps.
You’ll get practical advice on materials, methods, and realistic outcomes.
Basic Understanding Cardboard and Wall Paint: Materials and Properties
You’ll first want to know what kind of cardboard you’re working with—single-wall, double-wall, corrugated—and how porous and stiff it is, since those factors affect strength and paint behavior.
Wall paints come in latex, acrylic, and oil-based formulas, plus primers and a range of finishes, each with different drying and adhesion properties.
Because cardboard soaks up liquids and can warp, you’ll need to take into account absorption, sealing, and how well a given paint will stick without causing deformation.
What is cardboard? (types, porosity, strength)
Cardboard is a fibrous, paper-based material available in several types—single-wall, double-wall, and corrugated variants—that differ in thickness, strength, and surface texture; knowing which type you’re working with matters because porosity and structural rigidity affect how paint soaks in and how the board holds up.
You’ll find single-wall is lightweight and absorbent. Double-wall adds stiffness, and corrugated layers resist bending but can still warp when wet.
What is wall paint? (latex, acrylic, oil-based, primers, finishes)
Paint comes in several chemical bases and finishes, and each one behaves differently on porous surfaces like cardboard.
You’ll find latex and acrylic water-based paints—easy to clean, quick-drying, flexible—and oil-based enamels—durable, slower to dry, more odorous.
Primers seal and promote adhesion; choose based on paint type.
Finishes (flat, eggshell, satin, gloss) affect sheen and durability, so match finish to use.
How paint interacts with cardboard (absorption, warping, adhesion)
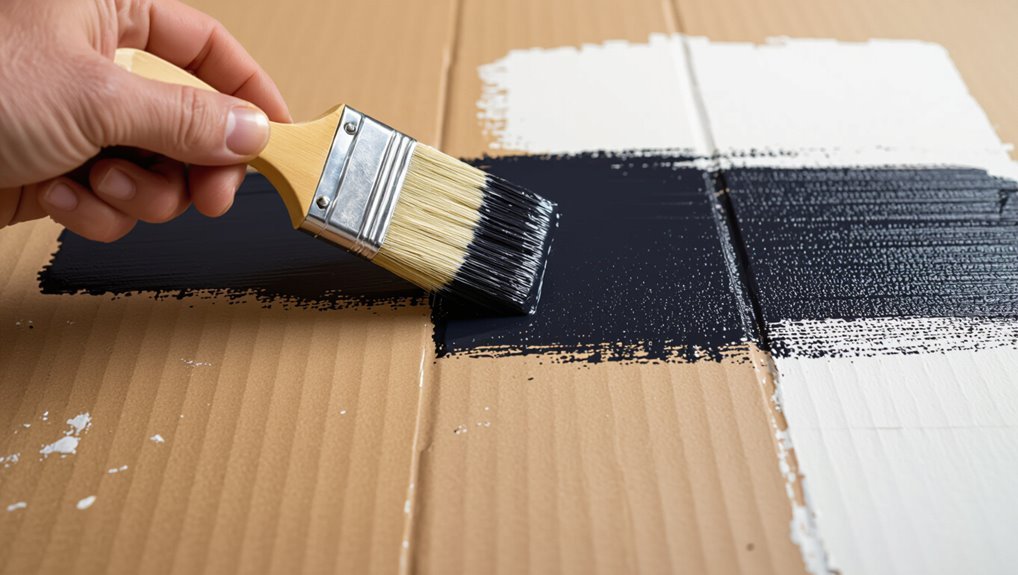
Because cardboard soaks up liquids, the way wall paint behaves on it depends heavily on absorption, which then drives warping and adhesion.
You’ll find thin coats penetrate fibers, darken and stiffen the board but can cause buckling. Heavy or water-rich paint warps and delaminates.
Priming or sealing reduces soak-in, improves adhesion, and minimizes distortion, so you’ll get a more durable, even finish.
When Wall Paint Works on Cardboard Suitable Scenarios
You’ll find wall paint works well for indoor craft projects and temporary displays where durability isn’t critical.
It’s great for signage and prototypes, especially when you use thick corrugated board rather than thin single-ply cardboard.
Sealing or priming thin or porous pieces expands your options and improves finish and longevity.
Indoor craft projects and displays
When you’re putting together indoor crafts or short-term displays, wall paint can be a quick, affordable way to get bold color on cardboard without fuss.
You can cover large areas smoothly, layer hues, and add texture with brushes or rollers. Seal with clear acrylic for durability, avoid heavy coats that warp, and keep projects dry and sheltered from moisture indoors.
Temporary signage and prototypes
If your indoor craft techniques worked on posters and display pieces, you can apply the same approach to short-term signs and prototypes.
Use wall paint for quick mockups, directional signs, or product samples you’ll discard or replace. Seal edges lightly, keep pieces dry, and avoid heavy handling.
Expect minor warping; paint’s durability suits temporary indoor use but not long-term exposure or rough treatment.
Thick corrugated vs thin single-ply cardboard: which holds paint
Wondering which cardboard will take wall paint better? You’ll find thick corrugated holds paint more reliably—its fluted core resists warping, so colors sit evenly and survive light handling.
Thin single-ply soaks up paint, wrinkles, and tears easily, producing uneven finish and requiring more coats. For short-term, low-detail projects pick corrugated; avoid single-ply unless you accept texture issues and fragility.
Sealed or primed cardboard use cases
Thick corrugated cardboard usually handles paint better than single-ply, but sealing or priming changes the game by stabilizing fibers and reducing soak-through so you can use wall paint in more situations.
Sealers let you paint lightweight boxes, display boards, props, and craft projects without warping.
Use a primer for detailed finishes or to prevent color bleed; sand lightly between coats for smooth results.
When Wall Paint Doesn’t Work on Cardboard Limitations and Failures
Don’t use wall paint on cardboard when you need structural strength or long-term durability, because it can warp, weaken, or fail outdoors.
You’ll also see bleeding, feathering, and brush marks that spoil a clean finish, and many paints aren’t safe for food-contact items or some kids’ projects.
Consider these limitations before you start so you can choose a better material or product.
Structural weakness and warping risks
Because cardboard soaks up moisture and flexes more than plaster or drywall, applying wall paint can quickly reveal the material’s structural limits.
You’ll notice sagging panels, softened edges, and weakened corrugation where paint adds weight or moisture. Heavy coats or repeated wetting can warp sheets, split seams, and collapse flutes.
Bleeding, feathering, and visible brush marks
Once paint starts to soften and warp cardboard, surface flaws become impossible to ignore: pigments can bleed along soaked fibers, brush strokes feather at edges, and every stroke may leave a visible ridge.
You’ll notice jagged color edges, fuzzy seams, and obvious brush texture that primer can’t always hide. Sanding helps, but heavy coats worsen feathering, so use thin, controlled layers and proper tools.
Durability issues for long-term or outdoor use
If you plan to use wall paint on cardboard for projects that need to last, be prepared for rapid breakdown: cardboard soaks moisture, stiffeners, and UV differently than wallboard, so painted surfaces can peel, delaminate, or crumble within weeks when exposed to humidity, rain, or sun.
You should expect warped panels, flaking finish, and weakened joints outdoors; sealants and rigid backing help but don’t guarantee longevity.
Toxicity and safety concerns for food-contact or kids’ items
When you plan to use wall paint on cardboard that will touch food or children’s items, treat it as potentially unsafe—most interior wall paints aren’t certified food-safe and can leach solvents, VOCs, or heavy metals from the pigment and additives.
Don’t use painted cardboard for plates, toys, or crib liners. Instead, choose certified food-safe coatings, non-toxic craft paints, or seal with a tested barrier before contact.
How to Prepare Cardboard for Wall Paint Step-by-Step
Before you paint, you’ll want to pick sturdy, single- or double-wall cardboard and make sure it’s clean and flat.
Next you’ll seal or prime the surface, sand any rough spots smooth, then choose the right paint and application method—brush, roller, or sprayer—for the job.
I’ll walk you through each step and recommend products and techniques as we go.
Step 1: Choose the right cardboard type
Although cardboard looks simple, picking the right type matters for how paint will adhere and how durable your finished piece will be.
Choose single-wall corrugated for lightweight projects, double-wall for sturdier pieces, and avoid very thin paperboard or waxed/laminated surfaces that repel paint.
Ripples, heavy textures, or water-damaged boxes will compromise results, so start with clean, dry, solid stock.
Step 2: Clean and flatten the surface
Clear away dust, tape, and any loose fibers so paint will stick evenly to the surface.
Inspect for dents, creases, or warped areas and smooth them gently with a soft brush or fingertip pressure.
Weigh curled edges flat with books or clamps until dry.
Trim ragged edges with a sharp blade for clean lines.
Work on a clean, level workspace to prevent new damage.
Step 3: Apply sealing or priming (products and methods)
Seal the cardboard so paint won’t soak in, warp, or flake off later. You’ll choose a primer or sealer, apply thin coats, and let each dry fully.
Consider these options and tips:
- PVA glue thinned with water for cheap sealing
- Acrylic gesso for tooth and primer
- Shellac for moisture resistance
- Spray primer for even coverage and speed
Step 4: Sanding and surface smoothing techniques
Smooth the surface before painting so your wall paint lays down evenly and the finish looks professional.
Lightly sand sealed cardboard with fine-grit (220–320) sandpaper using gentle, even strokes. Knock down rough fibers and ridges, wipe dust with a tack cloth, and inspect for imperfections.
Repeat spot-sanding after any filler dries. Keep edges crisp and avoid over-sanding thin areas.
Step 5: Choosing the right paint and tools (brush, roller, sprayer)
Now that the surface is even and dust-free, pick paints and tools that match your project’s scale and finish.
Use water-based latex for flexibility and low odor; consider acrylic for stronger adhesion.
For small details use a synthetic brush, for larger panels a short-nap roller, and choose a sprayer only if you can control overspray and thin the paint appropriately.
Step 6: Paint application steps (thin coats, drying times)
Once you’ve chosen your paint and tools, apply several thin, even coats rather than one thick layer to prevent warping and bubbling; let each coat dry fully to the touch before adding the next.
Work quickly with smooth strokes, maintain a wet edge, and sand lightly between coats if needed.
Allow recommended drying times on the paint label to guarantee proper adhesion and finish.
Step 7: Finishing and protective topcoats
After your coats have dried and any sanding is done, it’s time to protect that finish with a suitable topcoat so the paint resists scuffs, moisture, and yellowing.
Choose a clear acrylic sealer or water-based polyurethane for flexibility; apply thin, even layers, letting each dry fully.
Lightly sand between coats if needed. Two coats usually suffice for everyday use.
Comparison: Paint Types and Treatments for Cardboard
You’ll weigh latex/acrylic against oil-based paints for flexibility, drying time, and odor so you can pick what’s right for cardboard.
Decide whether spray paint or brush/roller gives the finish and control you need for edges and texture.
Then compare primers and sealers—PVA, gesso, shellac, and clear acrylic—to see how each affects adhesion, absorbency, and moisture resistance.
Latex/acrylic vs oil-based paints
Although both latex/acrylic and oil-based paints can cover cardboard effectively, they behave quite differently on the surface, so you’ll want to choose based on durability, drying time, and finish. You’ll find latex dries fast, flexes, and cleans easily; oil gives tougher, smoother results but takes longer and can stiffen cardboard.
| Feature | Quick note |
|---|---|
| Drying | Latex: fast |
| Durability | Oil: higher |
| Flexibility | Latex: better |
| Cleanup | Latex: water-based |
Spray paint vs brush/roller for cardboard
When you need even, fast coverage on corrugated or smooth cardboard, spray paint gives a thin, uniform coat that minimizes brush marks and soaks less into the fibers; by contrast, brushes and rollers let you control thickness, texture, and edges but can leave visible strokes and take longer to dry.
Use spray for quick, smooth finishes and detail brushes or rollers when you need opacity, blending, or precise edges.
Primers and sealers compared (PVA, gesso, shellac, clear acrylic)
Because untreated cardboard soaks and warps, you should seal it before painting; choosing the right primer—PVA, gesso, shellac, or clear acrylic—changes how paint adheres, how the surface looks, and how durable the final piece will be.
Use PVA for cheap sealing, gesso for tooth and matte finish, shellac for strong moisture barrier, and clear acrylic for flexible, non-yellowing protection.
Common Mistakes and How to Avoid Them
Watch for common errors like over-saturating the cardboard, skipping a primer or sealer, and applying heavy finishes that can sag.
You’ll also want to respect drying and curing times to prevent warping and tacky surfaces.
I’ll explain the causes and quick fixes so you can avoid these pitfalls.
Over-saturating cardboard causes and fixes
If you soak cardboard with too much wall paint, it’ll warp, buckle, and lose strength, turning your neat project into a soggy mess. The good news is you can prevent and repair most damage with the right techniques.
Work in thin coats, dilute paint slightly, and let each layer dry fully.
For warped pieces, clamp flat between boards with weights until dry, then reinforce.
Skipping primer or sealer
After fixing warps and using thin coats, don’t skip a primer or sealer on cardboard—going straight to wall paint lets the board soak up paint unevenly, causes blotchy coverage, and weakens the surface.
You should use a dedicated primer or diluted PVA to seal fibers, improve adhesion, reduce absorption, and create an even base so fewer topcoats achieve consistent color and durability.
Using heavy finishes that cause sagging
Because cardboard’s fibers are soft and flexible, heavy finishes like thick gloss coats, multiple heavy-bodied varnish layers, or oil-based enamels can pull the board down and cause sagging or warping as they dry.
You should choose lightweight, water-based paints or dilute finishes, apply thin even coats, and support large pieces flat while drying to keep edges from drooping.
Ignoring drying and curing times
Heavy finishes can sag while they dry, but even light coats need proper drying and curing to perform well on cardboard.
Don’t rush handling or recoating; wet layers deform, lift, or tack. Allow recommended flash and cure times, work in moderate humidity and temperature, and test a scrap piece.
Patience prevents warping, stickiness, and finish failure—plan drying into your project timeline.
Best Practices and Expert Tips
Match paint thickness to your cardboard so it won’t warp, and reinforce edges or add a simple frame for strength.
You’ll want to weatherproof finished pieces with a clear sealant for durability, especially outdoors.
Whenever possible choose non-toxic paints and reuse or recycle scraps to keep projects low-waste.
Optimal paint-to-thickness match
When you choose paint thickness for cardboard, think about the board’s strength and the finish you want: thin coats keep the board flexible and dry quickly, while thicker coats give richer color and better coverage but can warp or soak through.
Test on scraps, use multiple thin layers for durability, and let each layer fully cure to prevent sogginess and uneven texture.
Edge reinforcement and framing techniques
A few simple reinforcement steps will keep cardboard edges from fraying, warping, or showing paint bleed-through, so you can get a clean, durable finish.
Tape edges with paper or gaffer tape, sand lightly, and seal with thinned PVA or gesso.
Add narrow wood or foam-core frames glued to edges for rigidity and a neat paintable trim that prevents dents and curling.
Weatherproofing and making projects durable
Because cardboard soaks up moisture and flexes under stress, you’ll want to combine sealing, structural reinforcement, and smart finishes to keep projects weatherproof and long-lasting.
Seal edges with waterproof tape or caulk, apply a quality primer, and use exterior-grade paint or clear sealant.
Add internal ribs, a rigid backing, and elevate the base to prevent ground moisture and bending over time.
Sustainable and low-waste approaches (recycling, non-toxic paints)
If you want to keep cardboard projects low-waste and safe, choose recycled or upcycled cardboard, use water-based, low-VOC paints and primers, and seal with biodegradable or recyclable coatings where possible; these choices cut landfill waste, reduce toxins, and make future recycling easier.
Also, test small paint amounts, prefer non-toxic pigments, reuse brushes, compost scrap cardboard, and label materials for proper disposal.
Project Examples and Case Scenarios
You’ll get a clear step-by-step checklist for small crafts, so you can plan painting, sealing, and finishing without guessing.
For large props or signage, you’ll see workflow tips on structure, paint layering, and transportability to keep things sturdy and vivid.
And for kids’ school projects, you’ll find safe-materials guidance and time-saving shortcuts that still look great.
Small craft project stepwise checklist
1 simple checklist will keep your small cardboard-and-wall-paint craft projects tidy and successful: gather materials, prep the surface, choose the paint type and finish, plan layers and drying times, protect surrounding areas, and seal the final piece.
Work in this order: sand/lightly prime, test color on scrap, apply thin coats with drying pauses, add details, seal with appropriate varnish, trim edges cleanly.
Large prop or signage considerations and workflow
When you scale up from a small craft to a large prop or sign, plan for weight, structural support, and weather resistance from the start; assess cardboard grade, reinforce with ribs or a frame, and attach handles or mounting points.
Prime and seal surfaces, use exterior-rated paints or sealants, and stage tests for wind, moisture, and transport.
Schedule assembly, drying, and installation steps.
Kid’s school project safe materials and shortcuts
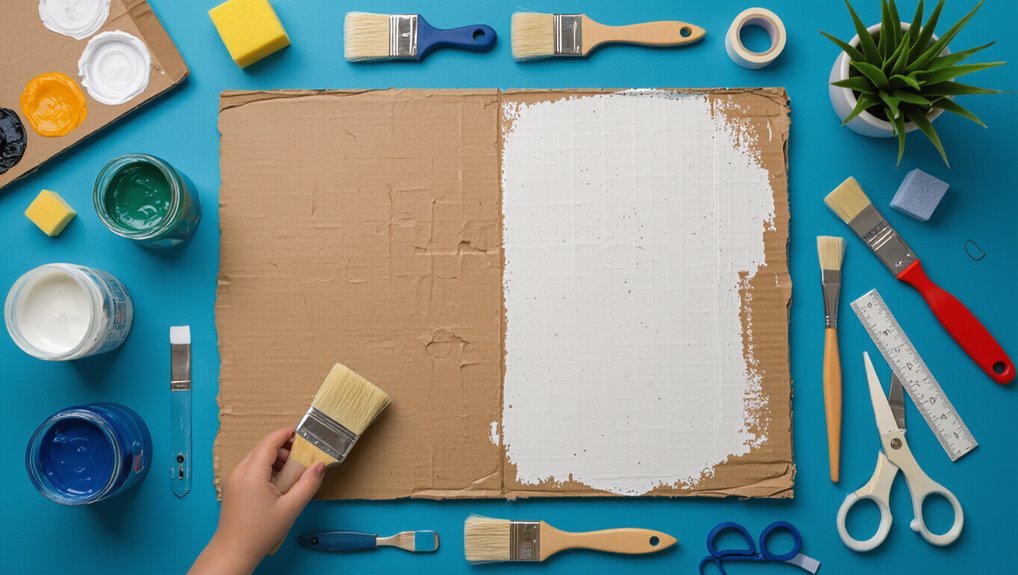
If you’re putting together a cardboard-based school project for kids, focus first on safe, easy-to-find materials and time-saving shortcuts that still give a polished result.
Use low-VOC wall paint, washable tempera for finger-friendly color, and painter’s tape for crisp edges. Pre-primed cardboard or gesso speeds coverage.
Recycle cereal boxes for detail pieces, and hot glue alternatives like tacky glue for younger kids.
Tools, Materials, and Product Recommendations
You’ll need a short list of essential tools—brushes, rollers, sandpaper, a utility knife, and masking tape—before you start.
I’ll recommend primers, wall paints, and sealers that work best on cardboard and explain why each matters.
I’ll also note when it’s smarter to call a pro for large or delicate jobs.
Essential tools list
Here’s a concise checklist of tools and materials you’ll need to get reliable, long-lasting results when painting cardboard:
- Foam roller or high-density brush for even coverage
- Fine-grit sandpaper to smooth edges and remove fuzz
- Utility knife and straightedge for clean cuts
- Clean rags, a disposable tray, and gloves for prep and cleanup
Use them systematically to prevent warping and guarantee neat finishes.
Recommended primers, paints, and sealers
Start with a water-based primer designed for porous surfaces, since it soaks into the cardboard to stabilize fibers and cut down on warping;
follow that with a mid- to high-build acrylic wall paint for good coverage, and finish with a clear water-based sealer (matte or satin for craft projects, gloss for durable, washable surfaces) to protect the finish.
Use acrylic primers, interior eggshell or satin paints, and acrylic poly or spray sealers.
When to use professional services
After sealing your painted cardboard, you may still face projects that demand tools, finishes, or expertise beyond typical DIY scope—this is when hiring a pro makes sense.
Hire professionals for structural reinforcement, large installations, weatherproofing, or complex coatings (industrial primers, spray systems, epoxy).
They’ll recommend compatible materials, guarantee longevity, and use proper ventilation and safety gear you mightn’t have.
FAQ
You’ll find quick answers here to common questions like using exterior wall paint, whether paint stops warping, needed coats for full coverage, food- or child-safe options, and spraying corrugated cardboard.
I’ll explain limitations—such as paint not guaranteeing zero warping—and give practical tips for coatings and application methods.
If you have a specific project, tell me the cardboard type and use so I can recommend the best approach.
Can I use exterior wall paint on cardboard?
Curious if exterior wall paint will work on cardboard? You can use it, but choose water-based acrylic exterior paint and apply thin coats.
Test first—some formulations soak or repel differently. Prime with a flexible acrylic primer for better adhesion and durability.
Avoid heavy oil-based or textured exterior coatings; they can crack, resist bonding, or add unwanted stiffness to lightweight cardboard.
Will paint prevent cardboard from warping completely?
Using a water-based acrylic exterior paint and a flexible primer can reduce cardboard’s tendency to warp, but it won’t stop warping completely.
You should expect some dimensional change when humidity or moisture shifts. Seal both sides, keep coats thin, and dry pieces flat to minimize cupping.
For critical, long-term stability, consider backing with a rigid board or using sealed, moisture-resistant materials instead.
How many coats of paint are needed for full coverage?
How many coats you need for full coverage depends on the paint type, cardboard color, and how thinly you apply each coat.
Generally, two thin coats of latex or acrylic cover most surfaces; darker or printed cardboard may need three.
Use even strokes, let each coat dry fully, and sand lightly if texture builds.
Primer can reduce total coats required.
Is it safe to paint cardboard that will touch food or children?
Once you’ve got good coverage with two or three coats, consider safety if the painted cardboard will touch food or children.
Use water-based, low-VOC or labeled food-safe paints and let curing finish fully. Avoid direct food contact; add a food-safe barrier like food-grade wax or a sealed tray.
For toys, choose non-toxic, ASTM D-4236 or EN71-compliant paints and supervise use.
Can I paint corrugated cardboard with a sprayer?
Wondering if you can spray-paint corrugated cardboard? Yes, but prep and technique matter.
Mask vents, work in thin, even passes to avoid soggy warping, and use a primer or diluted paint for better adhesion. Test a scrap first.
Hold the sprayer 8–12 inches away, let each coat dry fully, and avoid heavy buildup that weakens the fluted core.
