
How to Fix Paint Chips on a Bike Frame for a Like-New Finish
You can get a like-new finish by cleaning and sanding chips, treating any rust, then applying primer, color-matched touch-up paint and clearcoat in thin, even layers with proper drying between coats; for metal exposure use rust converter and more primer, then feather and build the paint up to match surrounding edges. Once cured, wet-sand and polish to blend gloss. Use protective film afterward to prevent repeats, and keep going to learn step-by-step techniques and tips.
How to Fix Paint Chips on a Bike Frame for a Like-New Finish
You can often get a like-new finish by cleaning the chip, applying matching touch-up paint, smoothing the repair, and sealing with clear coat—expect small chips to blend in and larger ones to need more work.
Tackle simple surface nicks and shallow chips yourself with steady hands and the right supplies.
If the frame is structurally damaged, the paint covers corrosion, or the finish needs perfect blending, get a professional to avoid making things worse.
Quick Answer Fast summary of what to do and expected results
Start by cleaning and sanding the chipped area. Then apply primer, color-matched touch-up paint, and a clear coat—wet-sand and polish if you want a factory-smooth finish.
You’ll repair scratches, stop corrosion, and blend color so your frame looks nearly new. Follow proper curing times, use fine grit and gentle polishing, and expect durable, professional-looking results when learning how to fix paint chips on bike.
When to tackle paint chips vs. when to seek professional help
After the basic cleaning, sanding, priming, and touch-up steps, decide whether you should finish the job yourself or call a pro.
Tackle small chips, shallow scratches, and single-color areas if you’re confident with color matching and steady hands.
Seek professional help for extensive rust, structural damage, multi-layer or metallic finishes, or if you want a flawless, warranty-safe respray.
Understanding Paint Chips on Bike Frames
When you inspect a chip, look at which layers are affected—the clearcoat, color coat, primer, or bare metal—to decide what repair you’ll need.
Chips usually come from impacts, abrasion, corrosion, UV damage, or poor surface prep before painting.
You’ll also want to classify severity as surface-only, through the paint, or all the way to metal so you can choose the right fix.
What is a paint chip components affected (clearcoat, paint, primer, metal)
Paint chips aren’t just cosmetic; they can bite through several layers of your frame’s finish.
When a chip occurs, you may expose the clearcoat first, then the color coat, and beneath that the primer.
Deep damage reaches bare metal or alloy, risking corrosion.
Identifying which layers are affected helps you choose touch-up paint, primer, or corrosion treatment to restore protection and appearance.
Common causes of paint chips (impacts, abrasion, corrosion, UV, improper prep)
Although it looks harmless at first, chips usually come from a handful of predictable causes you can prevent: sharp impacts from road debris or crashes, repeated abrasion from cables or rubbing parts, corrosion that eats through the finish, UV-driven breakdown of clearcoat and color, and poor original prep or repairs that let paint peel.
You can minimize chips by inspecting, padding contact points, cleaning, and storing sheltered.
How severity is classified (surface, through-coat, through-to-metal)
Because chips vary a lot in depth and risk, you’ll want to classify them before deciding how to repair.
Surface chips only scar the clearcoat and need gentle polish or touch-up.
Through-coat chips penetrate base color, requiring sanding, primer, and color fill.
Through-to-metal exposes bare metal, risks corrosion, and demands rust treatment, primer, paint, and clearcoat for durable protection.
Tools, Materials, and Safety Preparations
Before you start, gather the essential tools and materials—sandpaper, primer, matching touch-up paint, clear coat, and a steady stand—and consider optional pro-grade products or kits for better durability.
Don’t forget safety gear: a respirator or mask, nitrile gloves, and good ventilation or a workspace with airflow.
Finally, learn how to identify your frame’s color code and finish (gloss, semi-gloss, or matte) so your repairs blend in.
Required tools and materials
You’ll need a small, focused kit to get clean, durable repairs: sandpaper (various grits), a rust remover or primer for metal, touch-up paint matched to your frame, clear coat, fine brushes or a toothpick for application, masking tape, lint-free cloths, and safety gear like nitrile gloves and goggles.
- Clean, degrease, and dry the chip area.
- Sand to feather edges.
- Apply primer/paint in thin layers.
- Finish with clear coat and cure.
Optional professional-grade products and touch-up kits
Once you’ve handled basic repairs, consider upgrading to professional-grade products and touch-up kits to get longer-lasting, shop-quality results.
- Touch-up pens matched to factory colors for small chips.
- Single-stage aerosol or airbrush-ready touch-up paint for seamless blends.
- Thin clearcoat and hardener for durable gloss and UV protection.
- Precision applicators, micro-sanders, and polishing compounds for smooth finishes.
Safety gear and workspace setup (ventilation, mask, gloves, stands)
One clear, well-ventilated workspace and the right PPE will keep you safe and make paint repairs easier.
Set up a bike stand, use drop cloths, and position fans for cross-ventilation.
Wear an N95 or respirator, nitrile gloves, and eye protection.
Keep rags and a fireproof waste bin nearby.
- Bike stand
- Ventilation
- Respirator & goggles
- Gloves & disposal
Matching paint and finish how to identify color codes and finish types
How do you make your bike’s repair disappear into the original finish?
Identify the frame’s color code from manufacturer stickers, invoice, or online lookup. If unavailable, take a clean, sunlit photo or detached chip to a paint store for spectrometer matching.
Note finish type—gloss, satin, or matte—and choose matching touch-up paint and clearcoat.
Test on scrap before applying to the frame.
Step-by-Step Repair Process (From small chips to exposed metal)
Start by evaluating the chip so you can pick the right fix—spot fill, touch-up, or a full panel repair.
Remove the wheel or parts, clean the area, then sand, remove rust, and feather the edges to help paint adhere.
If metal’s exposed use primer (follow product drying times), then apply thin base-coat layers and blend until the finish matches.
Step 1 Assess damage and choose repair method (spot fill, touch-up, full panel)
Inspect the damage closely so you can pick the right fix: check chip size, depth, and any exposed metal.
For tiny surface nicks use spot-fill with matching paint.
Larger chips that break through primer need touch-up and light sanding.
If multiple chips or peeling paint exist, plan a full panel repair.
Choose materials and technique based on severity and finish match.
Step 2 Remove the wheel/parts and clean the area
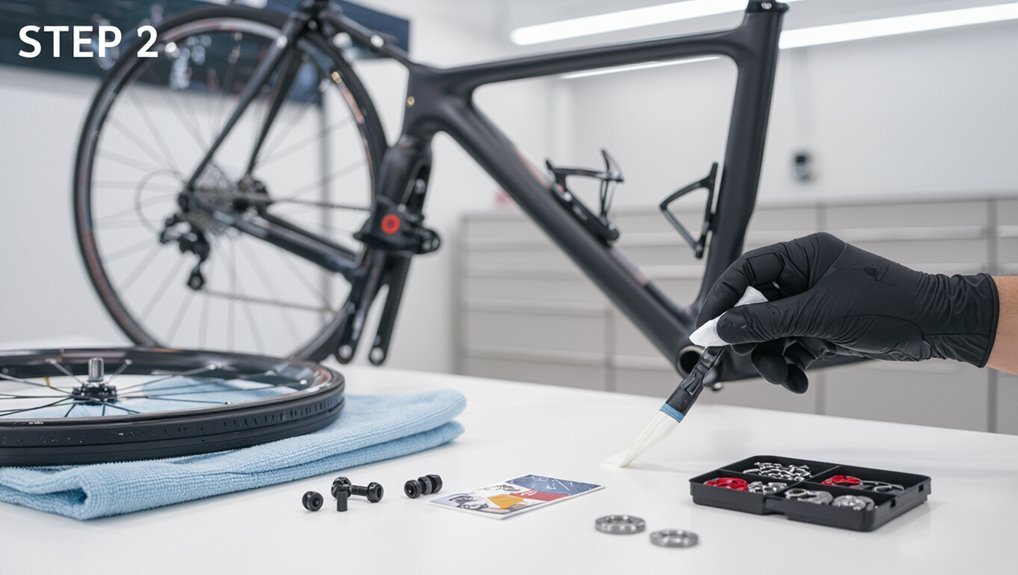
Once you’ve decided on the repair approach, remove any nearby wheels, accessories, or components that might get in the way so you can work safely and access the chip directly.
Use basic tools to detach parts, keep fasteners organized, and support the frame.
Clean the area with degreaser and a lint-free cloth, then dry thoroughly so contaminants won’t interfere with the repair.
Step 3 Prep: sand, de-rust, and feather edges for adhesion
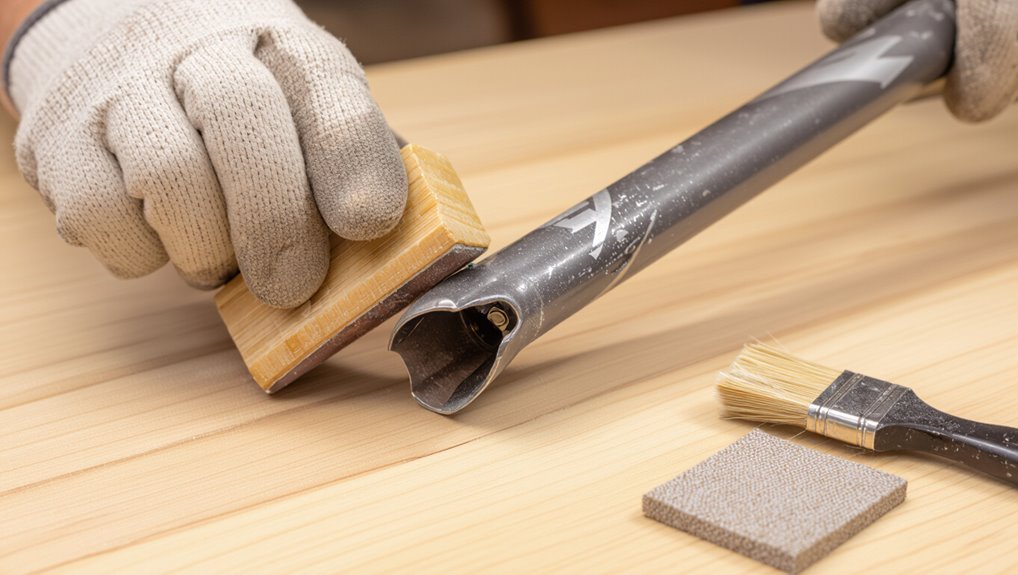
Prep the damaged area by sanding, removing any rust, and feathering the paint edges so new coatings will bond properly.
Use 400–600 grit sandpaper to smooth chips, a wire brush or fine abrasive to eliminate rust, and gentle feathering to blend old paint into bare metal.
Clean with isopropyl alcohol, dry thoroughly, and mask surrounding areas before moving to primer.
Step 4 Apply primer for bare metal or deep chips (product tips and drying times)
Apply a corrosion-blocking primer to any bare metal or deep chip to guarantee adhesion and prevent rust from returning.
Choose an etch or self-etching primer for steel/aluminum, or an epoxy primer for severe damage.
Shake or mix thoroughly, apply thin even coats, letting each coat tack for 10–15 minutes and cure per label (typically 30–60 minutes between coats) before proceeding.
Step 5 Apply base coat/touch-up paint: techniques for thin layers and blending
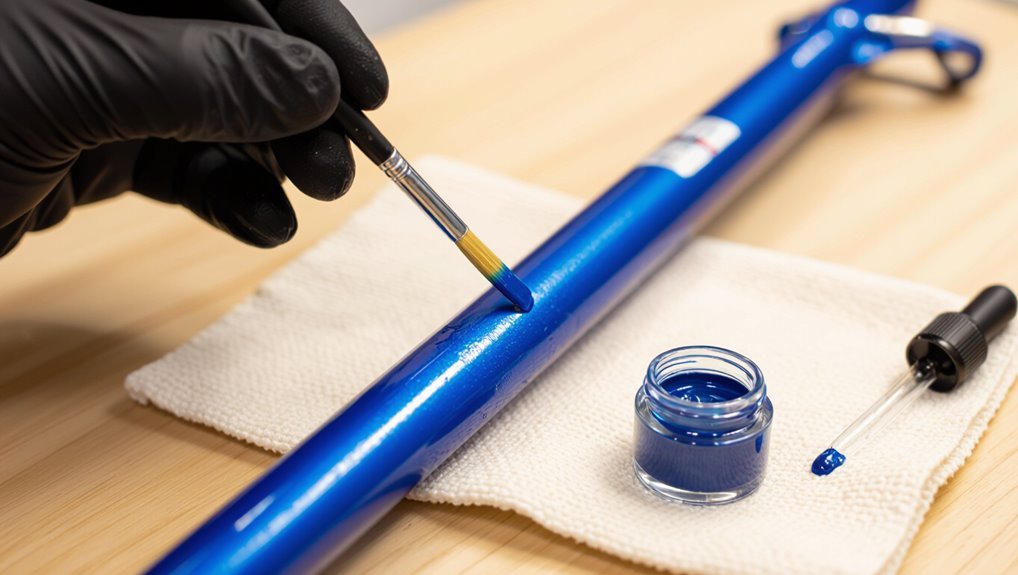
Start with thin, controlled layers of the base color, working from the chip’s edges inward so the paint builds up without creating drips or a raised bump.
Let each micro-layer flash per manufacturer time, sanding lightly between coats with very fine grit if needed.
Feather edges into surrounding paint, use a fine brush or toothpick for precision, and check color match under real light before proceeding.
Step 6 Apply clearcoat or protective top layer and proper curing methods
Seal the repair with a protective clearcoat to restore gloss, blend the finish, and protect the exposed paint from moisture and UV.
Use thin, even coats—brush, spray, or pen—allowing tack-free times per product instructions.
Keep humidity and temperature within recommended ranges, cure fully before handling, and avoid stacking or stress.
Follow manufacturer cure times for best durability and chemical resistance.
Step 7 Wet sanding and polishing for a seamless, like-new finish
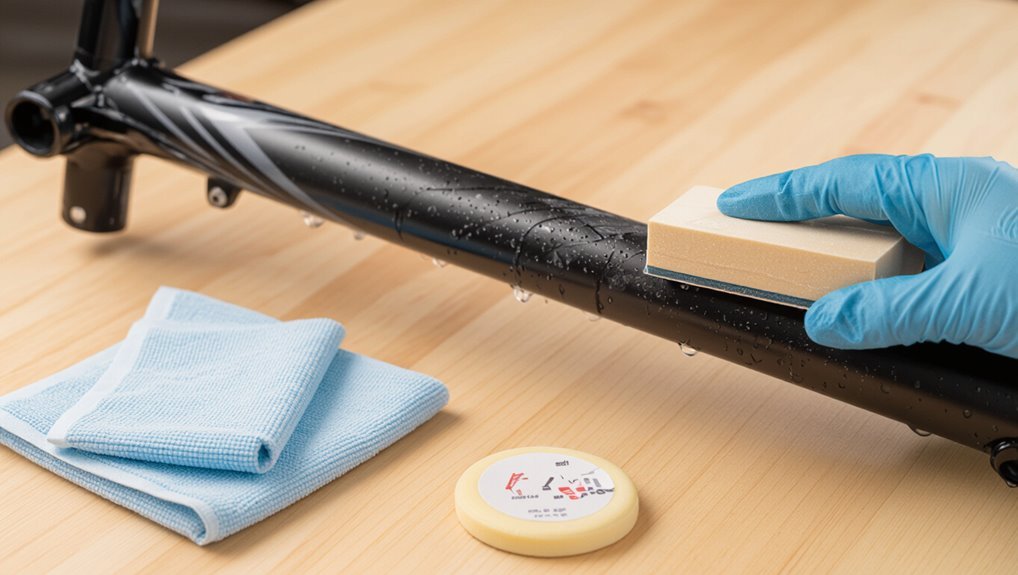
Once your clearcoat has cured to the touch and you’ve confirmed there’s no tackiness, it’s time to refine the repair by wet sanding and polishing so the patch blends perfectly with the surrounding finish.
Lightly wet-sand with 1000–2000 grit to level edges, rinse, then progressively use finer grits.
Finish with a polish compound and microfiber pad until gloss matches; wipe and inspect for swirl removal.
Step 8 Reassemble and inspect final results
Carefully reattach any removed components and give the frame a final inspection to verify the repair is secure and visually seamless.
Tighten bolts to spec, reinstall cables and accessories, and guarantee moving parts operate smoothly.
Check color match and edge blending under varied light. If you spot imperfections, address them now with touch-ups or buffing; otherwise, enjoy your refreshed, protected frame.
Repair Variations and Advanced Techniques
You’ll choose different tools and techniques depending on chip size and finish—use a toothpick or dot applicator for tiny chips, a fine brush for medium areas, and spray for larger or blended repairs.
For deep gouges you’ll need filler and possibly full-panel repainting, and metallic or pearlescent finishes require careful color matching and feathered resprays.
Keep a few temporary field-fix options for rides, but plan permanent shop repairs when structure or appearance demands it.
Using toothpick/dot-application vs. brush vs. spray for different chip sizes
For tiny chips and pinholes, a toothpick or fine dot applicator gives you the control to place paint precisely without overfilling; for larger chips, a small brush helps feather the edges and build up thin layers; and for broad, faded sections, a spray touch-up or aerosol can provide an even, blended finish.
| Tool | Scale | Feeling |
|---|---|---|
| Toothpick | Pinholes | Calm |
| Brush | Small chips | Confident |
| Spray | Broad areas | Relief |
| Choice | Fit fix | Pride |
Filling deep gouges and repainting entire panels (when and how)
When a chip goes deeper than surface scratches—exposing bare metal or carbon—you’ll need to fill and rebuild the area before repainting the whole panel to restore strength and prevent corrosion.
Sand to clean edges, apply epoxy or automotive filler in thin layers, sand smooth between coats, prime fully, then repaint and clearcoat.
Rebuild geometry accurately to match surrounding contours for a seamless repair.
Color blending and panel respray techniques for metallic and pearlescent finishes
After you’ve rebuilt damaged areas and matched the panel’s contours, blending the new paint into the surrounding finish becomes the next challenge—especially with metallics and pearls, which reveal layering and flake orientation.
You’ll feather the base, match flake direction with light coats, apply pearls or mica in thin layers, and extend clearcoat beyond the repair.
Wet-sand and polish to unify gloss and texture.
Temporary fixes for field repairs vs. permanent shop repairs
Although you’ll prefer a full shop repair for longevity, quick field fixes can keep a bike rideable and protect bare metal until you get to better tools and materials.
Use touch-up pens, nail polish, or clear tape to stop corrosion and mask chips temporarily.
For permanent shop repairs, expect sanding, primer, color-matching, wet-sanding and clearcoat for durable, seamless results.
Common Mistakes and How to Avoid Them
Watch out for sanding too much or too little, because either one can ruin paint adhesion and your final finish.
Make sure your color match is accurate and build up thin, even coats of paint and clear to avoid visible touch-ups, drips, or orange peel.
Always treat any rust beneath chips before you paint so the repair lasts.
Over- or under-sanding and paint adhesion failures
When you sand too aggressively you can gouge the metal or remove the factory primer, and when you don’t sand enough the new paint won’t key properly—both lead to adhesion failures that show up as peeling or flaking later.
Balance sanding: use progressive grits, feather edges, and stop when you see dull, scuffed primer.
Clean thoroughly, use appropriate primer, and let proper cure times.
Poor color matching and visible touch-up marks
Sanding, primer choice, and cure times matter for adhesion, but they won’t help if the color and finish don’t blend—poor matching and obvious touch-ups are what everyone notices first.
You should match OEM codes, test spray on scrap, and thin coats to build color.
Blend edges with feathering, match gloss level, and let proper cure times prevent a patchy, obvious repair that screams DIY.
Applying too much paint or clearcoat leading to drips and orange peel
Too much paint or clearcoat will run or settle into an orange‑peel texture, and you’ll notice it long before the repair’s cured.
Work in thin, even layers, letting each coat flash per manufacturer instructions.
Shake and strain bottles, use a fine brush or airbrush, and keep a light touch.
Sand between coats if needed; build slowly to avoid drips and texture.
Neglecting rust treatment under chips
You can avoid finish problems from heavy coats, but a worse mistake is ignoring rust under a chip — and that will keep spreading even after you patch the paint.
Inspect bare metal, sand to bright steel, and neutralize corrosion with rust converter or phosphoric acid.
Prime exposed areas, let primer cure, then match paint.
Otherwise rust will lift new finish and return quickly.
Preventing Future Paint Chips and Maintaining Finish
To keep chips from coming back, you’ll want to use protective measures like clear film, frame guards, and mindful fender placement.
Stick to a routine of washing, waxing, and scheduled touch-ups so small nicks never become big problems.
And adopt riding and storage habits—careful handling, avoiding rock-prone routes, and protected storage—to cut your chipping risk.
Protective measures: clear protective film, frame guards, and fender placement
When you want to keep repair work from becoming a habit, adding protective film, frame guards, and correctly positioned fenders is the simplest defense.
- Apply clear film to high-impact areas to stop chips before they start.
- Fit rubber or silicone frame guards at cable rub points.
- Mount fenders to redirect road spray and debris away from the frame.
- Inspect adhesives and guard alignment regularly to guarantee continued protection.
Routine care: washing, waxing, and touch-up maintenance schedule
Protective film and guards cut down on new damage, but regular care keeps your finish looking sharp and prevents small nicks from becoming bigger problems.
Wash gently with mild soap and a soft sponge after rides, dry thoroughly, then apply a thin coat of automotive or bike-specific wax monthly.
Inspect for chips biweekly and touch up promptly to stop corrosion and spreading.
Riding and storage habits that reduce chipping risk
If you want to keep chips from happening in the first place, adopt riding and storage habits that minimize impacts, abrasion, and moisture exposure.
Use fenders and frame guards, route cables away from paint, and mount racks or panniers with padded contact points.
Store indoors or under cover, keep tires properly inflated to absorb bumps, and avoid tossing the bike against hard surfaces.
Cost, Time, and When to Choose Professional Services
You can often fix small chips yourself in an hour or two with touch-up paint, clear coat, and a few simple tools, while a full professional respray or frame replacement can cost hundreds to over a thousand dollars.
If the damage is widespread, the frame is structurally compromised, or color-matching is critical, it’s usually worth paying a pro.
Otherwise, a DIY repair saves time and money for minor cosmetic chips.
Estimate of DIY time and materials vs. professional repaint costs
When deciding between a DIY touch-up and a full professional repaint, weigh the scope of damage, your skill level, and how much time you can realistically commit; small chips take a few hours and basic materials, while a complete strip-and-respray can take days and specialized gear. You’ll spend $10–$50 on DIY supplies vs. $200–$800 pro.
| Task | DIY time | Pro cost |
|---|---|---|
| Single chip | 1–3 hrs | $20–$80 |
| Full frame | 6–20 hrs | $300–$800 |
Signs it’s worth paying for a professional respray or frame replacement
How do you know it’s time to hire a pro or replace the frame? If chips expose rust, deep dents, cracked clearcoat, or structural damage, don’t DIY.
If repainting costs approach a new frame, or you want flawless color match and warranty, pay a pro.
Consider time, safety, resale value, and whether repairs will hide or truly fix the problem.
FAQ Common Questions About Fixing Bike Paint Chips
You probably have a few practical questions about touch-ups, like whether car touch-up paint will work on your frame and how long the repair needs to cure before you ride.
You’ll also want to know if touch-up paint stops rust, how to match metallic or pearl finishes on older frames, and whether repairs can be made invisible up close.
Below are concise answers to those common FAQs to help you choose the right approach.
Can I use car touch-up paint on my bike frame?
Curious if car touch-up paint will work on your bike frame? You can use it in many cases—especially for metal frames—if the color matches and you prepare the area properly.
Car paint bonds well and resists chips, but check compatibility with your frame’s original finish (powder coat or anodized).
Test on a hidden spot and follow sanding, priming, and clear-coat steps for best results.
How long does a DIY touch-up take to cure before riding?
After matching paint and prepping the spot as described above, you’ll want to wait for the repair to fully cure before putting stress on the area.
Light surface cure takes 24–48 hours; handle gently after 24 hours.
Full cure for lacquer or enamel touch-up and clearcoat usually needs 5–7 days at room temperature.
Cooler or humid conditions extend cure time—be patient before riding hard.
Will touch-up paint prevent rust on exposed metal?
Although touch-up paint can greatly slow or stop rust, it only does so if you prepare the bare metal and seal it properly first.
You’ll need to remove rust, sand to clean metal, apply a rust converter if needed, prime, then topcoat with matching touch-up paint.
Proper sealing and multiple thin layers prevent moisture ingress and long-term corrosion on exposed spots.
How to match metallic or pearl finishes for older frames?
If your bike has a metallic or pearl finish, matching it on an older frame takes patience and a few extra steps beyond plain color matching.
Start by photographing the finish in natural light, note base color and flake size, then test small samples of basecoat, metallic/pearl coats, and clear coats.
Blend edges, age the sheen to match surrounding patina before sealing.
Is it possible to make touch-ups invisible on close inspection?
Can you make a touch-up truly invisible on close inspection? You can get very close with careful color matching, ultra-fine brushes, thin layers, and wet-sanding between coats.
Metallics and clearcoat depth are toughest. Under perfect lighting and angle, tiny differences may show.
For flawless results, consider professional respray or blending with a controlled spray booth and expert color formulation.
Visual Guides and Reference Resources
You’ll find before-and-after photos that show common chip types and realistic repair outcomes so you know what to expect.
I’ll point you to a short recommended product list with links to reliable sellers and where each item’s best used.
You can also follow concise video tutorials and step-by-step demonstrations that match the photo examples.
Before-and-after photo examples and common problem cases
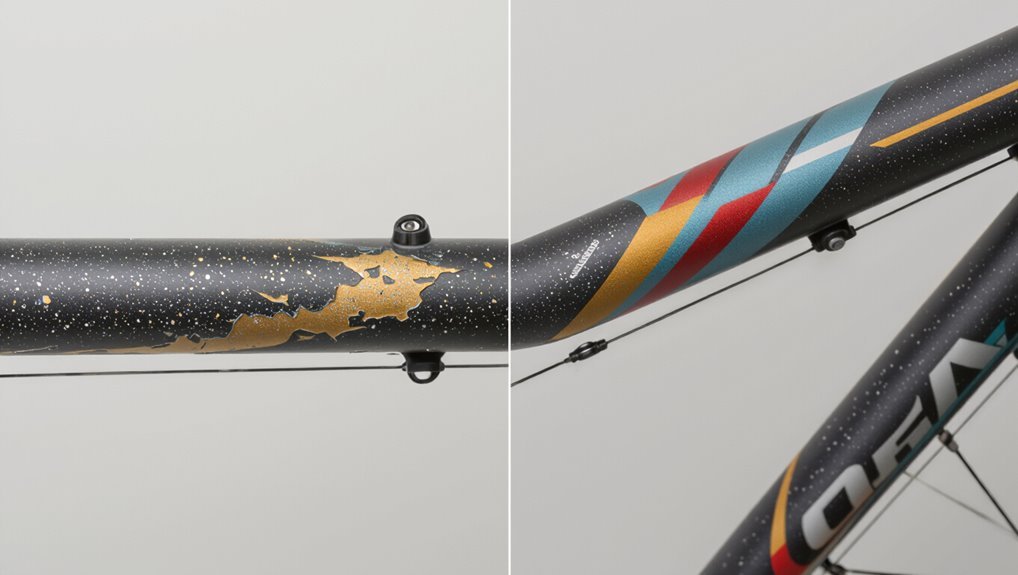
Browse through these before-and-after shots to see exactly how common chip types look and how simple repairs change a frame’s appearance.
You’ll spot edge chips, deep gouges, scratched clearcoat, and flaked areas. Each set labels tools used, prep steps, and drying time so you can match your case.
Use these references to choose the right technique and avoid guesswork.
Recommended product list and where to buy
When you’re ready to shop, pick products that match the chip type and finish—touch-up pens and aerosol primers for small edge chips, epoxy fillers and fine grit sandpaper for deep gouges, and clearcoat sprays or brush-on lacquer for surface scratches.
Choose trustworthy brands and buy locally or from bike shops, hardware stores, or reputable online retailers.
- Touch-up pen set
- Epoxy filler kit
- Fine grit sandpaper pack
- Clearcoat spray
Links to video tutorials and step-by-step demonstrations
Now that you’ve picked the right products, watch a few targeted video walkthroughs to see each step in action—paint prep, filling, sanding, color matching, and clearcoating look very different on small chips versus deep gouges.
- Manufacturer demo for matching touch-up pens.
- DIY channel full-frame repair walkthrough.
- Close-up micro-chip techniques and tools.
- Clearcoat layering and polishing step-by-step.
