How to Paint a Swirl Textured Ceiling for a Polished Custom Look
You can give a swirl-textured ceiling a polished, custom look by prepping, priming, and painting with care: clear and mask the room, repair cracks or loose texture, then spot-prime stains with a stain-blocking primer. Use a matched-nap roller for most jobs, a brush for edges and touch-ups, or a sprayer for large areas, working in small sections and following swirl directions with thin, even coats. Keep ventilation and safety gear handy, and continue for tips on technique, tools, and troubleshooting.
How to Paint a Swirl Textured Ceiling for a Polished Custom Look
Yes—you can paint a swirl ceiling and achieve professional-looking results with the right prep and technique.
Start by cleaning, repairing any damage, and choosing a high-quality ceiling paint and tools that match the swirl pattern.
With steady strokes and patience, you’ll get a polished, custom finish.
Quick Answer Can You Paint a Swirl Ceiling and Get Professional Results?
Wondering if you can paint a swirl ceiling and still get pro-quality results? Yes—you can.
With the right prep and tools, you’ll follow how to paint a swirl textured ceiling: clean, prime, and use a nap roller plus angled brush for edges.
Work in consistent strokes, keep a wet edge, and apply two thin coats for even coverage and a polished, professional finish.
Understanding Swirl Textured Ceilings
A swirl ceiling texture features overlapping circular patterns created with a brush or trowel, and you’ll notice the raised ridges and seams when you look up closely.
Painting it can freshen the room, highlight the pattern, and hide minor stains or discoloration for a polished, custom look.
But if the texture is crumbling, has water damage, or shows active mold, you should repair or replace it before you paint.
What Is a Swirl Ceiling Texture?
Swirl ceiling texture gives your room a subtle, decorative pattern created by overlapping circular strokes in joint compound or plaster.
You apply compound wet, then swirl with a brush, trowel, or sponge to form raised, concentric arcs. Patterns vary by tool pressure, angle, and size.
It hides minor imperfections and adds gentle dimensionality without overwhelming the space.
Why Paint a Swirl Ceiling? Benefits and Aesthetic Outcomes
Because textured ceilings catch and reflect light differently than smooth ones, painting a swirl ceiling can dramatically change a room’s mood and perceived size while hiding flaws you’d rather not spotlight.
You’ll refresh tired surfaces, unify mismatched patches, and highlight architectural character.
A well-chosen color enhances depth and warmth, improves light diffusion, and gives a custom, finished look that boosts appeal and comfort.
When Not to Paint: Signs You Should Repair Instead
If your ceiling shows sagging, active water stains, large cracks, or loose texture, don’t reach for paint—these are repair jobs that painting will only mask temporarily.
Address structural issues, fix leaks, replace damaged drywall, and secure loose texture first. After repairs and proper priming, you can paint confidently.
Skipping repairs risks recurring damage, peeling, and wasted effort.
Tools, Materials, and Paint Selection
Before you start, gather the right tools and protective gear—rollers with thick naps, extension poles, angled brushes, drop cloths, and a respirator will save time and prevent mess.
Choose paints and primers suited for textured ceilings—flat or matte ceiling paints and stain-blocking primers are common, while satin sheens can highlight swirls if you want more depth.
I’ll also cover when to prime, which colors work best, and how to protect yourself and the room.
Essential Tools and Equipment
Tools matter when you’re tackling a swirl textured ceiling: gather sturdy ladders, a textured roller or brush, extension poles, quality drop cloths, and breathable safety gear so you can work efficiently and safely.
Pick high-quality primers, brushes for edges, and disposable gloves. Keep cleaning supplies handy for prep.
- Ladder with stabilizer
- Textured roller and pole
- Drop cloths and masks
Recommended Paint Types, Sheen, and Colors
When you choose paint for a swirl textured ceiling, pick a high-quality latex formulation designed for ceilings and textured surfaces so coverage is even and splatter is minimized.
Use flat or matte sheen to hide imperfections and preserve texture; satin can work in higher light but shows more sheen.
Choose light neutrals to enhance depth; subtle contrasts emphasize the swirl without overwhelming the room.
Primer Options and When to Use Them
A good primer can make or break your swirl ceiling paint job, so choose one that matches the existing surface and the paint you’ll use.
Use stain-blocking primer for water or smoke marks, high-build primer to level patched areas, and bonding primer for glossy or slick surfaces.
For new drywall, apply a drywall/standard acrylic primer to guarantee even sheen and adhesion.
Safety Gear and Work Area Protection
Although the work looks straightforward, you’ll want the right safety gear and drop protection before you roll paint onto a swirl ceiling.
Protect yourself and the room: wear goggles, a respirator, and a hat; use drop cloths and tape; and keep a stable ladder.
Follow these safeguards to prevent messes, inhalation, and falls.
- Goggles, respirator, gloves
- Canvas drop cloths, tape
- Sturdy ladder, non-slip shoes
Preparing the Room and Ceiling
Start by clearing the room and covering floors, furniture, and fixtures so paint and dust won’t cause damage.
Inspect the ceiling for cracks, stains, and any loose texture, then patch holes, re-adhere flaky areas, or skim over uneven spots as needed.
Finally, clean the texture of dust, grease, and stains so paint will adhere evenly.
Clearing the Room and Protecting Surfaces
Before you touch any paint, clear the room completely and cover every surface you want to protect—move furniture out or to the center and wrap it in plastic, roll up rugs, and remove light fixtures and switch plates; tape drop cloths over floors and up the walls to catch drips and dust.
You’ll also:
- Secure vents and seal doorways with plastic sheeting.
- Use painter’s tape on trim and crown molding.
- Keep a garbage bag for debris and used tape.
Inspecting for Damage: Cracks, Stains, and Loose Texture
When you’re ready to work on the ceiling, do a careful sweep for cracks, stains, and loose texture so you can fix problems now rather than after painting.
Look for hairline splits, water discoloration, flaking swirls, and areas where texture detaches.
Note locations, size, and severity, and mark them lightly with pencil so you know what needs attention before priming and painting.
Repair Steps: Patching, Re-adhering, and Skimming
Move furniture out or to the center of the room and cover everything with drop cloths. Then turn off power to ceiling fixtures before you begin patching, re-adhering, and skimming.
Remove loose texture, scrape flaking areas, and re-adhere with drywall adhesive. Fill holes and cracks with joint compound, sand smooth, and apply a thin skim coat over repairs to blend texture.
Allow to dry fully.
Cleaning the Texture: Dust, Grease, and Stain Treatment
Start by clearing as much dust and debris from the ceiling texture as you can so cleaners and stain treatments will work effectively.
Vacuum with a soft brush, then wipe greasy areas with degreaser and warm water.
Treat stains with a stain-blocking primer once dry.
Replace filters and mask vents to prevent recontamination.
- Vacuum with soft brush
- Degrease stubborn spots
- Prime stained areas
Step-by-Step Painting Process
Start by taping and masking edges so you get sharp lines and protect fixtures.
Apply primer with the right technique and drying time, then pick the best application method—roller, brush, or spray—based on your ceiling and paint.
Use careful strokes to preserve the swirl definition, let the first coat dry, then do a second coat, touch-ups, and edge work.
Step 1 Taping and Masking Edges for a Clean Finish
1. You’ll prep edges carefully so paint stays only on the ceiling. Clean dust, press painter’s tape along molding, and overlap plastic sheeting to protect walls and fixtures.
Work methodically and smooth tape to seal.
- Use 2–3 inch painter’s tape for crisp lines
- Cover light fixtures with plastic and tape
- Remove tape within an hour of final coat drying
Step 2 Applying Primer: Techniques and Drying Times
Before you pick up a roller, apply a high-quality primer to confirm even paint adhesion and to block any stains or color bleed-through from the old ceiling texture.
Work in small sections, brushing edges and tipping into texture crevices. Use thin, even coats; allow recommended drying time (usually 1–4 hours) between coats.
Guarantee proper ventilation and check for full cure before topcoating.
Step 3 Choosing Your Application Method: Roller, Brush, or Spray
With the primer cured and the room ventilated, choose the application method that matches your ceiling’s swirl texture, budget, and comfort level. Rollers cover broadly, brushes refine edges, and sprayers speed large areas. Match nap thickness, tip size, and pressure to avoid clumping.
| Method | Best for |
|---|---|
| Roller | Medium swirls |
| Brush | Edges/details |
| Spray | Large rooms |
Step 4 How to Paint Over Swirl Patterns Without Losing Definition (technique details)
Start by working in small, manageable sections so you can follow and preserve each swirl’s contours—paint just enough area that the wet edge doesn’t lap over finished texture, keeping your strokes consistent with the original pattern to maintain definition.
Use a thin, even coat; load your brush or roller lightly. Follow swirl direction with gentle, feathered strokes, avoiding heavy pressure that flattens peaks.
Step 5 Second Coat, Touch-ups, and Edge Work
Apply the second coat once the first is fully dry to the touch—this helps even out coverage and restores any softened definition from the initial pass.
Work in small sections, rolling with the swirl direction to preserve texture. Cut in cleanly along edges with a steady brush, then touch up thin spots and drips.
Inspect under good light and feather connections for a seamless finish.
Step 6 Drying, Curing, and When to Move Furniture Back
Once the final coat feels dry to the touch, give the paint proper time to cure before moving furniture back—this prevents smudges, premature wear, and trapped odors.
Wait at least 24–48 hours for light use, and 7–14 days for full cure.
Keep ventilation, low humidity, and avoid heavy contact.
Move pieces gently using felt pads and test small areas first.
Techniques for Different Swirl Styles and Ceiling Heights
Whether you’re working in a small room or a large one, you’ll adjust brush size and stroke rhythm to keep the swirl pattern consistent.
For high ceilings, you’ll want safe scaffolding or an extended pole and a plan for blending sections as you move.
Finally, you’ll match new ceiling paint to existing walls and trim by testing swatches under the room’s lighting before you commit.
Small Room vs. Large Room Strategies
Because room size and ceiling height change how swirls read, you’ll choose different approaches for small versus large spaces:
In small rooms use tighter, subtler swirls and light, matte paint to avoid visual clutter and lower perceived height.
In larger rooms opt for broader, more dramatic swirls and richer tones to add depth.
Adjust tool size and stroke scale to suit proportions.
High Ceilings and Scaffolding Tips
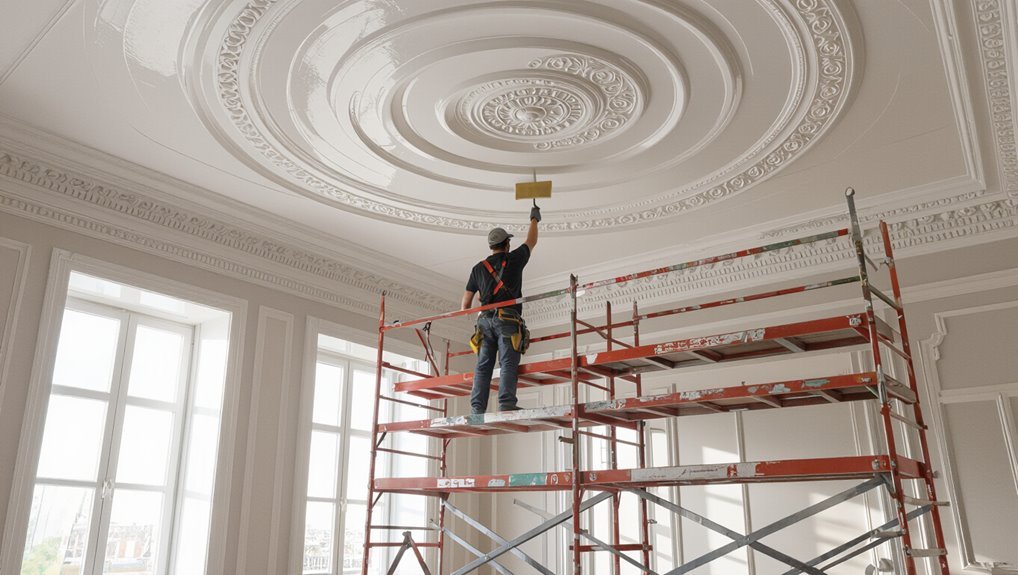
Tackle high ceilings confidently by planning access, safety, and the scale of your swirls before you paint: choose scaffolding or a tall, stable ladder that gives you a comfortable work zone at ceiling level, inspect and secure all fittings, and set up lighting so you can see the texture clearly.
Work in manageable sections, use an extension pole for broad swirls, and keep a helper nearby for adjustments and safety.
Matching New Paint to Existing Wall Colors and Trim
When you’re matching new ceiling paint to existing walls and trim, start by evaluating the swirl pattern and room scale so you can choose a sheen and color that harmonize with both texture and architecture.
Pick subtle contrasts for bold swirls, or match hue and raise sheen slightly to emphasize texture.
Test swatches under lighting, consider trim undertones, and let samples cure before deciding.
Common Problems and How to Fix Them
When you paint a swirl ceiling you’ll sometimes run into issues like drips, sags, or lost texture that need quick fixes.
You’ll also want to correct visible brush marks or roller lines and address uneven coverage or patchy spots for a smooth, consistent finish.
Below are practical causes and straightforward solutions for each problem so you can get the job right.
Problem: Paint Drips, Sags, or Texture Loss Causes and Fixes
Although swirl ceilings can look great, paint drips, sags, or lost texture are common issues you’ll notice if the paint’s too heavy, the roller’s overloaded, or the surface wasn’t properly primed.
Catching problems early and correcting technique prevents major rework. Let drips dry, sand lightly, retexture with matching compound, thin paint for better flow, use a properly loaded roller, and apply primer where adhesion failed.
Problem: Visible Brush Marks or Roller Lines Corrections
Spotting brush marks or roller lines on a swirl ceiling is frustrating because they break the pattern and draw the eye; you can fix them by adjusting technique and smoothing the paint before it dries.
Work in small sections, keep a loaded roller with even pressure, maintain a wet edge, and lightly feather imperfections with a brush or roller tip.
Sand and recoat if necessary.
Problem: Uneven Coverage or Patchy Appearance Solutions
If your swirl ceiling looks patchy or thin in places, you can bring it back to uniformity by identifying the cause—insufficient paint, uneven pressure, or drying too fast—and correcting it methodically.
Recoat thin areas with even, generous coverage; maintain consistent pressure and overlap; mist a small section to slow drying if needed.
Blend edges and feather strokes until texture and tone match.
Best Practices and Pro Tips for a Polished Custom Look
Keep your roller and brush strokes light and consistent so you preserve the swirl pattern while you paint.
Choose colors and sheens that play up the texture—matte hides flaws, satin or eggshell catches highlights for more depth.
If the pattern is extensive or your ceiling has damage, consider a pro for repairs and seamless results; otherwise, you can handle a careful DIY job.
Tips for Preserving the Swirl Pattern While Painting
When you want the swirl pattern to stay crisp, work slowly and use tools that respect the texture—think a high-quality roller with a thick nap and a brush that can reach into the grooves.
Roll in one direction, avoid overworking wet paint, and keep a light touch near edges.
- Use thin, even coats
- Tip-brush grooves gently
- Maintain consistent pressure
Color and Sheen Choices to Enhance Texture
Three simple choices—color, sheen, and contrast—will make your swirl ceiling read as a deliberate design element rather than a painted afterthought.
Choose mid-tone neutrals to reveal shadows, warmer hues to soften texture, or cooler tones to crisp lines.
Use eggshell or satin for subtle highlights; avoid high gloss.
Contrast trim subtly to frame the pattern without competing for attention.
When to Hire a Pro vs. DIY
Now that you’ve decided on color and sheen to showcase the swirl, you’ll need to decide whether to tackle the application yourself or call in a pro.
DIY if you’re confident with ladders, steady brush/roller technique, and patching imperfections; it saves money.
Hire a pro for high ceilings, extensive repairs, uniform swirl replication, or when you want guaranteed finish, time savings, and warranty protection.
Comparison: Roller vs. Brush vs. Paint Sprayer for Swirl Ceilings
You’ll compare performance, finish quality, and cost to pick the best tool for your swirl ceiling.
I’ll outline when a roller, brush, or paint sprayer makes sense based on room size, texture depth, and budget.
That way you’ll know which method gives the finish you want without wasting time or money.
Performance, Finish Quality, and Cost Comparison
When you’re weighing tools for painting a swirl ceiling, performance, finish quality, and cost matter in different ways depending on the size of the room and your skill level. You’ll balance speed, control, and expense: rollers are affordable and forgiving, brushes give detail but are slow, sprayers deliver uniform finish fast but cost more and need masking.
| Tool | Speed | Finish |
|---|---|---|
| Roller | Medium | Good |
| Brush | Low | Detailed |
| Sprayer | High | Smooth |
Recommended Scenarios for Each Method
Although each method can create an attractive swirl ceiling, the best choice depends on room size, your experience, and how fast you need the job done.
Use a roller for medium rooms and consistent texture, a brush for touch-ups or tight corners when you’re experienced, and a sprayer for large areas or professional-speed jobs—expect more prep, masking, and cleanup with spraying.
Cost, Time Estimate, and Materials Checklist
Before you start, know what this job will cost you—DIY vs. pro rates—and how long it’ll take based on room size and ceiling condition.
You’ll also want a clear materials and tools checklist so you don’t stop mid-project.
Below I’ll break down typical expenses, time estimates, and the final gear you’ll need.
Typical Cost Breakdown (DIY vs. Professional)
You can expect costs and time to vary widely depending on whether you tackle a swirl ceiling yourself or hire a pro, so planning starts with a clear budget and timeline. Compare DIY vs pro costs, time, and materials below to decide.
| Item | DIY | Pro |
|---|---|---|
| Labor | Your time | Charged |
| Materials | Buy | Included |
| Total | Lower | Higher |
| Risk | Higher | Lower |
Time Estimates by Room Size and Condition
Rooms vary a lot, so estimate time and cost by size and condition: a small, good-condition bedroom (10×12) takes a few hours to prep and roughly 3–5 hours to swirl and paint.
In contrast, a large living room (15×20) or damaged ceiling can double that time and add repair costs.
Plan extra time for drying, multiple coats, and cleanup; factor labor or helper hours and patching needs.
Final Materials and Tools Checklist
Gather everything you’ll need into one final checklist so you can work efficiently and avoid trips back to the store: Gather tools, materials, and budget estimates, then plan time per room.
Expect 4–8 hours for a standard room; costs vary by paint quality and rentals.
Pack your kit:
- Paint, primer, and texture-friendly roller
- Extension pole, ladder, and drop cloths
- Painter’s tape, brushes, and respirator
Frequently Asked Questions
You probably have a few quick questions before you start, like how many coats swirl ceilings need and whether painting will make the room look smaller.
You’ll want to know if you can change or remove the swirl, how to treat stains or water damage, and whether a paint sprayer will work over the texture.
Below are concise answers to those common concerns.
How many coats of paint do swirl ceilings need?
How many coats does a swirl ceiling usually need?
You’ll typically apply two coats: a primer if the texture is bare, stained, or drastically different in color, then a full topcoat.
Sometimes a single topcoat over well-primed, previously painted texture suffices.
Use a thick-nap roller and allow proper drying between coats to guarantee even coverage and preserve the swirl detail.
Will painting a swirl ceiling make the room look smaller?
After finishing the necessary coats, you might wonder whether painting a swirl ceiling will make a room feel smaller.
It usually won’t if you pick light, neutral colors and keep ceiling trim crisp. Dark hues or heavy contrasts can visually lower the ceiling, so choose paints that reflect light.
Proper lighting and a continuous wall-to-ceiling color also help maintain openness.
Can I change the swirl pattern or remove it before painting?
Wondering if you can alter or remove a swirl ceiling before painting?
You can soften patterns by lightly sanding high points or skim-coating with joint compound for a smoother finish, but full removal’s labor-intensive and risks damaging drywall.
If you want a different texture, apply a thin knockdown or orange-peel skim after prep.
Always test a small area first and guarantee proper ventilation and protection.
How do I cover stains or water damage on a swirl ceiling?
Got stains or water damage on your swirl ceiling? First stop leaks and let the area dry thoroughly.
Gently clean mildew with diluted bleach, rinse, and dry.
Spot-prime stains with a stain-blocking primer designed for ceilings. Feather primer out to blend with surrounding texture.
After priming, repaint the whole ceiling to guarantee uniform color and finish.
Is it okay to use a paint sprayer over a swirl texture?
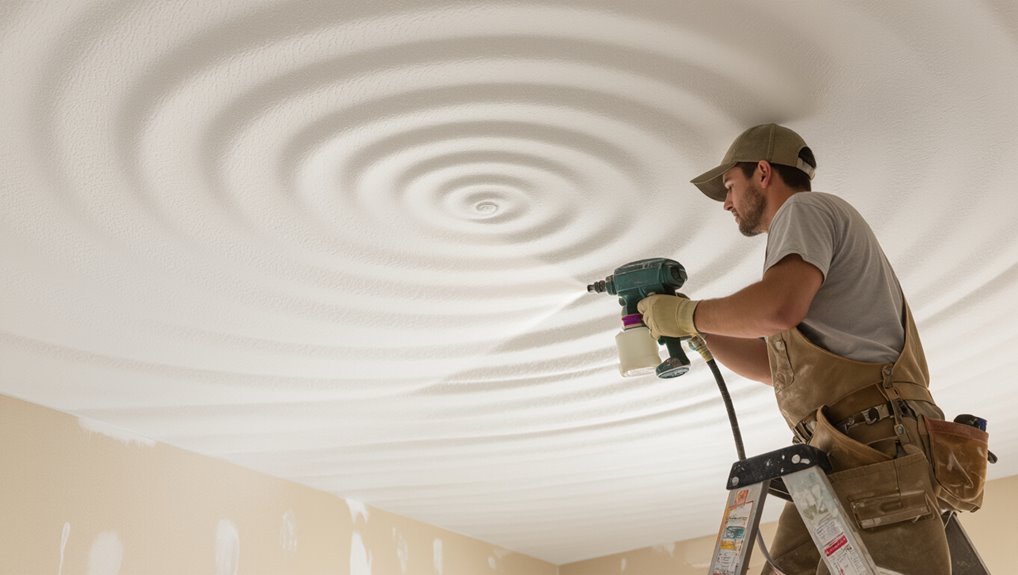
Can you use a paint sprayer over a swirl texture? Yes — but proceed carefully.
A sprayer speeds coverage and keeps texture crisp, yet it can overcoat peaks and fill valleys if pressure or tip size is wrong.
Thin coats, test spray on a scrap, and back-roll lightly only if needed.
Mask thoroughly and use a respirator; overspray is significant.