
How to Paint a Greasy Kitchen Ceiling Without Streaks or Peeling
You can repaint a greasy kitchen ceiling without streaks or peeling by first degreasing thoroughly with TSP or a citrus cleaner, rinsing, and letting it dry. Wear gloves, protect the room, and remove light fixtures. Seal stains with an oil-based or shellac stain-blocking primer, then roll ceiling paint evenly with consistent strokes and overlap wet edges. Allow full drying between coats and cure time; follow-up ventilation and maintenance will extend the finish, and the steps ahead explain how.
How to Paint a Greasy Kitchen Ceiling Without Streaks or Peeling
If your kitchen ceiling is greasy, start with a quick answer: clean with a trisodium phosphate (TSP) solution, prime with an oil-based or stain-blocking primer, then topcoat with a quality acrylic or latex ceiling paint.
Follow those three steps for the best approach to avoid streaks and peeling.
Repaint yourself for surface grease and stains you can remove, but call a pro if the grease is widespread, the ceiling has water damage, or you’re worried about safety and ventilation.
Quick Answer Best Approach in 3 Steps
Start with three clear steps you’ll follow: clean, prime, and paint.
To learn how to paint a greasy kitchen ceiling, degrease thoroughly with trisodium phosphate or a heavy-duty cleaner, rinse, and dry.
Spot-prime with an oil-based or stain-blocking primer.
Finish with two thin coats of washable latex ceiling paint, using a roller and cutting in with a brush for even coverage and no peeling.
When to repaint vs. when to call a pro
Now that you’ve cleaned, primed, and painted, decide whether the job stays DIY or needs a pro: small stains, light grease, and intact drywall seams are usually within reach if you follow the degreasing and spot-priming steps;
call a pro when the ceiling shows widespread staining that keeps bleeding through primer, sagging or blistering drywall, persistent mold, or when the ceiling height, ventilation, or electrical fixtures make safe, even work difficult.
Know limits, save time.
Understanding the Problem: Why Grease Causes Streaks and Peeling
Grease and smoke leave a thin, oily film that stops paint from bonding, so you’ll see streaks and eventual peeling if you don’t clean first.
Different ceiling materials—drywall, plaster, and textured finishes—vary in how easily they trap oils and how well they accept primer and paint.
Look for discoloration, tackiness, or flaking as signs your ceiling needs special prep before painting.
How grease and smoke affect paint adhesion
1 reason paint fails on kitchen ceilings is that oils and smoke form an invisible barrier that keeps paint from bonding to the surface.
You’ll find that airborne grease and soot create a slick, porous film that repels water-based coatings and prevents proper adhesion.
If you don’t remove or seal that residue first, paint will blister, streak, and peel instead of forming a durable finish.
Common ceiling materials and their vulnerability (drywall, plaster, textured ceilings)
Ceiling materials—drywall, plaster, and textured finishes—each react differently when kitchen oils and smoke land on them, and that affects how and why paint will streak or peel.
Drywall soaks oils into paper and mud. Plaster can absorb and hold grime in pores. Textured surfaces trap residue in crevices—each needing different cleaning and priming approaches to prevent failure.
Signs your ceiling needs special preparation
When kitchen oils and smoke have been circulating for a while, you’ll start seeing clear signs that your ceiling needs special prep before painting.
- Yellowing or brown streaks across the surface.
- Paint that’s chalky, blistered, or peeling.
- A greasy sheen that repels water or primer.
- Persistent cooking odors trapped in the paint.
Address these before painting to prevent failures.
Materials, Tools, and Products You’ll Need
Before you start painting, you’ll need the right cleaning supplies and degreasers (look for trisodium phosphate or citrus-based cleaners) to remove oil and grime.
Choose a primer and paint made for greasy surfaces—oil-based, shellac, or stain-blocking acrylics—and decide whether a roller, brush, or sprayer fits the job while laying down drop cloths and using a ladder and respirator.
If the ceiling has heavy staining or extensive damage, opt for professional-grade products and possibly a pro; for light buildup, quality DIY options will usually do.
Cleaning supplies and degreasers (types and recommended ingredients)
Although you can clean with plain soap and water, kitchen ceilings usually need a stronger degreaser to cut through cooking oils and smoke buildup.
So pick products with grease-fighting ingredients like sodium carbonate (washing soda), sodium metasilicate, or biodegradable surfactants.
- Heavy-duty degreaser (dilutable)
- TSP substitute (phosphate-free)
- Citrus-based cleaner for light residues
- Microfiber cloths and scrub pads for agitation
Primers and paints suitable for greasy surfaces (oil-based, shellac, stain-blocking acrylic)
Because kitchen ceilings attract grease and smoke, you’ll need primers and paints that block stains and withstand residual oils—choose oil-based or shellac primers for heavy staining, and stain-blocking acrylics for moderate buildup or painted-over surfaces.
- Oil-based primer: seals heavy stains.
- Shellac primer: fast-drying, excellent for nicotine/grease.
- Stain-blocking acrylic primer: low-odor, water cleanup.
- Semi-gloss or satin enamel paint: washable, resists future grime.
Tools: rollers, brushes, sprayers, drop cloths, ladders, respirators
You’ve picked the right primers and paints, now gather the tools that’ll let you apply them cleanly and safely.
Use quality roller covers, angled brushes, and a sprayer if skilled. Secure drop cloths and a sturdy ladder; wear a respirator when sanding or spraying.
- Roller (9–12mm nap)
- Angled sash brush
- Drop cloths
- Respirator/mask
When to use professional-grade products vs. DIY options
When deciding between professional-grade products and DIY options, think about the scope of the job, your skill level, and how long you want the finish to last. Choose pro-grade for heavy grease, frequent cooking, or selling soon; DIY is fine for light stains and tight budgets. Compare:
| Situation | Recommendation | Why |
|---|---|---|
| Severe grease | Professional | Durable, stain-blocking |
| Light grime | DIY | Cost-effective |
| Selling house | Professional | Better resale appeal |
| Quick touch-up | DIY | Faster, cheaper |
Step-by-Step Preparation
Before you pick up the roller, set up for safety and protect countertops, appliances, and floors with tarps and tape.
Next you’ll thoroughly degrease the ceiling, rinse and let it dry completely, then inspect the surface.
Finally, repair any cracks, flaking paint, or stains and sand smooth so the primer and paint will adhere.
Step 1 Safety setup and protecting the kitchen
1. You’ll prioritize safety and shield surfaces before painting. Do the following:
- Turn off power to overhead fixtures and remove light covers.
- Lay drop cloths and tape plastic over cabinets and appliances.
- Wear goggles, a respirator, and gloves.
- Set up a sturdy ladder and guarantee good ventilation.
These steps keep you safe and prevent messes.
Step 2 Thorough degreasing: techniques and timing
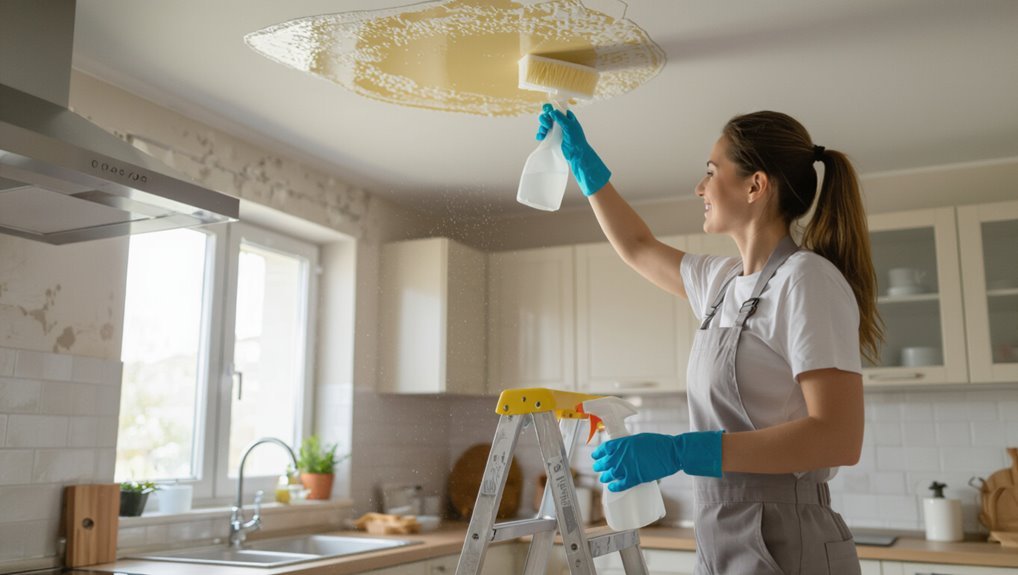
Degreasing is essential because kitchen ceilings collect cooking oils that prevent paint from adhering properly.
So you’ll tackle it thoroughly using the right cleaners and timing. Wear gloves and goggles.
Use a trisodium phosphate substitute or heavy-duty degreaser, working in small sections with a microfiber scrub pad.
Let cleaner dwell per label, agitate stubborn spots, and repeat as needed before moving on.
Step 3 Rinsing, drying, and surface inspection
Once you’ve removed the grease, rinse the ceiling thoroughly to remove any cleaner residue that could interfere with paint adhesion.
Use clean water on a sponge or low-pressure sprayer, working in sections.
Let the surface air-dry fully—use fans or dehumidifiers to speed it.
Inspect for remaining grime, tackiness, or uneven moisture before priming or painting.
Step 4 Repairing damage (cracks, flaking paint, stains) and sanding
Patch and sand any damage before you prime or paint so the finish looks smooth and lasts.
Scrape loose or flaking paint, fill cracks and gouges with spackling or joint compound, and feather edges.
Once dry, sand with medium then fine grit for an even surface.
Wipe dust with a damp cloth, let dry, and spot-prime stains before full priming.
Priming the Ceiling (Step 5)
Now you’ll pick a primer that blocks greasy kitchen stains—an oil-based or stain-blocking shellac primer usually works best.
Use a roller for even coverage and a brush for edges, apply the manufacturer-recommended thickness and wait the specified drying time between coats to guarantee adhesion.
If you see peeling, bubbling, or tannin bleed-through, sand, spot-prime with a stronger stain blocker, and recoat.
Choosing the right primer for greasy stains
Because kitchen ceilings often collect greasy residue, you’ll want a primer that blocks stains and bonds to slick surfaces before painting.
Choose a high-quality oil-based or shellac-based stain-blocking primer for stubborn grease; water-based latex primers sometimes fail.
Look for labels noting “stain blocker” and “adhesion to glossy surfaces.”
Test compatibility with your paint, and verify good ventilation when applying strong primers.
How to apply primer for full coverage and adhesion (tools, coat thickness, drying times)
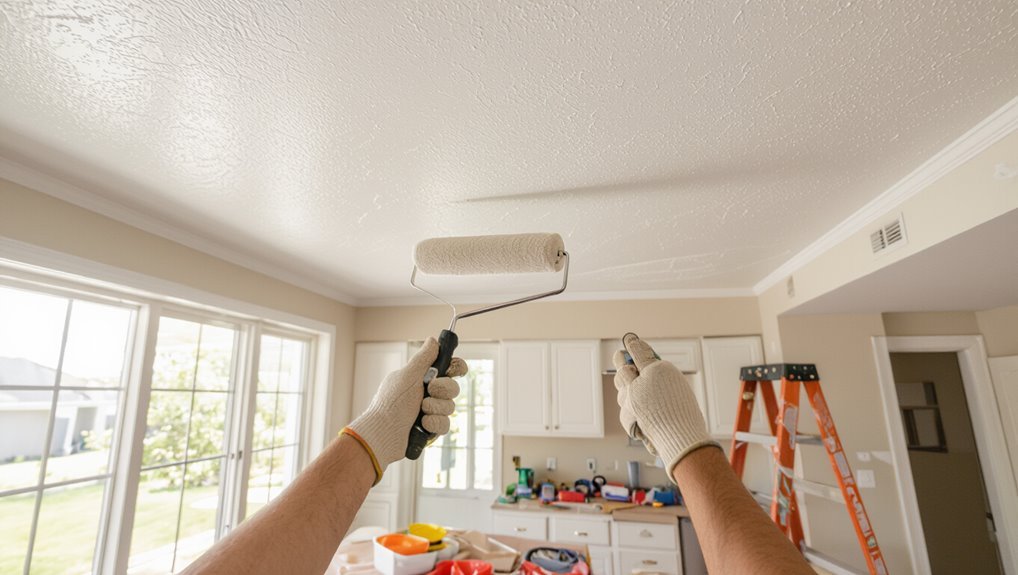
When the surface is clean and any greasy spots are sealed, apply primer with the right tools and technique to guarantee full coverage and strong adhesion.
Use a quality roller (¾” nap) for textured ceilings and a brush for edges.
Lay a thin, even coat; don’t overload.
Expect 2–4 hours to dry; follow label for recoating.
Troubleshooting primer issues
A few common primer problems can stop a smooth finish before you even start painting, so check for them as soon as the primer dries.
If you see fisheyes, pinholes, or poor adhesion, sand lightly, clean residue, and recoat with a stain-blocking primer.
For tacky spots, allow more cure time; for peeling, remove failed areas and prime with proper surface prep and bonding primer.
Painting Technique to Avoid Streaks and Peeling (Step 6)
Choose a flat or matte ceiling paint in a light color to hide imperfections and reduce sheen-related streaks.
You’ll weigh rollers, brushes, and sprayers by coverage and control—rollers give even coverage, brushes handle edges, and sprayers are fast but need masking.
Work with consistent strokes, overlap wet edges, and wait the manufacturer’s recommended dry time before applying a second coat for full coverage and adhesion.
Selecting paint sheen and color for ceilings
Although ceilings are often overlooked, picking the right sheen and color matters for preventing visible streaks and premature peeling.
Choose a flat or matte ceiling paint to hide imperfections and minimize lap marks; these sheens resist showing brush or roller texture.
Use light, warm neutrals to reflect light evenly and mask minor grease stains.
Avoid high-gloss finishes that highlight flaws.
Application methods: roller vs. brush vs. sprayer pros and cons
When you’re ready to apply paint, pick the method that fits your ceiling’s size, texture, and your comfort level—rollers give even coverage for most ceilings, brushes handle edges and tight spots, and sprayers speed up large or textured surfaces but need more prep and masking. Choose rollers for flats, brushes for trim, sprayers for speed; practice first.
| Tool | Best use |
|---|---|
| Roller | Large flat areas |
| Brush | Edges/trim |
| Sprayer | Textured/large |
| Hybrid | Detail + area |
Best practices: stroke direction, overlap, wet edge, and coat timing
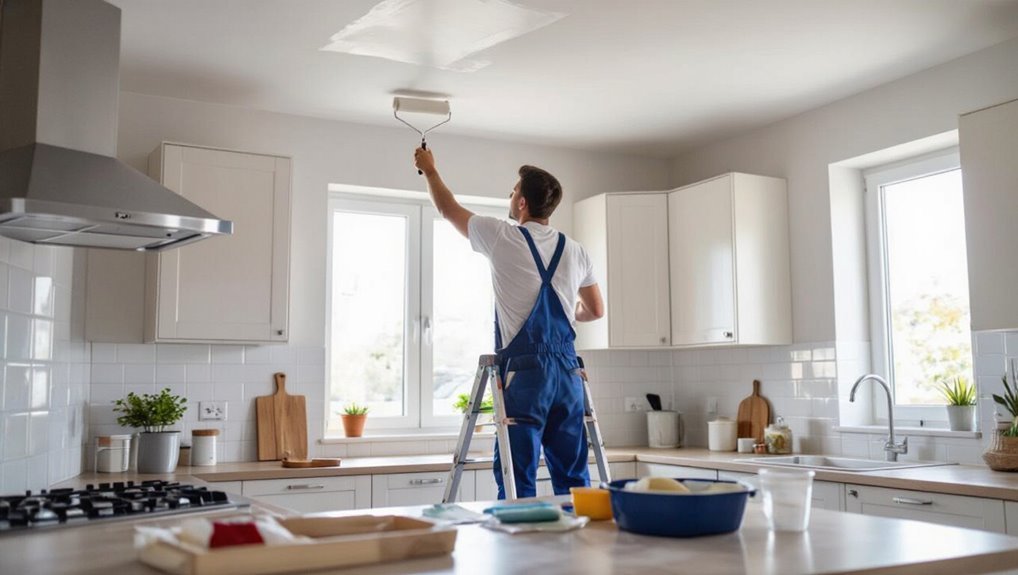
Because paint dries fast at the edges, keep a consistent stroke direction and work in overlapping passes so you maintain a wet edge; move steadily from the light source toward the opposite side, overlap each roller pass by about 30–50%.
Feather brush cuts into roller areas, and avoid lifting the roller. Time coats so edges stay workable, pausing only long enough to reload or reposition.
Number of coats and when to apply a second coat
One good rule is to plan on two coats for a smooth, durable ceiling: the first coat lays down color and adhesion, and the second evens out coverage and hides roller marks.
Wait the manufacturer’s recommended dry time—usually 2–4 hours for fast-dry latex, longer for oil-based.
Touch up missed spots with the second coat; don’t overload the roller.
Drying, Curing, and Post-Paint Care
Keep the room at moderate temperature with good airflow and low humidity so the paint can dry evenly; use fans and a dehumidifier if needed.
Wait the manufacturer’s recommended curing time before touching or cleaning—dry to the touch isn’t the same as fully cured.
When you do clean, use a soft cloth or sponge with mild detergent and test a small area first to avoid damaging the finish.
Ideal drying conditions and how to control humidity and ventilation
Although paint feels dry to the touch within a few hours, proper curing—when the solvents evaporate and the film hardens—can take days.
Controlling temperature, humidity, and airflow speeds that process and prevents tacky finishes or stain bleed-through.
Keep room temperature 65–75°F, humidity 40–50%.
Use fans for gentle cross-ventilation, run exhaust to remove odors, avoid direct AC blasts, and pause cooking until tack-free.
When the paint is fully cured and safe to clean
After the paint has fully cured—usually several days to a week depending on product and conditions—you can safely clean the ceiling without risking damage to the finish.
Check manufacturer cure times, wait the full period, and test a small inconspicuous spot before wider cleaning.
Maintain gentle handling for at least two weeks, avoid heavy scrubbing initially, and resume normal maintenance once the finish feels hard and stable.
Cleaning painted ceilings without damaging finish
Once the paint’s fully set, you can clean your ceiling gently without harming the finish by using soft tools, mild cleaners, and careful technique.
- Use a soft microfiber mop to dust.
- Test a mild detergent solution on a small patch.
- Lightly wipe with a damp sponge; avoid scrubbing.
- Rinse with clean water and air-dry; avoid harsh chemicals or abrasives.
Common Mistakes and How to Avoid Them
Don’t skip degreasing or grab the wrong cleaner—grease ruins adhesion and leads to peeling.
Use the correct primer and ceiling-grade paint, and apply them with proper technique to avoid streaks and lap marks.
Finally, don’t rush between coats or paint in poor conditions; let each layer dry fully and work when temperature and humidity are right.
Skipping degreasing or using the wrong cleaner
If you skip degreasing or grab the wrong cleaner, grease and residue will prevent paint from adhering and make the finish look uneven.
You should wipe the ceiling with a degreasing solution designed for kitchen grease, rinse thoroughly, and let it dry.
Test a small area first to guarantee compatibility.
Missing this step causes peeling, stains, and wasted time.
Using the wrong primer or paint type
Because kitchen ceilings face grease, moisture, and heat, choosing the right primer and paint is essential to a durable, stain-resistant finish.
Don’t use standard interior primers or flat paints alone; pick a high-adhesion, stain-blocking primer and a washable, mildew-resistant ceiling paint or kitchen-grade enamel.
Test adhesion on a small area and follow manufacturer cure times to prevent peeling and bleed-through.
Poor application technique that causes streaks or lap marks
Even with the right primer and paint, poor application can ruin the look by leaving visible streaks and lap marks.
Work in consistent, overlapping strokes, maintain a wet edge, and load your roller or brush evenly. Don’t press too hard or stop mid-panel; finish each section before the paint skins.
Inspect under good light and smooth drips immediately to avoid marks.
Rushing between coats or painting in bad conditions
When you rush between coats or paint in high humidity, extreme temperatures, or dusty conditions, the finish suffers—adhesion weakens, drying times become unpredictable, and visible defects like sagging or blistering can appear.
Wait recommended dry times, control temperature and humidity, and work in clean air.
Use fans, dehumidifiers, or delay until conditions improve to guarantee proper curing and a smooth, durable ceiling.
Prevention and Long-Term Maintenance
To keep your freshly painted ceiling looking good, consider upgrading kitchen ventilation to cut down future grease buildup.
Set a routine cleaning schedule and use gentle, non-abrasive cleaners safe for painted surfaces.
Also think about protective finishes and plan when to recoat to preserve durability and appearance.
Kitchen ventilation upgrades to reduce future grease buildup
If you want to keep fresh paint on your kitchen ceiling longer, upgrade your ventilation so grease and steam don’t settle there in the first place.
Improve airflow and reduce buildup with practical upgrades:
- Install a high-CFM range hood vented outside.
- Add a timed exhaust fan for long cooks.
- Use ductwork with minimal bends.
- Seal gaps to stop recirculation.
Routine cleaning schedule and safe cleaners for painted ceilings
Upgrading your ventilation will cut grease and steam, but you’ll still need a simple cleaning routine to keep the painted ceiling looking fresh.
Wipe every 1–2 months with a microfiber mop and a mild detergent solution (few drops dish soap in warm water). Avoid abrasive pads and strong solvents.
Spot-clean grease promptly. Test any cleaner in an inconspicuous area first to prevent damage.
Protective finishes and when to recoat
One protective step you shouldn’t skip is applying a clear finish—like a water-based polyurethane or a matte acrylic sealer—over your kitchen ceiling paint to resist stains, moisture, and occasional cleaning.
Apply two thin coats, allow proper drying, and ventilate.
Recoat every 5–7 years or sooner if you see wear, yellowing, or reduced stain resistance; touch up high-use spots as needed.
Comparison: DIY vs. Hiring a Professional
You can save money by doing the ceiling yourself, but weigh that against the extra time and the risk of uneven results.
Hire a pro when damage is severe, the ceiling has textured surfaces, or you need spray equipment for a smooth finish.
Consider cost, schedule, and the quality you want before deciding.
Cost, time, and quality trade-offs
Although tackling your kitchen ceiling yourself can save money, it often costs more time and effort than people expect; hiring a pro typically costs more upfront but finishes faster and delivers more consistent, long-lasting results. You should weigh costs, schedule, and finish quality to decide.
| Option | Cost | Speed |
|---|---|---|
| DIY | Low | Slow |
| Pro | High | Fast |
When to hire a pro (severity of damage, texture ceilings, spray equipment needs)
If your ceiling has major cracks, water stains, or sagging spots, call a pro—these issues often need structural fixes or specialized drying and sealing that DIYers can’t reliably handle.
Hire a pro if texture requires feathering or match repairs, ceilings are popcorn or heavily textured, or you need spray equipment for even, streak-free coverage.
Pros also handle hazardous prep and warranty concerns.
Troubleshooting Guide
If yellow stains keep reappearing after painting, you’ll need to identify and treat the underlying moisture or nicotine source before repainting.
If paint starts peeling after a few months, check for poor surface prep or incompatible products and strip or sand affected areas.
For visible brush or roller streaks and lap marks, adjust your technique, use the right roller nap, and keep a wet edge while working.
Yellow stains reappearing after painting
When yellow stains come back after you’ve painted the kitchen ceiling, it’s usually a sign that the stain source wasn’t fully addressed or the wrong primer and paint were used; you’ll want to diagnose the cause quickly so you can stop further discoloration and fix it properly.
Check for nicotine, cooking fumes, water leaks, or smoke residue. Clean thoroughly, use an oil-based or shellac stain-blocking primer, then repaint with a durable ceiling paint.
Paint peeling after a few months
Stains coming back can signal deeper issues that also cause paint to peel, so it’s worth addressing both problems together.
If paint peels months later, check for residual grease, moisture, or poor adhesion. Strip loose paint, degrease thoroughly, sand to a keyed surface, prime with a stain-blocking, high-adhesion primer, and use a quality ceiling paint.
Guarantee good ventilation and full cure time.
Visible brush/roller streaks or lap marks
Brush and roller marks or lap lines are usually caused by uneven paint thickness, improper overlap timing, or using the wrong tool for your ceiling texture.
To fix them, sand lightly once dry, clean dust, then recoat with thin, even passes.
Use a high-quality nap roller matched to texture, maintain a wet edge, and work in consistent sections to prevent visible streaks or overlaps.
Frequently Asked Questions
You’ll find quick answers here to common concerns like painting a greasy ceiling without sanding and whether shellac beats oil-based primer for kitchen grease.
I’ll also cover timing between primer and paint, whether a matte finish hides ceiling flaws, and how to treat nicotine stains differently from cooking grease.
Use these FAQs to pick the right prep and products for your ceiling.
Can I paint a greasy ceiling without sanding?
If your kitchen ceiling is greasy, you can often skip aggressive sanding—but you shouldn’t skip cleaning and prep; wipe the surface with a strong degreaser, rinse, let it dry, and then apply an appropriate primer before painting to guarantee adhesion and hide any remaining residue.
After that, sand only glossy spots lightly, repair damaged areas, and paint with a quality ceiling paint for lasting results.
Is shellac primer better than oil-based primer for kitchen grease?
Cleaning and priming are your best defense against kitchen grease, but you still have to choose the right primer.
Shellac blocks stains and adheres fast, so it’s superior for heavy grease and smoke residues.
Oil-based primers resist bleed-through and sand well, but they’re slower and smell stronger.
Choose shellac for toughest jobs; use oil-based for milder staining or easier sanding.
How long should I wait between primer and paint coats?
While paint manufacturers vary, a good rule is to wait until the primer’s surface is fully dry and no longer tacky—typically 30 minutes to 2 hours for water-based primers and 24 hours for oil- or shellac-based primers—before applying your topcoat.
Also follow the product’s recoat window; painting too soon traps solvents, too late can reduce adhesion.
Light sanding between coats improves bonding.
Will a matte finish hide imperfections better on a ceiling?
Once your primer’s dry and sanded, you’ll want to choose a finish that masks minor flaws—matte (flat) finishes usually do the job best.
Matte hides small bumps, texture inconsistencies, and thin primer overlap by diffusing light. You should still repair obvious dents and heavy stains first, but for most ceilings a flat sheen minimizes attention to imperfections and gives a consistent look.
How do I remove nicotine stains differently than cooking grease?
How do you tackle nicotine stains versus cooking grease?
You’ll treat nicotine with stronger degreasers and oxidizers—trisodium phosphate (TSP) or a commercial nicotine remover—scrubbing gently, rinsing, then priming with a stain-blocking primer.
For cooking grease, use a citrus or ammonia-based degreaser, rinse thoroughly, and prime.
Always wear gloves, ventilate, and test a small area before full treatment.
