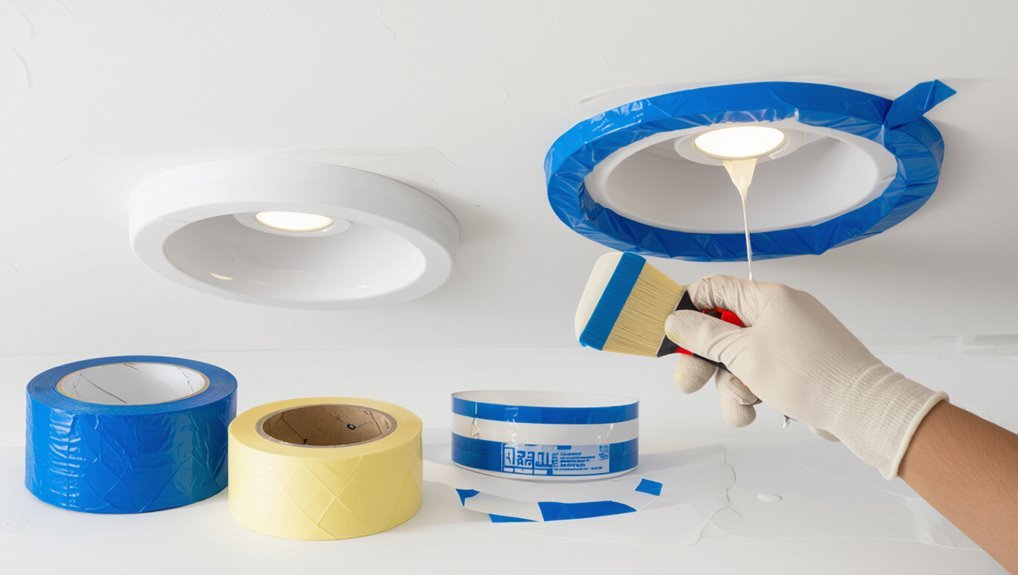
How to Paint a Ceiling With Recessed Lights Without Making a Mess
Turn off the power and remove bulbs, then cover floors and furniture with drop cloths. Wipe the ceiling clean and tape plastic over trims, using removable tabs to hold edges tight. Cut in around each recessed light with an angled brush, then roll small sections with an extension pole, angling the roller away from fixtures to avoid splatter. Inspect for drips and touch up with a brush. Follow the steps below to learn technique, timing, and masking tips.
How to Paint a Ceiling with Recessed Lights Without Making a Mess
Yes — you can paint around recessed lights without making a mess if you prep the fixtures and use the right tools.
This short guide shows step-by-step prep, masking, and technique tips to keep paint off fixtures and floors.
It’s written for DIYers and homeowners who want a clean, professional-looking ceiling with minimal cleanup.
Quick Answer Can you paint around recessed lights without a mess?
Wondering if you can paint around recessed lights without creating a mess? Yes — with prep and the right technique.
Mask fixtures, remove trims when possible, and use painter’s tape and plastic sheeting. Cut in carefully with a brush or use an angled brush for tight spots.
Follow steps in how to paint a ceiling with recessed lights to keep edges neat and cleanup minimal.
What this guide covers and who it’s for
Now that you know you can paint around recessed lights without a mess, this guide outlines exactly what you’ll need and the step-by-step techniques to get clean edges, protect fixtures, and speed up cleanup.
You’ll find tool lists, surface prep, safe masking methods, painting around trims, and quick-touch cleanup tips. It’s for DIYers, renters, and homeowners who want neat, professional-looking results without fuss.
Basic Understanding: Ceiling Paint and Recessed Lights
You’ll want to know how recessed lights are mounted and the way housings and trims stick out or sit flush, because that changes how you paint around them.
Different trims and housings — from adjustable gimbals to flush baffles — call for different masking and cutting-in approaches.
Also pick a ceiling paint and finish (flat or low-sheen) that hides imperfections and resists scuffs near fixtures.
How recessed lights are installed and why they complicate painting
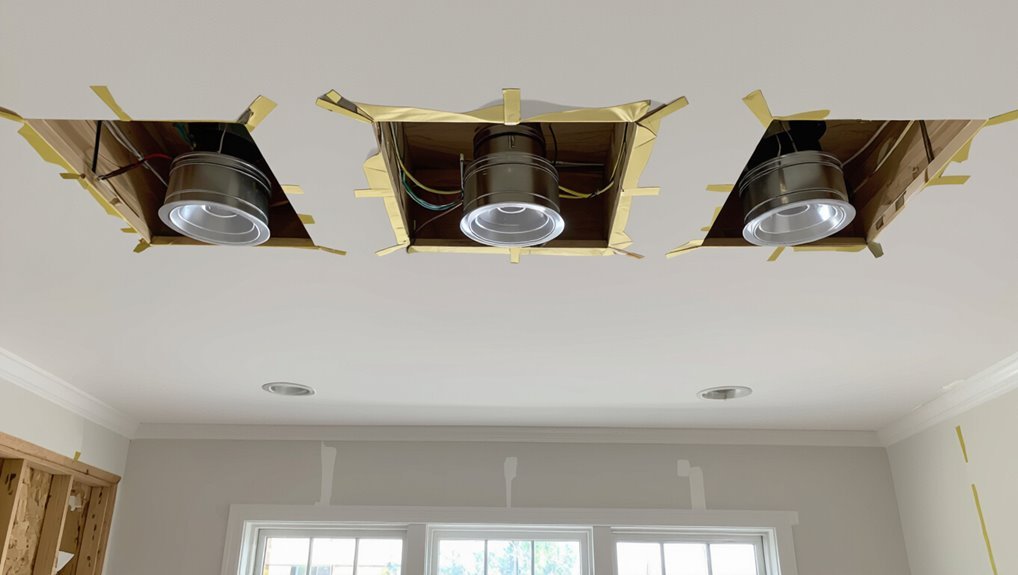
Because recessed lights sit flush with the ceiling, their housings, trim, and wiring create tight gaps and edges that change how paint behaves and how you can access the surface.
You’ll encounter wiring, junction boxes, and insulation clearance requirements hidden above drywall, so you must protect fixtures, avoid overpainting vents, and work around sealed cans.
That complicates masking, cutting-in, and even roller coverage.
Types of recessed light trims and housings that affect painting
Trims and housings come in several styles that directly change how you paint around recessed lights, so it helps to know what each type looks like and how it sits in the ceiling.
Fixed, adjustable, and eyeball trims sit differently; baffle and reflector finishes affect edges.
Remodel versus new-construction housings change gap access. Low-profile trims need finer masking to avoid drips and paint buildup.
Paint types and finishes suitable for ceilings with fixtures
Choosing the right paint and finish makes a big difference when you’re painting a ceiling with recessed lights: pick a flat or matte ceiling paint to hide imperfections and reduce glare, but use satin or semi-gloss near fixtures if you need easier cleaning or better light reflection.
You’ll want quality acrylic or latex for durability, low-VOC for indoor air, and touch-up-ready sheens around trims.
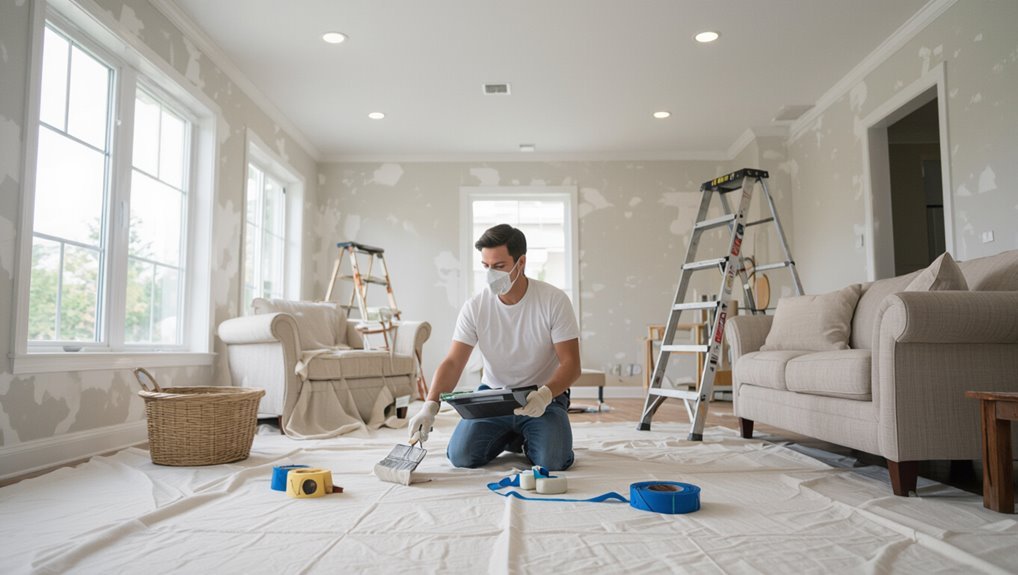
Prep Work Before Painting
Before you start rolling, gather a checklist of tools and materials so you won’t stop mid-job.
Turn off power to the recessed lights, use a stable ladder, and put on gloves and eye protection for safety.
Protect the room and fixtures with drop cloths, tape or masking paper, and painter’s adhesive where needed.
Tools and materials checklist
A simple checklist keeps you organized and speeds up the job: gather drop cloths, painter’s tape, a sturdy ladder, a high-quality angled brush for cut-ins, a roller with an extension pole and the right nap for your ceiling texture, primer and ceiling paint, plus replacement bulbs and trim gaskets for the recessed lights so you can reinstall safely.
- Tools: brush, roller, pole
- Materials: paint, primer, tape
- Extras: bulbs, gaskets, cloths
Safety precautions (power off, ladder safety, protective gear)
Because recessed fixtures combine electricity and awkward heights, shut off power at the breaker and confirm the circuit is dead before you start.
Wear eye protection and a dust mask while working from a stable ladder or scaffold. Keep a spotter if possible, lock ladder feet, position it on level ground, use nonconductive tools near wiring, and wear gloves to protect hands.
Protecting fixtures and the room: drop cloths, masking, and adhesive options
With power off and your ladder secure, protect the room and fixtures so paint never has to be cleaned off delicate surfaces.
Lay canvas or plastic drop cloths over floors and furniture, taping edges.
Cover light trims and switches with painter’s tape and plastic or paper, use removable adhesive tabs for trim, and seal gaps to prevent drips.
Remove bulbs or mask firmly before painting.
Quick Answer: Best Approach at a Glance
You’ve got two solid strategies: cut in around fixtures first for tight control, or save cut-ins until after the main roll for faster coverage.
Decide whether to remove the trims for cleaner edges or mask them in place to save time and avoid rewiring.
Pick the approach that matches your comfort with detail and how much prep you want to do.
Two recommended strategies: cut-in first vs. cut-in last
When you’re tackling a ceiling with recessed lights, you’ll usually pick one of two approaches: cut-in first (paint around fixtures before rolling) or cut-in last (roll the field first, then trim). Choose cut-in first for tight control; pick cut-in last for speed. Match method to fixture spacing, trim condition, and your steadiness.
| Method | Strength |
|---|---|
| Cut-in first | Precision |
| Cut-in last | Speed |
| Both | Flexibility |
| Tip | Protect bulbs |
When to remove trims vs. mask in place
If the trims come off easily and you want the cleanest edge, take them down—otherwise mask them carefully and paint around the openings.
Remove trims when accessible, undamaged, and reattachable; it gives crisp lines and lets you avoid touch-ups.
Mask in place if trims are stuck, fragile, or wired. Use painter’s tape plus paper, press edges, and replace trims after paint cures for best results.
Step-by-Step Painting Process
Before you start painting, turn off the power and either remove or carefully mask the recessed fixtures to protect them.
Clean the ceiling and light trims, patch any stains, and prime only where needed.
Then cut in around each light with an angled brush before rolling the rest of the ceiling.
Step 1 Turn off power and prepare fixtures
1. Turn off the circuit breaker for the room and test switches to confirm power’s dead.
Remove trim rings or disconnect clips per manufacturer instructions, and pull housings slightly down if accessible.
Cover exposed bulbs and wiring with painter’s tape and plastic to prevent paint or dust.
Keep screws and parts in a labeled container so reassembly’s quick and accurate.
Step 2 Clean ceiling and light trims
A damp microfiber cloth and a soft brush will make quick work of dust and cobwebs on the ceiling and around trim pieces.
Remove loose debris, then wipe stains with a mild detergent solution and rinse with clean water. Let the surface dry completely.
Check trim edges for dust or grease so paint adheres evenly. Replace any brittle trim later if needed.
Step 3 Remove or mask recessed trims (detailed methods)
Next, decide whether you’ll remove the recessed trims entirely or mask them in place; removing gives the cleanest edge but masking is faster and safer for wired fixtures.
If removing, cut power, detach trim and spring clips, label parts, and store screws.
If masking, use painter’s tape and overlapping plastic or magnetic covers, seal edges tightly, and protect bulbs and housings from paint splatter.
Step 4 Primer application for patched or stained ceilings
If your ceiling has been patched or shows stains, apply a high-quality primer before painting to guarantee uniform adhesion and hide discoloration; choose a stain-blocking, fast-dry primer.
Patch seams smoothly, sand lightly, then tack-cloth. Use a roller with nap matched to texture, working wet edges to avoid lap marks.
Allow full dry time and inspect for bleed-through before topcoating.
Step 5 Cutting in around lights with an angled brush
With primer dry and the surface sanded smooth, you’re ready to cut in around the recessed lights using an angled brush; this will let you paint clean edges before rolling the rest of the ceiling.
Work with steady, short strokes, keeping bristles flat against the trim. Trim excess paint, maintain a wet edge, and pause to remove drips immediately for crisp, even lines.
Step 6 Rolling the main ceiling area without splatter
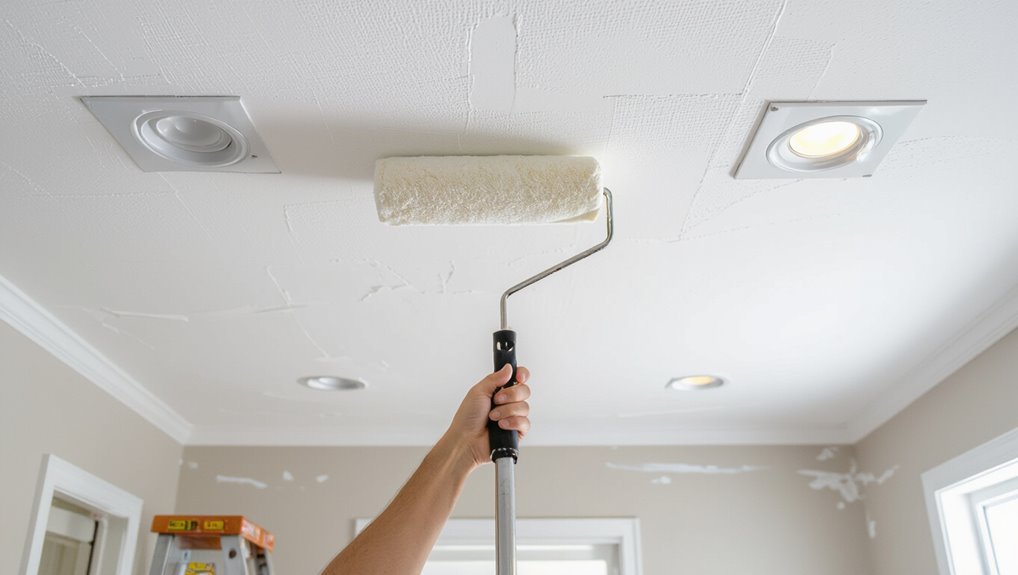
Start by loading your roller evenly—dip it into the tray’s grid and roll until paint’s distributed without dripping—then work in small, manageable sections using a “W” or “M” pattern to spread the paint before smoothing it out in long, overlapping strokes.
Keep a consistent pressure, maintain a wet edge, and pause to wipe or replace the roller if it starts to shed or fling paint to prevent splatter.
Roll steadily, avoid overloading, and angle the roller away from recessed lights.
Step 7 Touch-ups and second coat timing
Now inspect the ceiling closely under good light, touching up thin spots and drips as needed while you gauge dry time for the second coat.
Use a brush for edges and recessed rims, feathering into rolled areas.
Wait the manufacturer’s recommended recoat window; test a small area for tackiness.
If uniform and dry, apply the second coat with the same technique for even coverage.
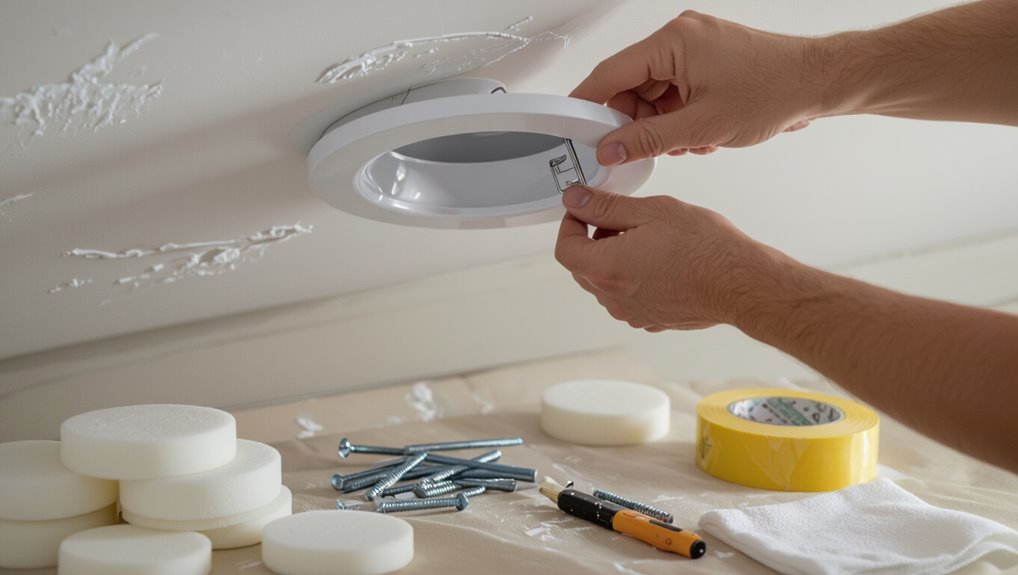
Step 8 Unmasking, reattaching trims, and restoring power
Carefully remove the tape and protective coverings once the final coat is fully dry, pulling tape back at a low angle to avoid peeling fresh paint.
Then reattach the recessed light trims and bezels, tightening screws or clips snugly but not overtight.
Finally, restore power at the breaker or switch.
Inspect each fixture for paint smudges, tighten any loose hardware, and test lights to confirm proper function.
Alternatives and Special Scenarios
You can consider alternatives like spraying the ceiling with masked fixtures—I’ll cover the pros and cons of that method.
You’ll also need to know how to handle IC-rated or insulated housings to keep fire and insulation safety intact.
Finally, I’ll explain tips for painting textured or popcorn ceilings around recessed lights without damaging the finish.
Spraying the ceiling with masked fixtures: pros and cons
While spraying the ceiling with the recessed fixtures masked can save time and give a smooth, even finish, it also brings trade-offs you should weigh: it’s fast and often cleaner than rolling, but risks overspray, uneven coverage around trims, and more complicated masking that, if done poorly, can let paint into housings or create drips.
| Benefit | Risk | Tip |
|---|---|---|
| Speed | Overspray | Test spray |
| Smooth finish | Paint in housing | Secure masks |
| Less physical strain | Drips | Thin coats |
Working with IC-rated or insulated housings
1 thing to know about IC-rated or insulated housings is that they’re designed to be in direct contact with insulation, so you can’t just stuff them full of paint or block their vents without risking overheating or voiding the rating.
You should mask trims, avoid spraying inside cans, and use a small brush to touch up edges.
Check manufacturer guidance before painting.
Painting textured ceilings or popcorn around recessed lights
Because textured or popcorn ceilings grip paint differently and hide imperfections, you’ll need a gentler approach around recessed lights to avoid clumping and loss of texture.
Use a light spray or stipple brush, feather edges, and avoid overworking.
Mask trims and bulbs, remove excess spray with a dry brush, and test a small area first so you preserve texture and guarantee even coverage.
Common Mistakes and How to Avoid Them
Don’t paint with the power on—turn off and, if possible, disconnect the fixtures before you start to avoid shocks or damage.
Take time to mask trims and bulbs carefully so you don’t get drips or paint on visible parts.
Use the right finish and color, and avoid overloading your brush or roller to prevent splatter and an uneven result.
Mistake 1 Painting with power on or not disconnecting fixtures
If you leave the power on or don’t disconnect recessed fixtures before painting, you risk electrical shorts, damaged fixtures, and even shocks.
Turn off the circuit at the breaker, test with a noncontact tester, and remove or cover trim and bulbs.
Securely cap wires if you disconnect fixtures.
Working on dead circuits keeps you safe and prevents costly repairs or ruined lights.
Mistake 2 Poor masking leading to drips on trims and bulbs
When you skimp on masking around recessed lights, paint drips and overspray can ruin trims and coat bulbs, forcing you to scrape, replace parts, or redo the job.
Protect fixtures with quality tape, plastic, or paper, secure edges tightly, and cover bulbs or remove them.
Inspect seals before painting and touch up any gaps immediately to prevent permanent stains or damage.
Mistake 3 Using wrong paint finish or color
Along with careful masking, picking the wrong paint finish or color can undo all your prep work by highlighting imperfections or creating glare around recessed lights.
Choose a flat or matte finish to minimize sheen and hide texture. Avoid high-gloss or overly bright whites near fixtures.
Test samples under the actual recessed lighting before painting the whole ceiling to guarantee even appearance.
Mistake 4 Overloading brush/roller and creating splatter
Don’t overload your brush or roller — it causes drips, splatter, and uneven coverage that’s hard to fix around recessed lights.
Load modestly, tap off excess from the tray or grid, and work in controlled passes.
Use a shorter-nap roller for smooth ceilings, keep a small angled brush for edges, and pause to smooth drips immediately before they dry.
Best Practices and Expert Tips
Before you start, pick the right pro tools—angled sash brushes, flexible edgers, and foam shields—to get sharp lines around trims and cans.
Pay attention to timing, temperature, and humidity for proper drying, and keep Goo Gone, a razor blade, and microfiber cloths handy to clean paint off trims and lenses quickly.
If wiring, damaged fixtures, or complicated trims are involved, don’t hesitate to call an electrician or a professional painter.
Tools pros use for clean edges (brush types, edgers, foam shields)
Typically, pros reach for a tight-angle synthetic sash brush, a slim edger, and foam light shields to get crisp lines around recessed fixtures without splatter.
You’ll use the sash brush for precision cuts, the edger for quick straight runs along trim and cans, and foam shields to protect trims and bulbs.
Keep tools clean and swap brushes for different paint sheens to avoid dragging.
Timing, temperature, and humidity considerations
Once your tools are staged and your edges are prepped, plan the timing around temperature and humidity so paint can cure properly and you avoid lap marks or drips.
Paint when indoor temps are 50–85°F and humidity is under 60%. Work in thin, consistent coats during stable conditions.
Avoid painting before storms, heat cycles, or heavy HVAC changes that alter drying times and finish quality.
Clean-up tips to remove accidental paint from trims and lenses
If you do get paint on trims or recessed-light lenses, act quickly and gently to avoid permanent stains or scratches.
For fresh latex, wipe with a damp cloth or mild soap; for dried spots, soften with warm soapy water or a small amount of rubbing alcohol.
Use a plastic scraper or cotton swab to lift paint, then dry and inspect for scratches before reinstalling.
When to call an electrician or pro painter
When you’re dealing with electrical components or complex repairs, call a licensed electrician—and bring in a pro painter for tricky finishes or large jobs that demand speed and consistency.
If wiring, fixture replacement, or insulation contact is involved, don’t risk DIY. Hire pros for high ceilings, textured surfaces, or color-matching.
Ask for licenses, insurance, references, and written estimates before they start.
Cost, Time, and Effort Estimates
You’ll want a clear time breakdown—typically an hour or two for prep, a few hours to paint, and several hours of drying between coats.
Expect DIY costs for paint and supplies to run much lower than hiring a pro, though pros save you time and may handle tricky recessed fixtures better.
We’ll compare typical price ranges and show where you’ll spend most of your effort.
Time breakdown for a typical room (prep, painting, drying)
Although every room differs, you can expect a straightforward sequence: prep (covering fixtures, masking trims, and removing or protecting trim and furniture), painting (cutting in around recessed lights and rolling the field), and drying between coats.
Plan 30–60 minutes prep, 1–2 hours for the first coat, 30–45 minutes for touch-ups, and 2–4 hours drying; repeat for a second coat.
Cost estimate for DIY vs. professional service
Budgeting a ceiling paint job comes down to three things: material costs, your time and effort, and whether you hire a pro. You can save on labor but expect more time and risk; pros charge for speed, cleanup, and warranty. Compare options:
| Option | Cost Range | Time |
|---|---|---|
| DIY | $40–$150 | 4–8 hrs |
| Pro | $200–$600 | 2–4 hrs |
FAQ Painting Ceilings with Recessed Lights
You’ll find answers to common questions about painting around recessed lights, like whether you can paint the trim and if bulbs should be removed first.
You’ll also learn how paint can affect light output or fixture temperature, how to treat oil or water stains near fixtures, and what to do if paint lands on an LED lens or bulb.
Read on for clear, practical guidance so you can finish the job safely and neatly.
Can I paint over the recessed light trim?
Wondering if you can paint recessed light trim? You can, but choose wisely: metal trims accept paint if cleaned and primed; plastic trims often warp or peel, so use spray-on plastic primer designed for PVC.
Mask bulbs and housing, scuff lightly, and use thin coats to avoid drips. Consider replacing trim if it’s heat-sensitive or has a finish you want preserved.
Do I need to remove bulbs before painting?
After prepping or replacing trims you’ll want to address the bulbs themselves: it’s best to remove or at least fully retract and cover them before painting.
Removing bulbs prevents paint splatter, avoids accidental breakage, and lets you mask or tape the housing more effectively.
If removal’s impractical, retract bulbs, cover with a tight plastic bag or painter’s tape, and label for reinstallation.
Will painting affect the light output or fixture temperature?
Although a fresh coat of paint won’t magically change your bulbs’ wattage, it can affect light output and fixture temperature if you alter trim reflectivity or accidentally clog vents.
Darker paint or textured finishes absorb more light and can make recessed cans run slightly warmer.
Keep trims glossy or reflective, avoid sealing vents, and use LED bulbs rated for enclosed fixtures to maintain output and safe temperatures.
How do I handle oil stains or water stains around lights?
If you see oil or water stains around recessed lights, don’t paint over them—treat the stain first so it doesn’t bleed through the new finish or hide an ongoing problem.
Identify source: fix leaks or HVAC oil issues.
Clean with mild detergent, let dry.
Apply a stain-blocking primer (shellac- or oil-based).
After primer cures, repaint.
Monitor for recurrence to guarantee repair worked.
What if paint gets on the LED lens or bulb?
1 common worry is getting paint on the LED lens or bulb while cutting in or rolling near recessed lights; don’t panic—small amounts on the trim or lens are usually removable, but paint on the bulb or internal LED surface can reduce light output and may require replacement.
If wet, wipe gently with a microfiber and mild solvent; if cured, replace the trim or lamp to restore brightness.
Quick Checklist Before You Start
Before you start painting, run through a final prep and safety checklist to make sure everything’s ready.
Turn off power to the recessed lights, cover fixtures and floors, and secure a stable ladder or platform.
Double-check you have masks, goggles, and the right paint and tools on hand.
Final prep and safety checklist
Do a quick walk-through of the room to confirm everything’s ready: clear drop cloths and ladders into place, remove or securely cover furniture and floor vents, and set up a stable work platform so you can reach each recessed light without overextending.
- Turn off power and test fixtures.
- Tape and mask trim tightly.
- Keep a flashlight, gloves, and goggles nearby.