
How to Make Stucco Wall Texture at Home: A Step-by-Step Guide
You can make stucco wall texture at home by mixing premixed stucco or a cement–lime–sand mortar, then applying a scratch coat, brown coat and finish coat with a trowel or sprayer. Prep the surface, repair damage, mask nearby areas and use a bonding agent if needed. Keep coats thin, score the scratch coat, cure between layers and use floats, sponges or a hopper gun to create your chosen pattern. Keep going to learn step‑by‑step mixes, tools and troubleshooting.
How to Make Stucco Wall Texture at Home Quick Answer
You can mix a premade stucco or mortar, apply it with a trowel or float, and texture it in about 2–6 hours per small wall depending on drying time and skill.
Expect low-to-moderate material costs ($20–$100) and a moderate difficulty—DIY is sensible for small repairs or simple textures, but larger or intricate jobs are worth hiring a pro.
If you’re short on time, lack tools, or need guaranteed uniform results, call a contractor.
Short summary of the process and estimated time, cost, and difficulty
Get a clean, primed surface, mix pre-blended stucco or make a sand-cement-lime mix, apply a scratch coat, follow with a brown coat, then trowel or float the finish coat for texture—drying between coats takes hours to days.
For how to make stucco wall texture, expect 1–3 days labor, $50–300 materials for small projects, and moderate skill—practice on a board first.
When to choose DIY vs hiring a pro
Although tackling a small accent wall or patching a few damaged spots is doable for most handy homeowners, hire a pro when the job grows in scale, involves structural cracks or moisture problems, or when you need a flawless, long-lasting finish quickly.
You should DIY for small, low-risk projects to save money and learn skills, but call a pro for complexity, warranty, or tight deadlines.
Understanding Stucco and Wall Textures
Stucco is a durable exterior plaster made from cement, lime, sand, and sometimes acrylics, and you’ll encounter several mixes and types for different uses.
Texture matters because it shapes the look and hides flaws while adding weather resistance and durability.
Common styles you’ll see are roughcast, dash, Spanish lace, skip trowel, and float, each giving a distinct finish and application method.
What is stucco? Types and common compositions
A durable exterior coating, stucco’s a mixture of cement, sand, lime, and water that hardens into a dense, weather-resistant surface. Different formulations and application methods give you a range of textures and finishes for walls.
You’ll choose between traditional Portland cement stucco, lime-stabilized mixes, or acrylic and synthetic blends. Each composition alters workability, curing time, and durability for your project.
Why texture matters aesthetic and functional benefits
Texture shapes both how your walls look and how they perform, so pick it with purpose. You’ll influence light, depth, and perceived scale—smoother finishes feel modern, subtle textures add warmth.
Functionally, texture hides imperfections, improves durability, and can aid water runoff and impact resistance. Consider maintenance, climate, and the room’s style so your choice balances beauty with practical performance.
Common stucco texture styles (roughcast, dash, Spanish lace, skip trowel, float)
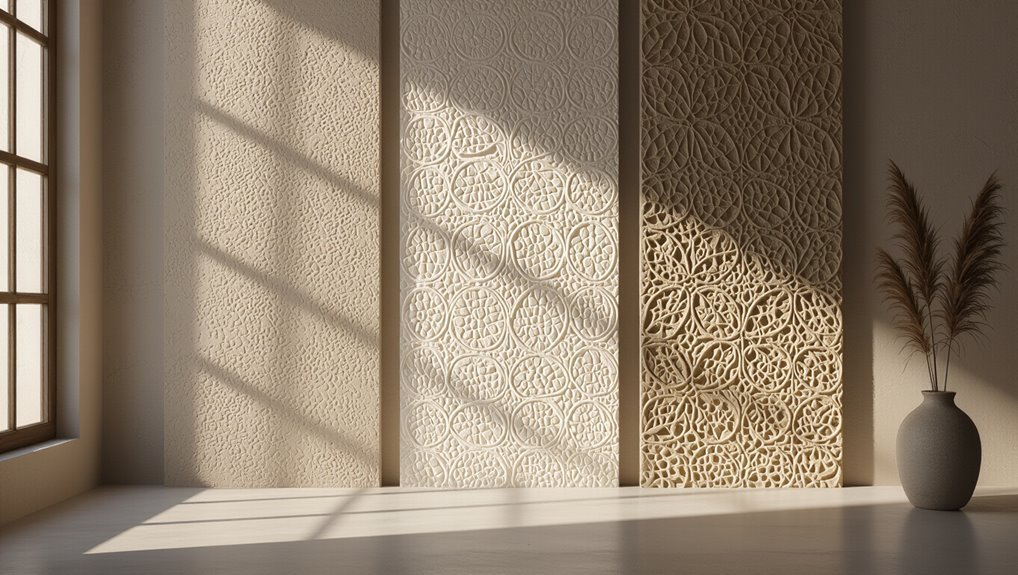
Now that you’ve weighed aesthetic and functional goals, it helps to know the common stucco looks that will deliver them.
You’ll choose based on maintenance, coverage, and style.
- Roughcast — coarse aggregate, durable.
- Dash — thrown, highly textured.
- Spanish lace — ornate, patterned finish.
- Skip trowel/float — subtle peaks, modern appeal.
Materials, Tools, and Safety Equipment
Before you start, gather the right materials—cement or premixed stucco, lime or bonding agent, and the correct sand—so you won’t interrupt the job to run for supplies.
You’ll also need a tools checklist (trowels, hawk, float, sprayer, mixing drill, brushes, and masking supplies) to keep application efficient and consistent.
Wear proper safety gear and guarantee good ventilation to protect your lungs and eyes while mixing and spraying.
Essential materials (cement, lime, sand, bonding agent, premix options)
Getting the mix right starts with a few key ingredients: Portland cement for strength, hydrated lime for workability and breathability, clean sharp sand for body and texture, and a bonding agent to help the new stucco adhere to surfaces—although pre-mixed stucco blends can save time if you prefer.
- Cement
- Lime
- Sharp sand
- Bonding agent
Measure proportions, keep materials dry, and choose premix for consistency.
Tools checklist (trowels, hawk, float, sprayer, mixing drill, brushes, masking supplies)
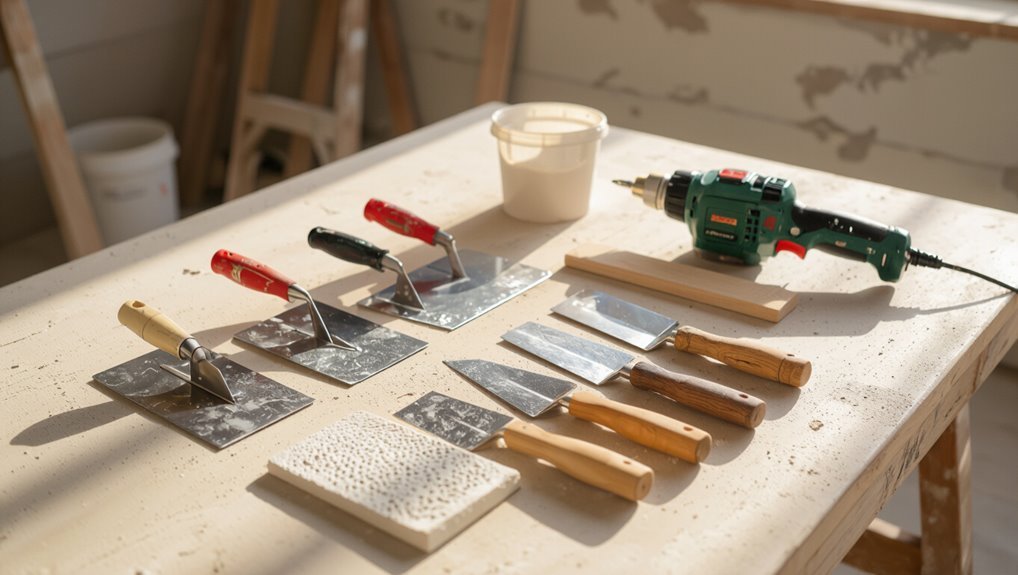
With your mix proportions settled, gather the right tools so you can apply and finish the stucco correctly.
You’ll need quality trowels and a hawk, a float for smoothing, and a sprayer or mixing drill for consistency.
Don’t forget brushes and masking supplies for edges.
- Trowels/hawk
- Float
- Sprayer/drill
- Brushes/masking tape
Safety gear and ventilation precautions
Because stucco mix and airborne dust can irritate skin, eyes, and lungs, wear proper PPE every time you work: a NIOSH-approved respirator or at least an N95 mask, safety goggles, chemical-resistant gloves, long sleeves, and knee protection.
Ventilate well, use fans or open windows, and avoid working alone.
- Seal off area
- Run exhaust fan
- Wet down dust sources
- Dispose safely
Preparing the Surface
Before you apply stucco, inspect the substrate—masonry, drywall, wood, or existing stucco—to identify cracks, loose plaster, or other damage that needs repair.
Clean the surface thoroughly, prime or use a bonding agent where required, and let everything dry to guarantee good adhesion.
Finally, mask and protect adjacent surfaces, windows, and trim so you don’t create extra cleanup or damage.
Assessing substrate: masonry, drywall, wood, stucco over stucco
When you’re ready to apply stucco, start by identifying the existing substrate—masonry, drywall, wood, or old stucco—since each demands different prep and fixes.
Check porosity, stability, and whether a bonding agent, lath, or metal lath and fasteners are needed.
Note moisture barriers, backing type, and surface flatness so you can choose appropriate scratch/float coats and adhesion methods.
Repairing cracks, loose plaster, and damaged areas
Once you’ve identified the substrate, inspect the wall for cracks, loose plaster, and impact damage so you can prioritize repairs and prevent future failure.
Remove loose material with a scraper, chip out deteriorated plaster, and widen hairline cracks slightly to get proper adhesion.
Fill gaps with appropriate patching compound or cement, level and screed smooth, and let repairs cure fully before proceeding.
Cleaning, priming, and applying bonding agents
After you’ve repaired damaged areas, clean the surface thoroughly so the primer and bonding agents can grip properly: scrub with a stiff brush, rinse, and let dry.
Apply a masonry primer spread evenly; wait recommended cure time. For smooth or glossy patches, use a concrete bonding agent—brush or roll it on thinly.
Follow manufacturer timing before mixing and applying stucco.
Masking and protecting adjacent surfaces, windows, and trim
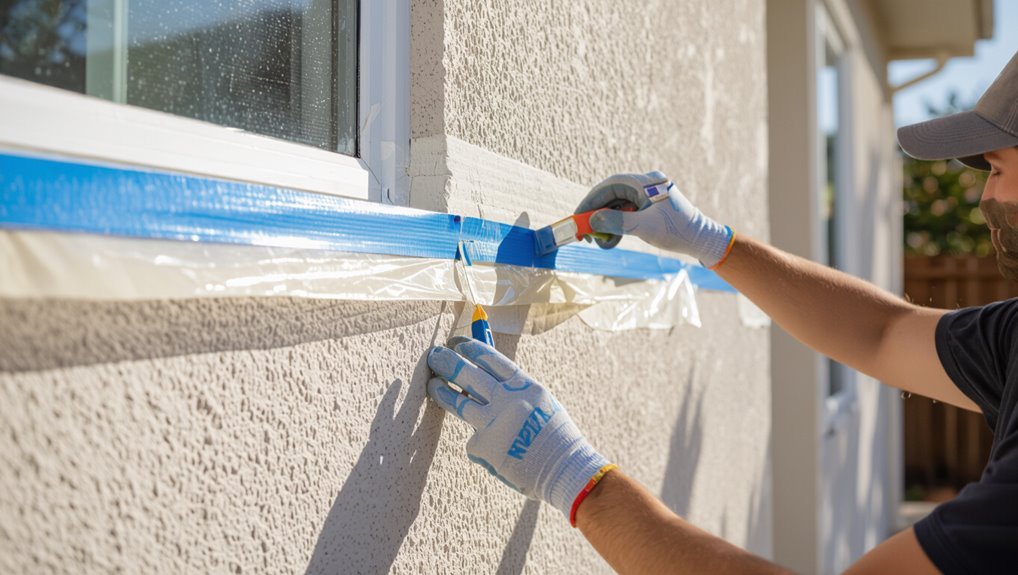
Protect nearby surfaces, windows, and trim before you start applying stucco so overspray, splatters, and sanding dust won’t cause extra work.
Tape plastic sheeting over windows, vents, and fixtures, and use painter’s tape on trim and edges. Cover nearby plants and walkways with drop cloths.
Remove or mask hardware, seal gaps with caulk, and check tape adhesion before you mix stucco.
Basic Stucco Mixes and How to Mix Them
You’ll want to start with a simple cement-lime-sand ratio (commonly 1:1:6 or 1:0.5:4) or choose a premixed stucco to save time and reduce guesswork.
Mix in small batches using a drill mixer or hoe, adding water gradually until you get a smooth, peanut-butter–like consistency that holds its shape without sagging.
I’ll cover pros and cons of premixed vs. raw materials and give practical tips for consistent, workable mixes for beginners.
Simple DIY cement-lime-sand mix ratios
Mixing simple stucco comes down to three ingredients — cement, lime, and sand — and a few reliable ratios you can follow depending on the strength and finish you want.
For a strong base coat, use 1 part cement:½ lime:3½ sand.
For a finish coat, use 1:1:6 for more workability and finer texture.
Adjust water to a creamy, spreadable consistency.
Using premixed stucco products vs. mixing from raw materials
Now that you’ve seen basic cement-lime-sand ratios, you’ll want to decide whether to buy premixed stucco or make your own from raw materials. Premixed saves time and guarantees consistency; raw lets you tweak strength and cost. Consider skill, project size, and storage before choosing.
| Option | Pros | Cons |
|---|---|---|
| Premixed | Convenient | Costly |
| Raw | Customizable | Time-consuming |
Mixing tips for consistency and workability
Because getting the right consistency makes application easier and reduces cracks, measure ingredients by volume or weight and keep them consistent from batch to batch.
Use clean water, add slowly while mixing, and aim for a peanut-butter to mayonnaise thickness depending on texture.
Mix thoroughly to eliminate dry pockets, let slaked lime hydrate if used, and test a small sample for spreadability before applying.
Small-batch mixing for beginners
Start with a simple recipe you can handle alone: for a basic 3-part sand to 1-part cement stucco, measure by volume (a 3-gallon bucket works well), add clean water gradually until you reach a peanut-butter to mayonnaise consistency, and mix until homogenous with no dry pockets.
Use a margin trowel or small drill mixer, make only what you’ll apply in 30–45 minutes, and keep tools wet.
Step-by-Step Application Process
Now you’ll move through the application steps, starting with a scored scratch coat for adhesion and a leveled brown coat that needs proper curing.
Then you’ll apply the finish coat at the right consistency and use trowels, sponges, brushes, or sprayers to create the texture you want.
Finally, you’ll follow specific curing and drying practices to guarantee a durable finish.
Step 1 Scratch coat: applying and scoring for adhesion
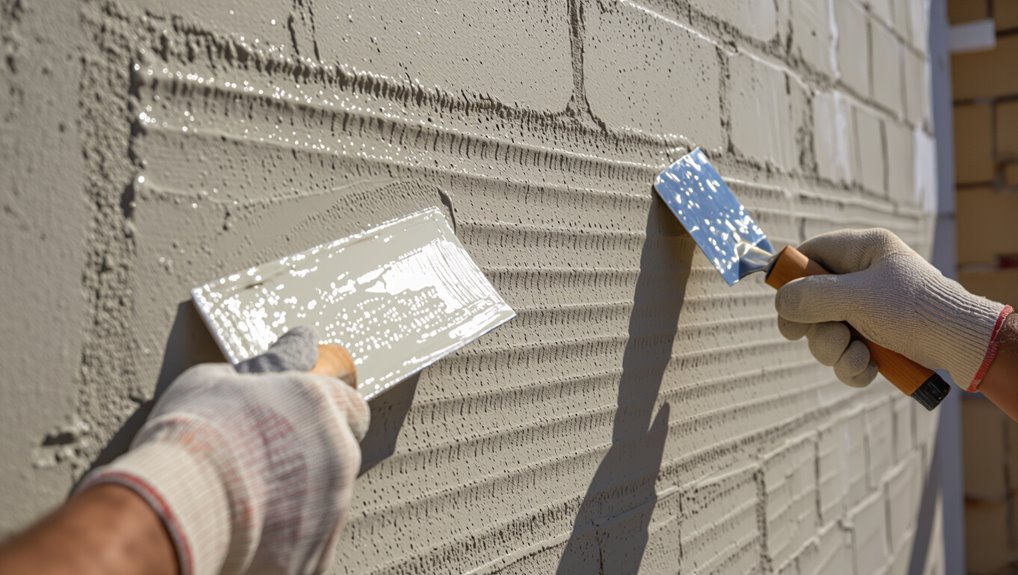
1. You’ll mix the scratch coat to a stiff, trowelable consistency, then apply a 3/8–1/2 inch layer over the lath or prepared surface.
Press firmly for full contact, then score horizontal grooves about 1/4 inch deep using a scratcher or comb while the coat is still plastic.
Keep edges neat and remove excess for consistent adhesion and bonding.
Step 2 Brown coat: leveling and curing times
Apply the brown coat after the scratch coat has set enough to hold its shape but is still moist enough to bond—typically 24 to 48 hours depending on temperature and humidity.
You’ll spread a 3/8–1/2 inch layer, level with a straightedge, and float to remove ridges.
Keep the surface damp for 48–72 hours, misting periodically to guarantee proper curing and reduce cracking.
Step 3 Finish coat: timing, consistency, and tools to use
Start the finish coat once the brown coat has cured for at least 48–72 hours and feels firm but still slightly damp to the touch; you’ll work in small sections so the finish remains wet enough to texture consistently.
Mix to a creamy, spreadable consistency—no runny slurry. Use a clean stainless trowel, hawk, and margin float.
Apply thin, even layers and keep edges feathered for seamless joins.
Step 4 Creating different texture patterns (trowel techniques, sponge, brush, spray)
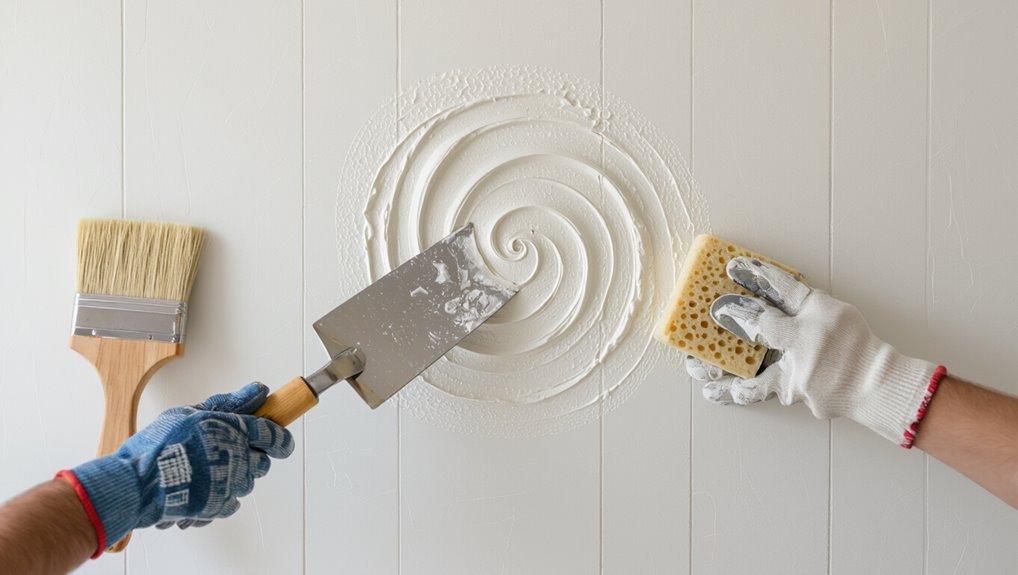
Choose your texture based on the look you want and the tools you have—each method (trowel swirls, skip trowel, sponge stipple, brush drag, or spray) gives a distinct rhythm and depth, and you’ll work in small, consistent sections so patterns match across the wall.
- Trowel: circular or sweeping motions.
- Sponge: press and lift.
- Brush: long directional drags.
- Spray: overlap passes for even coverage.
Step 5 Curing and final drying considerations
After you finish texturing, let the stucco cure slowly and evenly to prevent cracking and color variation.
You’ll control this by keeping the surface slightly moist and protected from direct sun, wind, and freezing temperatures for the first 48–72 hours.
Mist the wall periodically, cover with breathable cloth or plastic sheeting, avoid touch or heavy humidity swings, and wait at least seven days before painting or sealing.
Texture Techniques for Specific Styles
Now you’ll learn specific techniques for common looks: the step sequence and tips for skip trowel, the tools and motions for Spanish lace/rustic, and how to float for a smooth plaster finish.
I’ll also cover hopper gun setup and nozzle choices for dash and sand textures. Follow these methods step by step to get consistent results.
How to achieve a skip trowel texture step sequence and tips
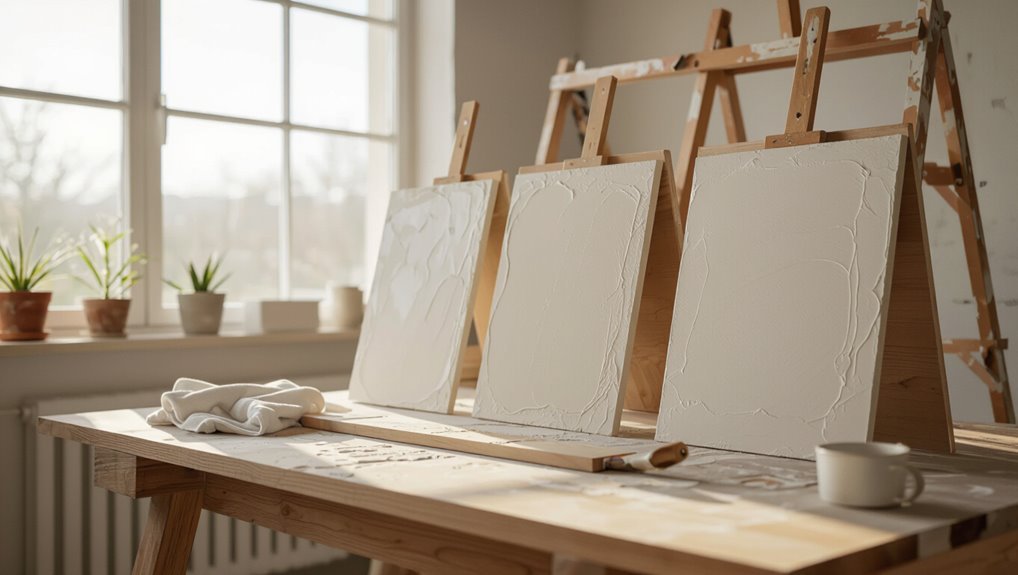
Start by prepping a smooth, clean base and gathering a hawk, a 12–14-inch trowel, a premixed or well-mixed stucco, and a spray bottle of water; you’ll work in small, manageable sections so the plaster doesn’t skin over.
Float a thin stucco coat, then drag the trowel with light pressure, lifting intermittently to leave thin gaps.
Vary angles, overlap passes, and mist to control drying.
How to create a Spanish lace/rustic texture tools and motion
Create the Spanish lace or rustic stucco by working with a round-edged trowel or a small hawk trowel and using a sweeping, circular motion that lifts and drags the plaster to form soft ridges and shallow voids.
Hold the trowel at a low angle, vary pressure and circle size, overlap patterns, and finish edges with light dabs to keep an organic, irregular appearance consistent across the wall.
How to make a float finish and smooth plaster
Aim for a silky, even surface by using a clean metal float and long, sweeping passes that compress and level the plaster as it cures.
Work in small sections, keeping the mix slightly wet for feathered edges. Hold the float flat, remove ridges, and finish with light, overlapping strokes.
Let the plaster firm slightly, then burnish gently for a smooth, uniform sheen.
Using a hopper gun/sprayer for dash/sand finishes setup and nozzle choices
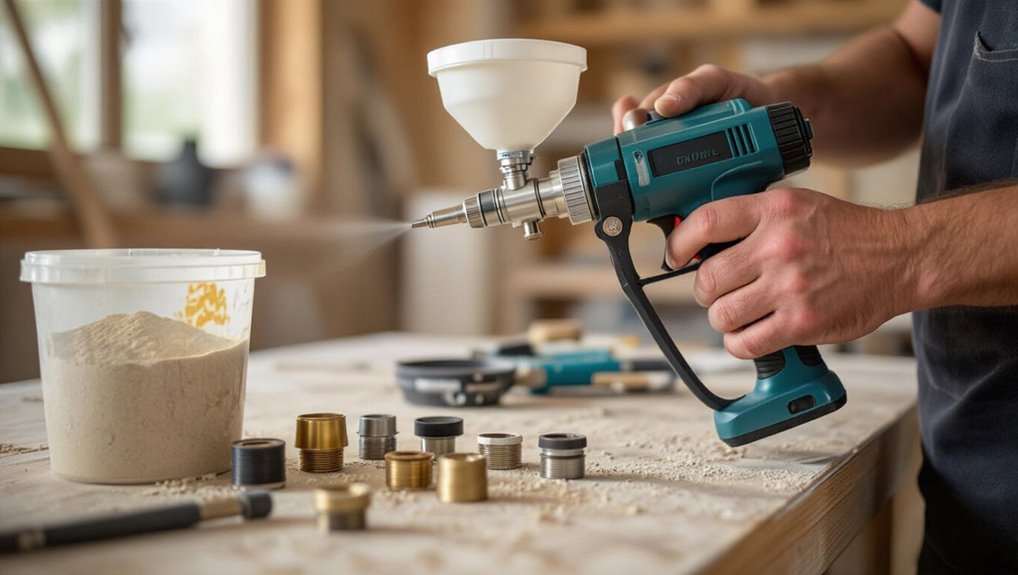
One key tool for dash and sand stucco finishes is a hopper gun or texture sprayer, which lets you apply consistent, controllable blends of aggregate and cement quickly.
You’ll set it up by matching air pressure, nozzle size, and material viscosity to the particle size you want.
Choose larger nozzles (3–5 mm) for coarse dash, smaller (1–2 mm) for fine sand textures, adjust pressure, and test.
Common Problems, Causes, and Fixes
You’ll run into a few predictable issues when you texture stucco, so it’s good to know what causes them and how to fix them.
You’ll learn how to prevent and repair cracking or delamination, correct uneven texture or trowel marks, and diagnose efflorescence, stains, and mold.
You’ll also get quick solutions for weather-related problems—too hot, too cold, or too wet—so your finish holds up.
Cracking and delamination prevention and repair
Because stucco thrives when it’s applied to a stable, well-prepared surface, preventing and fixing cracks or delamination starts with proper substrate prep and moisture control.
Patch hairline cracks with polymer-modified stucco or flexible sealant.
Remove delaminated sections, rekey the substrate, apply bonding agent, then reinstall stucco in thin coats.
Control water, flashing, and expansion joints to prevent recurrence.
Uneven texture or trowel marks corrective steps
When your stucco shows uneven texture or visible trowel marks, it usually means application technique or timing was off — not the material itself.
Smooth small areas with a damp sponge or soft brush while material’s still plastic. For larger flaws, mist, rework with a clean trowel, and feather edges.
Let layers cure correctly and practice consistent pressure and angle to prevent repeats.
Efflorescence, staining, and mold diagnosis and treatment
If your stucco develops white powdery deposits, dark stains, or fuzzy growths, don’t ignore them—these signs point to efflorescence, staining, or mold and need different fixes.
Brush and rinse efflorescence, fix water sources, and allow drying. Use mild detergent or oxygen bleach for stains.
Treat mold with a fungicide solution, remove affected material if deep, then repair and repaint with breathable, mold-resistant products.
Problems from weather (too hot, too cold, too wet) and how to mitigate
Although stucco is durable, extreme temperatures and excess moisture can cause cracking, poor curing, and adhesion failures, so you’ll want to recognize the signs and act fast.
In hot weather, mist surfaces, work mornings, use retarders.
In cold, protect with insulated blankets and avoid freezing; postpone application below 40°F.
In wet conditions, delay work, cover walls, guarantee drainage and proper flashings to keep stucco dry.
Tips, Best Practices, and Time-Saving Strategies
When tackling large walls, plan your work sequence and assign clear roles so each section’s timing and finish match.
Watch temperature and humidity for proper curing, then finish with the right paint, sealant, and a simple maintenance schedule.
Finally, compare premix versus buying materials by cost, time, and skill to know where you can save.
Planning work sequence and team roles for large walls
Because large stucco walls demand coordination, start by mapping the work sequence and assigning clear roles so your crew moves efficiently and avoids rework.
Designate leader, applicators, finishers, mixers, and cleanup.
Sequence tasks: prep, base coat, embed mesh, scratch, brown, finish.
Schedule overlapping shifts to keep material tack times consistent.
Hold briefings, track progress, and swap roles to prevent fatigue.
Temperature, humidity, and curing best practices
After you’ve mapped roles and sequences, plan environmental controls so your crew can apply and cure stucco reliably. Temperature and humidity affect set time, adhesion, and final strength.
Work between 50–90°F, avoid direct sun and wind, and mist in hot, dry conditions. Protect from rain and freezing for at least 48–72 hours.
Monitor moisture and adjust cure times accordingly.
Finishing touches: painting, sealing, and maintenance
If you want your stucco to look great and last, don’t skip proper finishing: paint and sealants protect against moisture, UV damage, and staining while regular maintenance catches small issues before they grow.
Follow these steps:
- Clean surface and repair cracks.
- Use breathable masonry primer.
- Apply quality exterior acrylic paint.
- Seal joints and inspect annually for damage.
Cost-saving tips and when to buy premix vs. materials
Once you’ve painted and sealed your stucco, it makes sense to look for ways to save time and money on the rest of the project.
Buy premix for small patches or if you lack mixing tools—it’s consistent and fast.
Mix your own for large areas to cut cost per bag.
Compare bulk prices, reuse tools, and buy materials during sales to save more.
Tools and Product Comparison
You’ll need to choose between hand tools and mechanical sprayers based on scale, finish control, and budget—hand tools give precision for small patches while sprayers speed up large jobs.
Compare premixed stucco brands for consistency, cure time, and ease of use, and check bonding agent specs for adhesion and weather resistance.
I’ll walk you through pros and cons and recommend products that match your project size and skill level.
Hand tools vs. mechanical sprayers pros and cons
While you can achieve attractive stucco textures with just a hawk and trowel, mechanical sprayers speed up large jobs and produce more consistent results; choosing between them comes down to scale, skill level, and budget. You’ll prefer hand tools for control and low cost; sprayers suit speed and uniformity but need power and cleanup.
| Method | Pros | Cons |
|---|---|---|
| Hand tools | Control | Slow |
| Sprayer | Fast | Complex |
| Hybrid | Flexible | Cost |
Brand or product considerations for premixed stucco and bonding agents
After choosing between hand tools and a sprayer, you’ll want to pick products that match your technique and job size: premixed stucco bags or buckets save mixing time and give consistent blends for hand-applied textures, while specific bonding agents improve adhesion on smooth or problematic substrates and can be used with either method. Choose reputable brands, check VOCs, and match curing times.
| Use case | Benefit | Tip |
|---|---|---|
| Small repairs | Convenience | Buy small tubs |
| Full walls | Consistency | Match cement type |
| Smooth substrates | Bonding agents | Follow dilution |
Project Checklist and Estimated Materials Calculator
Before you mix a bag, make a quick pre-project checklist: confirm permits, pick a dry weather window, and have all tools staged and working.
Then calculate how much stucco you’ll need by measuring square footage and applying the manufacturer’s coverage rate.
Finally, add a waste factor (usually 10–15%) to cover overage and mistakes so you don’t run short.
Pre-project checklist (permits, weather window, tools ready)
1 simple pre-check will save you time and money: confirm permits, pick a reliable weather window, and make sure your tools and materials are ready.
You’ll avoid delays and fines by planning.
Checklist:
- Permit status confirmed
- 48–72 hour dry weather forecast
- Tools inspected and clean
- Materials staged and covered
How to estimate quantity of stucco needed per square foot and waste factor
To figure how much stucco you’ll need, calculate the wall’s square footage, decide the total thickness of coats, and add a waste factor for mixing/trim—then convert that volume into bags or gallons based on the product’s coverage specs. Measure length × height, multiply by thickness, add 10–15% waste. Use the table below to record quick estimates.
| Item | Value |
|---|---|
| Area | ft² |
| Thickness | in |
FAQ
You’ll find answers here to common questions like whether stucco can go over painted surfaces and how long textured stucco typically lasts before needing maintenance.
You’ll also learn if stucco works well indoors, which beginner texture is quickest to master, and whether to tint the mix or paint afterward.
If you’ve got a specific situation, ask and I’ll give targeted advice.
Can I apply stucco over painted surfaces?
Can you apply stucco over painted surfaces? Yes, but prep matters: remove loose paint, sand glossy finishes, clean grime, and etch slick surfaces.
Use a bonding agent or primer designed for stucco to guarantee adhesion. Test a small area first.
If paint’s flexible or peeling, strip it; otherwise stucco may crack or delaminate. Proper prep prevents failures and guarantees lasting texture.
How long does stucco texture last and how often to maintain?
Most stucco finishes last 50 to 80 years when properly mixed, applied, and maintained, though texture appearance can start showing wear much sooner.
You should inspect annually for cracks, chips, or delamination, touch up minor damage promptly, and repaint or reseal every 7–15 years depending on exposure.
Proper maintenance prevents moisture problems and preserves texture and color longer.
Is stucco suitable for interior walls?
Wondering whether stucco works inside your home? You can use stucco indoors for rustic, textured looks—it’s durable, fire-resistant, and masks imperfections.
You’ll want a thin, interior-graded mix or Venetian/plaster variants to control dust and cracking.
Prep surfaces, use proper ventilation, and finish with a seal or paint suited for interiors to keep maintenance minimal and appearance consistent.
What is the fastest texture for a beginner to learn?
Which texture should you start with?
Start with a simple skip trowel or knockdown finish — it’s forgiving, quick, and requires minimal tools: hawk, trowel, and sponge.
You’ll apply a thin coat, let it firm, then gently knock down peaks for a subtle, even pattern.
Practice on a board to build timing and pressure before tackling walls.
Can I color stucco during mixing or should I paint afterward?
Can you color stucco during mixing? Yes — you can add integral color pigments to the wet mix for consistent, fade-resistant color through the material.
Measure pigments carefully, mix thoroughly, and test a small patch.
Alternatively, paint afterward for easier color changes or touch-ups.
Integral color resists chipping but limits future color shifts; choose based on durability and flexibility needs.
Quick Troubleshooting Flowchart
If something’s off with your stucco texture, follow a quick troubleshooting flowchart to fix it fast.
You’ll start by identifying the common issue, do an immediate check, and apply a short-term fix to keep things stable.
Then plan a long-term solution so the problem doesn’t come back.
Common issue → immediate check → short-term fix → long-term solution
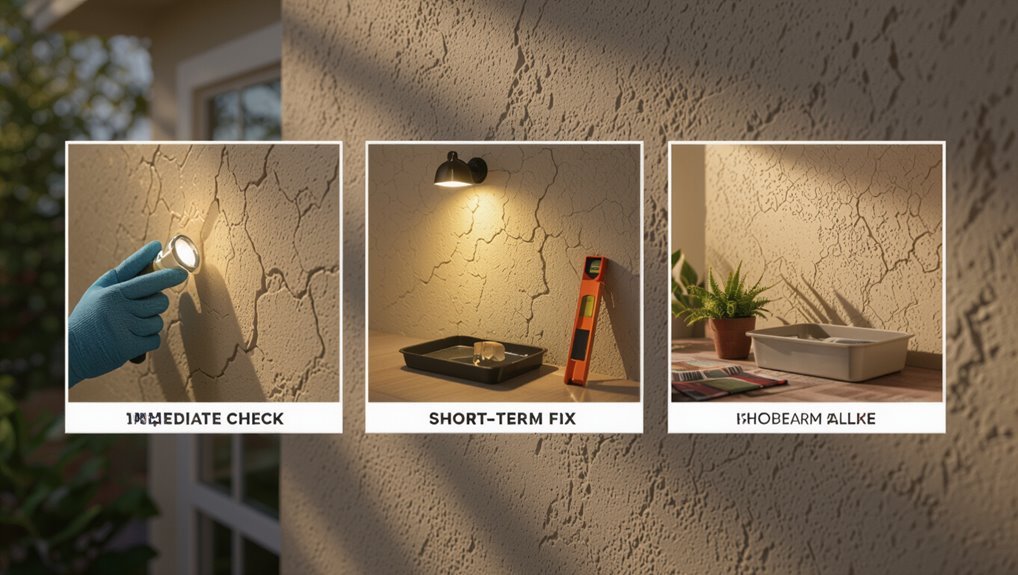
When a stucco texture problem shows up, follow a quick troubleshooting flow: identify the common issue, perform an immediate check to confirm the cause, apply a short-term fix to stop further damage, and plan a long-term solution to prevent recurrence.
Spot cracks, blisters, or stains; check moisture, adhesion, and drainage; patch or seal temporarily; schedule proper reapplication, flashing repair, or substrate correction for lasting results.
