How to Get Rust Stains Off Painted Walls for Good
You can remove rust stains from painted walls by acting quickly, testing cleaners on a hidden spot, and using gentle, nonabrasive methods so paint isn’t damaged. Start by washing the area, apply a mild rust remover or a paste of baking soda and lemon, blot and rinse, then dry. For set-in stains, use a chelating cleaner and prime any stained spot before repainting. Follow prevention steps and the guide below to learn more.
Quick Answer Remove Rust Stains from Painted Walls Fast
You can usually remove fresh rust stains quickly with a commercial rust remover or a paste of baking soda and lemon juice, applied gently and rinsed right away.
Use a non-abrasive sponge and test any product on a hidden spot first to protect the paint.
Call a pro if the stain’s widespread, the paint is peeling, or DIY methods don’t work after one careful try.
Direct solution summary (best immediate methods and safe products)
If rust just appeared, act fast: blot loose flakes, then try a gentle, safe remover—white vinegar, lemon juice with salt, or a commercial rust cleaner labeled safe for painted surfaces—testing first in an inconspicuous spot.
For how to get rust stains off painted walls, work gently with a soft cloth, rinse, and repeat; finish by drying and touching up paint if needed.
When to call a pro vs DIY
When should you tackle rust stains yourself and when should you call a pro?
If stains are small, fresh, and on washable paint, try household removers, gentle scrubbing, and spot priming.
Call a pro if stains are widespread, old, penetrating, or paint flakes and substrate suffer.
Also hire a pro for lead paint, structural rust, or if DIY attempts fail repeatedly.
Understanding Rust Stains on Painted Walls
Rust is iron oxide from metal that transfers pigments onto paint, and you’ll notice it stains differently depending on the paint and surface porosity.
Porous or matte finishes soak up rust more readily than glossy, non-porous paints, and oil- and latex-based paints can also react differently.
You can usually tell a fresh stain by its brighter orange color and loose particles, while set-in rust is darker, more diffuse, and harder to lift.
What is rust and how it stains paint
Oxidation happens when iron or iron-containing metals react with oxygen and moisture, producing reddish-brown iron oxides that can transfer onto painted walls.
When rust contacts paint, abrasive particles and dissolved iron stick to the surface, causing visible stains. You’ll notice color changes and sometimes surface roughness.
Prompt cleaning prevents permanent discoloration and limits corrosion spread from nearby metal fixtures.
Why painted surfaces react differently (porous vs non-porous, paint types)
Knowing what rust is and how it transfers to paint helps explain why different painted surfaces respond in varying ways.
You’ll see porous surfaces—like unsealed drywall or chalky paint—absorb iron particles, making stains penetrate and cling.
Hard, non-porous finishes—gloss or semi-gloss—keep rust on the surface, so it’s easier to remove.
Oil and latex paints also differ in adhesion and stain resistance.
How to identify fresh vs set-in rust stains
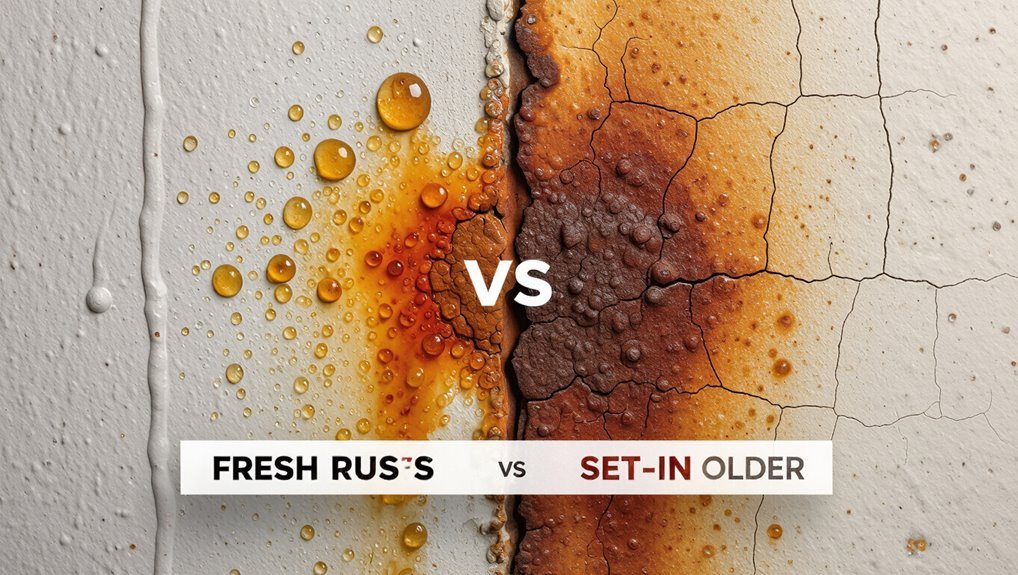
How can you tell whether a rust mark is fresh or has already set into the paint?
Check texture and color: fresh rust is powdery or flaky and brighter orange; set-in stains are darker, matte, and may feel smooth because pigment’s bonded to the finish.
Try a gentle dab with a damp cloth and mild cleaner—if it lifts, it’s fresh; if it smears or stays, it’s likely set.
Safety, Tools, and Materials Checklist
Before you start, make sure you’ve got proper PPE like gloves, goggles, and good ventilation to protect your lungs and skin.
You’ll also want to choose the right cleaning agent—acidic, chelating, or abrasive—based on the stain and paint type, and I’ll explain why each works.
Finally, gather the necessary tools and supplies (soft cloths, brushes, plastic scrapers, buckets, and neutralizing agents) so the job goes smoothly.
Personal protective equipment and ventilation
Because rust removers often contain harsh chemicals and you’ll be working with scrubbing and rinsing, wear gloves, eye protection, and a mask and guarantee good airflow so you don’t inhale fumes or skin-contact residues.
Use chemical-resistant gloves, safety goggles, and an N95 or respirator if needed.
Open windows, run a fan toward outdoors, and cover nearby surfaces to prevent contamination.
Recommended cleaning agents and why (acidic vs chelating vs abrasive)
When you pick a cleaner, choose based on the stain type, paint finish, and your tolerance for chemicals: acidic cleaners (like diluted vinegar or commercial rust removers) dissolve rust quickly but can dull or strip paint if left too long;
chelating agents (such as products containing EDTA or oxalic acid in low concentrations) bind iron particles and lift stains more gently without aggressive etching;
and abrasive methods (like fine pads or baking soda pastes) physically remove surface discoloration but risk scratching the paint if you scrub too hard.
Use acidic solutions sparingly, prefer chelators for delicate finishes, and test abrasives in an inconspicuous spot before broader use.
Tools and supplies list
Safety matters most: gather personal protective gear (gloves, eye protection, and a mask if using sprays or powders), gentle cleaning tools (soft microfiber cloths, non-scratch sponges, and a soft-bristled brush), and your chosen cleaners (diluted vinegar or commercial rust remover, a chelating product containing EDTA or low-concentration oxalic acid, and a baking soda paste option).
- Bucket and spray bottle
- Soft towels and rags
- Plastic scraper and brush
- pH strips and waste bags
Step-by-Step How to Remove Rust Stains (Primary Method)
Start by testing a hidden spot to make sure the paint won’t react.
Protect the floor and nearby surfaces, then apply a mild rust remover like vinegar or lemon with salt and let it sit.
Gently agitate and blot, rinse thoroughly, and repeat or move to a stronger remover only if needed.
Step 1 Test a hidden area
Want to be sure your cleaner won’t damage the paint? Pick an inconspicuous spot—inside a closet, behind furniture, or near a baseboard.
Apply a small dab of the cleaner, wait the recommended time, then blot gently with a white cloth.
If the paint softens, discolors, or lifts, stop and try a milder solution.
If it stays intact, proceed.
Step 2 Prep the wall and protect surroundings
Before you treat the rust, clear the area and protect nearby surfaces: move furniture away, lay down drop cloths or old towels on the floor, and tape plastic sheeting or painter’s tape around trim, outlets, and baseboards so cleaner won’t drip or splash onto them.
Next, gently dust the stain with a soft cloth, wipe away grime with mild soap and water, and let the wall dry completely.
Step 3 Apply a mild rust remover (vinegar/lemon + salt) and wait
Mix a gentle rust remover by sprinkling salt over the stain, then squeezing fresh lemon juice or pouring white vinegar to saturate the area—this creates a mild acid that lifts rust without harming most painted finishes.
Let it sit undisturbed for 10–20 minutes, checking occasionally. If bubbling or color change occurs, keep waiting until the stain fades, then proceed to the next cleaning step.
Step 4 Gently agitate and blot; rinse thoroughly
Once the rust lift has had time to work, gently agitate the spot with a soft-bristled brush or a clean microfiber cloth to help break up loosened particles without scratching the paint.
Blot repeatedly with a damp cloth to lift residue, then rinse the area thoroughly with plain water.
Dry with a lint-free cloth and inspect for any remaining discoloration.
Step 5 Repeat or step up to stronger removers if needed
If the stain’s still visible after rinsing, don’t panic—repeat the rust lift application and agitation once or twice more, giving the remover several minutes each time to penetrate.
If that still doesn’t work, it’s time to move up to a stronger, paint-safe product and follow its instructions carefully.
Test any stronger remover on an inconspicuous spot first, apply sparingly, monitor progress, and avoid overworking the paint.
Step 6 Neutralize, dry, and assess paint condition
After the rust’s lift is complete, neutralize any remaining remover with a clean, damp cloth—this stops chemical action and prevents halo stains—then dry the area thoroughly with a soft towel or hair dryer on low.
Inspect the paint for dulling, lifting, or texture change. If damage’s minimal, touch up with matching paint; if severe, sand and repaint the affected section for a seamless finish.
Alternative Methods Sorted by Paint Type and Stain Severity
Depending on your paint type and how deep the rust is, you’ll choose different fixes: gentle household remedies like baking soda paste or hydrogen peroxide for light stains, commercial chelating agents or rust converters for tougher spots, and very light sanding or Magic Erasers when mechanical action’s safe.
Test any method in an inconspicuous spot first, and avoid abrasive or acidic treatments on delicate or older paint finishes.
If a stain’s through the paint or extensive, consider repainting rather than risking more damage.
Non-abrasive household remedies (baking soda paste, hydrogen peroxide)
When you’re tackling rust stains on painted walls, start with gentle, non‑abrasive household remedies like a baking soda paste or hydrogen peroxide so you don’t damage the finish; these treatments work well on most paints and let you test and treat progressively based on paint type and stain severity.
Mix baking soda with water to a paste, apply, wait, blot gently.
For stubborn spots, dab 3% hydrogen peroxide, rinse, repeat.
Commercial rust removers and chelating agents (oxalic acid, rust converters)
If baking soda or hydrogen peroxide doesn’t lift the stain, reach for a commercial rust remover or a chelating agent like oxalic acid or a rust converter—these products chemically break down iron compounds rather than just scrubbing them away. You should test first, follow label safety, dilute as directed, and neutralize afterward.
| Product | Use | Paint type |
|---|---|---|
| Oxalic acid | Spot treat | Masonry/latex |
| Rust converter | Seal residual | Exterior/enamel |
| Commercial remover | Fast action | Test first |
Mechanical options (very light sanding, magic erasers) and when to avoid them
Though chemical treatments handle most rust, you can also try gentle mechanical methods—very light sanding or a melamine sponge (Magic Eraser)—to lift surface stains or smooth tiny pitted areas.
Test a hidden spot first. Avoid on glossy, thin, or textured finishes that show scuffs or lose sheen.
Stop if paint thins, fluffs, or you see bare metal; then use a chemical or repaint.
Repairing and Restoring the Paint After Stain Removal
Once the rust stain is gone, you’ll need to decide whether a touch-up will hide the spot or if a full repaint is required based on damage size and finish consistency.
Prep the area by sanding, cleaning, and using a stain-blocking primer where any discoloration remains before you paint.
Match the original paint sheen and feather the new coat into the surrounding surface to blend edges and avoid noticeable patches.
When to touch up vs repaint
Deciding whether to touch up or repaint comes down to the size, location, and severity of the rust stain and any damage left behind.
If the stain is small, isolated, and the surrounding finish is intact, you’ll likely touch up with matching paint.
Choose full repaint when stains are widespread, the finish is uneven, or patching would leave noticeable color or texture differences across the wall.
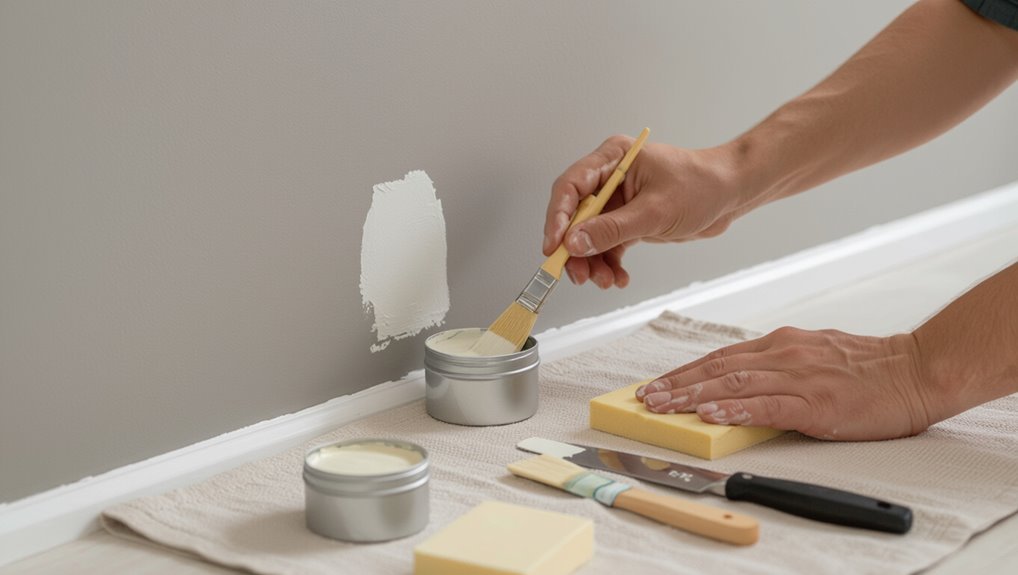
Surface prep for touch-up (primer, stain-blocking primer)
If you opt for a touch-up rather than a full repaint, proper surface prep will make the repair blend and last.
Sand smooth, remove dust, and guarantee the area is dry.
Apply a stain-blocking primer to seal any remaining rust tint.
Let it cure per instructions, then lightly scuff before painting. This prevents bleed-through and guarantees durable coverage.
Matching paint finish and blending techniques
Although small repairs can be discreet, matching the paint finish and blending the new coat into the old is what makes the fix invisible; start by identifying the existing sheen (flat, eggshell, satin, semi-gloss) and buying a matching finish.
Feather brush strokes outward, thin coats, and lightly sand between layers. Use a small roller matching texture, blend edges, and let proper dry times prevent lap marks.
Preventing Future Rust Stains
To stop rust from coming back, check common sources like leaky pipes, metal fixtures, and outdoor furniture and remove or protect them.
Use rust-inhibiting primers, sealants, and humidity control to keep metal and painted surfaces dry.
Finally, follow a simple maintenance checklist—inspect problem areas monthly, touch up coatings, and address any moisture promptly.
Common sources of rust near walls and how to eliminate them
Rust near walls usually comes from a few predictable sources: metal furniture and décor left damp, leaking pipes or HVAC components, metal fasteners in siding or trim, and poorly sealed outdoor fixtures that drip onto walls.
Inspect these spots, dry and move damp items, tighten or replace corroded plumbing/HVAC parts, replace rusty fasteners with stainless or coated ones, and redirect dripping fixtures away from walls.
Protective coatings, sealants, and humidity control
When you seal vulnerable metal and control indoor humidity, you greatly reduce the chances of rust staining painted walls.
Apply rust-inhibiting primers and durable topcoats on exposed metal; use silicone or polyurethane sealants at joints.
Install dehumidifiers or exhaust fans in damp areas and monitor humidity under 50%.
Regularly inspect seals and repaint metal when coating shows wear to prevent future stains.
Maintenance checklist to catch rust early
1 simple monthly checklist can keep small corrosion issues from becoming visible stains on your painted walls.
You’ll inspect, clean, and fix targets before rust spreads. Follow this short routine each month to catch trouble early and protect paint.
- Check metal fixtures and fasteners for surface rust.
- Wipe damp areas and vents.
- Tighten or replace corroding hardware.
- Touch up sealant and paint.
Common Mistakes and What Not to Do
Don’t use harsh abrasives or strong acids that strip or etch your paint — they’ll make the problem worse.
Avoid over-saturating the wall, which can lead to water damage and mold behind the paint.
Always test cleaners on an inconspicuous spot first to check compatibility and prevent surprise staining or peeling.
Using harsh abrasives or wrong acids that damage paint
Although it might seem quicker, scrubbing with steel wool, heavy-duty scouring pads, or sanding can strip paint, roughen the surface, and make stains worse rather than better.
Don’t use harsh acids like muriatic or undiluted phosphoric; they eat finishes and leave etching.
Instead, test mild cleaners on an inconspicuous spot, use soft cloths, and work gently to preserve paint while treating rust.
Over-saturating walls and causing water damage or mold
If you soak the wall trying to lift rust, you’ll often cause more harm than good: excess moisture can seep into paint layers, drywall, or wood trim and lead to bubbling, peeling, or hidden mold growth.
Work with damp—not drenched—cloths, blot gently, and use small amounts of cleaner.
Dry surfaces quickly with fans, and stop if paint softens or odor suggests mold.
Skipping test spots and paint compatibility errors
Before you start scrubbing, try a discreet test spot—failing to do so is one of the quickest ways to damage your paint finish.
Test cleaners, rust removers, or solvents in an inconspicuous area first. If paint softens, flakes, or discolors, stop.
Choose products labeled safe for your paint type or consult the manufacturer. Never assume compatibility without testing.
Cost, Time, and Effort Expectations
Small, fresh rust spots often take only 10–30 minutes to treat with household cleaners, while deep or widespread stains can require hours or repeated treatments.
DIY supplies usually cost under $20–$50, whereas professional remediation or repainting can run from a few hundred to over a thousand dollars depending on scope.
If stains cover large areas, have penetrated the paint, or you’re short on time, hiring a pro for restoration or repainting can be more cost-effective than repeated DIY fixes.
Typical time required per stain severity
Expect to spend anywhere from 5 minutes to a few hours on a rust stain depending on severity: light surface marks take 5–20 minutes with a wipe-and-rinse method; moderate stains need 20–60 minutes including repeat treatments and dwell time; deep or old stains can require multiple sessions over several hours or days for full removal and touch-ups.
Plan accordingly.
Estimated costs for DIY vs professional remediation
One or two DIY products and a few hours of your time will usually cost you under $30, while hiring a pro can run from $150 to $500 or more depending on stain size, access, and whether repainting is needed.
Expect DIY to involve supplies ($10–$30), rental tools occasionally, and modest effort; pros charge labor, travel, materials, and guarantee—a higher but faster, lower-risk option.
When professional restoration or repainting is more economical
If the rust covers a large area, has soaked through primer, or sits on textured or hard-to-reach surfaces, you’ll often save time and money by hiring a pro.
You’ll avoid trial-and-error, wasted materials, and inconsistent finishes. Pros diagnose underlying corrosion, stabilize metal, and match paint quickly.
Factor labor, disposal, and warranty; sometimes full restoration or repainting costs less than repeated DIY attempts.
FAQ Rust Stains on Painted Walls
You probably have a few quick questions about rust on painted walls, so let’s answer the common ones.
Can bleach remove rust, will sanding work without repainting, are rust converters safe indoors, when does a stain become permanent, and what to do if rust returns?
Read on for clear, practical answers you can use right away.
Will bleach remove rust stains?
Curious whether bleach will lift rust stains from painted walls?
Bleach can lighten mild surface discoloration but won’t break down iron compounds that cause rust. It may damage paint’s color or finish and shouldn’t be mixed with other cleaners.
For painted surfaces, test a hidden spot first.
Use rust-specific removers or oxalic acid solutions for reliable results while protecting surrounding paint and ventilation.
Can I use sanding to get rid of rust without repainting?
Bleach won’t remove the iron compounds that cause rust, so sanding often looks like a tempting next step — but it’s not always a safe fix on painted walls.
You can sand small surface stains to remove loose rust and paint, but sanding exposes bare substrate and rough edges. Afterward you’ll likely need primer and touch-up paint to prevent recurrence and color mismatch.
Are rust converters safe on interior painted walls?
Can rust converters be used safely on interior painted walls? You can, but choose products labeled for indoor use and low odor.
Test a small, hidden area first to check for paint reaction and discoloration. Apply minimal amounts, ventilate the room, and wipe any drips promptly.
Avoid converters with strong acids or solvents that can damage paint or create fumes.
How long before a rust stain becomes permanent?
How long before a rust stain becomes permanent?
It depends on metal type, moisture, and paint porosity.
Fresh stains you treat within days to a couple weeks often lift completely.
Left wet or ignored, iron can etch or oxidize deeply into primer and paint within weeks to months, making removal much harder and requiring repainting rather than simple cleaning.
What if rust keeps returning after cleaning?
If rust keeps reappearing after you clean it, something nearby is still supplying iron and moisture, so treating the surface alone won’t fix the root cause.
Inspect for leaking pipes, metal fixtures, fasteners, or damp areas. Remove or seal the source, replace corroded hardware, improve ventilation, and use a rust-inhibiting primer before repainting.
That stops recurrence.