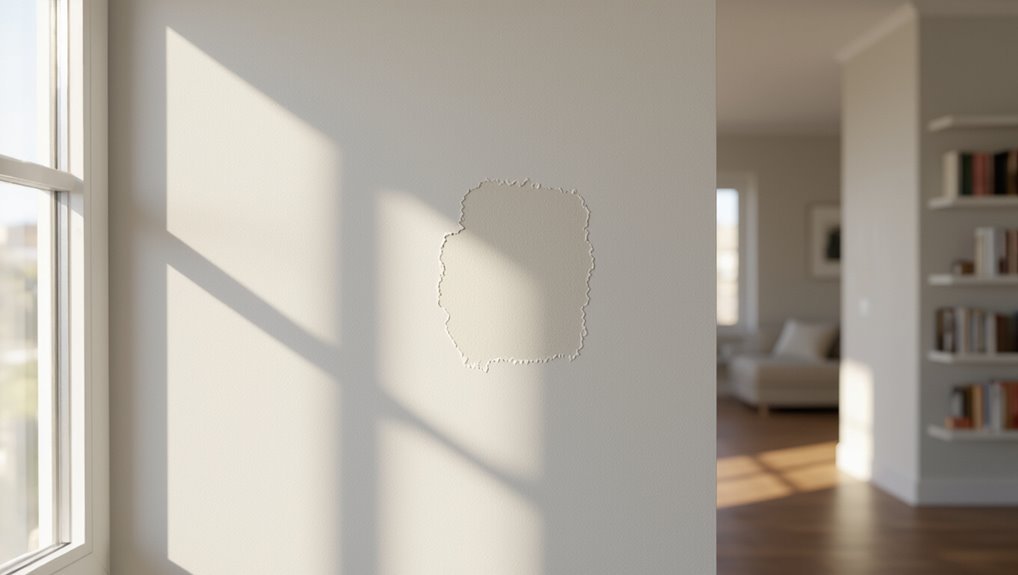
How to Paint Match Apartment Walls So the Repair Is Invisible
To make a patch invisible, clean and feather the repair, rebuild with spackle or joint compound, then sand and prime so paint grabs evenly. Match color and sheen using chips, apps, or a leftover can, and mimic texture with a mini-roller, sponge, or stomp brush. Work outward with thin coats and back-roll to blend edges, checking under different light angles. Take your time—follow the full step-by-step guide below to learn precise tools and techniques.
How to Paint Match Apartment Walls So the Repair Is Invisible
Yes — with the right prep and a close color match, you can often make a patch disappear to the casual eye.
Try small repairs yourself if the damage is minor and you’re comfortable feathering edges and matching sheen; call a pro for large patches, textured finishes, or when the color is tricky.
I’ll walk you through how to decide which route to take and the exact steps for an invisible fix.
Quick Answer Can you make a repair invisible?
Wondering whether you can make a wall repair truly invisible? Yes — often you can if you follow proper steps.
You’ll learn how to paint match apartment walls by feathering edges, matching sheen, and using the original paint or a close sample.
Prep, thin coats, and blending matter. Small holes and dents are usually seamless when you match texture and finish carefully.
When to attempt this yourself vs. call a professional
Matching paint and blending repairs can make small fixes disappear, but deciding whether to tackle the job yourself or call a pro depends on the scope of damage, your skill level, and the stakes involved.
Try it yourself for small nail holes, scuffs, or touch-ups if you’re comfortable with patching and feathering.
Hire a pro for large damage, texture matching, or when your lease or resale value is at risk.
Understand the Basics: What Affects a Visible Paint Repair
When you fix a patch, differences in texture, sheen, color, and the wall’s age all make the repair stand out.
Different surfaces—drywall, plaster, and textured finishes like knockdown—require different prep and techniques to blend correctly.
Also remember that light and viewing angle will reveal even small mismatches, so inspect repairs from multiple positions.
Why repaired patches show up texture, sheen, color, and age
Because paint jobs aren’t just about color, repaired patches often stand out due to differences in texture, sheen, color, and the way they age.
You’ll need to address each factor to make a seamless repair. Match surface texture, feather edges, use the same sheen and application method, and consider paint fading or dirt accumulation so the patch blends now and over time.
Common types of wall surfaces in apartments (drywall, plaster, textured, knockdown)
You’ve already seen how texture, sheen, color, and age all make repairs stand out; now look at the surfaces those factors live on.
Drywall is smooth and forgiving; plaster is dense and may crack. Textured walls hide flaws but need matching texture.
Knockdown has flattened peaks—replicating it requires the right compound and technique.
Identify surface before repairing or painting.
How light and viewing angle reveal imperfections
Light grazing a wall can turn a nearly invisible patch into a glaring defect, so pay attention to both light direction and where you stand.
Inspect repairs from multiple angles and at different times of day. Side lighting highlights texture and edge differences; front lighting hides them.
Move slowly, tilt your head, and adjust fixtures or lamp positions until the repair disappears under normal viewing conditions.
Tools and Materials You’ll Need
You’ll want a mix of paint‑matching tools—chip samples, smartphone apps, or a spectrophotometer if you can access one—to identify the closest color.
Gather repair and painting supplies like spackle or joint compound, a range of sandpaper grits, primer, brushes, rollers, a tray, and painter’s tape.
If your walls are textured, consider optional tools such as a texture sprayer, stomp brush, or patching screen.
Paint-matching tools (chip samples, smartphone apps, spectrophotometer options)
Before you pick up a brush, gather a few paint‑matching tools so you can identify the exact shade and finish you need: physical chip samples, smartphone color‑matching apps, and handheld spectrophotometers each have pros and cons that matter depending on how precise the match must be.
Use chips for retailer accuracy, apps for quick on‑site checks (mind lighting), and spectrophotometers for lab‑grade precision.
Repair and painting supplies (spackle, joint compound, sandpaper grades, primer, brushes, rollers, tray, painter’s tape)
Once you know the color and finish you need, gather the repair and painting supplies that make the match look professional: spackle or joint compound for holes and seams, sandpaper in several grits (120–150 for smoothing, 220 for final feathering), primer suited to your surface, quality brushes and rollers, a tray, and painter’s tape to protect trim and edges.
Pick a lightweight putty knife, a sanding block, lint-free cloths, and a small mixing stick.
Optional tools for textured surfaces (texture sprayer, stomp brush, patching screen)
Match textured walls more easily by adding a few specialty tools to your kit: a texture sprayer for even, repeatable patterns; a stomp brush for hand-applied stipple and knockdown effects; and a patching screen for consistent sanding without gouging the surrounding texture.
- Texture sprayer — speeds large repairs.
- Stomp brush — matches manual patterns.
- Patching screen — evens cured compound.
Step-by-Step Process to Make the Repair Invisible
Start by inspecting and documenting the damage so you know what you’re fixing and what materials you’ll need.
Clean and feather the edges, then rebuild the surface with spackle or joint compound in multiple thin layers, sanding between coats and progressing through finer grits to blend the texture.
Finish by priming the patched area with the appropriate primer at the right time so paint will match and hide the repair.
Step 1 Inspect and document the damage
Step 1: inspect every affected wall and note what you find—size, location, depth, paint type, and any wallpaper or texture—so you know exactly what needs fixing.
Photograph each area with a ruler for scale, mark spots on a simple sketch, and list materials you’ll need.
Check for underlying issues like moisture or cracks that may affect repair strategy.
Step 2 Prepare the surface: cleaning, removing loose material, and feathering edges
Now that you’ve inspected and documented the damage, prepare the surface so repairs will blend seamlessly.
Clean with a mild detergent and water, rinse, and let dry.
Remove loose paint or debris with a putty knife or scraper.
Sand edges to feather the repair into surrounding paint, wipe away dust, and tape nearby trim.
Confirm the area is smooth and contaminant-free before filling.
Step 3 Fill and rebuild the surface (spackle vs. joint compound; multiple thin layers)
Patch the hole or ding using the right compound and thin, controlled layers so the repair sits flush with the surrounding wall.
Use spackle for small nicks, lightweight joint compound for larger gaps. Apply thin coats, let each dry fully, then add another. Build until slightly proud of the surface, avoiding overfilling.
Keep edges feathered so later sanding blends smoothly.
Step 4 Sanding and blending to match surrounding texture (sanding technique, progression of grits)
After the compound’s fully cured, you’ll sand and blend the repair so it disappears into the surrounding texture.
Start with 120–150 grit to level high spots, then progress to 220–320 grit for smoothing.
Use a sanding block and light feathering strokes outward, matching texture patterns.
Clean dust between passes and inspect under raking light until the repair visually and tactilely matches the wall.
Step 5 Prime the patched area correctly (when and what primer to use)
With the surface smooth and free of dust from your final sanding, you’ll prepare the repair for primer so the patched area takes paint the same way the rest of the wall does.
Use a stain-blocking primer for patched drywall or joint compound; oil-based for severe stains, water-based acrylic for normal repairs.
Apply one thin coat, feather edges, let fully dry before painting.
Step 6 Match the paint color precisely (how to take a sample, working with stores, DIY mixing)
Because lighting and age can change a wall’s color, you’ll need to get an exact paint match before you start blending the repair into the surrounding surface.
Cut a paint chip or scrape a small sample from behind the baseboard. Bring it to a store for spectrometer matching or mix small test batches at home, comparing swatches on the wall at different times of day until it disappears.
Step 7 Match paint sheen and finish (matte, eggshell, satin, semi-gloss)
Check the sheen before you paint: matching color isn’t enough—you must match the finish so light reflects the same way across the repair.
Determine original sheen by touch or small glossy test spot. Choose matte, eggshell, satin, or semi-gloss accordingly.
Use the same product line and finish level; even slight sheen differences reveal edges.
Test a small swatch and inspect from multiple angles before committing.
Step 8 Blend the paint beyond the patch (feathering, cut-in, and back-rolling techniques)
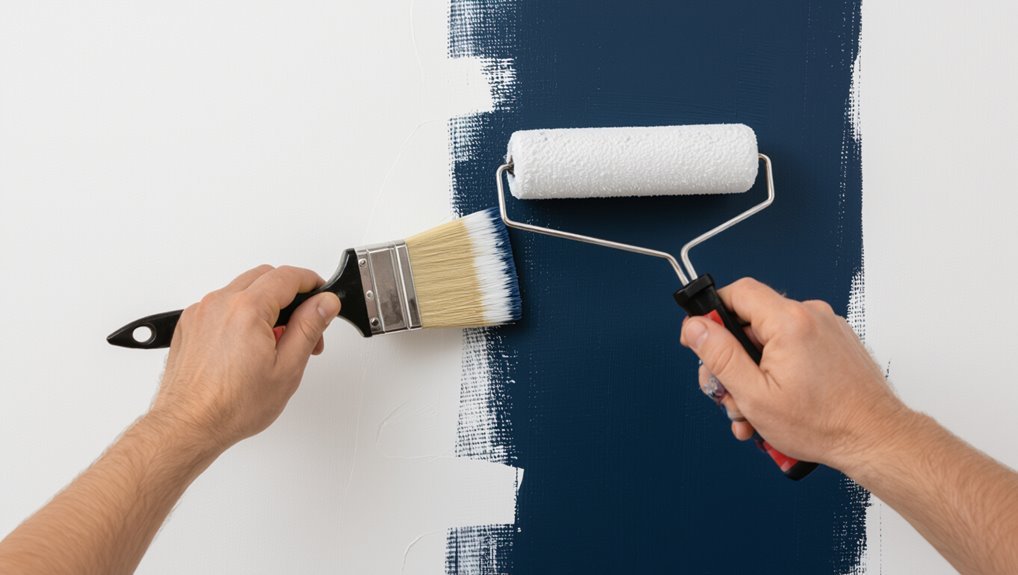
Feather the new paint well past the patched area so the repair fades into the surrounding wall instead of stopping at a hard edge; you’ll use cut-in strokes to control the perimeter, light rolling to blend texture, and back-rolling to smooth overlaps.
Work outward with diminishing pressure, keep a slightly damp edge, and use a mini-roller for texture match so shifts read seamless.
Step 9 Cure time and final inspection (lighting checks and touch-ups)
Step 9: let the paint and patch fully cure before you declare the job done—this gives solvents and joint compound time to settle so final light and touch-up checks are accurate.
After recommended cure, inspect under raking and natural light, mark flaws, and feather tiny edges.
Do small spot blending with thin coats, sand lightly if needed, then recheck until the repair disappears from every angle.
Matching Texture: Techniques for Common Apartment Finishes
Now you’ll match texture as well as color, starting with smooth drywall where careful sanding and a skim coat make the repair disappear.
For orange peel and knockdown you’ll use the right sprayer or stomp brush and practice on scrap drywall to get the pattern and pressure right.
Stipple and popcorn ceilings need special patching compounds and careful feathering to blend edges without disturbing the surrounding finish.
Smooth drywall patches sanding and skim coat method
Start by sanding the patch flush with the surrounding drywall so you can see where texture needs matching.
Then apply a thin skim coat to blend edges and recreate the wall’s finish.
Let it dry fully, sand lightly for feathered shifts, and repeat thin layers until seamless.
Prime the repaired area before painting to guarantee uniform sheen and color match.
Orange peel and knockdown textures replication techniques and tools
When you need to match orange peel or knockdown textures, the right tools and a careful approach make the difference between a visible patch and a seamless repair.
Use aerosol texture cans, hopper guns, or handheld pumps to mimic spray, then let the material set slightly.
For knockdown, drag a broad knife gently to flatten peaks.
Blend edges, feather thin, and test on scrap.
Stipple and popcorn ceilings special considerations and patching approach
If you’ve matched orange peel or knockdown successfully, you’ll find stipple and popcorn ceilings require a different touch because they’re thicker and more fragile.
You’ll work gently: clean loose material, feather edges, and use a matching premixed texture or mix with joint compound and popcorn bits.
Apply with a brush, sponge, or hopper gun in layers, let dry, then prime and blend paint to hide seams.
Color Matching Methods Compared
You’ll compare in-store spectrophotometer reads and brand color cards to see which gives the most reliable base.
Then you’ll weigh smartphone apps and DIY mixing — fast and cheap but sometimes off — against professional matching.
Finally, you’ll decide when a close match is good enough and when it’s worth repainting the whole wall.
In-store spectrophotometer vs. brand color cards
Although both aim to reproduce a wall’s color, an in-store spectrophotometer reads the exact pigment values from a sample while brand color cards give you preselected swatches to match by eye, so you’ll weigh precision against convenience when deciding which method to use.
| Method | Accuracy | Speed |
|---|---|---|
| Spectrophotometer | High | Moderate |
| Color cards | Variable | Fast |
| Cost | Higher | Lower |
Smartphone apps and DIY mixing pros and cons
Smartphone apps and DIY mixing give you two cheaper, hands-on routes for matching apartment paint, but they work in very different ways and have different limits.
Apps quickly approximate color using your phone camera but vary with lighting and phone model.
DIY mixing lets you tweak pigments for a closer visual match but requires trial, sample patches, and patience to avoid noticeable undertones or finish differences.
When to accept a close match vs. when to repaint the whole wall
When deciding whether to accept a close match or repaint the whole wall, weigh visibility, lighting, and how long you’ll keep the space.
If repairs sit in low-traffic areas or under soft light, a close match usually suffices.
Repaint the whole wall when the patch sits in bright light, spans a large area, or you’re planning to stay — mismatches become obvious over time.
Common Mistakes That Make Repairs Visible
When you skip primer or use the wrong one, the patch can absorb paint differently and stand out.
Also watch for sheen mismatches, old paint, or sanding errors that leave ridges or depressions — and don’t stop blending too close to the repair.
Finally, check the light and viewing angles, because shadows and reflections will reveal any flaw you missed.
Using the wrong primer or skipping primer
Skipping primer or picking the wrong one will make your repair stick out no matter how neatly you paint.
You need a primer that matches substrate and stain-blocking needs; drywall, wood, or patched joint compound each require specific formulas.
Primer evens porosity, prevents flash, and helps topcoat adhesion.
Don’t skip it or use an inappropriate type, or the patch will remain obvious.
Mismatching sheen or using old leftover paint
Primer choice matters, but paint sheen and the condition of your leftover paint matter just as much.
If the sheen differs, repaired spots will catch light differently; match eggshell, satin, or flat exactly.
Don’t use old, separated paint—streaks or inconsistent pigments reveal touch-ups.
Strain and remix leftovers, or buy a fresh small can in the same sheen and batch for seamless results.
Over-sanding or under-sanding (creating depressions or ridges)
If you sand too aggressively or not enough, you’ll create low spots or raised ridges that show up under paint, making repairs obvious.
Use a light, even touch with fine-grit sandpaper and check angles in different light. Feather edges smoothly until the surface feels uniformly level.
Stop frequently, clean dust, and reassess—small adjustments beat heavy sanding.
Not blending far enough beyond the repair area
When you stop your sanding and feathering too close to the patch, the repair will read as a distinct shape once paint dries.
You need to extend blending well past the damaged area so texture and sheen shift smoothly into the surrounding wall.
Widen your sanding radius, skim-coat lightly, and blend paint edges with thin, overlapping passes so changes disappear and the patch doesn’t catch the eye.
Ignoring lighting and viewing angles
Even after you’ve feathered and blended paint beyond the repair, lighting and viewing angles can still betray the fix if you don’t consider them.
Walk the room at different times, check from sitting and standing heights, and view from common sightlines.
Adjust sheen, texture, and feathering where highlights or shadows reveal edges.
Use diffuse light while inspecting to catch subtle mismatches.
Best Practices and Prevention Tips
When you move in, keep a small paint sample and note the brand and formula so touch-ups match.
Do regular maintenance to prevent big repairs, and talk with your landlord early about whether a patch or a full repaint is appropriate.
Sometimes a full-wall repaint is the smarter, cleaner solution—especially if multiple patches will still show.
Keep a small paint sample and record brand/formula when you move in
If you’re moving into a new place, take a small sealed paint sample from a closet or behind an outlet and note the brand, color name or code, finish, and purchase date—store this info with your move-in photos or in a digital note for quick reference.
Keep the sample sealed and labeled, and add where it came from. That record saves time and guarantees an exact match for future touch-ups.
Regular maintenance to avoid large repairs
Having that sealed sample and record on hand makes small touch-ups quick, but regular upkeep keeps those touch-ups small in the first place.
Inspect walls monthly for scuffs, dents, or moisture. Clean gently with mild detergent to prevent grime build-up.
Use felt pads on furniture, avoid hanging heavy items without anchors, and address leaks immediately so paint and drywall don’t degrade into bigger repairs.
How to communicate with landlords about repainting vs. patch repair
Wondering whether to ask your landlord for a full repaint or just a patch repair?
Explain the damage clearly, share photos, and suggest a minimally disruptive patch first.
Mention matching concerns and offer to coordinate color codes or contractor access.
Ask about responsibility, timelines, and documentation.
Keep tone cooperative, note lease clauses, and request written approval before any work starts.
When a full-wall repaint is the smarter choice
When scuffs, stains, or uneven fading affect large swaths of a wall, a full repaint often makes more sense than repeated spot fixes; you’ll get a uniform appearance, better long-term protection, and fewer callbacks.
You should choose full-wall repainting when color shift, widespread texture differences, or multiple patched areas are visible.
Prep thoroughly, use matched finish and primer, and work in consistent lighting.
Cost, Time, and When to Hire a Pro
For small nail holes and scuffs you can expect DIY patching to cost mostly time—an hour or two plus a few dollars for spackle—while a pro repair for larger or textured areas may run $100–$300 and take a day.
Hire a professional if you spot structural damage, complex textures you can’t match, or very large areas that would eat up your weekend.
Knowing these cost and time trade-offs will help you decide whether to tackle it yourself or call in help.
Typical cost and time estimates for DIY patch vs. pro repair
A few simple patch jobs—like filling nail holes or sanding and spot-priming small dings—can cost you under $20 in materials and take an hour or two.
While larger DIY repairs (repairing a 1–2 foot drywall hole, texturing, and repainting) typically run $30–$100 and require a half- to full-day.
Hiring a pro usually costs $150–$600+ depending on size, texture, and finish, and saves time.
Signs you should hire a professional (structural damage, complex textures, large areas)
If you spot sagging drywall, widespread cracks, uneven or matching complex textures, or you’re facing a whole-room repaint, call a pro—these issues often mean more than cosmetic fixes and can cost you time, money, or safety if handled wrong.
A pro assesses structural risk, matches intricate textures, and finishes large areas efficiently. Hire one when damage is extensive, texture is tricky, or time is tight.
Before-and-After Checklist for an Invisible Repair
Before you paint, make sure the area’s clean, well-lit, and that you’ve got all the tools and materials lined up.
After it dries, inspect the repair under the same lighting, do any small touch-ups, and compare against the surrounding wall.
Take clear photos for your records and to show your landlord if needed.
Pre-paint checklist (cleanliness, lighting, tools ready)
Though you’ve matched the paint, get your space ready so the repair disappears: clean the area thoroughly, set up good lighting, and lay out every tool and material you’ll need.
Remove dust, grease, and loose particles; wipe and let dry.
Position lamps to eliminate shadows and color shifts.
Arrange brushes, rollers, tape, sandpaper, patching compound, drop cloths, and a clean mixing tray within arm’s reach.
Post-paint checklist (inspection, touch-ups, photos for landlord)
1 final check will make the repair truly invisible: inspect the dried paint in different lights and angles, touch up any thin spots or feathered edges, and photograph the area for your landlord before you remove drop cloths.
Walk the room, note inconsistencies, blend with light glazing if needed, and recoat small areas.
Save timestamped photos and keep cleanup tools handy.
Frequently Asked Questions
You’ve got practical questions about making a repair truly invisible, and I’ll answer the common ones you’ll run into.
We’ll cover how close the color match needs to be, whether leftover tenant paint will work, how aging affects the patch, when a full-wall repaint is necessary, and how to match texture without special tools.
Read on for concise, usable answers.
FAQ 1: How close does paint need to match to be invisible?
How close does paint need to be to the original to be effectively invisible? You’ll want a near-exact match in color, sheen, and finish.
Small hue or sheen differences show under light. Match brand and formula if possible, test a small patch, and view at different times.
If tinting, use professional color-matching and blend edges into surrounding paint for an invisible repair.
FAQ 2: Can I use leftover paint from a previous tenant?
Can you use leftover paint from a previous tenant? Yes, sometimes — but check the label for color, sheen, and tint batch number.
Test a small patch and let it cure before deciding. If the label’s missing or the shade’s off, bring a sample to the store for color matching.
Use the same sheen and prep methods to blend the repair.
FAQ 3: Will the patch age differently than the rest of the wall?
Yes—patches can age differently than the rest of the wall, but you can minimize visible changes by matching paint type, sheen, and application technique; mix and apply the repair paint the same way the original was installed and allow proper curing before judging the result.
Over time, light exposure, cleaning, and smoke will shift tones. To blend longer, feather edges, use identical finish, and clean gently.
FAQ 4: How large of a repair requires repainting the whole wall?
When does a patch mean you should repaint the whole wall?
If the damage spans several square feet, involves multiple spots across the surface, or reaches beyond a single visual field, you should repaint the entire wall.
Large repairs, mismatched sheen, or extensive texture differences make blending impossible.
Repainting guarantees consistent color, sheen, and finish so the repair stays invisible.
FAQ 5: Can you match texture without special tools?
Large repairs often force a full repaint, but smaller fixes raise a different question: can you recreate wall texture without specialized tools?
Yes—you can mimic common textures using joint compound, a putty knife, sponge, brush, or crumpled paper towel.
Work thin layers, practice on scrap, and feather edges. Match sheen and paint after fully dry.
Patience and practice beat fancy tools.